PreSonus 2018 Rep and Distributor of the Year Awards!
Every year at NAMM, we like to recognize distribution partners and reps who have gone above and beyond in their support of PreSonus. Thanks to the below for leading by example, and for setting the bar so very high.


Friday Tips: Multiband Processing Development System
I’m a big fan of multiband processing. This technique divides a signal into bands (I generally choose lows, low mids, mids, and high mids), processes each band independently, then sums the bands’ outputs back together again.
I first used multiband processing in the early 80s, with the Quadrafuzz distortion unit (later virtualized by both Steinberg and MOTU). This produces a “cleaner” distortion sound because you didn’t have the intermodulation distortion caused by low strings and high strings interacting with each other. However, multiband processing is also useful with delay, like using shorter delays on lower frequencies, and longer delays on higher frequencies…or chorus, if you want a super-lush sound. But there are other cool surprises, like using different effects in the different bands, or using envelope filters.
So for Studio One, I’ve created a multiband processing “development system” for creating new multiband effects—and that’s the subject of this tip.When I find an effect I like, it gets turned into a fixed FX chain that uses the Splitter module’s multi-band capabilities instead of buses to create four parallel signal paths.
Band Splitting
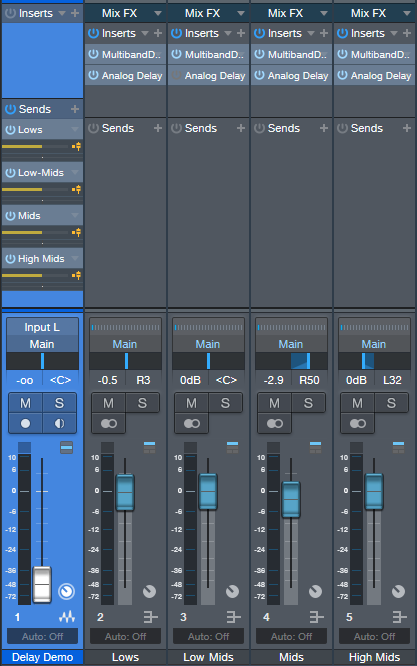
Figure 1: The Multiband Processing Development System, set to evaluate multiband processing with analog delay.
Start by creating four pre-fader sends to feed four buses (fig. 1). Each bus handles a specific frequency range. The simplest way to create splits is with the Multiband Dynamics set to no compression, so it can serve as a crossover.
To create the bands, insert a Multiband Dynamics processor in one of the buses, open it, and set the compression Ratio for all Multiband Dynamics bands to 1:1. This prevents any compression from occurring.
Referring to fig. 2, as you play your instrument (or other signal source you want to process), solo the Low band. Then adjust the Low / Low-Mid X-Over Frequency control to set the dividing frequency between the low- and low-mid band.
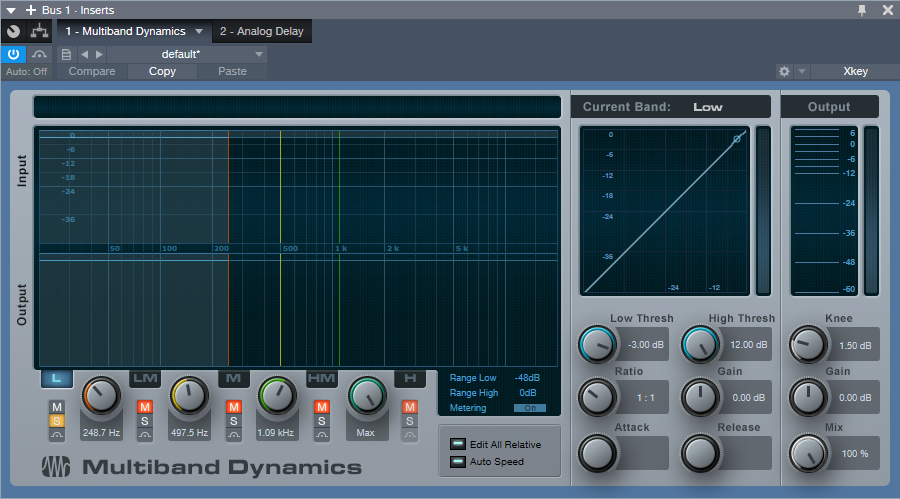
Figure 2: Use the Multiband Dynamics processor to create the individual band in each bus.
Next, solo the Low Mid band and adjust its frequency control. Use a similar procedure on each band until you’ve chosen the frequencies you want each band to cover. For guitar, having more than four bands isn’t all that necessary, so I normally set the frequency splits to around 250 Hz, 500 Hz, and 1 kHz. The resulting bands are:
- Below 250 Hz
- 250 – 500 Hz
- 500 – 1,000 Hz
- Above 1,000 Hz
Setting the Mid-High / High X-Over Frequency to Max essentially removes the Multiband Dynamics’ top band.
After choosing the frequency bands, copy the Multiband Dynamics processor to the other three buses. Solo the Low band for one bus, the Low Mid in the next bus, the Mid in the next bus, and finally, the High Mids in the fourth bus. Now each bus covers its assigned frequency range.
At this point, all that’s left is to insert your processor(s) of choice into each band. Don’t forget that you can experiment with panning the different bands, changing levels, altering sends to the buses to affect distortion drive, and more. This type of setup allows for a ton of options…so get creative!
Bill “The Buddha” Dickens receives NAMM Believe in Music Award!

“The Buddha” in his studio
Bill “The Buddha” Dickens, legendary electric bass guitarist, has been bestowed the 2019 NAMM Believe in Music Award!
This special award recognizes Bill’s work in supporting the music community and the role he has played in helping grow the NAMM Oral History program. Bill Dickens has been on the scene since 1971, and has played with many legendary performers, all of whom have added their genius to the history of American music. The Oral History Program archives the sights, sounds and creative art of many inventive musicians, past and present.
Bill is a pioneer in the music business. He is a composer, having written numerous #1 hits including, “Don’t Lose the Magic,” with Shawn Christopher and “In Case You Forgot” with Aretha Franklin. He is a performer, having played with many legendary performers, from Ramsey Lewis to Questlove, Leo Nocentelli to Chet Baker.
Bill recently added acting to his resume, and features in I Am Your Keeper, due to be released in 2019. “The Buddha” is also teacher and mentor to emerging artists having released a video and book with Alfred Publishing. Bill designed and invented the nine-string bass guitar and has developed the lowest playable note on the bass.
We’re proud of Bill and thankful to count him among our users!
Bill says:
“PreSonus has been a part of my productions for many years. I am currently using StudioOne 4 and The FaderPort. Both of these products make working in the studio easier. The amazing support provided by PreSonus staff is a big part of why I use their gear. Thank you PreSonus, you’re the best!”
Billthebuddhadickens.com
Friday Tip: MIDI Guitar Setup with Studio One
I was never a big fan of MIDI guitar, but that changed when I discovered two guitar-like controllers—the YRG1000 You Rock Guitar and Zivix Jamstik. Admittedly, the YRG1000 looks like it escaped from Guitar Hero to seek a better life, but even my guitar-playing “tubes and Telecasters forever!” compatriots are shocked by how well it works. And Jamstik, although it started as a learn-to-play guitar product for the Mac, can also serve as a MIDI guitar controller. Either one has more consistent tracking than MIDI guitar retrofits, and no detectable latency.
The tradeoff is that they’re not actual guitars, which is why they track well. So, think of them as alternate controllers that take advantage of your guitar-playing muscle memory. If you want a true guitar feel, with attributes like actual string-bending, there are MIDI retrofits like Fishman’s clever TriplePlay, and Roland’s GR-55 guitar synthesizer.
In any case, you’ll want to set up your MIDI guitar for best results in Studio One—here’s how.
Poly vs. Mono Mode
MIDI guitars usually offer Poly or Mono mode operation. With Poly mode, all data played on all strings appears over one MIDI channel. With Mono mode, each string generates data over its own channel—typically channel 1 for the high E, channel 2 for B, channel 3 for G, and so on. Mono mode’s main advantage is you can bend notes on individual strings and not bend other strings. The main advantage of Poly mode is you need only one sound generator instead of a multi-timbral instrument, or a stack of six synths.
In terms of playing, Poly mode works fine for pads and rhythm guitar, while Mono mode is best for solos, or when you want different strings to trigger different sounds (e.g., the bottom two strings trigger bass synths, and the upper four a synth pad). Here’s how to set up for both options in Studio One.
- To add your MIDI guitar controller, choose Studio One > Options > External Devices tab, and then click Add…

Figure 1: Check “Split Channels” if you plan to use a MIDI guitar in mono mode.
- To use your guitar in Mono mode, check Split Channels and make sure All MIDI channels are selected (Fig. 1). This lets you choose individual MIDI channels as Instrument track inputs.
- For Poly mode, you can follow the same procedure as Mono mode but then you may need to select the desired MIDI channel for an Instrument track (although usually the default works anyway). If you’re sure you’re going to be using only Poly mode, don’t check Split Channels, and choose the MIDI channel over which the instrument transmits.
Note that you can change these settings any time in the Options > External Devices dialog box by selecting your controller and choosing Edit.
Choose Your Channels
For Poly mode, you probably won’t have to do anything—just start playing. With Mono mode, you’ll need to use a multitimbral synth like SampleTank or Kontakt, or six individual synths. For example, suppose you want to use Mai Tai. Create a Mai Tai Instrument track, choose your MIDI controller, and then choose one of the six MIDI channels (Fig. 2). If Split Channels wasn’t selected, you won’t see an option to choose the MIDI channel.
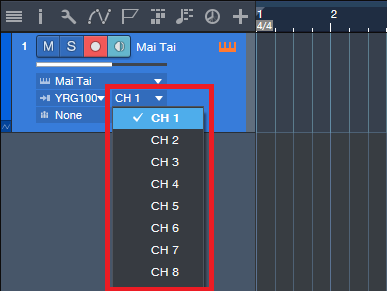
Figure 2: If you chose Split Channels when you added your controller, you’ll be able to assign your instrument’s MIDI input to a particular MIDI channel.
Next, after choosing the desired Mai Tai sound, duplicate the Instrument track five more times, and choose the correct MIDI channel for each string. I like to Group the tracks because this simplifies removing layers, turning off record enable, and quantizing. Now record-enable all tracks, and start recording. Fig. 3 shows a recorded Mono guitar part—note how each string’s notes are in their own channel.
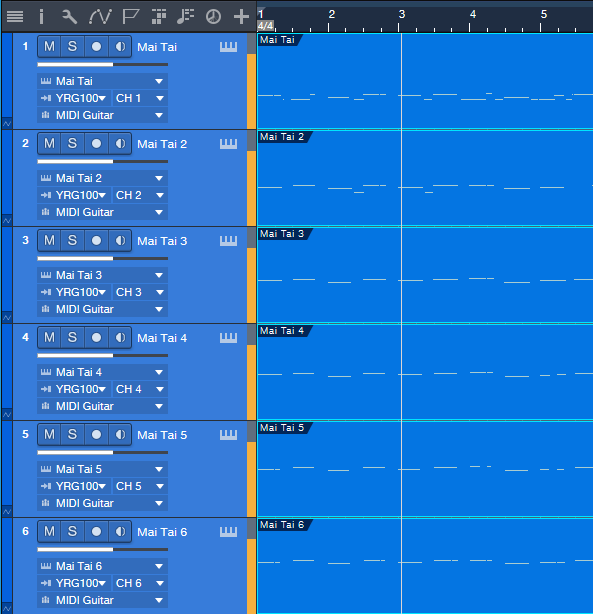
Figure 3: A MIDI guitar part that was recorded in Mono mode is playing back each string’s notes through its own Mai Tai synthesizer.
To close out, here are three more MIDI guitar tips.
- In Mono mode with Mai Tai (or whatever synth you use), set the number of Voices to 1 for two reasons. First, this is how a real guitar works—you can play only one note at a time on a string. Second, this will often improve tracking in MIDI guitars that are picky about your picking.
- Use a synth’s Legato mode, if available. This will prevent re-triggering on each note when sliding up and down the neck, or doing hammer-ons.
- The Edit view is wonderful for Mono mode because you can see what all six strings are playing, while editing only one.
MIDI guitar got a bad rap when it first came out, and not without reason. But the technology continues to improve, dedicated controllers overcome some of the limitations of retrofitting a standard guitar, and if you set up Studio One properly, MIDI guitar can open up voicings that are difficult to obtain with keyboards.
In Mono mode with Mai Tai (or whatever synth you use), set the number of Voices to 1 for two reasons. First, this is how a real guitar works—you can play only one note at a time on a string. Second, this will often improve tracking in MIDI guitars that are picky about your picking.
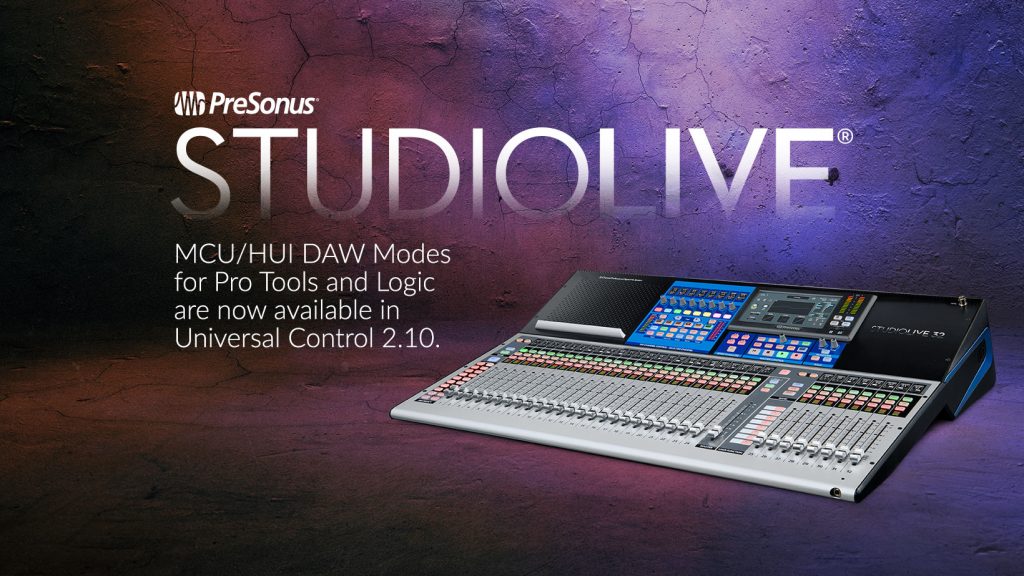
Universal Control 2.10 available now!
Get Universal Control 2.10 here!
Additionally, this Universal Control update adds support for the just-announced Studio Series USB-C™-compatible interfaces, a firmware update for the ATOM pad controller.
Be sure to update your StudioLive mixer to the latest firmware. You can get product-specific firmware updates by logging into your My.PreSonus account. Instructions for updating SW5E, NSB, or EarMix 16M firmware will be displayed when downloading the firmware file for each product from your account.
- MCU/HUI support for Series III Consoles
- 44.1kHz support for all Series III mixers
- NSB and EarMix 16M firmware update – Adds 44.1kHz support, as well as indicator light workflow improvements (light will no longer change from green to blue unless AVB clock is locked)
- Adds support for Studio 1824c, Studio 1810c, Studio 68c, Studio 26c, Studio 24c
- Firmware update for ATOM
Version Information
Firmware:
- StudioLive Series III (all models) – v1.10.15552
- NSB 16.8 – v1.1.0.15533
- NSB 8.8 – v1.1.0.15534
- EarMix – v1.1.0.15533
- SW5E – v1.0.0.15447
Supporting Software:
- Universal Control (Mac/PC) – v2.10.0.50756
- UC Surface (iOS/Android) – v2.10.0.50756
- QMix-UC (iOS/Android) – v2.6.0.49920
- Capture (Mac/PC) – v2.4.0.50756
Notable Bug Fixes In This Release:
- Android permission issues for UC Surface and QMix-UC now fixed
- UC Surface – Series III mixer Aux Ins, Tape In, and Digital Return now show up in all Mix Views
- StudioLive Series III – Rack Mixer now gets Dig Gain Trim when another network mixer has exclusive preamp permission over the Rack Mixer
Studio Series USB-C Interfaces are here!
Wherever songs are made, Studio Series USB-C Audio Interfaces are there. All Studio Series USB-C™-compatible Audio Interfaces ship with Studio One Artist—a $99 USD value, so you can hit the ground running and be making music straight out of the box.
No matter how complex your project or vision, there’s a Studio Series USB-C™-compatible Interface that’s the right tool for the job.
Learn more about the Studio Series USB-C™-compatible Audio Interfaces here.
Studio One 4.1.3 is here!
Studio One 4.1.3 is a free maintenance update for all Studio One 4 users and includes a variety of improvements. Click “Check for Updates” in Studio One’s Start Page to get it!
- Support for new Studio Series USB-C™-compatible Interfaces
- FX Sends are now visible by default on the console
Please click here to check out the latest release notes for a full list of fixes and improvements. in 4.1.3
In case you missed it, this release is hot on the heels of 4.1.2, which included the following:
- AAF Import/Export now supports volume automation
- AAF Export is now compatible with MOTU Digital Performer 9 (using legacy mode)
- A safety query has been added to the “Reset recent songs list” function
- Saving versions of a song is now more flexible with added control over how they affect the original song
- The song key signature is now included in the song meta data
- Quantize macros have been updated
- Multi-touch support now prevents “Mouse-as-Pointer” emulation for Plug-ins
- Time-stretching events in Arrangement is now reflected in the Audio Editor
Please click here to check out the latest release notes for a full list of fixes and improvements in 4.1.2.
The Bentley Boys on StudioLive
The Bentley Boys
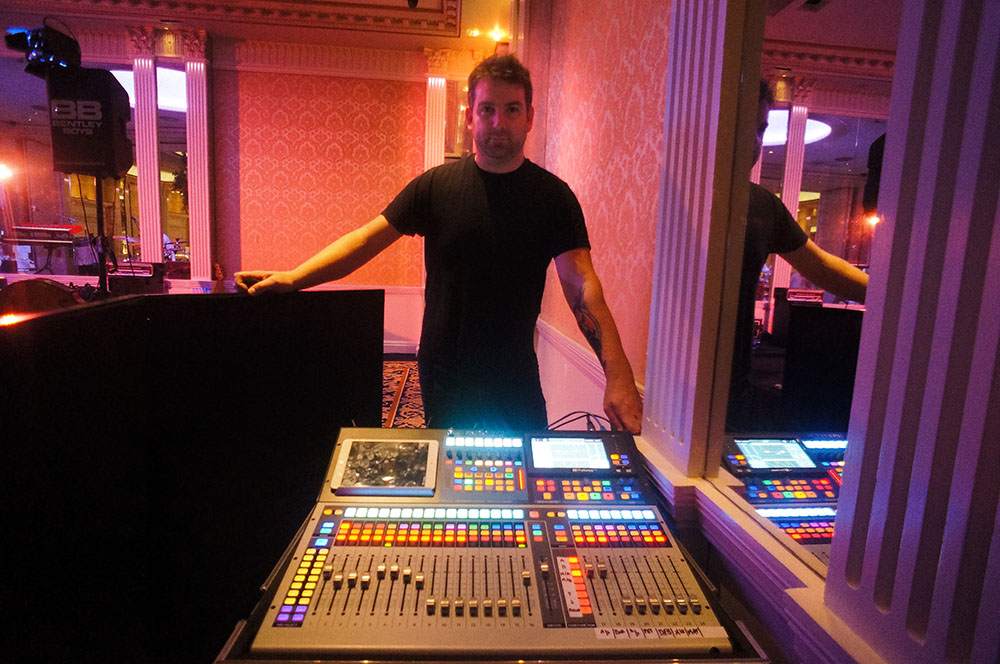
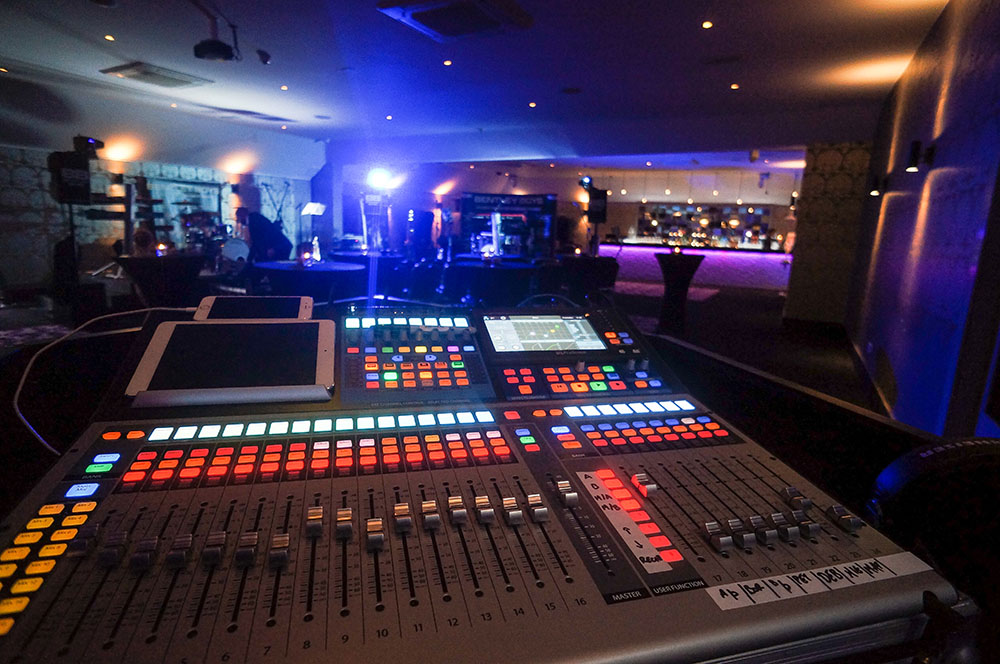
The Bentley Boys are Ireland’s premier corporate entertainment and wedding band. They were voted RSVP Wedding Band of the Year in 2013 and 2014 and Nominated Weddings Online Band of the Year for 2013, 2014 & 2015, 2016 and 2017. The Bentley Boys play all around Ireland and they tailor the band to every event to make sure the event is nothing short of sensational. Having been long-standing PreSonus users, we spoke to Dez Carpenter, Production Manager, about how PreSonus’ quality, price, and support ticks all the boxes for the Bentley Boys.
Dez is also a professional musician and has over 15 years experience playing professionally in Ireland. He came on board with Bentley Productions and Bentley Boys nearly ten years ago and has spent seven of these as their Production Manager. His roles within the company include event planning and execution, personnel management and training, and lead engineer. For Dez, having multiple systems out at any one time means he needs to have confidence in the product—which he’s found with PreSonus.
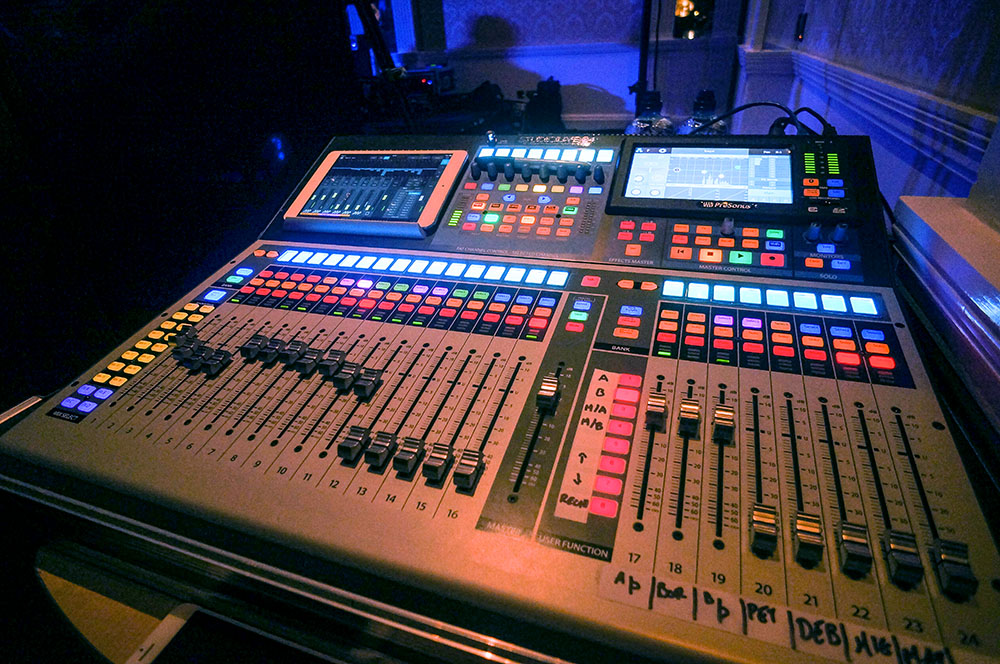
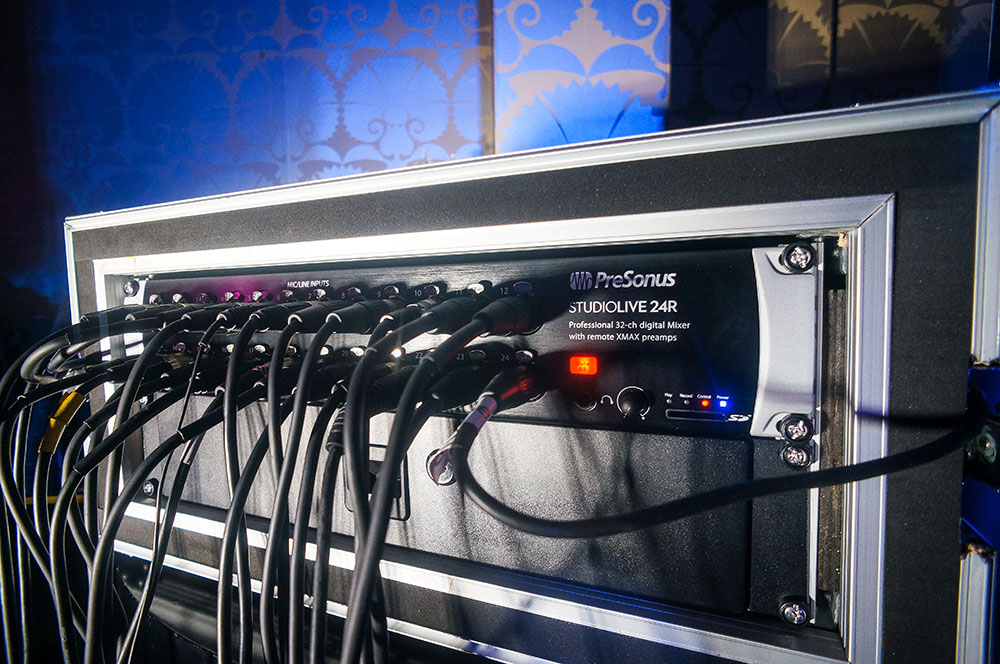
The Bentley Boys main digital mixer for stock is the StudioLive 16.0.2—and they have a lot of them! They have also now expanded to include the new StudioLive 24 (Series III) and StudioLive 24R rack mixer and are exploring the PA range to add to their inventory. In particular, the PreSonus AIR Series P.A. speakers have been selected to further enhance the quality of The Bentley Boys’ touring system. All of the PreSonus products are used for live FOH applications. High profile events, blue chip corporate clients, etc.
When asked what led the Bentley Boys to choose these particular PreSonus products, Dez Carpenter, Production Manager for the Bentley Boys states, “Our AV model is focused on small format, expandable, and minimal footprint equipment. The 16.0.2 was simply a no-brainer in terms of price, size, and functionality. It sounds better than anything else in its range, hands down. We’ve tried them all. The StudioLive 24 has transformed our larger events in terms of features and flexibility with the 24R.”
“PreSonus is a user-focused company,” he continues. “The community and support is so inclusive… you simply don’t get this from other companies. The equipment does exactly what it says on the tin, and it’s so intuitive. Training schedules are minimal, which is so important when taking on new personnel. The boards sound great, all our guys love using them and comment consistently how happy they are with their mixes.”
A big thing for the Bentley Boys that has proved to be particularly useful is that the presets work! “Before an event, I have total confidence to sit down in the lobby with the mixer and load my channels. I know that when the band is plugged in that my mix will be 95% of the way there. We get zero time on the majority of our events for soundcheck—the band is an afterthought most of the time, my mix position could be side stage, etc. To have total confidence in the product… I can’t put a value on that.”
When asked if there were any features on their wish list for PreSonus to add in future products, Dez explained that they are still working through the features on the StudioLive 24, and right now he can’t think of any. “I have been fortunate to A/B the StudioLive Series III alongside its competitors and without a doubt, it sounds better, is more flexible, and has a far better workflow. One of our events features two acts, split across two stages. The flexibility and layout of the DCAs are a big plus. The A/B option on each input is an awesome feature, along with the EQ variants. We are extremely happy to be working with the new additions to our PreSonus inventory and are greatly benefiting from even further flexibility the Series III mixers offer to our FOH requirements.”
Keep up with The Bentley Boys on Facebook!
Friday Tip: Colorization: It’s Not Just About Eye Candy
Some people think colorization is frivolous—but I don’t. I started using colorization when writing articles, because it was easy to identify elements in the illustrations (e.g., “the white audio is the unprocessed sound, the blue audio is compressed”). But the more I used colorization, the more I realized how useful it could be.
Customizing the “Dark” and “Light” Looks
Although a program’s look is usually personal preference, sometimes it’s utilitarian. When working in a video suite, the ambient lighting is often low, so that the eye’s persistence of vision doesn’t influence how you perceive the video. For this situation, a dark view is preferable. Conversely, those with weak or failing vision need a bright look. If you’re new to Studio One, you might want the labels to really “pop” but later on, as you become more familiar with the program, darken them somewhat. You may want a brighter look when working during daytime, and a more muted look at night. Fortunately, you can save presets for various looks, and call up the right look for the right conditions (although note that there are no keyboard shortcuts for choosing color presets).
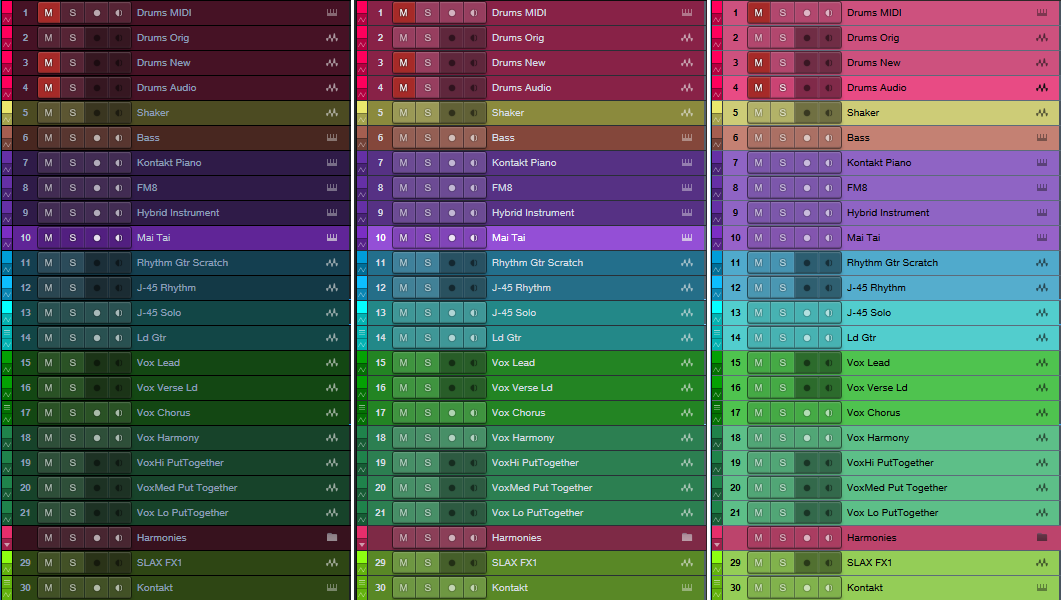
Figure 1: From left to right: dark, moderate, and bright luminance settings.
You’ll find these edits under Options > General > Appearance. For a dark look, move the Background Luminance slider to the left and for a light look, to the right (Fig. 1). I like -50% for dark, and +1 for light. For the dark look, setting the Background Contrast at -100% means that the lettering won’t jump out at you. For the brightest possible look, bump the Background Contrast to 100% so that the lettering is clearly visible against the other light colors, and set Saturation to 100% to brighten the colors. Conversely, to tone down the light look, set Background Contrast and Saturation to 0%.
Hue Shift customizes the background of menu bars, empty fields that are normally gray, and the like. The higher the Saturation slider, the more pronounced the colorization.
The Arrangement sliders control the Arrangement and Edit view backgrounds (i.e., what’s behind the Events). I like to see the vertical lines in the Arrangement view, but also keep the background dark. So Arrangement Contrast is at 100%, and Luminance is the darkest possible value (around 10%) that still makes it easy to see horizontal lines in the Edit view (Fig. 2).

Figure 2: The view on the left uses 13% luminance and 100% contrast to make the horizontal background lines more pronounced.
Streamlining Workflow with Color
With a song containing dozens of tracks, it can be difficult to identify which Console channel strip controls which instrument, particularly with the Narrow console view. The text at the bottom of each channel strip helps, but you often need to rename tracks to fit in the allotted space. Even then, the way the brain works, it’s easier to identify based on color (as deciphered by your right brain) than text (as deciphered by your left brain). Without getting too much into how the brain’s hemispheres work, the right brain is associated more with creative tasks like making music, so you want to stay in that mode as much as possible; switching between the two hemispheres can interrupt the creative flow.
I’ve developed standard color schemes for various types of projects. Of course, choose whatever colors work for you; for example, if you’re doing orchestral work, you’d have a different roster of instruments and colors. With my scheme for rock/pop, lead instruments use a brighter version of a color (e.g., lead guitar bright blue, rhythm guitar dark blue).
- Main drums – red
- Percussion – yellow
- Bass – brown
- Guitar – blue
- Voice – green
- Keyboards and orchestral – purple
- FX – lime green
Furthermore, similar instruments are grouped together in the mixer. So for vocals, you’ll see a block of green strips, for guitar a block of blue strips, etc. (Fig. 3)
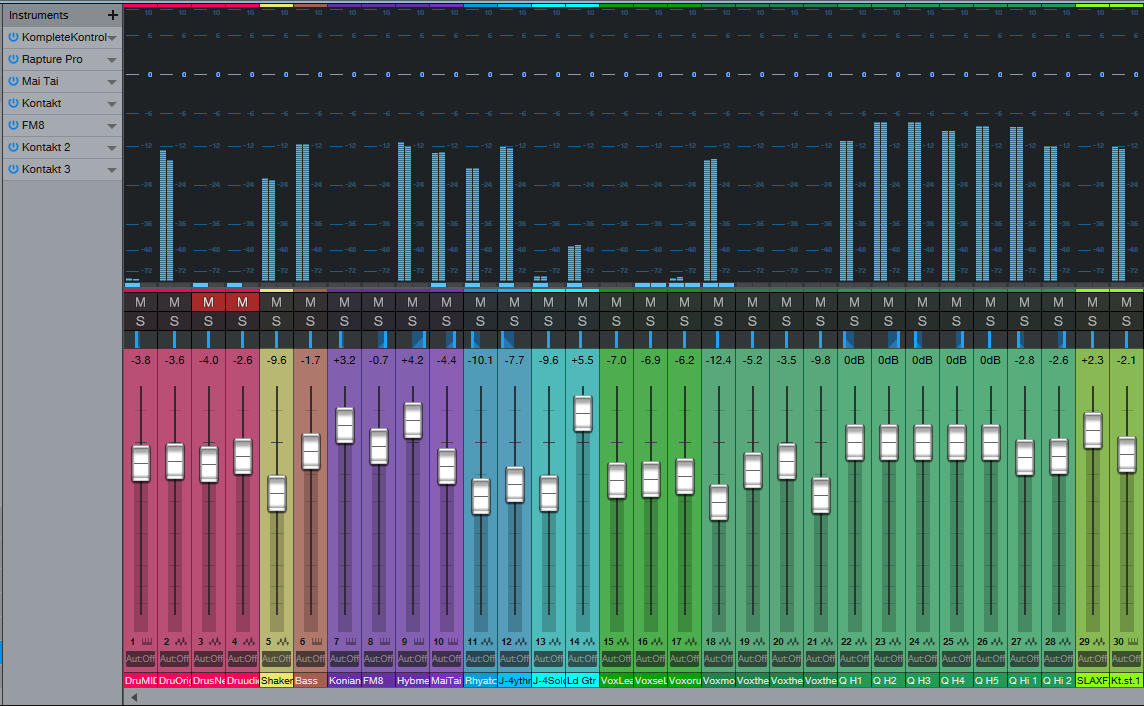
Figure 3: A colorized console, with a bright look. The colorization makes it easy to see which faders control which instruments.
To colorize channel strips, choose Options > Advanced tab > Console tab (or click the Console’s wrench icon) and check “Colorize Channel Strips.” This colorizes the entire strip. However, if you find colorized strips too distracting, the name labels at the bottom (and the waveforms in the arrange view) are always colored according to your choices. Still, when the Console faders are extended to a higher-than-usual height, I find it easier to grab the correct fader with colored console strips.
In the Arrange view, you can colorize the track controls as well—click on the wrench icon, and click on “Colorize Track Controls.” Although sometimes this feels like too much color, nonetheless, it makes identifying tracks easier (especially with the track height set to a narrow height, like Overview).
Color isn’t really a trivial subject, once you get into it. It has helped my workflow, so I hope these tips serve you as well.
Extra TIP: Buy Craig Anderton’s Studio One eBook here for only $10 USD!
Studio One 4.1.2 is available now!
Studio One 4.1.2 is a free maintenance update for all Studio One 4 users and includes a variety of improvements. Click “Check for Updates” in Studio One’s Start Page to get it!
- AAF Import/Export now supports volume automation
- AAF Export is now compatible with MOTU Digital Performer 9 (using legacy mode)
- A safety query has been added to the “Reset recent songs list” function
- Saving versions of a song is now more flexible with added control over how they affect the original song
- The song key signature is now included in the song meta data
- Quantize macros have been updated
- Multi-touch support now prevents “Mouse-as-Pointer” emulation for Plug-ins
- Time-stretching events in Arrangement is now reflected in the Audio Editor
Please click here to check out the latest release notes for a full list of fixes and improvements.