Monthly Archives: November 2023
Release Your Music in Stereo and Immersive
For over a decade, stereo and mono vinyl records co-existed before the transition to stereo was complete. During that time, many records were released in both mono and stereo. We’re in a similar situation now, with stereo still ruling the world but with immersive sound (primarily Dolby Atmos) coming on strong. It makes sense to release music in both formats—and Studio One makes it easy.
I release my music on YouTube, which doesn’t support multichannel Atmos files. But YouTube can play back Atmos files that have been rendered as binaural stereo. As long as people listen on headphones or earbuds, the music will have that full, wide immersive quality. So, I now post a headphones-only Atmos mix, and a conventional headphones/speakers stereo mix. Given how many people listen to music on headphones or earbuds, this isn’t as limiting as it might seem.
So does this work? Following are links to a binaural and stereo mix of the latest song in my YouTube channel. Both are done entirely in Studio One 6.5. Don’t expect instruments whizzing around your head—this isn’t a movie or a game. The more you listen to Atmos Binaural mixes and acclimate to what the process does, the more you hear the full, wide effect compared to stereo.
Atmos Binaural (headphones or earbuds only)
Stereo (speakers or headphones)
Here’s an overview of why Studio One makes this process so easy, especially if you’re used to mixing with headphones. Refine the Atmos mix as much as you can with headphones, because that’s how people are going to listen to it. Then, create a new Project in the Project page.
Set the Dolby Renderer to Binaural, and send the file to the Project page. Return to the Song page, choose Stereo for the Renderer to downmix your Atmos mix to stereo, and then add that file to the Project. Your Project will then have both Atmos Binaural and Stereo files, which you can export for your two mixes.
Note that the stereo downmixing is faithful to the mix. Of course, the stereo file lacks the Atmos fullness, but you don’t lose any of the music. In fact, because the downmixing tries to translate any Atmos nuances to stereo, you may end up with a better stereo mix than if you’d started with a stereo mix.
How to Do It—The Details
Here’s the step-by-step process.
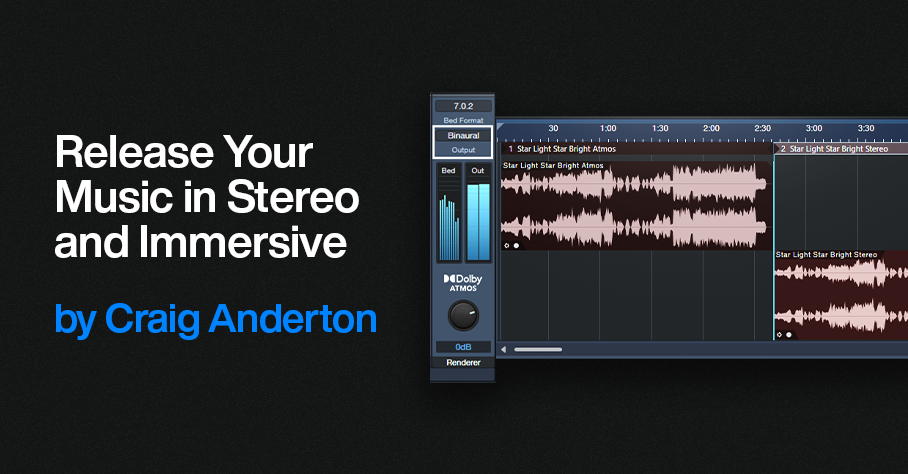
1. Finish your Atmos mix. Make sure it sounds awesome on headphones 😊. The Dolby Atmos Renderer should be set to Binaural (fig. 1).
Figure 1: Choose Binaural for the output when rendering to Atmos Binaural.
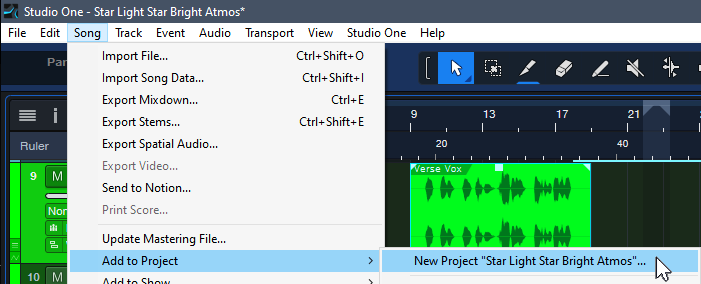
2. Choose Song > Add to Project > New Project “Song Title.”
Figure 2: The New Project will eventually contain both the Atmos Binaural and Stereo renders.
3. Set the Sample Rate, and click OK. Click OK again when asked to update the mastering file. Optionally, normalize it after it’s updated.
4. Go back to your Atmos mix. Save As “Song Title” Stereo. (This gives you separate songs for Atmos and stereo, in case you want to make changes later in either one.) In the Atmos renderer, change the Output from Binaural to Stereo.
5. Choose Song > Add to Project > Song Title (the top item in the list, not the “New Project” item that’s the next one down).
6. Click OK when asked to Update Mastering Files.In your Project, the Atmos mix will be followed by a track with the Stereo mix (fig. 3). If you normalized the Atmos mix, normalize the Stereo Mix.
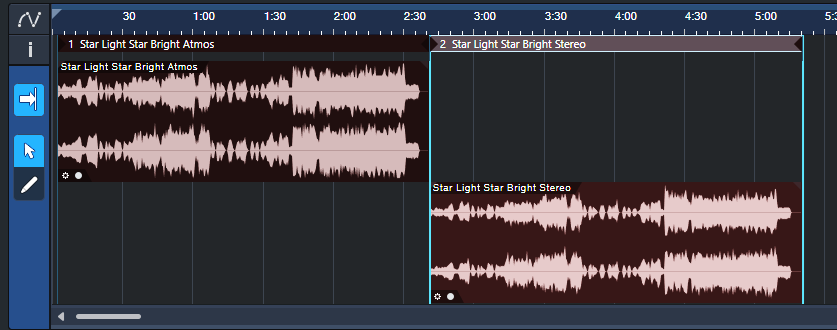
Figure 3: Both the Atmos and Stereo mixers are now in the Project page.
7. Add the insert processor(s) for the Atmos track and edit as desired. I typically use the Waves L3-16 to attain an LUFS reading of -12.5 so that the mix pops a bit more, with a True Peak between ‑1.0 and ‑1.5.
8. Drag the processor from the Atmos track insert to the Stereo track name in the track column. This inserts the processor in the Stereo file’s track.
9. Check the Loudness Information for the Stereo track. It will likely be lower. Edit your insert processors to obtain the same Post FX LUFS level as the Atmos track.
10. Listen to the stereo mix over loudspeakers as a reality check.
11. Click on Digital Release, and choose the formats for the two files.
And now, you’ve given your listeners a choice between an immersive binaural mix, or a conventional stereo one.
Tips
- In step 8, if you use more than one processor on your master file, it’s probably simplest to save the processors as a temporary FX Chain you can import into the other track.
- Because both mixes end up in the Project page, it’s easy to compare the two. The Phase meter will confirm the fuller sound you’re hearing, by displaying a wider, fuller stereo spread.
- You can process the master file in the Post fader insert section of the Main fader. However, I recommend doing it in the Project page, so you can go back and forth between the two files and obtain a consistent level prior to exporting.
- If there are significant differences between the two files (unlikely), you can return to either the original song or the one with Stereo in the title. Make your edits, then re-render.
- Similarly to mixing stereo over different loudspeakers to get a sense of how the mix translates over different systems, it helps to do reality checks on your Atmos Binaural mix with several different headphones.
String Arrangements Made Simple
Strings can enhance almost any genre of music—and with a little more effort, you can do string arrangements that go beyond simply adding a string pad preset. So, let’s look at how to create a convincing string section intro for a song. To hear the example used for this tip, go to the end, and check out the stereo mix. There’s also a headphones-only Atmos mix that’s rendered to binaural.
Choose Your Instruments
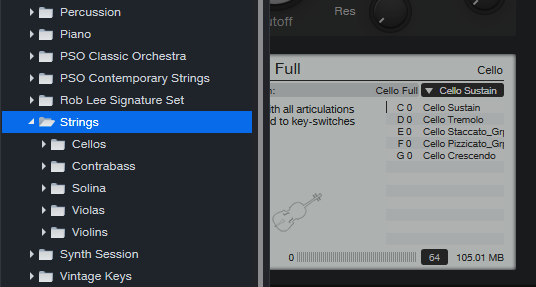
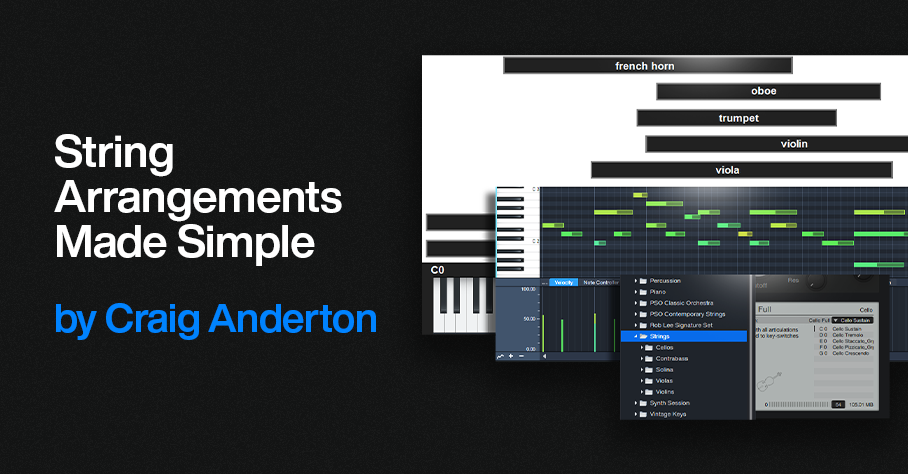
You don’t need a high-end sample library to create string arrangements. The sounds included in Presence are excellent—I often prefer them to mainstream string libraries. The following presets from Presence’s Strings folder (fig. 1) sound wonderful for a string section: Violins > Violin Full, Violas > Viola Full, Cellos > Cello Full, and Contrabass > Contrabass Full. In the audio example, all used the Sustain keyswitch C1 (except C0 for the Cellos).
Figure 1: Presence’s Strings folder is your friend for string arrangements.
Group Your Instruments
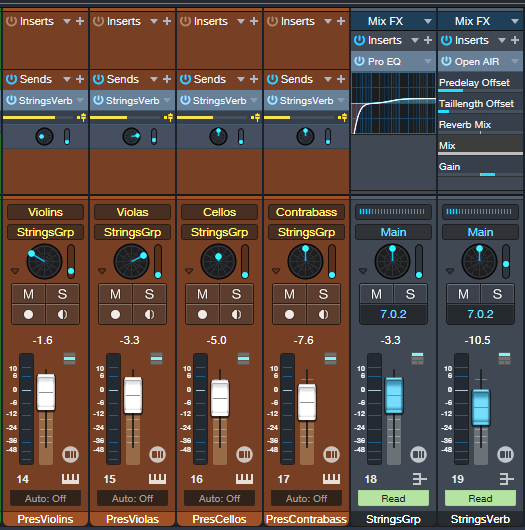
Place each instrument in its own track, and group them via buses or VCA channels. After setting a balance of the instruments, vary their common bus level to add dynamics while retaining the proper balance. In larger arrangements, you can have individual groups for violins, other strings, brass, percussion, etc. I also use Sends to a common reverb, so that the instruments sound like they’re in the same acoustic space (fig. 2).
Figure 2: Track layout for the string section, set up for Dolby Atmos. This layout also works with conventional stereo.
Pay Attention to Instrument Note Ranges
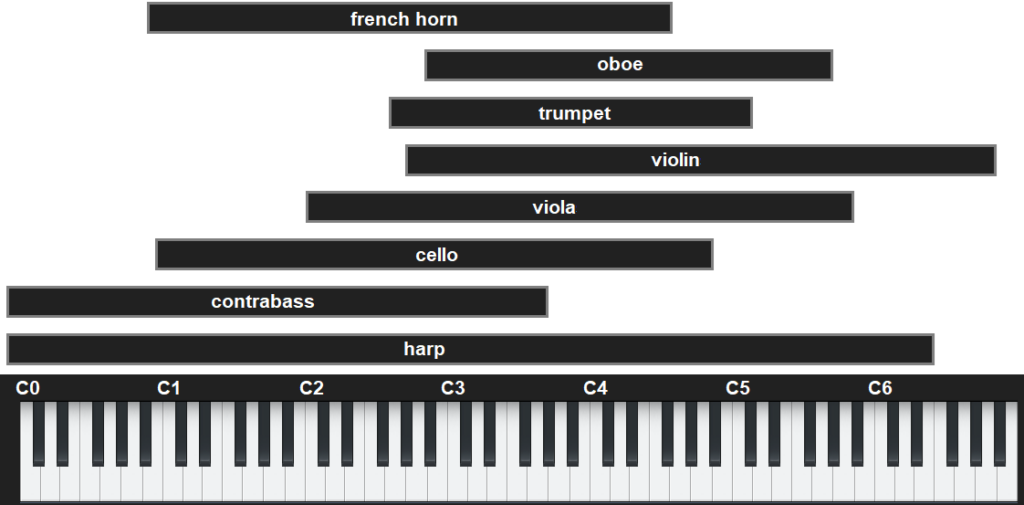
The beauty of string arrangements is how the notes from different instruments weave around each other as they create harmonies in the “sweet spots” of their note ranges. (For a crash course in string arrangements, check out Bach’s string quartets.) Players normally don’t play much at the highest and lowest notes of an instrument’s range. Ideally, the notes from different instruments shouldn’t overlap too much. Let each instrument have its own space in the frequency spectrum (fig. 3).
Figure 3: Typical note ranges for various orchestral instruments.
Edit Velocity, Modulation, and Keyswitches
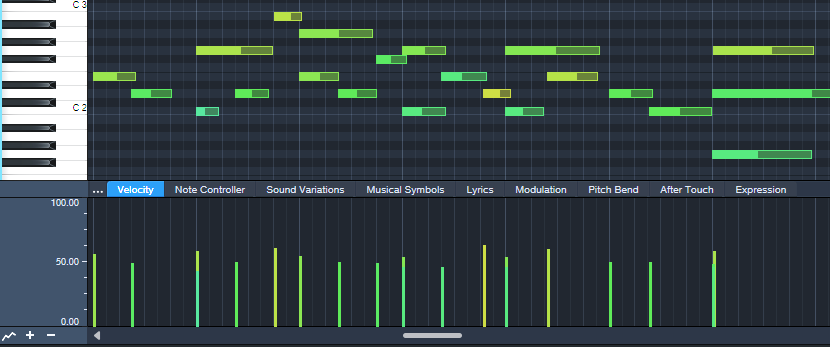
These are all powerful tools for expressiveness. I generally prefer editing velocity rather than level for individual instruments (fig. 4), and edit overall level with the instrument groups.
Figure 4: Notes for a violin part, and their velocities.
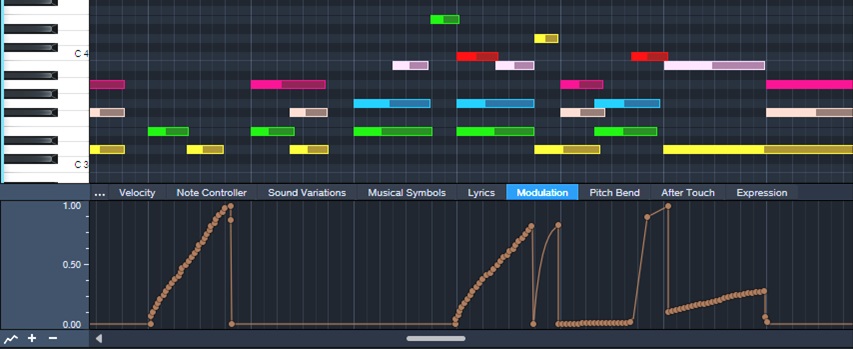
Modulation and Expression parameters are also essential. Fig. 5 shows vibrato being added to strings. I use the mod wheel for a human touch, but sometimes straighten out modulation changes that “wobble” too much.
Figure 5: Modulation added for violin vibrato.
Keyswitches choose different articulations, which can add variations and expressiveness in longer passages.
Tempo Changes: The Secret Sauce
Ritardandos, accelerandos, and rallentandos are not only important parts of a conductor’s toolbox, they’re the final touch for adding expressiveness in Studio One. Pushing tempo and pulling it back, in conjunction with velocity and modulation changes, gives a sense of realism and sophistication you can’t obtain any other way. Although tempo changes may not be an option if the strings are being added to music cut to a click, in a strings-only section tempo changes are pure gold. Fig. 6 shows the tempo changes used in the audio example.
Figure 6: Tempo changes add feel and flow to music.
Let’s listen to all these techniques applied to a string section introduction. Here’s the stereo mix.
And for an extra treat, here’s the Atmos mix, rendered to binaural. You need to listen to it on headphones to preserve the Atmos effect==being rendered to binaural means it won’t sound right over speakers.
The Metal Amp De-Harsher
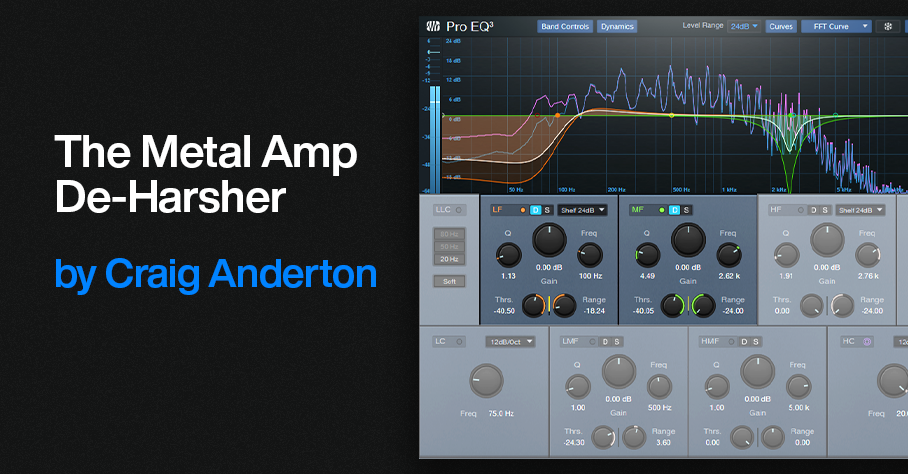
Since Dynamic EQ was introduced in version 5, I’ve used it to replace and improve some techniques I used to do with static EQ. For example, I’m a fan of adding a sharp notch in front of amp sims that feature heavy distortion. This is because notching out certain frequencies can lead to a smoother, less harsh sound. After tuning the notch for the sweetest tone, you make the Q narrow enough to take out only the frequencies that cause the harshness.
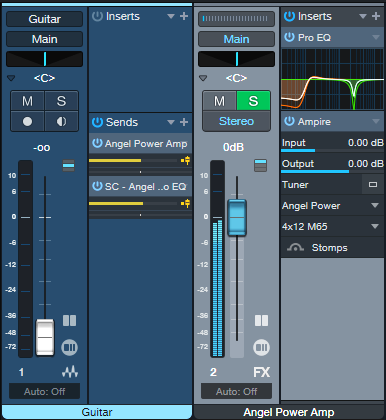
However, dynamic EQ can de-harsh amps with more finesse than static EQ. Fig. 1 shows the setup.
Figure 1: Setup for de-harshing with the Pro EQ3’s dynamic EQ.
The Pro EQ3 inserts before Ampire. I used Ampire’s Angel Power amp for the audio example. You’ll hear the biggest improvements with this technique when using high-gain amps, but it can also be effective with other amp sim designs.
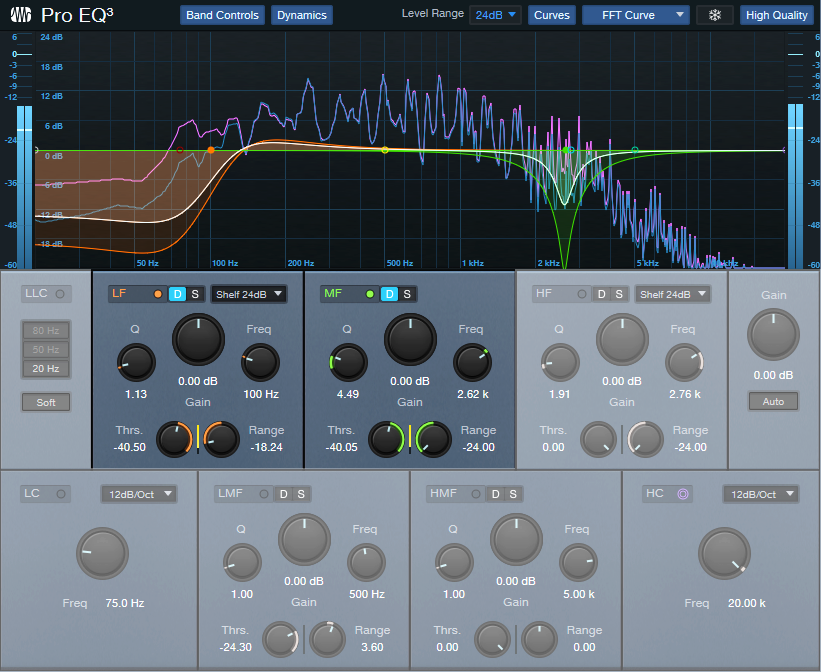
Fig. 2 shows the Pro EQ3 settings. The de-harsher uses only two stages of EQ. The most crucial one is the midrange filter around 2.62 kHz. That’s the frequency I liked best, but be sure to vary the notch and try different frequencies with different amps. The effect is quite dependent on the notch frequency.
Figure 2: Pro EQ3 settings.
The low-frequency shelf is there because…well, because we can. There’s not a lot of useful energy down that low, so why have it take up bandwidth? Fewer frequencies being distorted means a cleaner sound.
Start with the settings shown. The optimum Threshold and Range parameter values depend on the input signal strength. For the Mid frequency, set the Threshold so that the notch reaches the full -24 dB of attenuation when hitting your strings the hardest. Dial back the Range if you want to re-introduce a little more bite. The low shelf settings aren’t that critical. I set it so that when slamming chords, there’s maximum attenuation.
The audio example plays the straight Angel Power amp, and then the same riff with the same settings but with the de-harsher EQ inserted before the amp. If you play the original version right after the de-harshed version, you may find it easier to notice the “spiky,” harsh artifacts that the de-harsher removes.
Capture—and Keep—Your Creative Impulses
Gregor Beyerle recently posted a video called Producer vs. Engineer—What’s the Difference?, which had quite a few comments. It seems most people feel that for those who work in the studio by themselves, these roles overlap. But it’s vital to understand the mindset of these different roles, because how we adapt to them can either enhance or destroy our creative impulses.
Why Creativity Is Elusive
You’ve probably experienced this: You have a great idea for some music. But by the time you boot your computer, open a file, turn on your interface, and get ready to record, the inspiration is gone. Or, you’re deep into a groove and being super-creative. Then some technical glitch happens that requires fixing before you can proceed. Yet after you fix it, you can’t get back to where you were.
These scenarios highlight how the brain works. Your brain has two hemispheres, which are dedicated to different functions. The brain’s left hemisphere is involved in analytical and logical processes. The right hemisphere deals more with artistic and creative aspects. Although this is oversimplified (both hemispheres also work in collaboration), research into the nature of these differences earned the Nobel Prize in 1981 for Physiology or Medicine.
So…How Can We Stay in a Creative Space?
Here’s where it gets interesting. The corpus callosum is a wide, thick nerve tract that connects the two hemispheres—and several studies with MRI and fMRI scanners have implied that a musician’s corpus callosum has better “wiring” than the general population. Apparently, playing music is like an exercise that improves the ability of information to flow between the two hemispheres.
Before home studios became common, recording involved the artist (right hemisphere), engineer (left hemisphere), and an experienced producer who integrated the two. The artist could stay in a right-brain, creative space because the engineer took care of the analytical tasks. The engineer kept a left-brain focus to make the technology run smoothly. Meanwhile, the producer integrated both elements to shape the final production.
Today, when we wear all three hats, we have to switch constantly among these three roles. This works against the way the brain likes to function. Once you’re doing tasks that take place primarily in one hemisphere, it’s difficult to switch to activities that involve the other hemisphere. That’s why getting sidetracked by a glitch that requires left-hemisphere thinking can shut down your creative flow.
Retrospective Recording to the Rescue
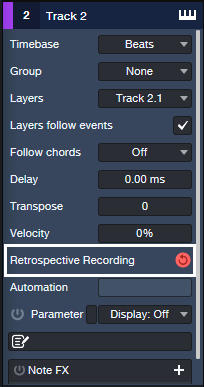
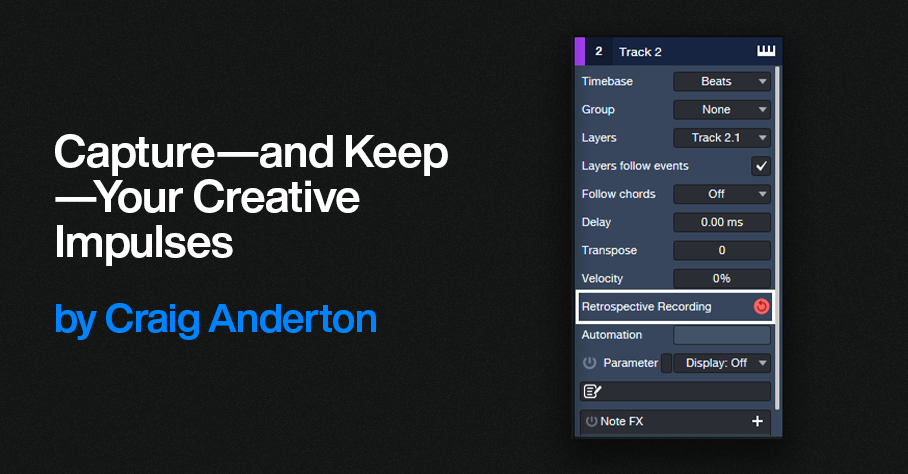
Fortunately, Studio One has a built-in engineer who remembers everything you play on a MIDI controller (fig. 1). Create an instrument track, and just…start playing. You don’t need to hit record or enable anything, because Studio One is always doing background recording of whatever MIDI data you play. You don’t even have to arm a track for recording, as long as the track’s Monitor button is enabled. If after playing for a while you come up with a great idea, just type Shift+[numpad *] or click the red button in fig. 1. Then, Studio One collects all the notes it squirreled away, and transfers them into the instrument track you were using.
Figure 1: Retrospective Recording works in the background to capture all the MIDI notes you play, whether or not you’re recording.
There are two Retrospective Recording modes. If the transport isn’t running, simply play in free time. Or, if the transport is running and you’re playing to a click, the notes will be time-stamped correctly relative to the grid. Furthermore, with Input Quantize enabled (fig. 2), these notes will be snapped to the grid. However, be aware that if you switch Retrospective Recording modes (e.g., record with the transport stopped, then record with the transport running), anything captured previously using the other mode disappears.
Figure 2: Play to the click, and Retrospective Recording will place your notes on the timeline—as well as quantize them if Input Quantize is enabled.
Retrospective Recording operates independently for each track. If you have different instruments on different tracks, you can play on one track and then decide to play on a different track. Everything in a track will be remembered until you transfer what you played to that track. For example, maybe you think playing on an acoustic piano will get your creative juices flowing, but you might wonder if an electric piano would be better. Load both instruments on their own tracks, play on each one, and you’ll find out which inspired you to play the better part.
What About Audio?
As expected, Studio One won’t remember audio that you play—audio requires much more memory than a MIDI data stream. But there’s a Faderport workaround that’s almost as good. Plug a footswitch into the Faderport. As soon as you open a song in Studio One, select a track, choose a track input, and arm the track for recording. Then, start playing. When inspiration strikes, press the footswitch. From that point on, Studio One will record on the track that you armed. Tap the footswitch again to stop recording but keep the transport running. You can resume recording with another footswitch tap. To end recording or playback, stop the transport.
Other techniques can help you stay in your right hemisphere. For example, the right hemisphere parses colors easier than text, so using color to identify tracks helps keep you in a creative space. Also, knowing shortcuts and macros can make initiating functions so second-nature you don’t have to think about them. In any case, the bottom line is that when it comes to being creative, you don’t want to think about anything—other than being creative.

