Category Archives: Studio One
Friday Tips in the Real World
[Editor’s note, we’re publishing this “Friday Tip” on a Wednesday, since we’re closed for the holidays on Dec. 24 and 25; a Thursday and a Friday.]

The Friday Tip series started three years ago, and it’s been an honor to be part of the family of Studio One enthusiasts. Ultimately, these tips come out of doing projects, and the album I dropped last week was the first one done from start to finish in Studio One. So, I thought you might like to hear what a few of these tips sound like not as isolated SoundCloud examples in a weekly blog, but as integral parts of a musical collection.
The specific examples below include start times, so you don’t have to listen aimlessly—just drag the dot on the embedded video to the indicated place on the timeline. But first, let’s start with the tips that were used on pretty much everything.
This phrase-by-phrase normalization techniques described in How to Gain Better Vocals and Get Better Vocals with Gain Envelopes were used on every vocal—lead and background—in every song. Most vocals added light limiting, and a few added compression, but these tips were the key to consistent vocals. The appearance of Gain Envelopes in V5 became the icing on the cake.
The Streaming: Limiter2 to the Rescue technique was used when assembling songs in the Project page. If it sounds like the songs have the same perceived level throughout the album…that’s why! Anything with a fadeout uses the technique described in How to Obtain The Perfect Fadeout, and Why Overlap Correction Is Totally Cool was used on every bass part (they were all MIDI bass).
Now let’s listen to some specific examples:
Reverb Chord Progressions? Why Not!
The effect is applied here to cymbals and noise, not reverb, but the principle is the same—and the harmonic “tuning” provides what sounds like some strange kind of psychedelic organ behind the guitar at 08:18. This same “organ” effect occurs at 09:06, 09:38, and 10:25 (not to be confused with the obvious Farfisa organ sound). I’ll be exploring this off-the-wall harmonic editing application much more in the future…it’s very cool, and unique to Studio One.
Saturation (using the Softube Saturation Knob) was crucial on several bass and drum parts to help them cut through busy mixes, or to add drama. Saturation is on bass all the way through three songs; the bass comes in at 00:17, 03:02, and 13:59. It’s also on drums all the way through two songs, where the drums enter at 08:25 and 16:58.
The preverb effect provides the ghostly sort of sound that starts at 12:00 behind the lead vocal, as well as several other places throughout the song.
Synthesize Open Air Impulse Responses in Studio One
It’s easy to make your own reverb impulses, and I took advantage of that for lead vocals starting at 03:02, 08:34, 16:09 (the most obvious example), and all vocals (lead/background) starting at 18:50. Custom impulses are also on drums at 16:58, and the Mai Tai organ starting at 19:14.
Create the “Barberpole” Audio Illusion
I love the way the “barberpole” effect starting at 12:25 accompanies the moon in the video getting bigger and bigger. The barberpole also uses a custom Open Air impulse with a long reverb time, which enhances the illusion of a tone that never stops rising.
This is applied to the entire stereo mix at 12:49 (go big or go home, right?), but it’s also applied more subtly to the flanged guitar parts in the same song. And I didn’t write a tip about it, but you gotta love that factory preset Mai Tai bell sound…
Yes, even something done in the middle of a pandemic when you just want to de-stress can come in handy. This provides a transition between songs; the first one is at 10:45, and the second at 13:38.
Polyphonic Glide with Any Synth
The “steel guitar” sound that starts at 21.22 and goes through to the end is actually a synthesizer that uses this technique.
This doesn’t dial up the gritty blues sound as much as on my 2017 album Simplicity, but it does make the harmonica at 03:52 and 0 4:52 sound a little less wholesome. This is a good thing.
Although I converted a guitar to Nashville tuning to replace the “faux” part, it didn’t sound quite right…so I mixed some of the virtual Nashville tuning part back in at 17:02 and 17:55. It’s the kind of effect you don’t notice until you take it out.
Varispeed-Type Formant Changes
This was used most prominently at 07:20, on the background vocals by the Nashville QTs. The goal was to create a sound like there were more people singing, but without using time-based effects.
Three hand percussion parts, processed as described in the tip, kick in at 06:04, and again at 06:40, after a brief drum solo. The odd thing about this technique is the percussion sounds like what percussion should sound like…but if you take out the tremolos and have the parts going all the time, they sound repetitive. (Oh, and I think you’ll recognize what’s providing much of the video background…)
Tempo Changes for Already Mixed Songs—Reloaded
When doing a mostly continuous mix, you’re bound to have beats that don’t quite match up. This technique was used in the two segues that start at 02:29 (the guitar carries the transition and speeds up) and 05:02 (the keyboard carries the transition, and slows down).
Of course there were plenty of other workflow and FX Chain-based tips used throughout, but I think these are arguably the most interesting ones. I’m looking forward to seeing what PreSonus comes up with in 2021 as we work our way through a new year. Stay healthy, stay optimistic—and keep making music! As Quincy Jones says, it’s food for the soul.
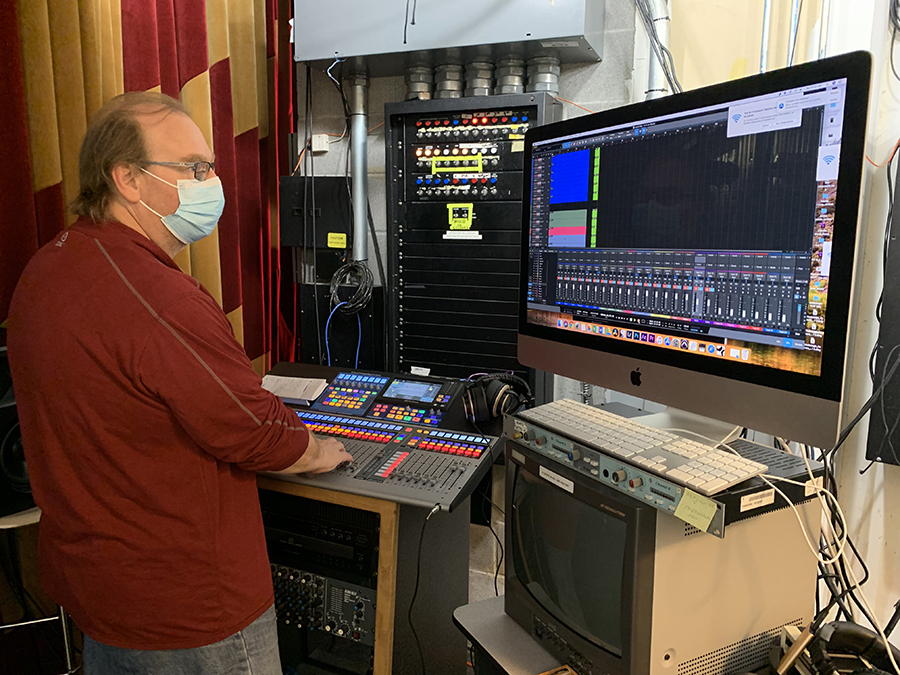
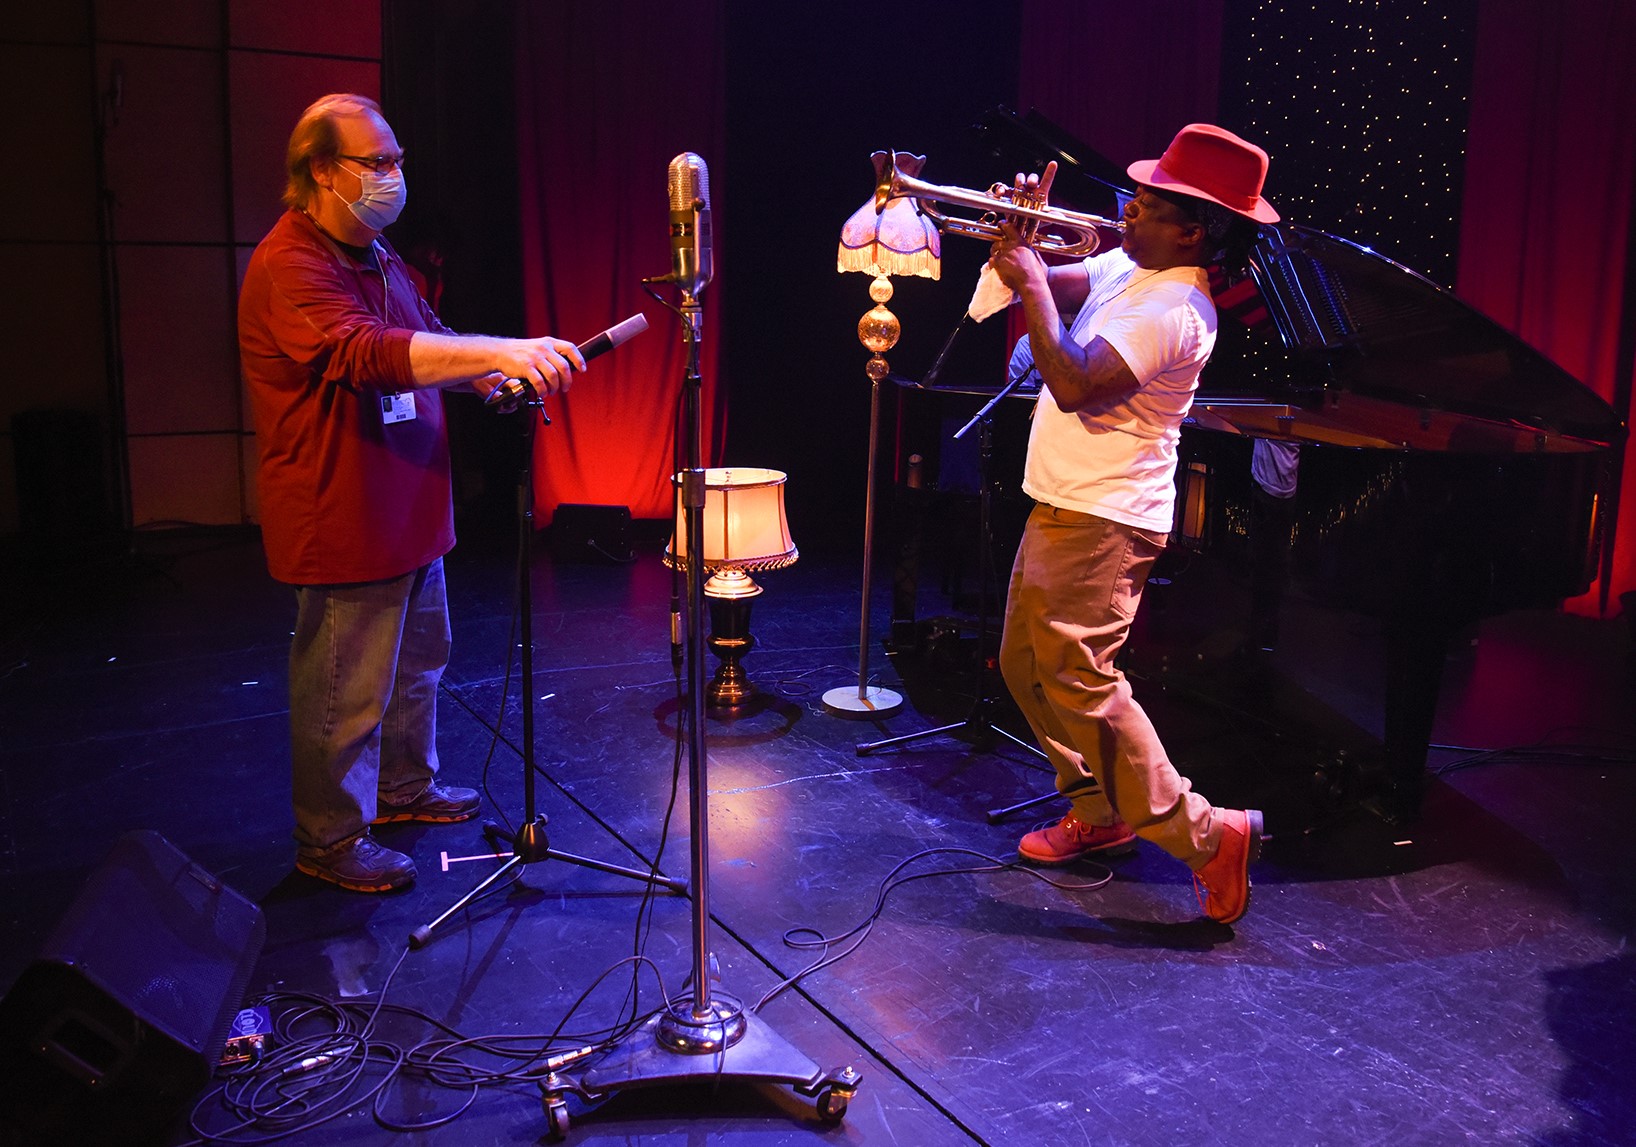
Home For The Holidays: Steve Himelfarb On Using The StudioLive 32S With Studio One At NOCCA
Home For The Holidays is a free virtual concert featuring holiday music by some of New Orleans’ favorite musicians including Jon Batiste, Preservation Hall Jazz Band, Irma Thomas, Kermit Ruffins, John Boutte, and others.

(click photo for NOCCA event details)
The performances by Irma Thomas, John Boutte, and Kermit Ruffins were recently tracked live at the New Orleans Center For Creative Arts (NOCCA) by professional recording engineer and faculty member, Steve Himelfarb using the PreSonus StudioLive 32S digital mixer and Studio One DAW software.
Let’s get to know him a bit better and hear what he has to say about integrating Studio One and StudioLive for use in live recordings!

Steve began working in recording studios around Los Angeles when he was about 18, doing the midnight til 9:00 a.m. cleanup shift at Cherokee Studios. As a result, he had priceless experiences including meeting Mötley Crüe (still one of the loudest he has ever heard to this day) when Roy Thomas Baker was mixing their debut record. Another fond memory was that of Ray Manzarek producing X’s Wild Gift during the heyday of the 80s music scene.
“Cherokee was super rock & roll, yet they were very strict with what they wanted from their cleanup people. I was taught how to conduct myself as a young would-be recording engineer,” Steve fondly recalls.
At 19, Steve began working for Capitol Records in the famed Capitol Studios building putting in a solid five years of work. Some of his album credits include Sheila E’s first album, Crowded House’s Crowded House, Bob Seager’s Like a Rock, Dwight Yoakum’s GTRs Cadillacs and Tori Amos’ Y Kant Tori Read. (Fun Fact: Tori and Steve have been friends since high school.)
Steve moved to New Orleans at the age of 25, and the first record he engineered in town was Buckwheat Zydeco’s On A Night Like This, which was produced by Chris Blackwell and nominated for a Grammy. He subsequently bought the studio that he worked at in the late 80s and rebuilt it with a Neve console and Studer tape machine. In 1993, Steve sold that studio and took a couple years off, sort of. To date, he has worked on 15 gold and platinum records and has five Grammy-nominated record credits to his name.
 Teaching himself to bake, Steve decided to open a small restaurant in the French Quarter of New Orleans called Cake Café, and became affectionately known as “The Cake Man” in the Marigny district. After 13 years of business (fast-forwarding past Hurricane Katrina to about four months ago), he sold the restaurant and wrote a cookbook.
Incidentally, around three years ago (after encouragement from Tori Amos) he started getting back into recording again and dove headfirst into the world of digital recording using Studio One.
Here are some thoughts by Steve, in his own words:
I really like the workflow of Studio One. It feels like I am working on a console and not a computer. The drag-and-drop integration is such a great feature. The plug-ins are very musical. Lately, my go-to has been the VT-1 on the stereo bus.
Using the StudioLive 32S in a live recording situation is wonderful. In all honesty, this type of setup used to be such an involved task with a mobile recording truck and countless hours of set up. The StudioLive 32S, along with the NSB digital stage box, is such a game-changer. Total set-up time takes about an hour. The sound is clean. I like the Fat Channel limiters. They are kinda my safety net against clipping in dynamic situations. I have used the StudioLive 32S on about eight projects over the past year, and it is truly a sturdy piece of equipment for such demanding situations. In live recording situations, you just need to count on your equipment and the StudioLive has always performed excellently.
 I really like how the company has developed the workflow of the recording studio in the current digital age. I could see how, about six years ago, PreSonus was ahead of the pack in their development of studio ecosystems. Now everyone is building small-format consoles and integrated systems.
Developing young artists has always been a large part of the work I have done. Teaching at New Orleans Creative Center For The Arts (NOCCA) is a natural extension of the work I love.
To learn more about this historic pre-professional arts training center for high school students in Louisiana, please visit and support them at: https://noccainstitute.com/ and https://www.nocca.com/
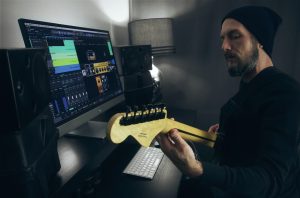
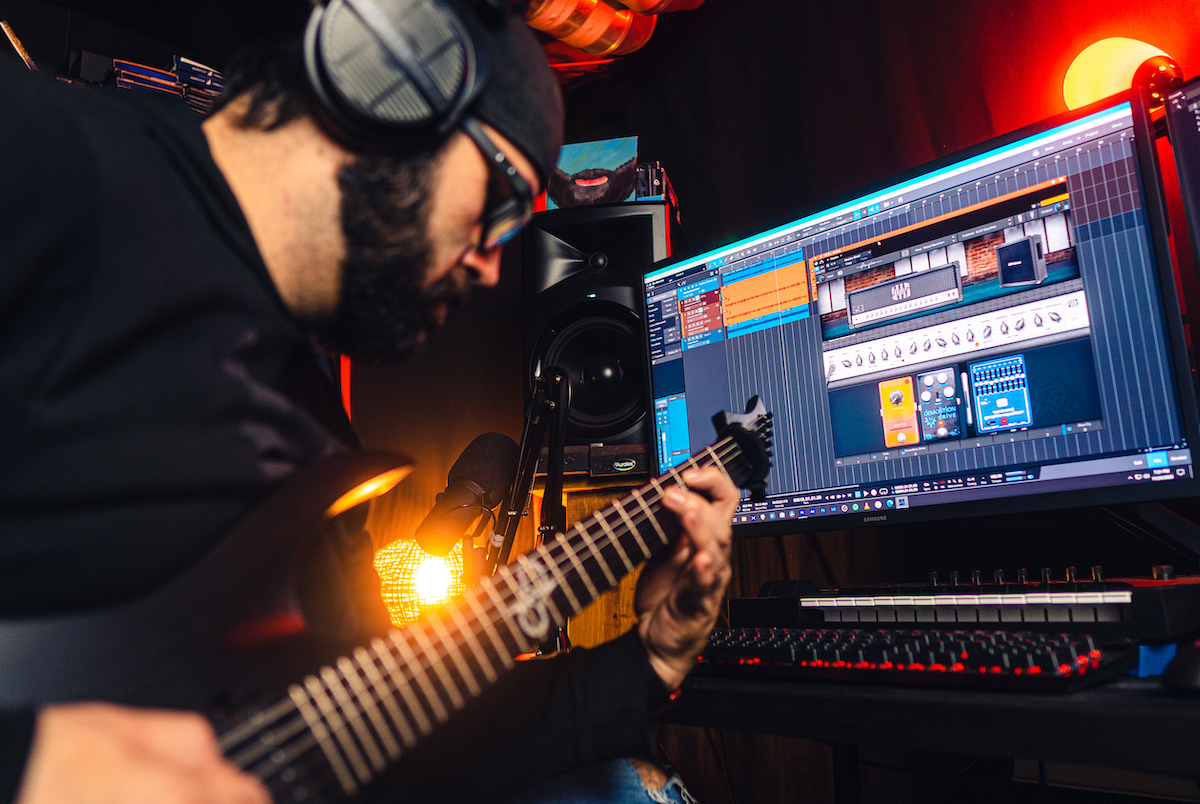
Extended Range Guitars With Ampire: Meet The Bunn, Nick Hill & Gary Hiebner
 The Bunn

The Bunn (a.k.a. Scott Sokoloski) is a stoked dude from Canada who makes low-tuned, heavy music despite wearing guitars incredibly high, with very short straps.
After a life of touring and gigging throughout North America in bands, The Bunn started producing his own music, back around 2010. Super-low tuned stuff. Not djent though, and not with 7 or 8 string guitars. The tunes are a post-sludge/ doom kind of thing and with extra long-scale, 6 string baritone guitars.
Besides creating and producing material for Foreigns, Wetlands, & Venns, “The Bunn” is forever busy sharing production and practical techniques in working with super-low tuning and getting music done on his YouTube Channel.
Nick Hill
Guitarist, producer, sound engineer and Solar Guitars Artist, Nick Hill runs his YouTube Channel focuses on mixing, metal, and tones. There, he shows how to create modern metal guitar tones, mix, master, and learn the process of music production.
He operates on Spotify both a solo artist and as part of a project called The Partisan Component with Jeff Plewa, an amazing metal vocalist.
Gary Hiebner
Gary Hiebner is a South African guitarist, music producer, content creator, and YouTuber. He started off as a guitarist in the South African music scene in the early 2000’s and from there gathered an interest in music production.
Through learning the different software audio applications available Gary developed a keen interest in music tuition and for the last 8 years he has been creating and providing music tutorials courses on many of the audio DAWs, plugins and effects available on different teaching platforms.
Currently he is a course creator at Groove3 and he also runs a YouTube Channel (Heavy Tones) where it focuses on heavy, low tuned guitars productions and how to get the most out of your heavy low tuned guitars… from dialing in a killer tone for low tuned guitars all the way to guitars setups for low tuned guitars. Also, be sure to check out his new series at Udemy: Advanced Tips and Techniques in Studio One
Because of their depth of work and respect in the extended range guitar online community on YouTube, PreSonus was so fortunate to have these three gentlemen so graciously and enthusiastically help out with creating most of the Presets (and sound examples on our website) for the recent PreSonus Ampire High Density software add-on pack that was just released. Thank you so much for your time and effort guys!
Let’s get to know them a bit better and how their workflow history intersects with PreSonus hardware and software.
PreSonus: How did you discover Studio One?
GH: I started off working in ProTools probably in about 2004, and then moved over to Logic in about 2006 and used that for a good couple of years. But around 2012 I started using Studio One alongside Logic. But I found myself preferring the workflow of Studio One. The interface is smoother and cleaner and with the new updates they have really been adding some great features that help my workflow.
TB: Initially through owning PreSonus hardware (since the FirePod and FireStudio, currently STILL using an AudioBox22 VSL which has been super solid for the last 5 years!). Bundled with the interface was an “Artist” version of Studio One. I’ve really taken to it in recent years (Studio One Pro) since connecting and collaborating with fellow YouTuber, Nick Hill. Nick is a veteran Studio One user and a great mixer. In our musical collaborations everything happens in twin setups of Studio One so that Nick can seamlessly go to the mix stage.
NH: I was definitely a little late to the Studio One party. I recall my early days of audio recording exploration, this would have been the early 00’s, using early versions of DAWs like Digital Orchestrator Pro and then moving into Reaper thinking THAT jump was massive. I tried various other offerings and my best friend Lenny had discovered this DAW called Studio One. At this point, it may have been toward the end of Version 2’s life cycle but we jumped in headfirst and the rest, as they say, is history.
PreSonus: If you explored Ampire in previous versions of Studio One, what are your thoughts on it now versus then?
TB: I started to pay attention to Ampire in Version 4, of particular interest was the “Double”. I’m a huge fan of Rectifiers and needed to try it. The amp itself sounded pretty great, however Ampire as a environment was missing some key functionality and features in order to make it part of my regular routine.
NH: I remember trying early iterations of Ampire and thought, “oh this is neat, but I won’t really use it.” The personal workflow I’ve developed and grown to feel most comfortable with has been hardware or externally based ie audio interface, using mics, capturing real sounds/amps/acoustic instruments, and then on to using hardware like the Line 6 Helix but as Ampire improved, I found myself using it for various mixing and layering tasks, adding in some melody lines, ambient guitar parts and overall “ear-candy” to some of my mixes and projects.
GH: In the beginning, like in version 2 where I started, Ampire was very basic. I was jumping for other Amp sim plugins to get the tone I was after. But I only really started exploring Ampire again with the new State Space Modelling. The Amps sound sooooo much better now. More realistic on getting that sound that you hear from a real amp. Where it sort of sounds like you can feel the air pushing out the speaker. So yeah the new version of Ampire has really come leaps and bounds from the earlier versions.
PreSonus: What do you think about the 3 new amp models in the Ampire High Density add-on pack?
NH: Having had some time to play with the new High Density stuff, It’s safe to say that these newly modeled amps stack up against some of the big-name, 3rd party offerings.
GH: I love all the new amps. Obviously I am more inclined towards amps catering towards high gain. So these new amps are exactly the tones I’m looking for. My favorite being the German sounding Gasoline EMC2. I’m a big fan of the brand it’s being modelled after, so yeah you guys really nailed it with that amp model.
TB: The new amps and cabs sound really good offering a satisfying level of feel and spirit as in the real-life hardware. Both the new drive pedals, the Wild Drive and Demolition Drive really help to shape, tighten, and add dimension to the amps. The new Space Reverb is a very nice addition that I could easily use in a number of different scenarios. Very soft and organic vibes.
PreSonus: How easy was it for you to dive in and start coming up with presets?
GH: Yeah, I could jump in straight away and build up presets quite easily. I’m not into building up big huge chains of amps and pedals. I like to keep the chain quite simple. So with the interface it was easy for me to dial up the sounds I was after. Sometimes just an amp head, speaker cabinet, gate, overdrive and EQ. That’s it.
TB: Ampire, for me, needed no instruction. I just opened it and started using it. Maybe the only thing I got tripped up on was looking for features that I expected that do not exist. Hahaaa!
NH: I wish that I could say I labored for hours and hours over the process but the fact of the matter is, I spent more time jamming on my presets and making the final 1-2% finishing touches than I did creating the actual tones. The new High-Density Amps are straight up, easy to work with and I think users will see that.
PreSonus: What’s the best feature you like about Studio One?
TB: That you don’t need any 3rd party plugins other than perhaps a virtual acoustic drum suite (if you don’t work with a drummer) to produce finished, commercially viable tracks. Typically I need 3rd party dynamics, EQ’s and spatial effects to actually make a track. Studio One closes that gap, especially with the addition of Ampire. The only similarly competing platform in this way would be Logic.
NH: Having used Studio One for years now, I’ve grown to love so much about this DAW. It seems to get out of my way and lets me create but the coolest or the best thing about it speaks to PreSonus as a whole and that is their willingness to work WITH the artists, producers, mix engineers, and musicians who use it. They take feedback, suggestions, and input from the community and continually try to make Studio One better with every update. It won’t always be a perfect process and pleasing everyone is a fool’s errand, but they get marks for trying in my book.
GH: I really like the Pitch Shift pedal effect. I have been through some of the other pitch shifting emulations around and a lot of them suffer from adding too many artifacts when the sound is transformed up and down. But this one works great. I really like the sound and use of it.
PreSonus: What are your thoughts on 2020?
NH: What can I say about 2020 that hasn’t already been said? It’s been rough and scary but with challenge comes growth. I focused on making my community a positive place, a creative place, and a sort of escape from the world and the at times, overwhelming negativity. Not as a way to put on blinders, but as a coping mechanism. I’ll tell you one thing, it’s given me much more appreciation for all of the things we all seem to take for granted when life isn’t on its head, that’s for sure.
GH: 2020 has been a strange year, I’m sure for all. With the whole pandemic and lockdown restrictions. Luckily for me I work from home, and don’t do much gigging and performing outside of the studio anymore. So I haven’t been affected too much in that way like many others have.
But it’s been a great year for guitars. There’s been some great releases focused towards guitarists. And I have been spending more time this year than ever dialing in the tones I want for my guitars and fine tuning them to a level where I finally like the productions I’m getting. So if anything 2020 has been a year for me to dive deeper into my guitar productions.
From my side in the future I’m going to be focusing more on Studio One tutorials courses across the platforms I use. And working hard at my Heavy Tones guitar YouTube channel as am having a lot of fun with that and it seems to be growing nicely. So if you haven’t seen my channel yet I would highly appreciate you stopping by, watching a video or two and leaving your thoughts on what you think.
TB: It’s an interesting, transitional period for music production. Pro audio and bedroom producer spaces are melding into the same space. I think that the trends going forward are going to be software that runs really light, ultra clean and simple GUIs that go away from trying to look like in real life, and software that makes global collaboration accessible and easy.
With Studio One and Ampire specifically I would like to see the gate, smoothed out and further developed (the Fortin Zuul is an incredible gate if you need inspiration). As well, it would be nice to see the cab shaping tools expanded so as to be able to launch a single instance from the inserts that offers a fully refined tone without the need for any additional inserts in the FX rack. This is the big reason that I favour the Helix platform, (and previously BiasFX) and also why I don’t use Neural DSP or STL plugins. I want a single instance that sounds awesome, needs no additional plugins, runs light on my system, and gets out of my way so that I can focus on playing and being creative. Additionally I’d like to see a clean GUI without IRL graphics. Much of Studio One is leaning already in this direction, it would be nice to see it go all the way!
Overall, I really like the single platform for creators approach of Studio One. Just needs a killer acoustic drum suite. No other cross-platform DAW offers such a comprehensive list of pro level tools. And the cross platform thing (Mac/PC) is huge.
We hope that you have enjoyed this round-table discussion by 3 of the most down-to-earth and formidable extended range guitar players online who took the time out to share their personal thoughts here with us.
Visit their YouTube Channels:
The Bunn | Nick Hill | Gary Hiebner (Heavy Tones)
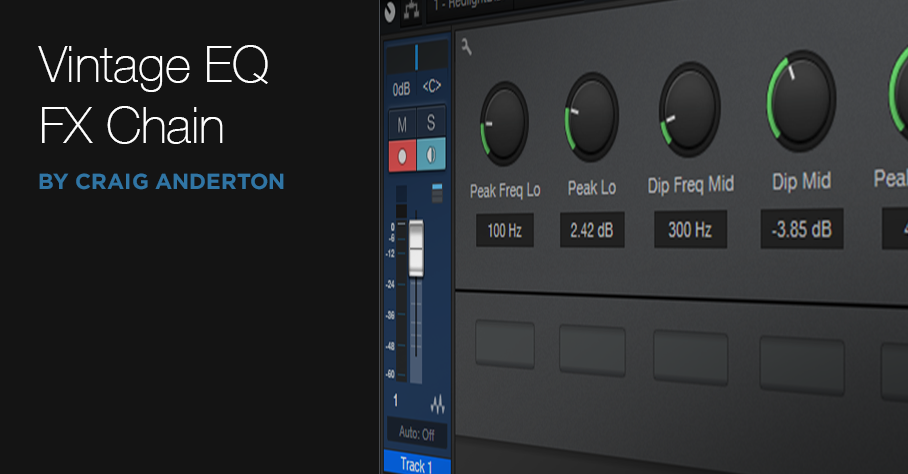
Vintage EQ FX Chain
While modern EQ can emulate pretty much any curve that a “vintage EQ” could produce, there’s more to EQ than the curve itself.
Vintage EQ, due analog technology’s constraints, wasn’t as flexible as today’s EQs. Therefore, the various parameters were limited to specific choices—and these choices were made for musical reasons. When people talk about dialing in a great vocal or drum sound within seconds using vintage EQ, I suspect it’s because those vintage EQs were engineered for fast, efficient changes that made musical sense.
So as an experiment, I created a Pro EQ2 FX chain that emulated (quite accurately, if I do say so myself!) not just the curves, but the controls of a Pultec MEQ-5 midrange equalizer (Fig. 1).
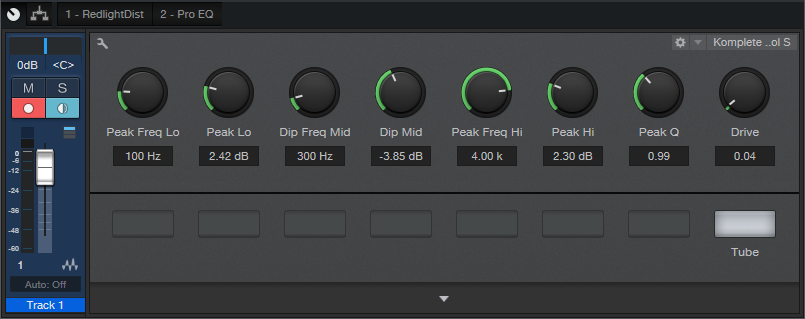
Figure 1: Control panel for Pro EQ2 Vintage Equalizer.
The Lo and Hi stages have a Frequency control and Boost (no cut) control. Originally, the low band had stepped frequencies of 200, 300, 500, 700, and 1 kHz, while the high band had 1.5, 2, 3, 4, and 5 kHz. The Freq controls cover mostly the same range, although in recognition of bass’s importance in today’s music, the low band goes down to 60 Hz. Another tweak is that the high band had a fixed EQ, which I always felt was a bit too narrow anyway—so I added a Q control.
The midrange section cuts (no boost) from 200 Hz to 7 kHz. However, the MEQ-5 had a subtle EQ shift that depended on the amount of cut, which is emulated here. I also added a RedLightDist to give subtle saturation effects.
So next time you need EQ, download and try out this FX Chain. It won’t sound different than what you can achieve with a Pro EQ2—but you may very well get where you want to go faster. Maybe even much faster.
Download the Pro EQ2 Vintage EQ here!
Studio One used on Taylor Swift’s TWO Surprise Records, Folklore and Evermore
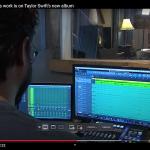
While binging some Taylor Swift videos a couple of weeks back, Peyton (our very own Inside Sales Coordinator) stumbled upon this video:
Imagine our surprise when Studio One, a FaderPort 8, and a pair of Scepters are prominently displayed with Taylor’s music in the background. We had to find out more about this project, the studio, the engineers, and how Studio One helped TWO of Taylor’s secret albums come to life, Folklore and Evermore. Here’s our interview with Jonathan Gautier, sound engineer and owner of Sound House Studio in Lakeland, FL.
-
- Sound House Studio
Give us some background on yourself. How long have you been making music?
I started playing the piano at age five. My parents pretty much nurtured rather than forced learning music, so I latched on rather quickly. From 5th grade to 8th grade, I went to a performing arts school, Rochelle School of the Arts, where my mother taught shortly after we moved from Boston to Lakeland. While there, I played cello in the orchestra and sang in the choir. After middle school, I got accepted into Harrison Arts Center for piano. Throughout this whole time, I was playing in church and playing in bands. After high school, I went to the University of Central Florida where I studied Digital Music/Music Production and later received my master’s degree in Music/Music Technology.
How has the music industry changed since your early days?
I’m 36, so I am not sure if I would be considered “old school,” but I feel like the music industry is changing for the better since I started. More tools are accessible than when I started, and you can definitely make music at a better quality. I started out on the original Mbox and a Tascam 4-track in high school, and now people are making better quality music on their phones than I ever did. I also feel that artists are being more responsible with their songs, especially on how they brand themselves, where they want to record, and how they want to use streaming platforms.
Who has been an influence in your life?
My dad was one of my major influences in my life. He, along with my mother, definitely understood the dream that I had to be a producer and own a studio. My dad always would tell me that the world needs dreamers.
Can you please share with us about the Taylor Swift project?
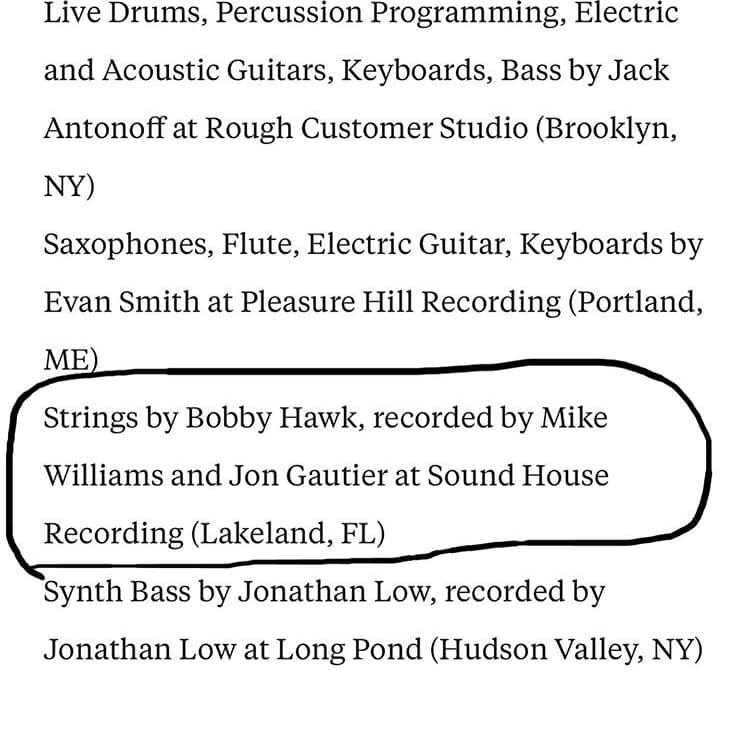
One of our clients, Rob Hecht, aka “Bobby Hawk,” comes to the studio frequently to record violin for various artists, all of which are not disclosed to us. Not even a day before Folklore is released, we get a text from Bobby and he tells us that we have a credit on Taylor Swift’s new album. It was definitely a surreal experience because it came out of nowhere. I almost didn’t want to believe it and when Bobby sent us the link to the credits, sure enough on the song “August” there it is: violins by Bobby Hawk recorded at Sound House Studios by Jonathan Gautier and Michael Williams! (Michael is our other engineer.) We also received another credit on her sister album, Evermore, which was just released on the song “Gold Rush.”
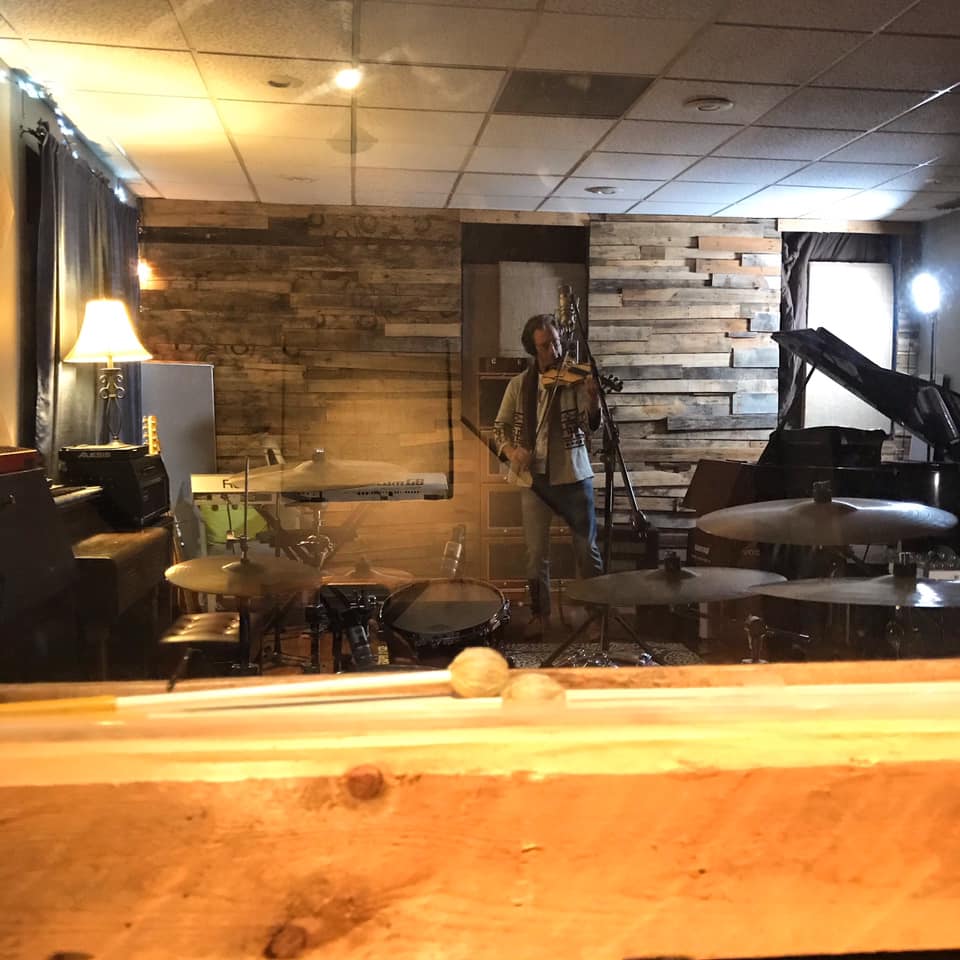
Violinist Bobby Hawk in Sound House Studios
What was your first PreSonus product? What all do you have now?
I have known about PreSonus for a while now. They were one of the first products that I started to build a studio around. My first PreSonus product was the two-channel tube preamp, the BlueTube, and then I had the Digimax LT that I used for an extra eight channels along with my Digi003 rack. Now I use Studio One for my DAW, a FaderPort 8 production controller, Eris 8s as monitors, and a DigiMax DP88.
When did you first hear about Studio One?
Definitely Joe Gilder and Home Studio Corner even before he was heavily involved with PreSonus. Also, the tech director at our church talked about it a lot.
Any user tips or tricks based on your experience with Studio One?
One of my favorite features in Studio One is the Pipeline XT plugin that allows you to use your outboard gear as plug-ins. That was a game-changer for me. I also think pocketing audio tracks using the cursor and Option-Command to line things up over global quantizing is better, at least for me.
How easy/difficult was Studio One to learn?
Coming from Pro Tools, I felt that the learning curve was easier than I thought it would be. I also love the wealth of online resources there are for Studio One, so I never felt stuck. Since making the switch to Studio One and having other PreSonus gear, I have felt that I have been able to be more productive in my studio than ever before.
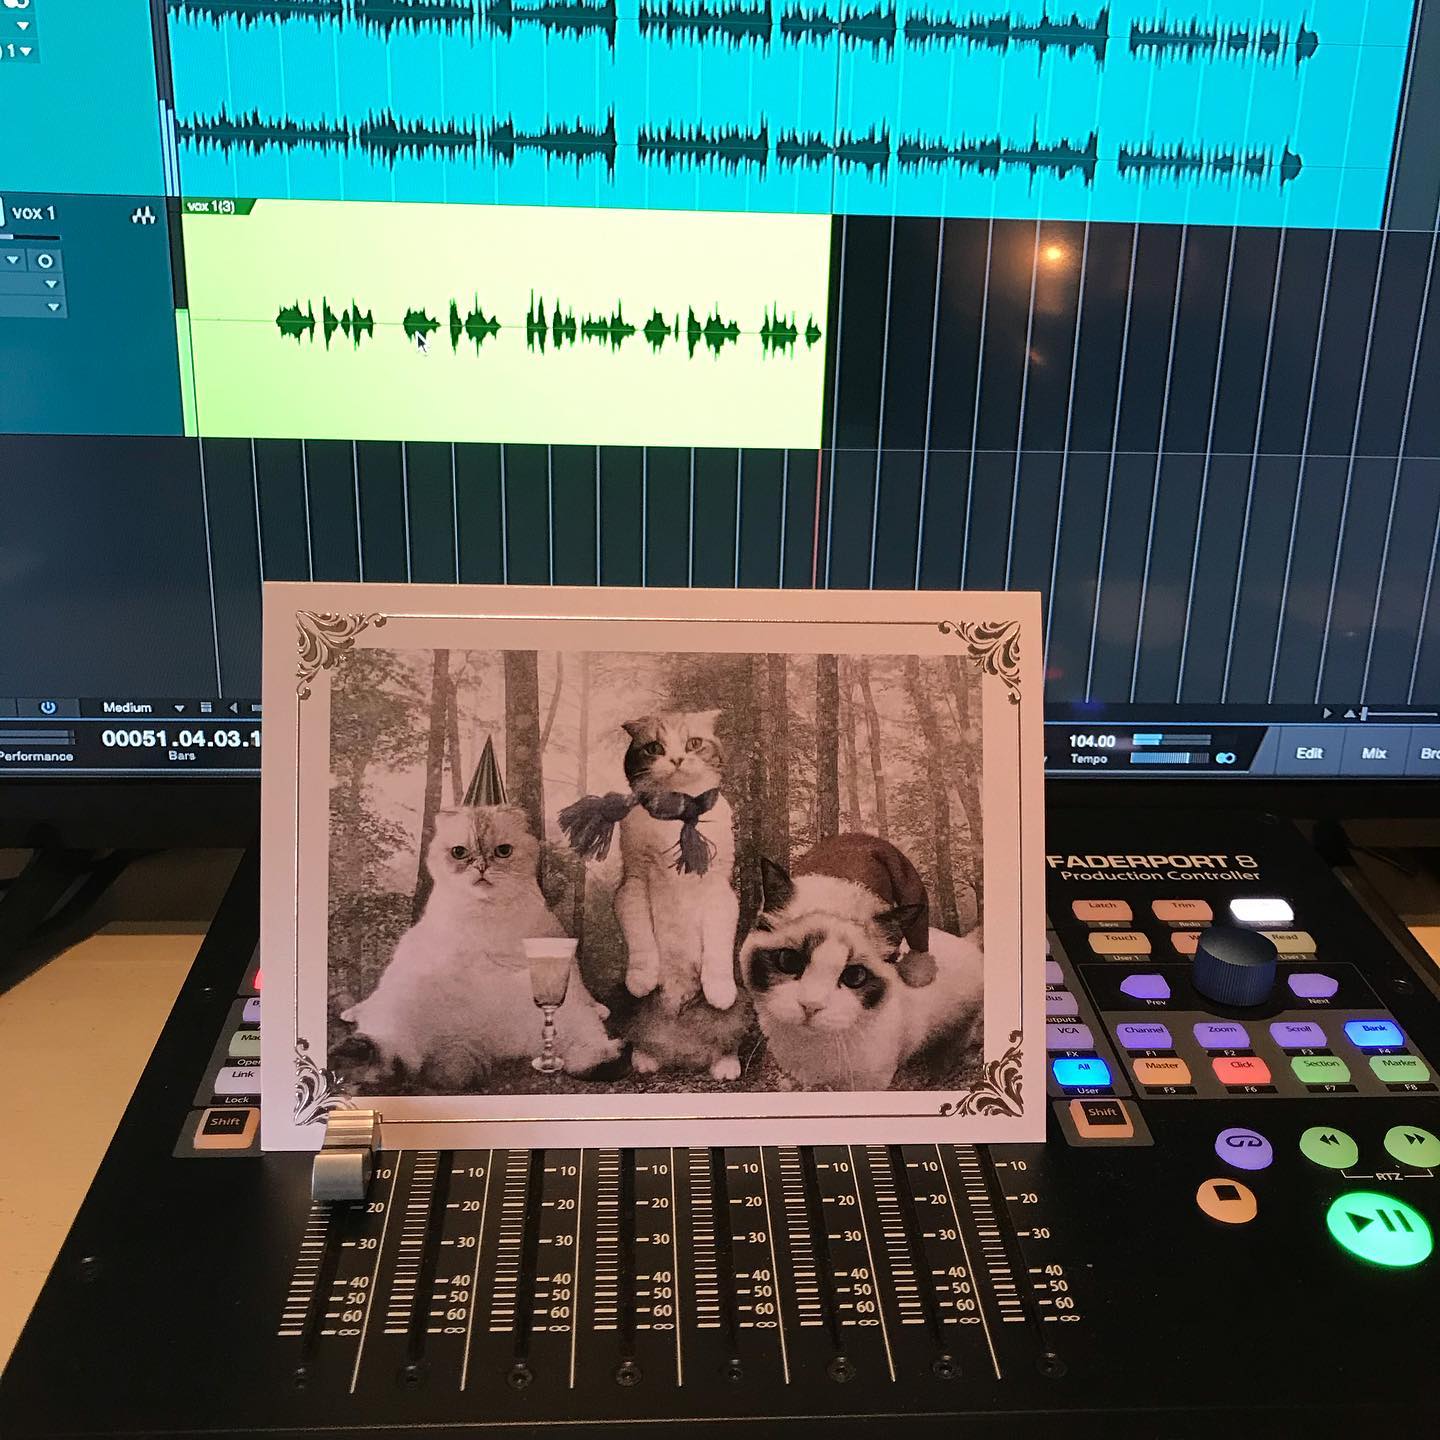
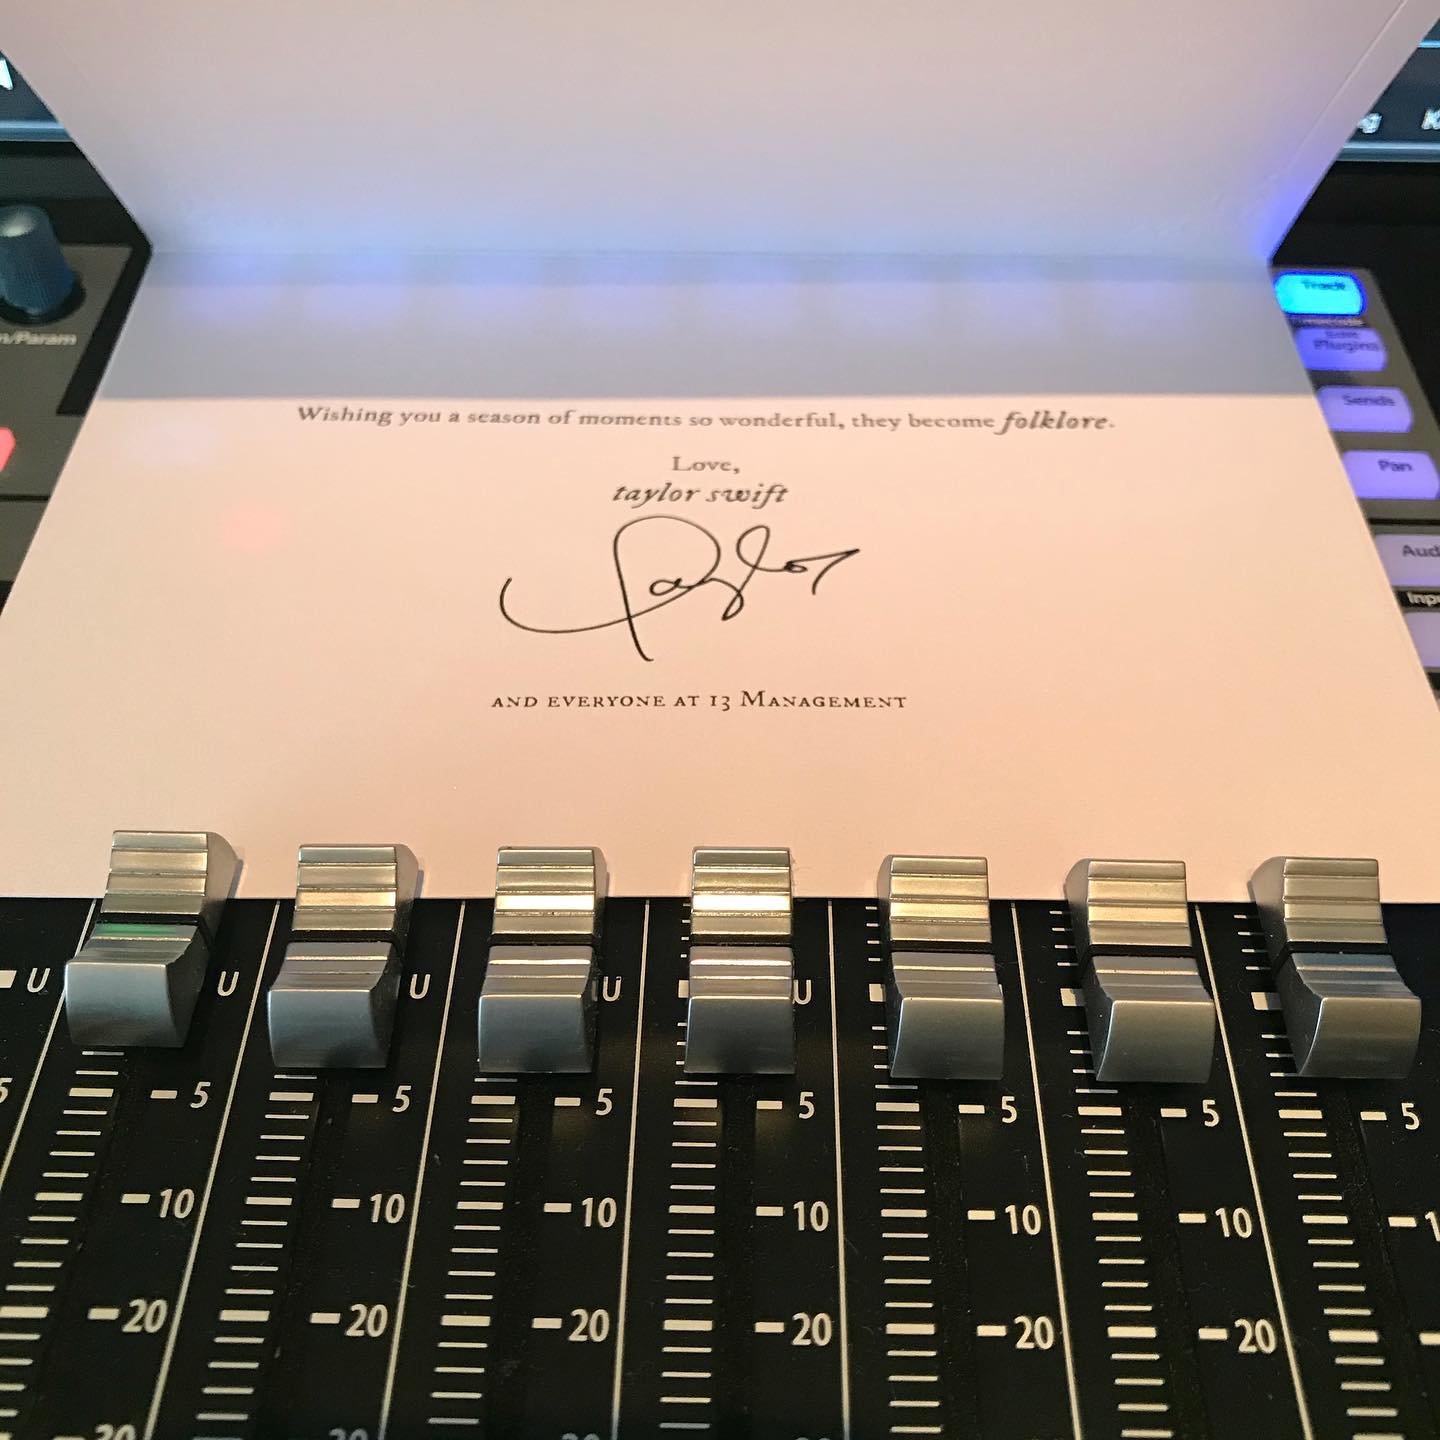
Taylor Swift’s personal Christmas card atop a FaderPort 8
Recent projects? What’s next for you?
Well, aside from the Taylor Swift stuff, I produced an album project for my church, Access, and another church, Redemption Church. Currently producing album projects for a few local artists: Hana McCartnety and Giselle Gutierrez, as well as mixing virtual choir performances for schools around the country and live recording and mixing for churches for their live streaming. You can check out our new releases on our Spotify Playlist!
HUGE congrats to Jonathan and Bobby for all their success from everyone at PreSonus… and Happy Birthday to Taylor Swift!
Connect with Sound House Studio on Instagram here!
Listen to Sound House Studio’s Artist playlist here!
Last Minute Gifts that Will Make People Say “YES!”
Holiday Shopping Pro Tip: If you wait until the last minute…it only takes a minute! It’s not too late to find the most perfect gift for the music lover in your life. Scroll through some of our most popular gift ideas and get your stocking stuffed today!
-
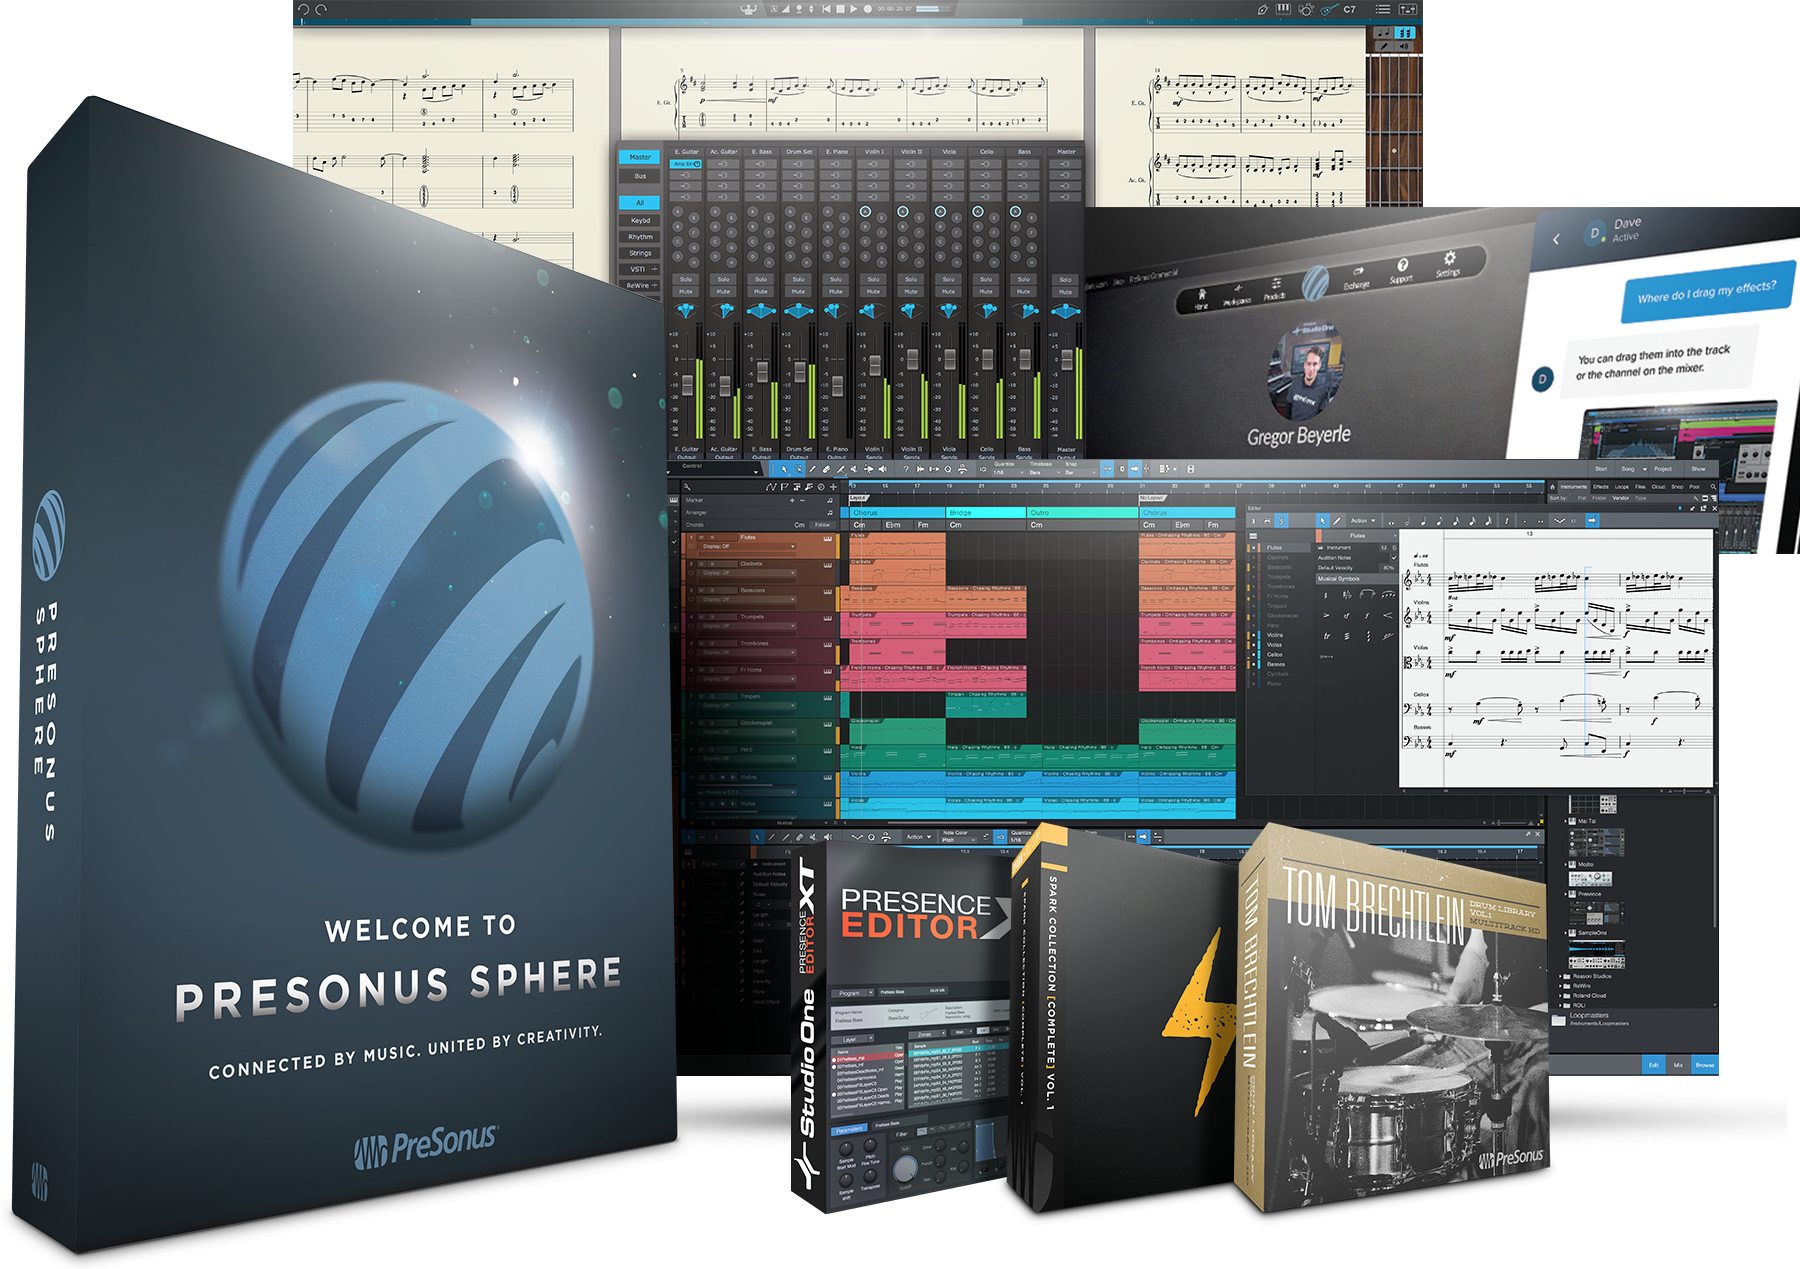
PreSonus Sphere
Learn More about Sphere!
Are you one of those people who believe there’s no such thing as too many gifts under the Christmas tree?
Just about every software product we make can be yours for a low monthly membership fee—or an even lower annual fee. Studio One Professional, Notion, all of our Add-ons and Plug-ins, over 100 content libraries, and more… You’ll always have the latest version of all PreSonus software, ready-to-go, and you’ll never pay extra for updates or upgrades for as long as you’re a PreSonus Sphere member. And we’re adding new stuff to the offering with every passing month.
Join Sphere NOW!
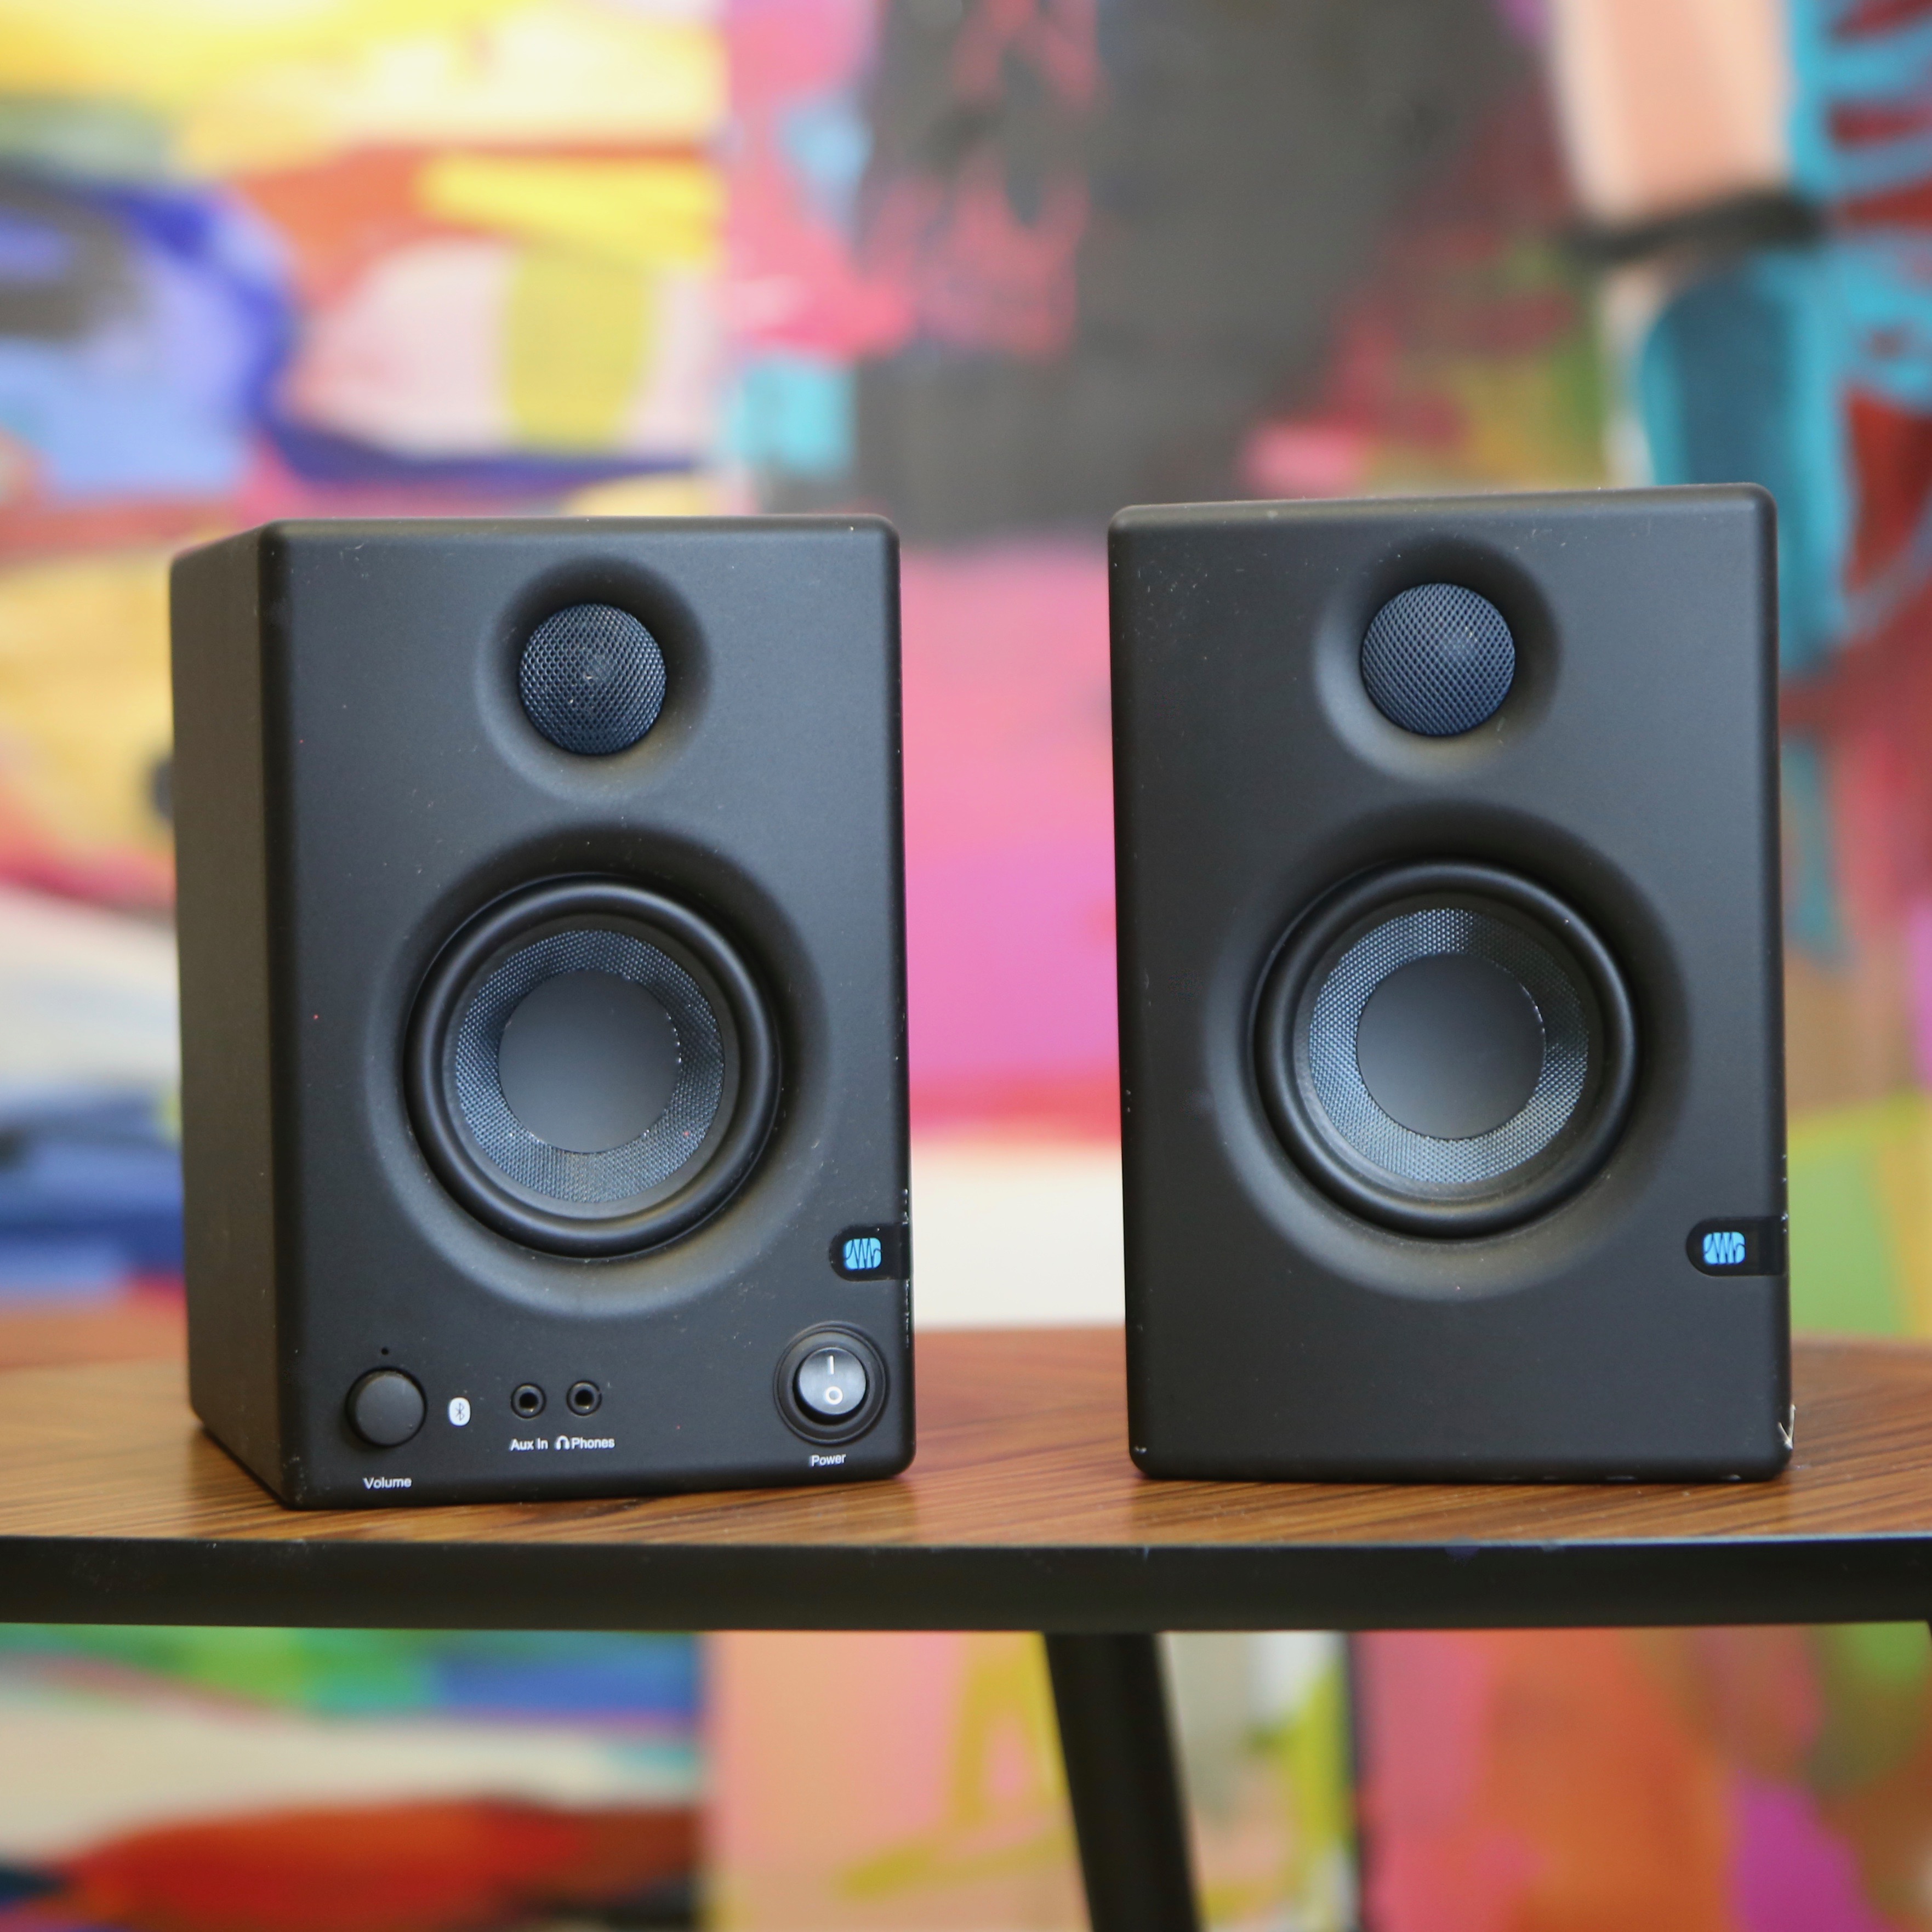
2. Eris 3.5 Monitors
BUY NOW!
PreSonus® Eris-series studio monitors are used worldwide by audio engineers who need to hear every detail of their recordings. Ideal for gaming and home video production, the Eris E3.5 employs the same technology as the larger Eris models to deliver studio-quality sound, with smooth and accurate frequency response. Yet they’re compact enough to fit almost anywhere… like under a Christmas tree.
3. Eris HD10BT Headphones

Now for LESS than $100 you get:
- Bluetooth® 5.0 wireless for mobile use, plus wired connectivity for use with professional devices or when wireless operation is prohibited
- Active Noise Canceling (ANC) to reduce environmental noise
- Closed-back, over-ear design for superior isolation
- Easy-to-use level and track navigation controls
- 40 mm drivers for studio-quality sound reproduction
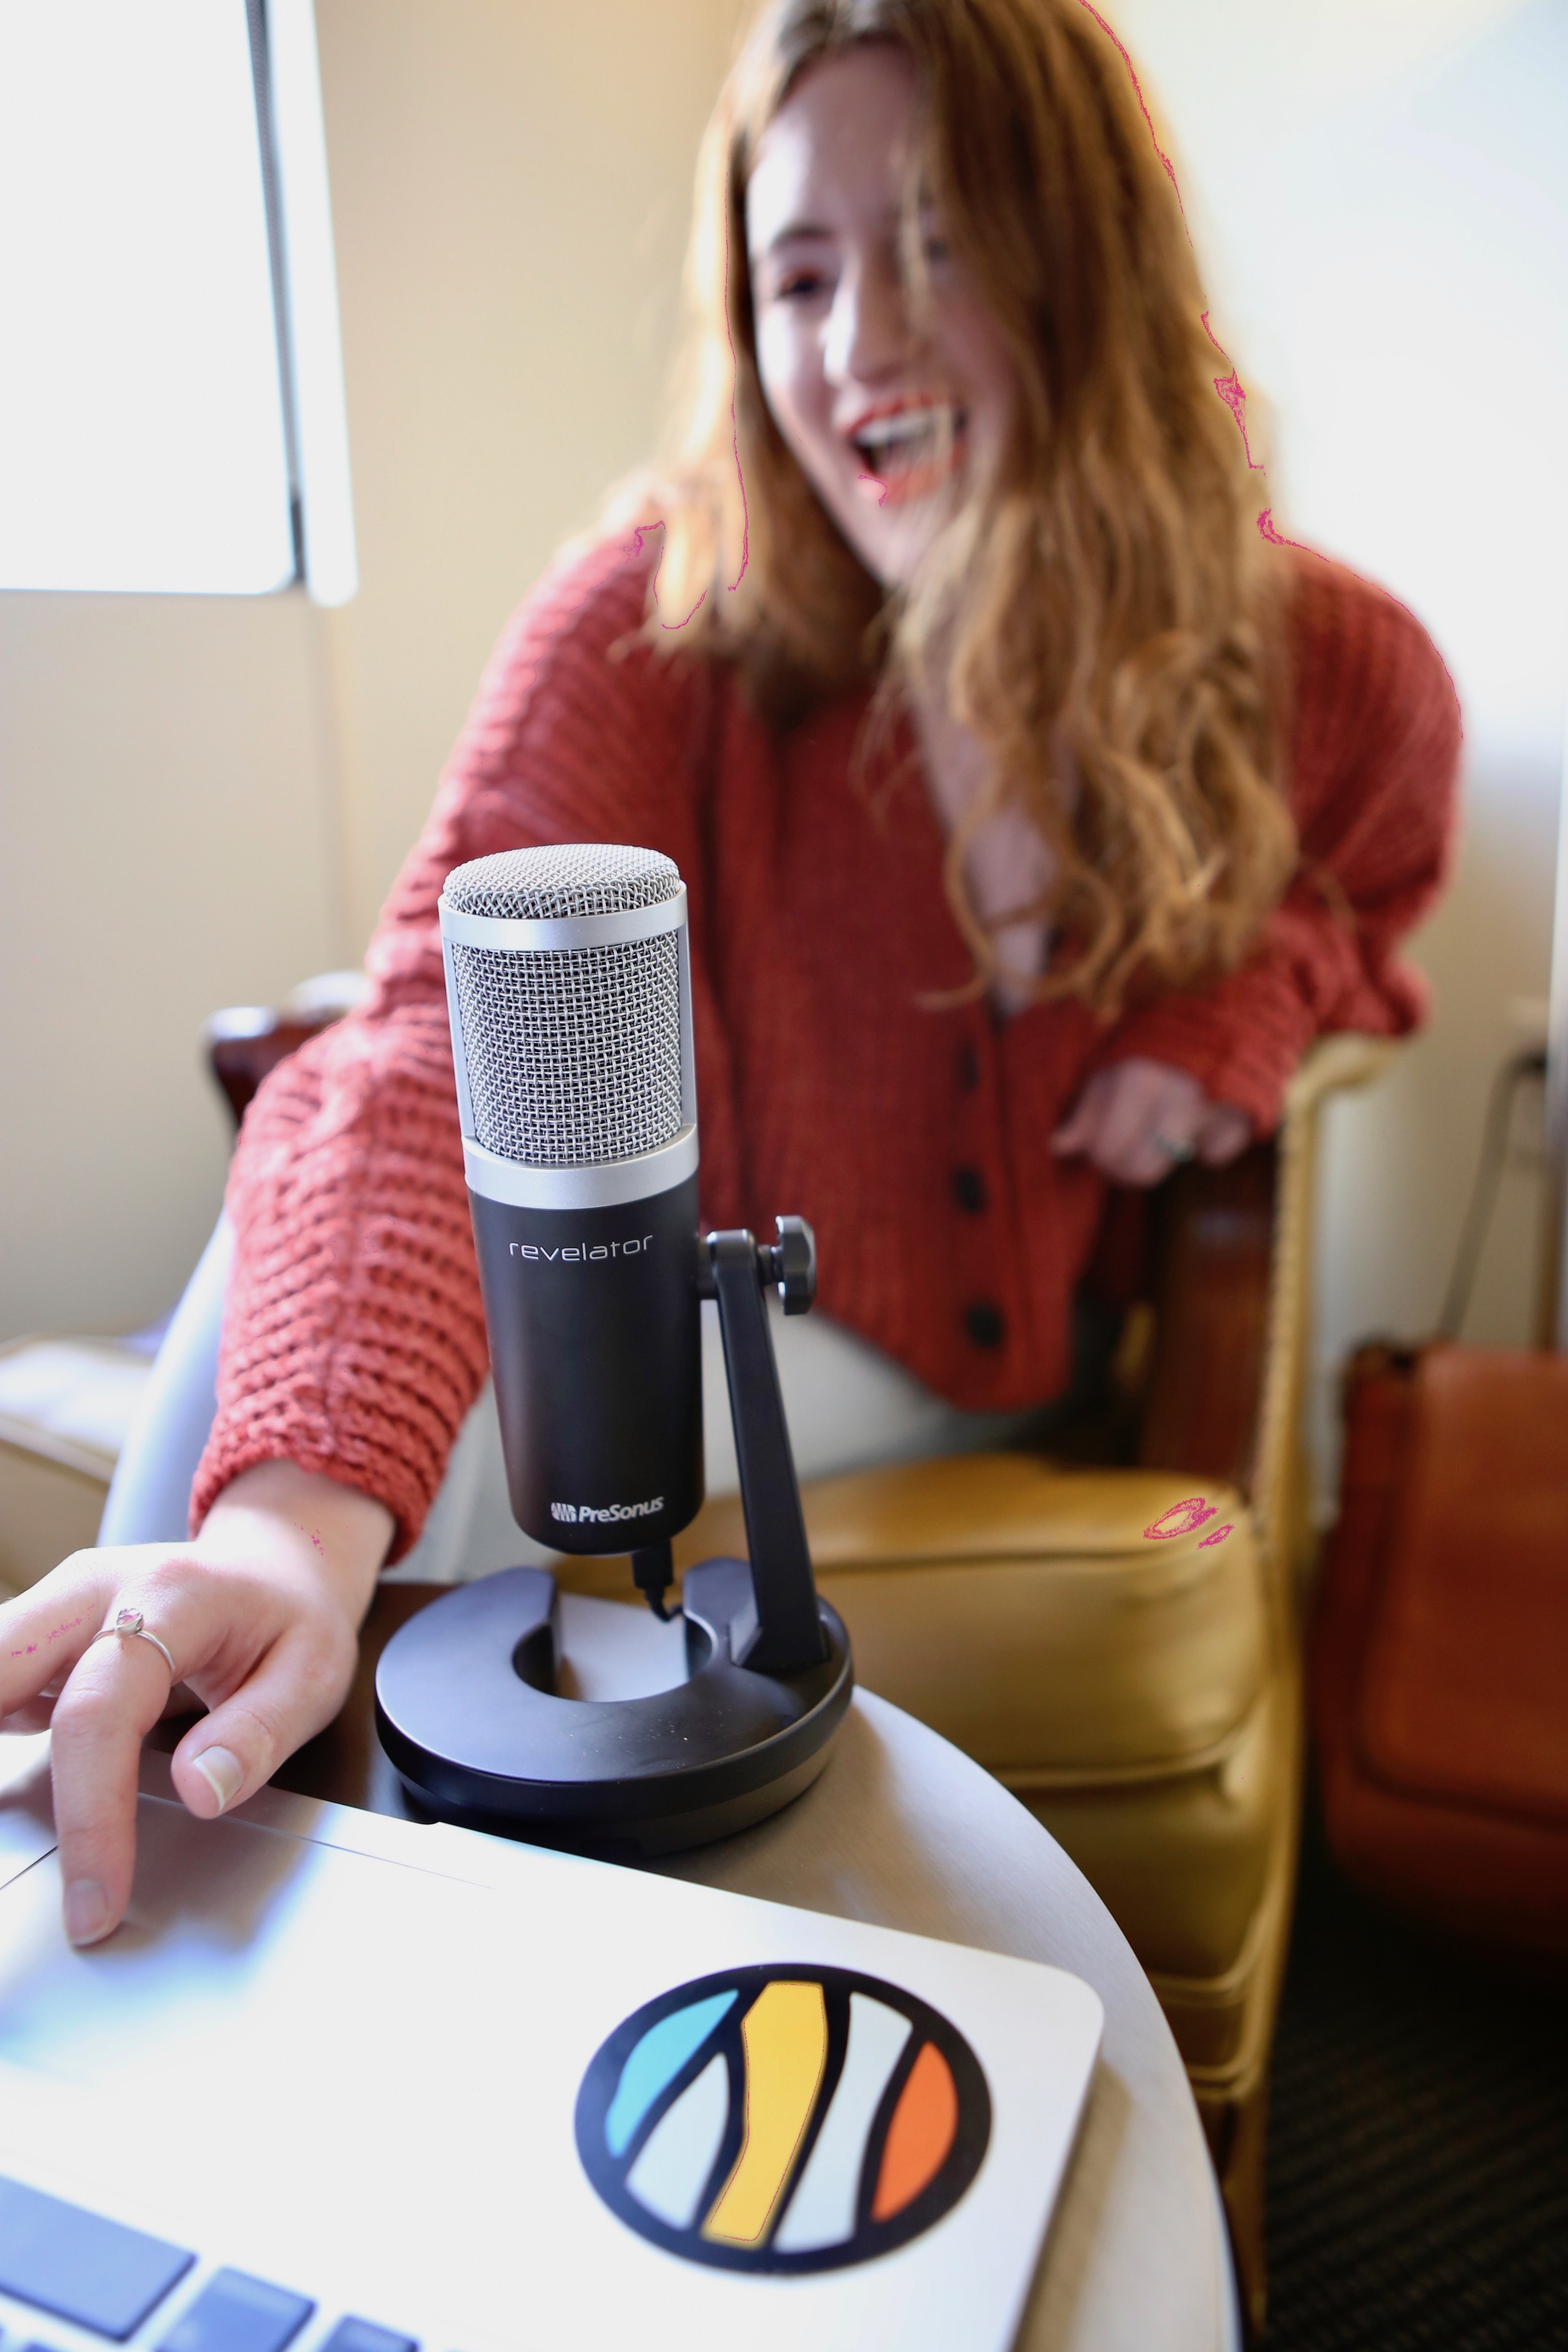
4. Revelator USB Microphone
BUY NOW!
Whether you’re looking for a USB microphone for streaming, vlogging, podcasting, or a simple recording solution for voice-overs or your home studio, Revelator is designed to deliver polished, professional-sounding results with ease. 16 easy-to-use, professionally-crafted presets and fully editable, award-winning StudioLive EQ and compression processing plus voice effects and reverb give you studio-quality sound with minimal effort. Revelator also provides three different polar patterns in one USB microphone to provide maximum flexibility.
Two stereo loopback channels make recording and mixing audio from multiple applications like Skype or Discord quick and easy. Built-in monitoring and an onboard headphone amplifier let you listen to your performance in real-time. So whether you’re recording in Studio One or going live on Instagram, Revelator is right there with you to make you sound—and look—professional.
5. ioStation 24c Audio Production | Desktop Control
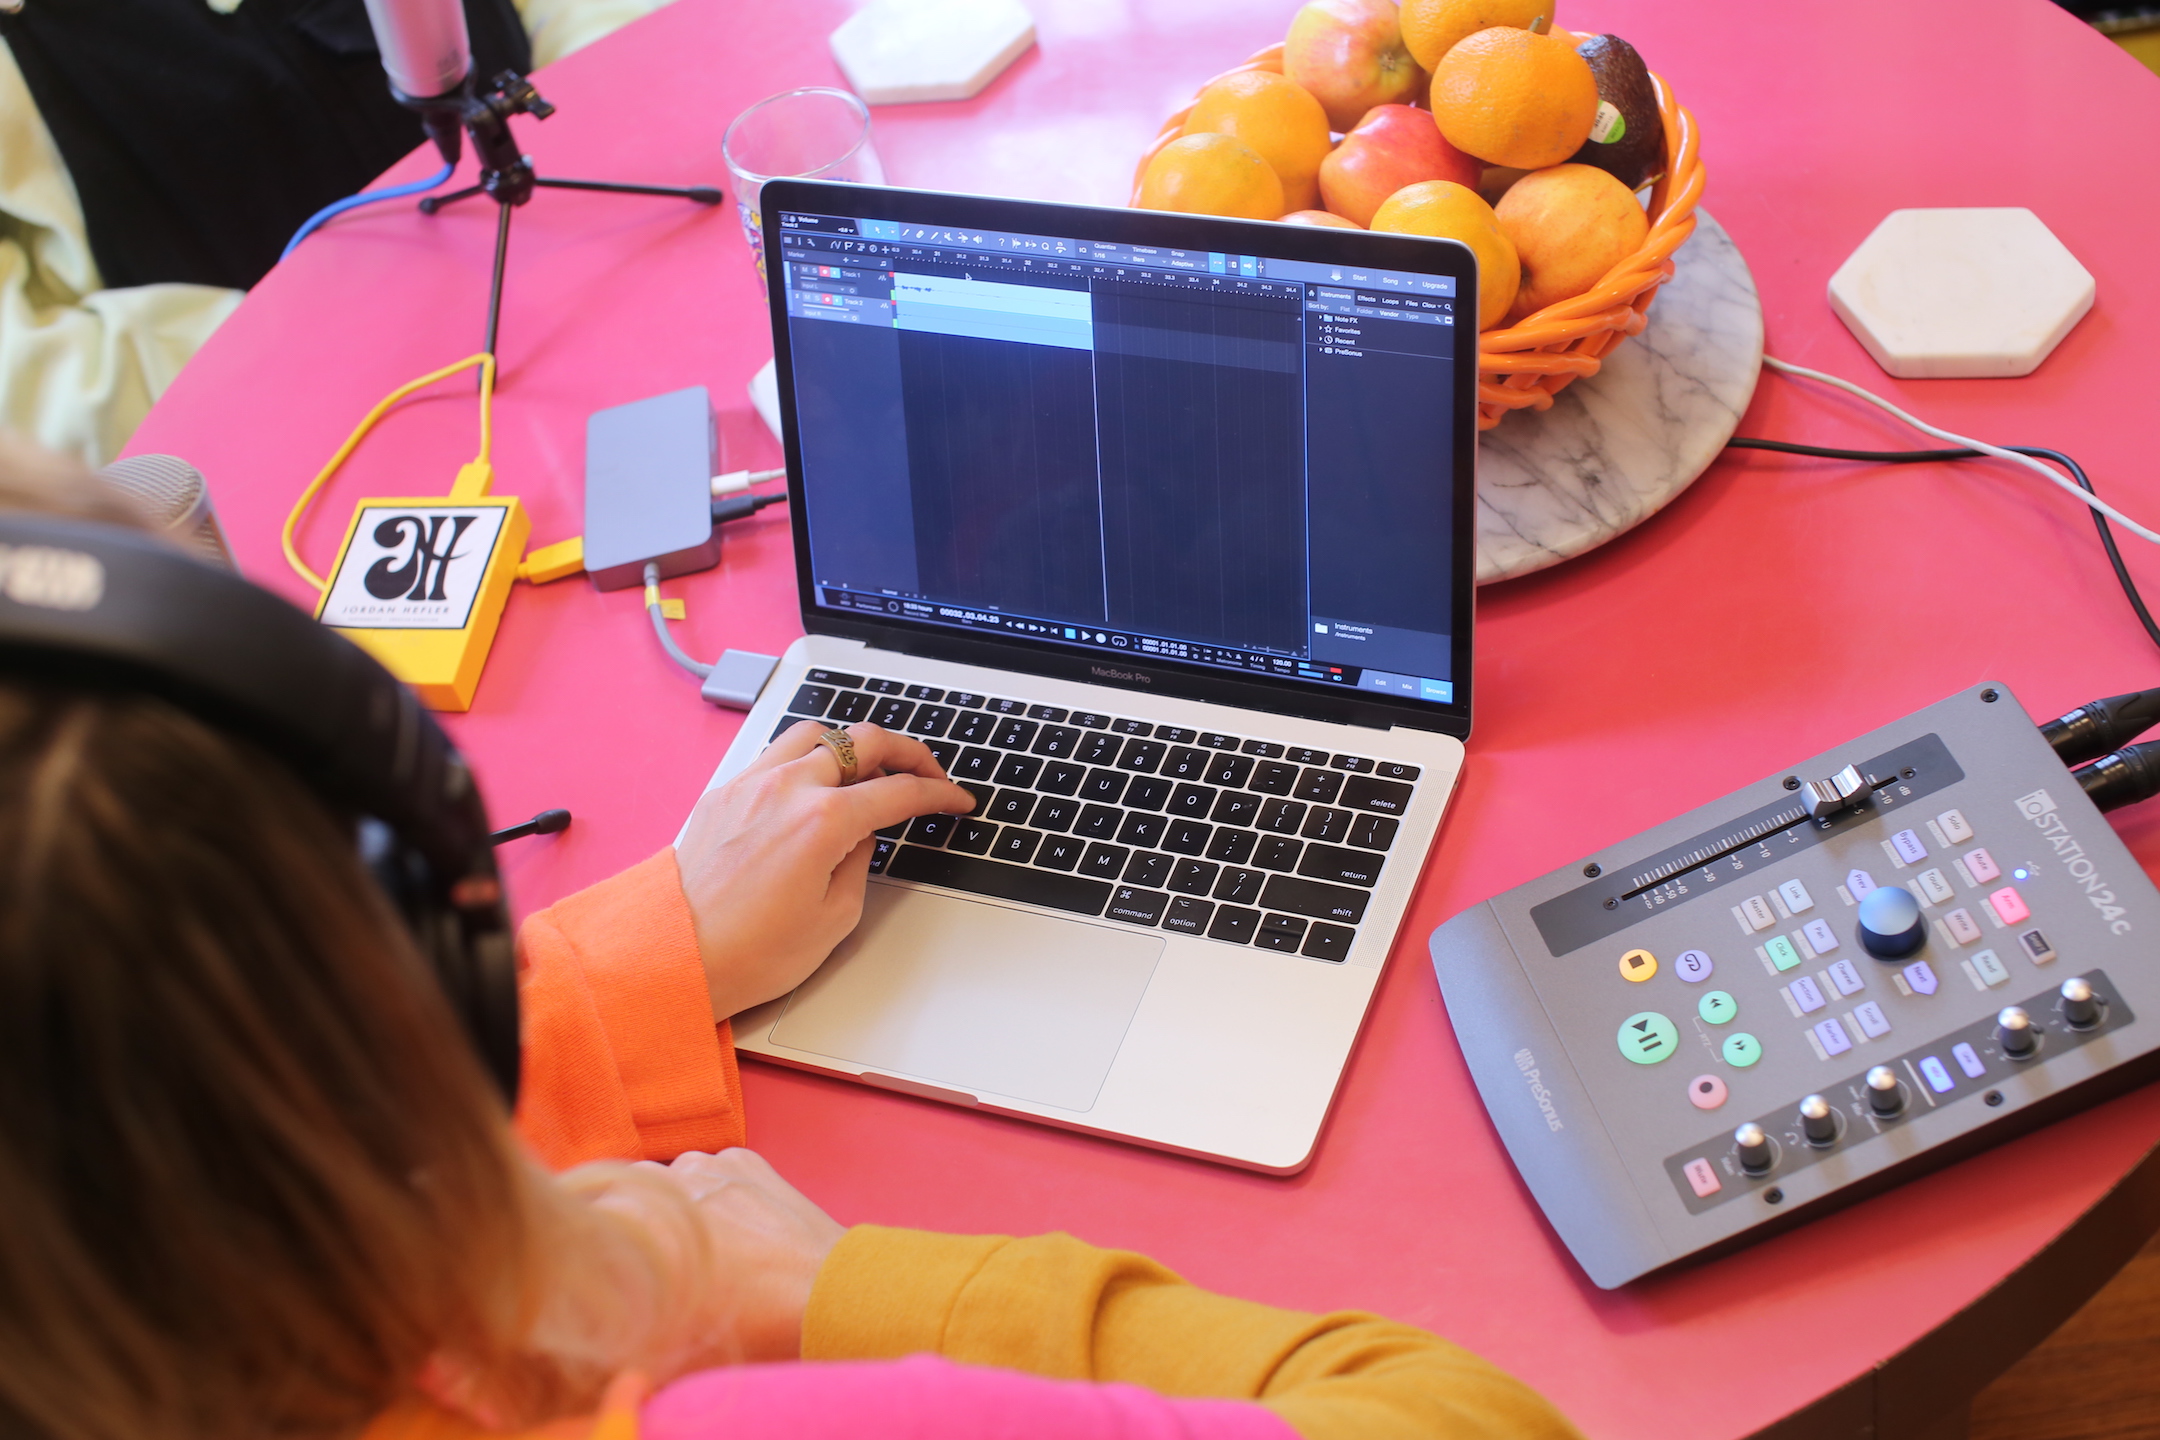
High-definition, desktop audio interface and production controller with USB-C™ compatible connectivity; two transparent XMAX mic preamps plus two switchable line/instrument inputs combined with a powerful DAW controller that includes a touch-sensitive, motorized, 100 mm fader; DAW recording transport; innovative Session Navigator that simplifies controlling and recording in your favorite DAW; support for HUI and Mackie Control emulation; native control of Studio One®; Studio One Artist included.
6. ATOM Pad Controller
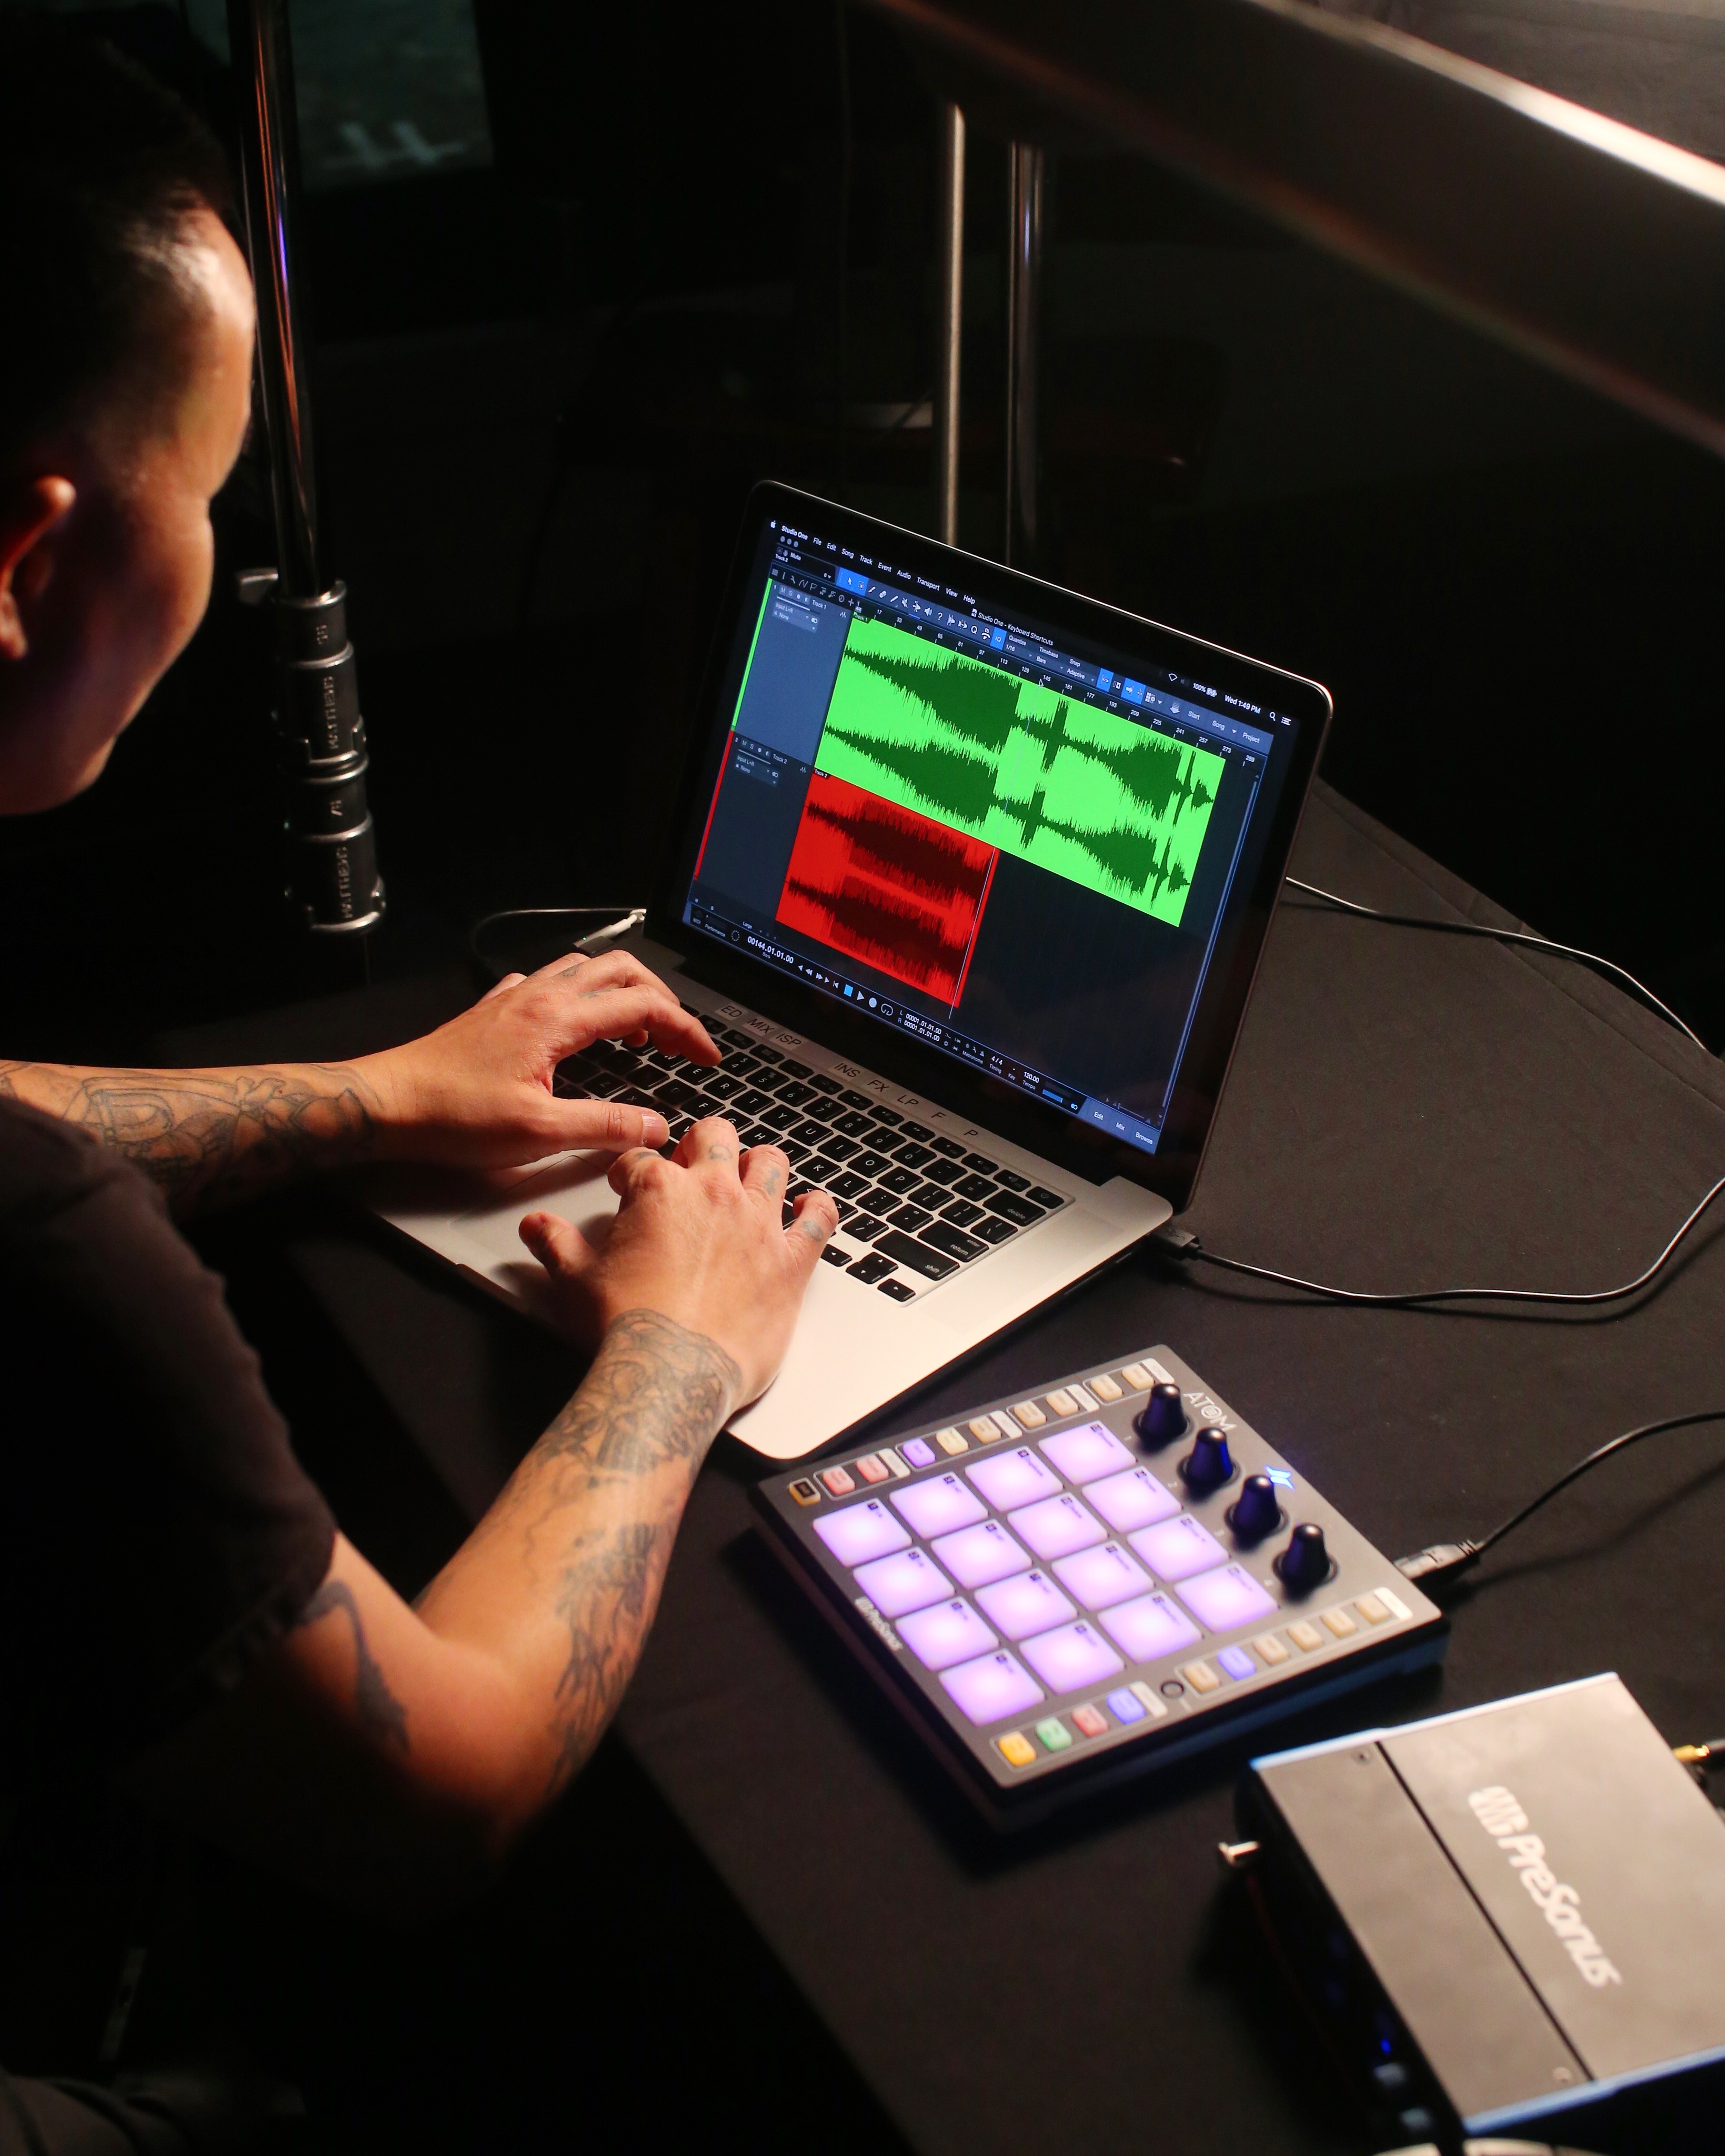
Both a flexible performance controller and a tightly integrated production environment, PreSonus®’ ATOM™ pad controller and included Studio One Artist production software let you create and perform with ease. The most versatile pad controller in its class, ATOM is compatible with most music software and lets you perform and produce with virtual instruments and trigger samples and loops in real-time, using 16 full-size, velocity- and pressure-sensitive RGB pads; 4 programmable rotary encoders; 20 assignable buttons; and 8 assignable pad banks. To fuel your creativity, you get an MVP Loops library custom-designed for ATOM, in addition to more than 2 GB of Studio One content.
7. AudioBox USB 96
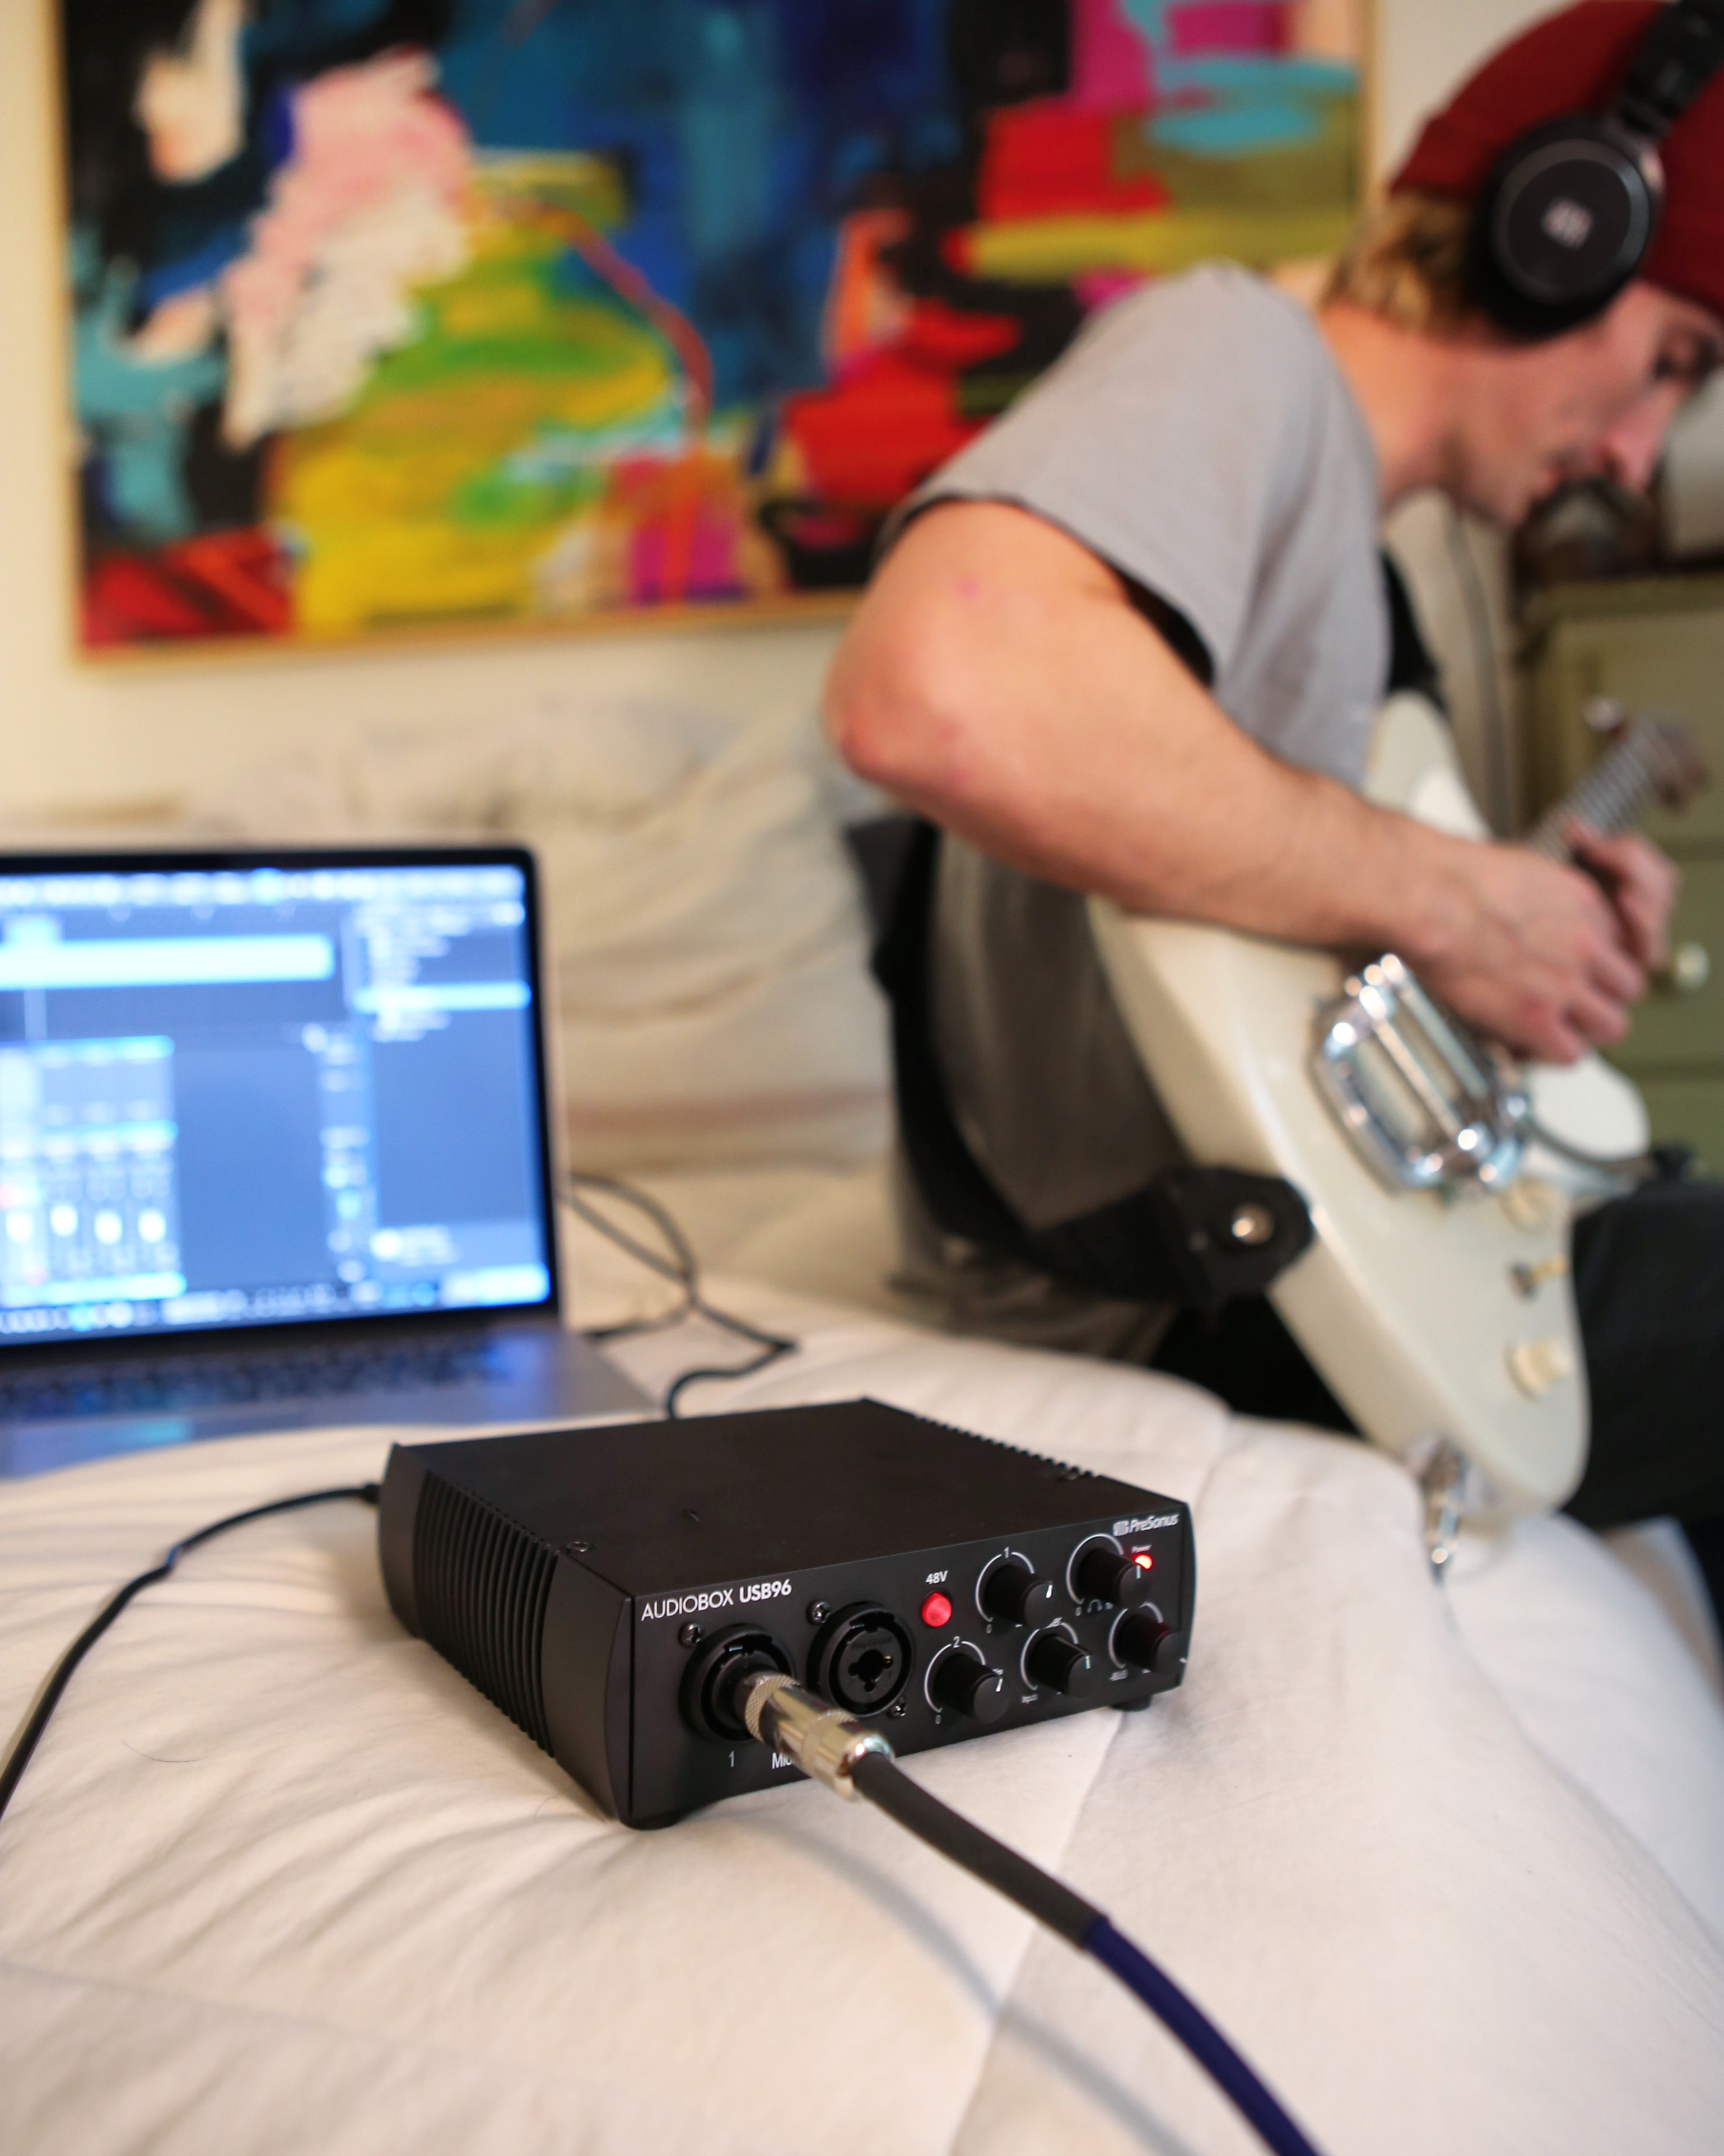
A great choice for mobile musicians, guitarists, and podcasters, the 2-in, 2-out AudioBox USB® 96 audio interface is bus-powered, compact, ruggedly built, and works with virtually any PC or Mac recording software. It boasts two combo mic/instrument inputs with high-performance Class A mic preamplifiers, MIDI I/O, and professional-quality, 24-bit, 96 kHz converters. And it comes with PreSonus’ amazing Studio One® Artist DAW software for Mac® and Windows®.
8. PX-1 Microphone
BUY NOW!
Designed for musicians and performers who demand outstanding audio quality, the PreSonus PX-1 cardioid condenser microphone is an ideal solution for recording vocals, guitar, podcasts, and much more. A true side-address, large-diaphragm condenser microphone, the PX-1 features a 25 mm, gold-sputtered capsule designed to provide exceptional clarity throughout its frequency response range. Rugged construction and top-quality performance specifications make the PX-1 large diaphragm microphone an excellent addition for any home recording or streaming studio.
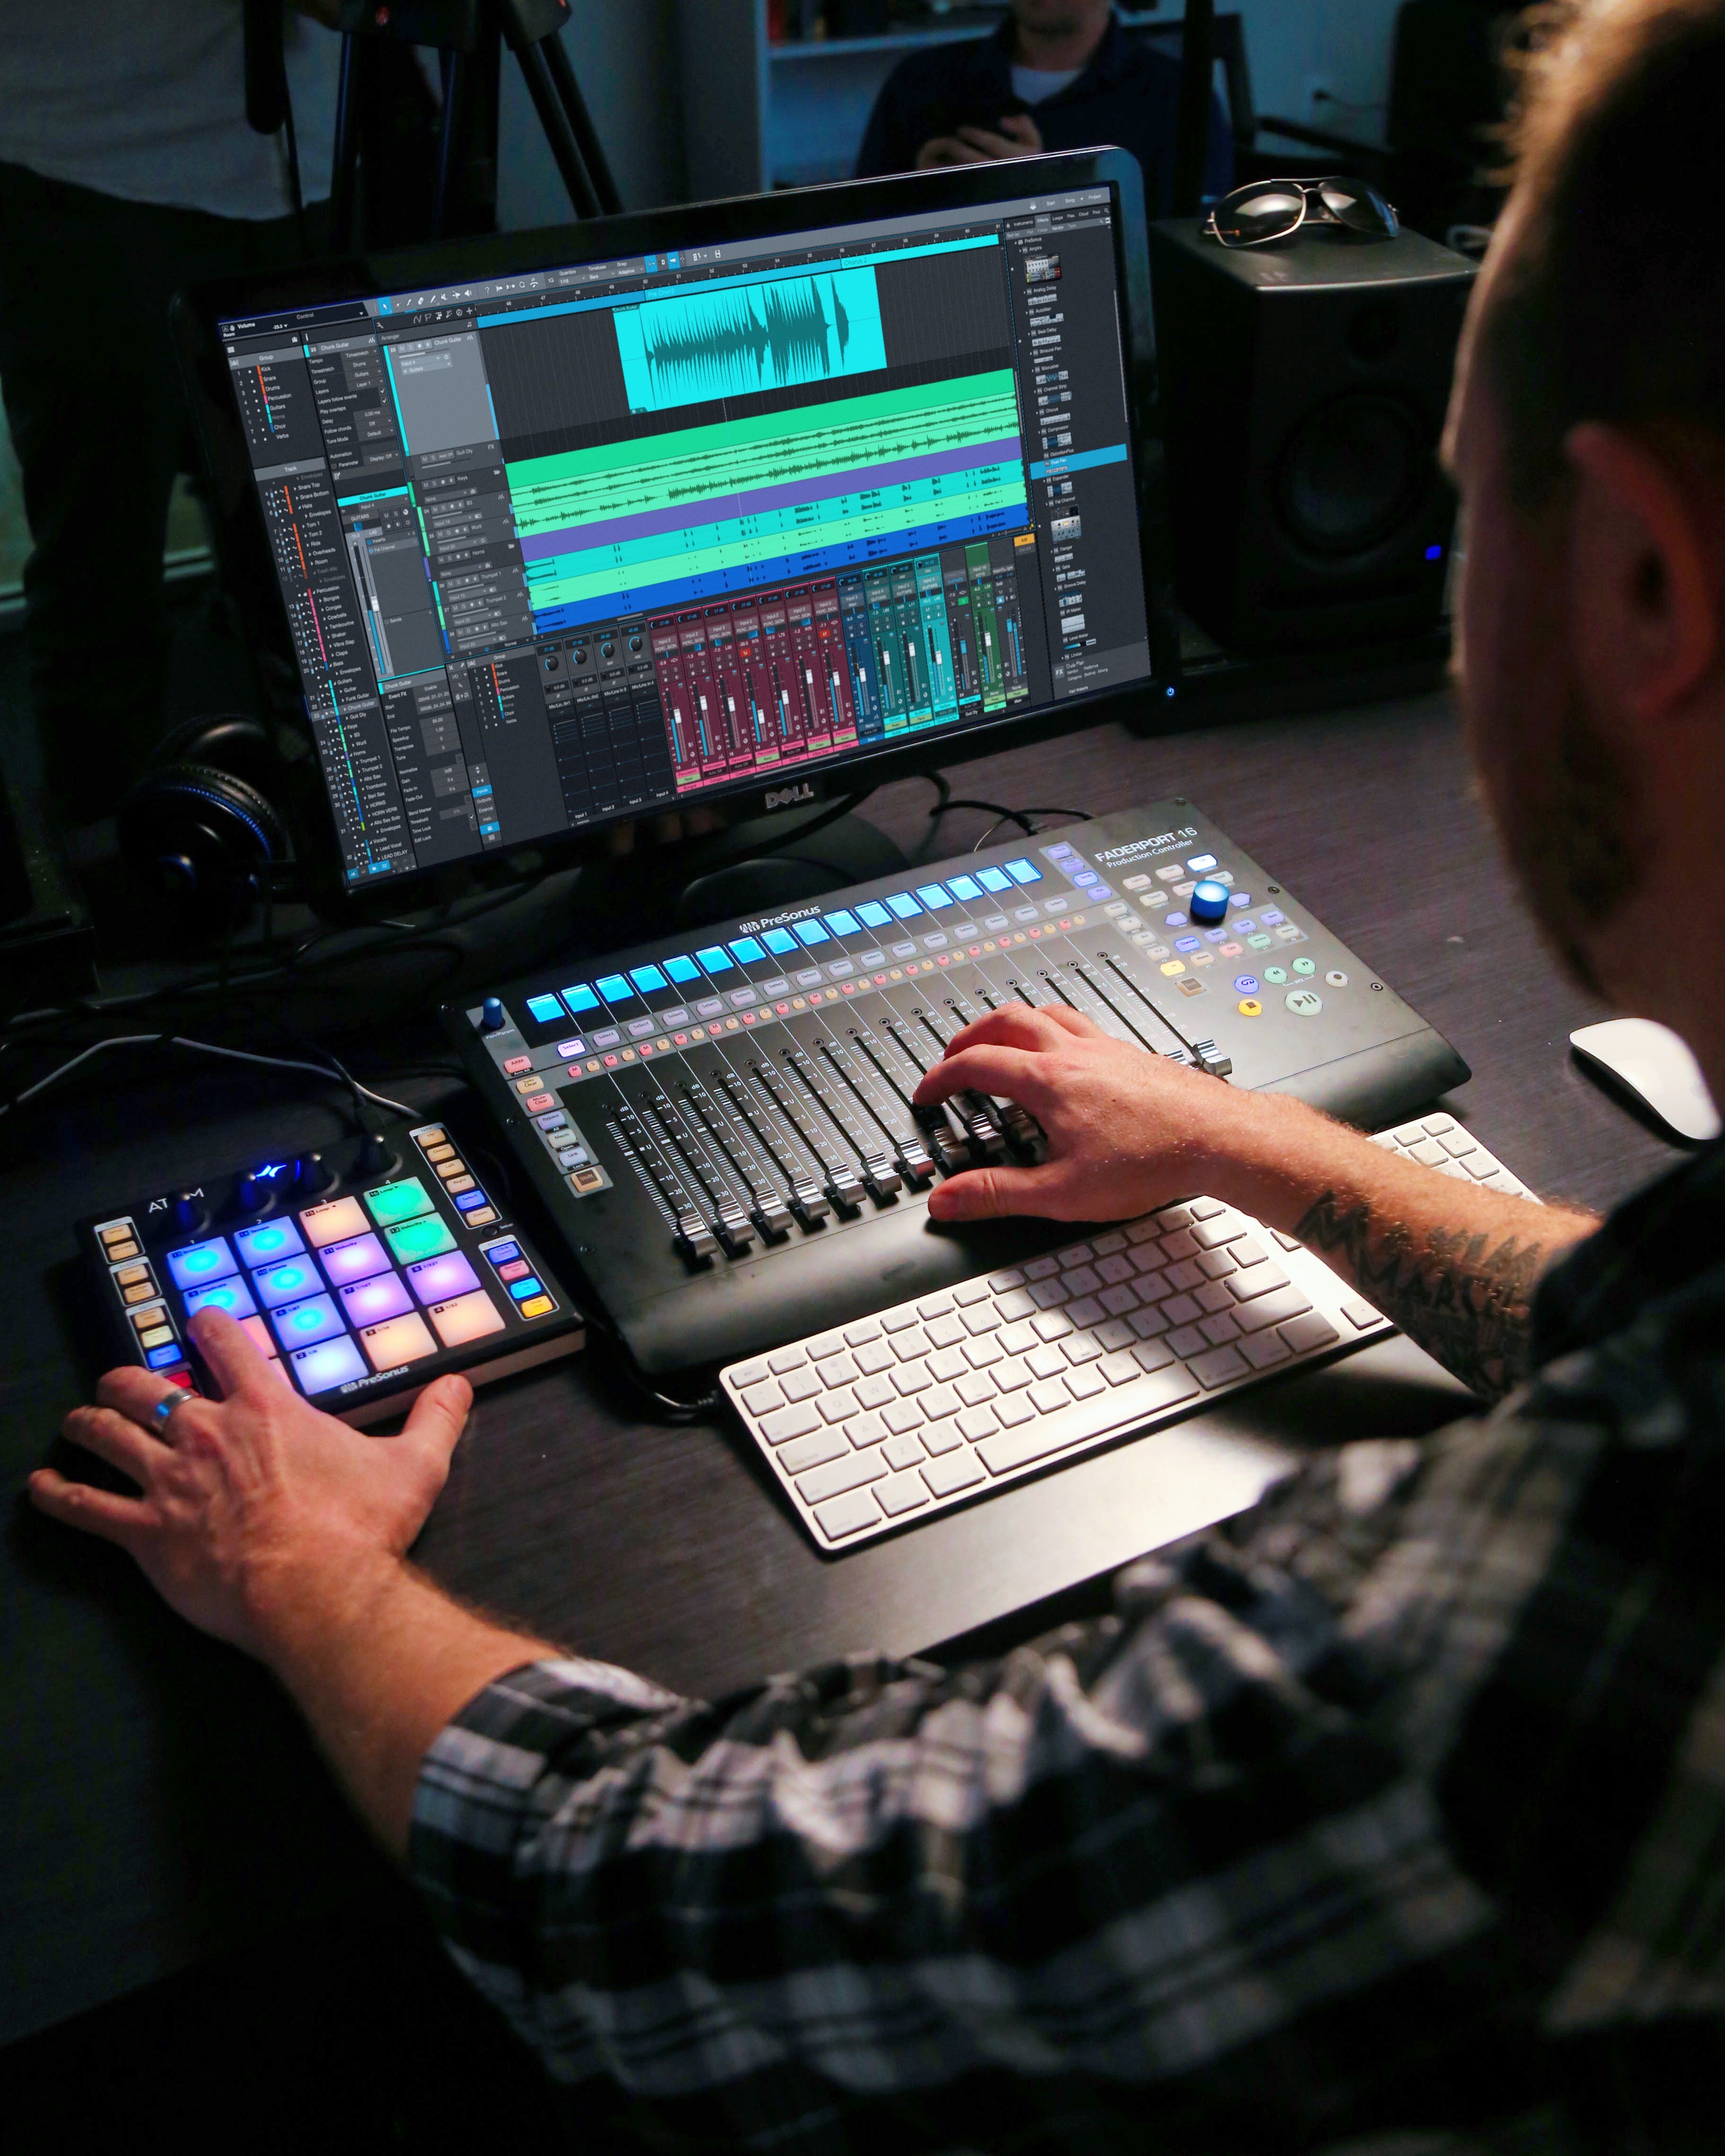
9. FaderPort 16
BUY NOW!
A superior solution for anyone who mixes in the box, only the FaderPort 16 provides 16 100 mm touch-sensitive, motorized faders in a compact chassis that easily sits on any desk. Like PreSonus®’ popular FaderPort 8, the FaderPort 16 features digital scribble strip displays; mute and solo for every channel; complete automation and transport control; plus level, pan, send, and plug-in control modes for every fader. The unique Session Navigator makes mixing and controlling your favorite DAW application quick and easy by putting eight critical functions under your fingers, including navigation, zoom, and master fader control. The FaderPort 16 is compatible with virtually any DAW host for Mac® or Windows®, with support for HUI and Mackie Control, including customized Mackie Control modes for Logic, Cubase, and Sonar. Its native Studio One® support provides even more functionality with PreSonus’ easy-to-use DAW, including Control Link support as well as parameter follow, allowing you quick access to any control under your mouse. Its ergonomic design makes it a comfortable companion to your keyboard and mouse.
10. Studio One Professional

Studio One 5 Professional
Record, produce, mix, master, and perform all from a single, intuitive application. Designed with ease of use at its core, Studio One® 5 is your creative partner from studio to stage. Studio One is driven by tools that enhance your creativity without getting in the way; we pioneered its drag-and-drop workflow that continues to be imitated elsewhere. Laborious tasks that take five steps in other DAWs usually only take… One. A popular example: you can convert MIDI to audio and back with a simple drag-and-drop.
BUY NOW!
Get Better Vocals with Gain Envelopes
Several of the comments have mentioned wanting me to do some video tips, and this week’s tip is well-suited to a video treatment—so here you go.
Gain envelopes have many uses, but one of my favorites is using them to bring down peaks with vocal and narration to allow boosting the overall level. This is a further refinement of the phrase-by-phrase normalization technique I’ve mentioned in the past, which is basically like compressing without a compressor. As a result there are none of the artifacts associated with compression or limiting, so the resulting sound is totally natural.
Showing this with a video makes it easy to see how placing nodes strategically simplifies taming peaks, and how clicking and dragging on a single node can control your dynamics, quickly and efficiently.
View this post on Instagram
If you like the video, let me know in the comments section, and I’ll do more videos in the future if I think they can convey a concept better or more efficiently than text.
And while we’re on the subject of videos…if you’re not aware of Gregor Beyerle’s playlist of Studio One video tips, they’re well worth watching. Unlike so many YouTube “tips” videos, after watching his videos you’ll feel you learned useful techniques that will help you use Studio One more efficiently—not wasted several minutes of your life you’ll never get back ?. Even when I’ve known much of what he covers, there are always some little gems I hadn’t discovered before.
Polyphonic Glide with Any Synth
 Before getting into this week’s tip, here’s some news.
First, thank you for your continued support of the Studio One eBooks. The goal was to make sure that the books remain current—so there are revisions, as well as new editions.
Revisions are like software “point” updates. They’re free to registered users of the original book, and also make sure new buyers get the latest information. A revision for “How to Make Compelling Mixes with Studio One” will be available next week. New editions expand substantially on the original (like how software advances from one version to the next). The latest is More than Compressors: The Complete Guide to Dynamics in Studio One – 2nd Edition, available now in the PreSonus shop (available to owners of the first edition for half-price).
Second, remember that if you have any questions, comments, corrections, or additional ideas about the books, there’s a support thread where you can ask questions and I’ll answer them. The thread also announces when revisions and new editions are available.
And now…on to the tip!
Why Polyphonic Glide is Cool
Creating steel or slide guitar sounds with keyboards is difficult, because few soft synths have polyphonic glide. If they do, sometimes the results are unpredictable.
For my first, admittedly pathetic attempt at “steel synth,” I tried setting the synth bend range to 12 semitones and using the pitch bend wheel to slide entire chords up or down in pitch. However, hitting an exact pitch with the wheel is really difficult. I tried editing the parts to have correct tuning…but that took forever.
Fortunately, there’s a simple answer. It’s not a real-time solution (you’ll need to use the note data edit view), but it works really well—check out the audio example.
A Studio One Pitch Bend “Secret”
The basic idea for slide emulations is you sustain a note, and then use pitch bend to slide the sustained note(s) up (or down). In Fig. 1, a C major chord is gliding up to F and then G, to create the ever-popular I-IV-V progression.
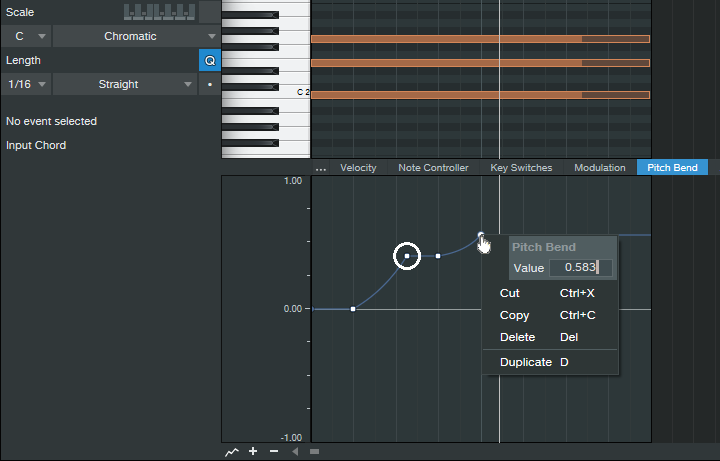
Figure 1: A C major chord is sliding up to an F major, and then a G major.
To ensure correct tuning, create a pitch bend node where you want the new pitch to begin. Right-click on it, and then enter a number that corresponds to the number of semitones you want to “glide” (see the table below). This assumes the synth’s pitch bend range is set to 12 semitones. If you want to bend down by a certain number of semitones, use the same pitch bend amount—just make it negative.

Remember that pitch bend is based on a percentage scale, so in Fig. 1, the first pitch bend node (circled in white to make it more obvious) is set to 0.417 (5 semitones). The second node for the fifth is 0.583 semitones. Lines from one node to the next create the actual glide.
When you right-click on a node to enter a number, the resolution appears to be only two digits to the right of the decimal point, which isn’t good enough for accurate tuning. However, you can enter a three-digit number, as shown above. Even though it won’t be displayed, if you enter that third digit, the dialog box accepts it and Studio One will remember it—so now, you can glide to the exact right pitch.
The Ultimate TremPan
I never lost faith in the potential of tremolo, even after those opto-based amplitude processors in guitar amps had become quaint. X-Trem rewarded my faith—and it’s about time tremolo joined the 21st century, given that we’re a fifth of the way through it already.
This FX Chain does dual-band standard tremolo, harmonic tremolo, and panning—and because it’s dual-band, the high and low frequencies are processed independently. You can download the Ultimate TremPan FX Chain if you can’t wait, but because of the flexibility, let’s go through the control panel before covering how it works.
Download the Ultimate TremPan FX Chain!
The control panel (Fig. 1) gives multiple ways to configure the effect. The low- and high-frequency bands have identical switches.
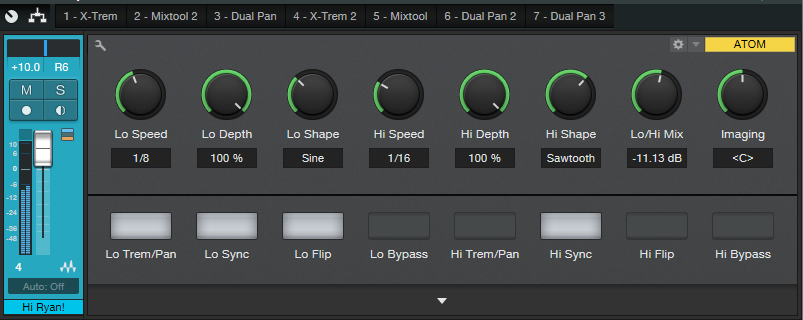
Figure 1: The TremPan control panel.
- Trem/Pan – chooses tremolo or panning mode
- Sync – Syncs to tempo
- Flip – Reverses the LFO phase, e.g., from positive-going to negative-going sawtooth
- Bypass – Bypasses a band, so you hear the effect on only the non-bypassed band
Let’s look at the controls. The low- and high-frequency bands have three controls in common.
- Speed – The sync switch determines whether the LFO speed syncs to tempo or runs free. When running free, the Speed control calibration still shows rhythmic values, but it’s actually continuously variable.
- Depth – Controls how much the tremolo or panning affects the signal.
- Shape – Available LFO waveforms are Triangle, Sine, Sawtooth, or Square.
The Hi/Lo Mix control determines the balance of the low- and high-frequency bands. Imaging spreads the low and high bands; when centered, the low and high bands are centered too, and if a band is in panning mode, it pans the full stereo field. Turning this control counter-clockwise moves the low band toward the left and the high band toward the right, while de-emphasizing panning so that when fully counter-clockwise, both bands are acting as tremolos in their respective channels. Turning this control clockwise reverse the action, i.e., when fully clockwise, the high band sounds like a tremolo in the left channel, while the low band sounds like a tremolo in the right channel.
How It Works
Figure 2 shows the block diagram.
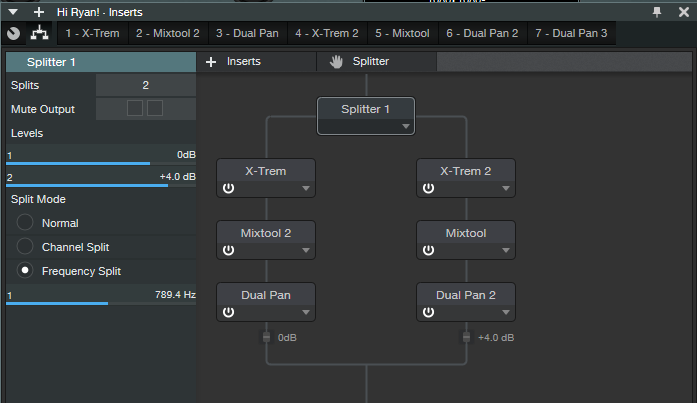
Figure 2: The processors inside the Ultimate TremPan FX Chain.
The Splitter does two splits based on frequency, with a split around 800 Hz. This seems to work well for guitar, but feel free to play around with it (I hope that in some future update, Splitter parameters will be assignable to control panel Macro knobs).
The Mixtools have their gains varied oppositely by the Lo/Hi Mix control to set the proportions of the high and low bands. The Dual pans in the Splits have their Input Balance controlled oppositely by the Imaging knob.
Applications
You have a lot of options, but here are some of my favorites.
- Different tremolo speeds and waveforms avoid the stereotyped tremolo sound.
- For EDM tremolo, try two negative-going sawtooths (i.e., don’t enable Flip) with the low band set to 1/8th notes and the high band set to 16th This gives a cool percussive effect.
- You can do the “harmonic tremolo” effect, as found in some old Fender amps, by setting both modes to tremolo and the same speed, but choosing Flip for one of the bands.
- Panning the low band back and forth slowly while setting a fairly fast tremolo for the high band gives a wide, interesting imaging effect.
The rhythmically synched effects can make one instrument almost sound like two instruments, working together as a team. This FX Chain can also animate hand percussion tracks by varying where the percussion happens in the stereo field. Have fun with this sucker—it’s time to re-discover amplitude modulation.
Poly Aftertouch: Ready for Prime Time
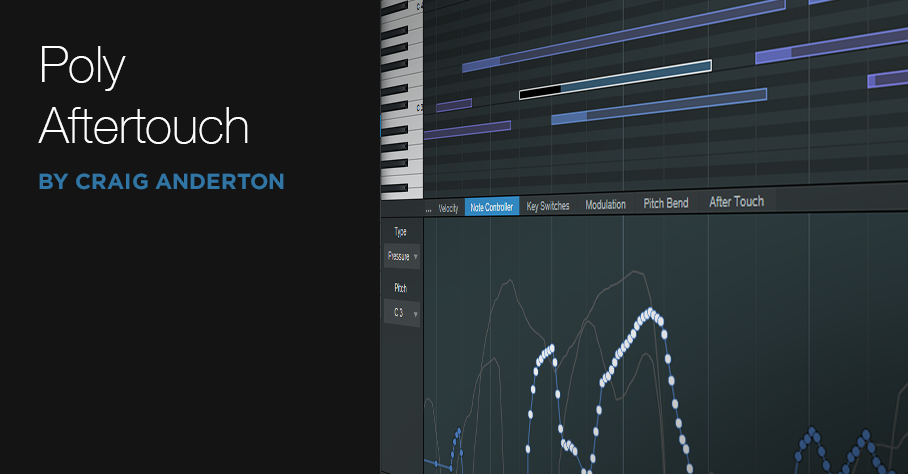
One of the complaints about electronic music instruments and controllers is that they lack the expressiveness of acoustic instruments. Although future instruments will take advantage of MIDI 2.0’s enhanced expressiveness, two options are available right now: polyphonic pressure, and MPE (MIDI Polyphonic Expression). Studio One 5 can record/edit both, and ATOM SQ generates polyphonic pressure…so let’s dig deeper.
Language Lesson
First, there’s some confusion because people call the same function by different names. Channel Aftertouch = Channel Pressure = Mono Aftertouch = Mono Pressure. Polyphonic Aftertouch = Polyphonic Pressure = Poly AT = Poly Aftertouch = Poly Pressure. Okay! Now we’ve cleared that up.
Aftertouch: Two Flavors
Aftertouch generates a control signal when you press down on a keyboard key after it’s down, or continue pressing on a percussion pad after striking it. Aftertouch is a variable message, like a mod wheel or footpedal—not a switch. A typical application would be changing filter cutoff, adding modulation, or doing guitar-like pitch bends by pressing on a key.
There are two aftertouch flavors. Mono pressure has been around since the days of the Yamaha DX7, and sends the highest controller value of all keys that are currently being pressed. Polyphonic pressure sends individual pressure messages for each key. For example, when holding down a chord for a brass section, by assigning poly pressure to filter cutoff, you can make just one note brighter by pressing down on its associated key. The other chord notes remain unaffected unless they’re also pressed.
Controllers with polyphonic aftertouch used to be fairly expensive and rare, but that’s changing—as evidenced by ATOM SQ.
Synth Requirements
As expected, you need a synth that responds to poly pressure. Many hardware synths respond to it, even if they don’t generate it. As to soft synths, although I haven’t tested all of the following, they reportedly support poly pressure: several Korg Collection synths, Kontakt, Reaktor, all Arturia instruments, all U-He instruments, XILS-Lab synths, TAL-Sampler, AAS synths, Albino 3, impOSCar2, Mach5, and Omnisphere. If you know of others, feel free to mention them in the comments section below. (Currently, Studio One’s bundled instruments don’t respond to polyphonic aftertouch.)
The Controller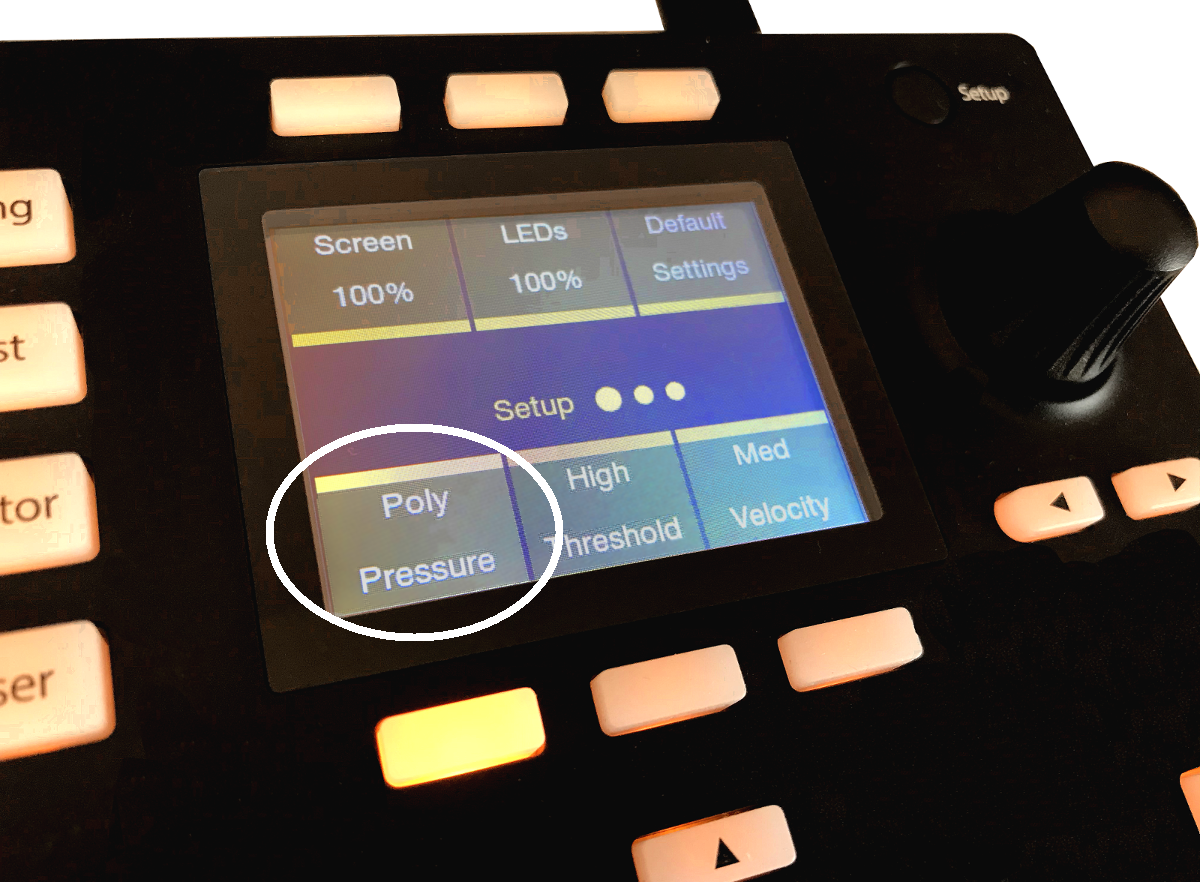
Figure 1: ATOM SQ being set up to generate Poly Pressure messages.
With ATOM SQ, press the Setup button. Hit the lower-left “pressure” button below the display, then spin the dial to choose Poly (Fig. 1). Note that if ATOM SQ outputs poly pressure, most instruments that respond only to channel (mono) aftertouch will ignore these messages.
Recording and Editing
Record poly pressure in Studio One 5 as you would any MIDI controller. To edit pressure messages, use the Edit window’s Note Controller tab. Select Pressure for the Type, and then the Pitch of the note you want to edit. Or, click on a note to select its corresponding note Pitch automatically. You can then edit that note’s poly pressure controller as you would any other controller (Fig. 2).
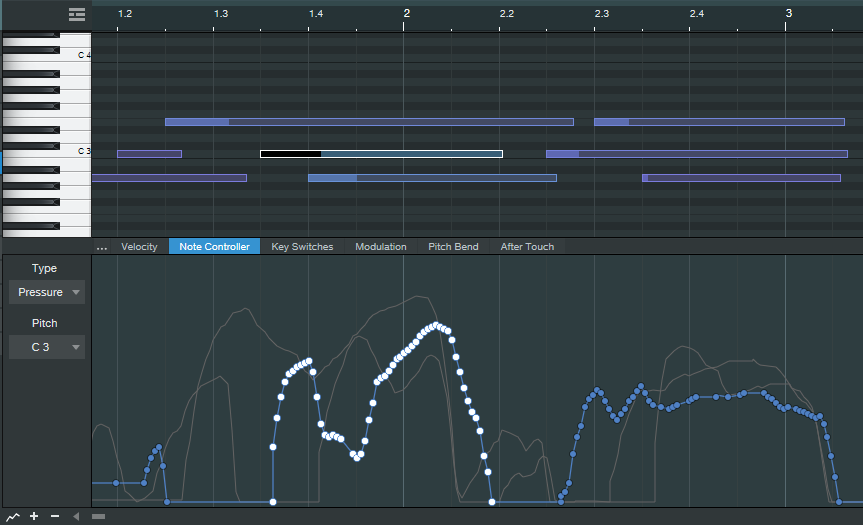
Figure 2: The selected Note’s data is white; unselected notes of the same pitch are blue. The gray lines in the background show the poly pressure controller messages for notes with other pitches.
It may seem that editing data for individual notes would be tedious, and it can be. However, because poly pressure allows for more expressive real-time playing, you might not feel the need to do as much editing anyway—you won’t need to use editing to add expressiveness that you couldn’t add while playing.
A fine point is that it’s currently not possible to copy Note Controller data from one note, then paste it to a note of a different pitch (probably because the whole point of poly AT is for different notes to have different controller data). However, if you copy the note itself to a different pitch, the Note Controller data will go along with it.
Although ATOM SQ can adopt a layout that resembles a keyboard, it would be a mistake to see it as a stripped-down version of a standard keyboard. Controllers with polyphonic pressure tend to think outside the usual keyboard box, by incorporating pads or other transducers that are designed for predictable pressure sensitivity. Poly pressure has been around for a while, but a new generation of MIDI controllers (like ATOM SQ) are making the technology—and the resulting expressiveness—far more accessible for those who want to wring more soul out of their synths.