Tag Archives: Studio One
The Force Is (Studio) One With Maarten Vorwerk
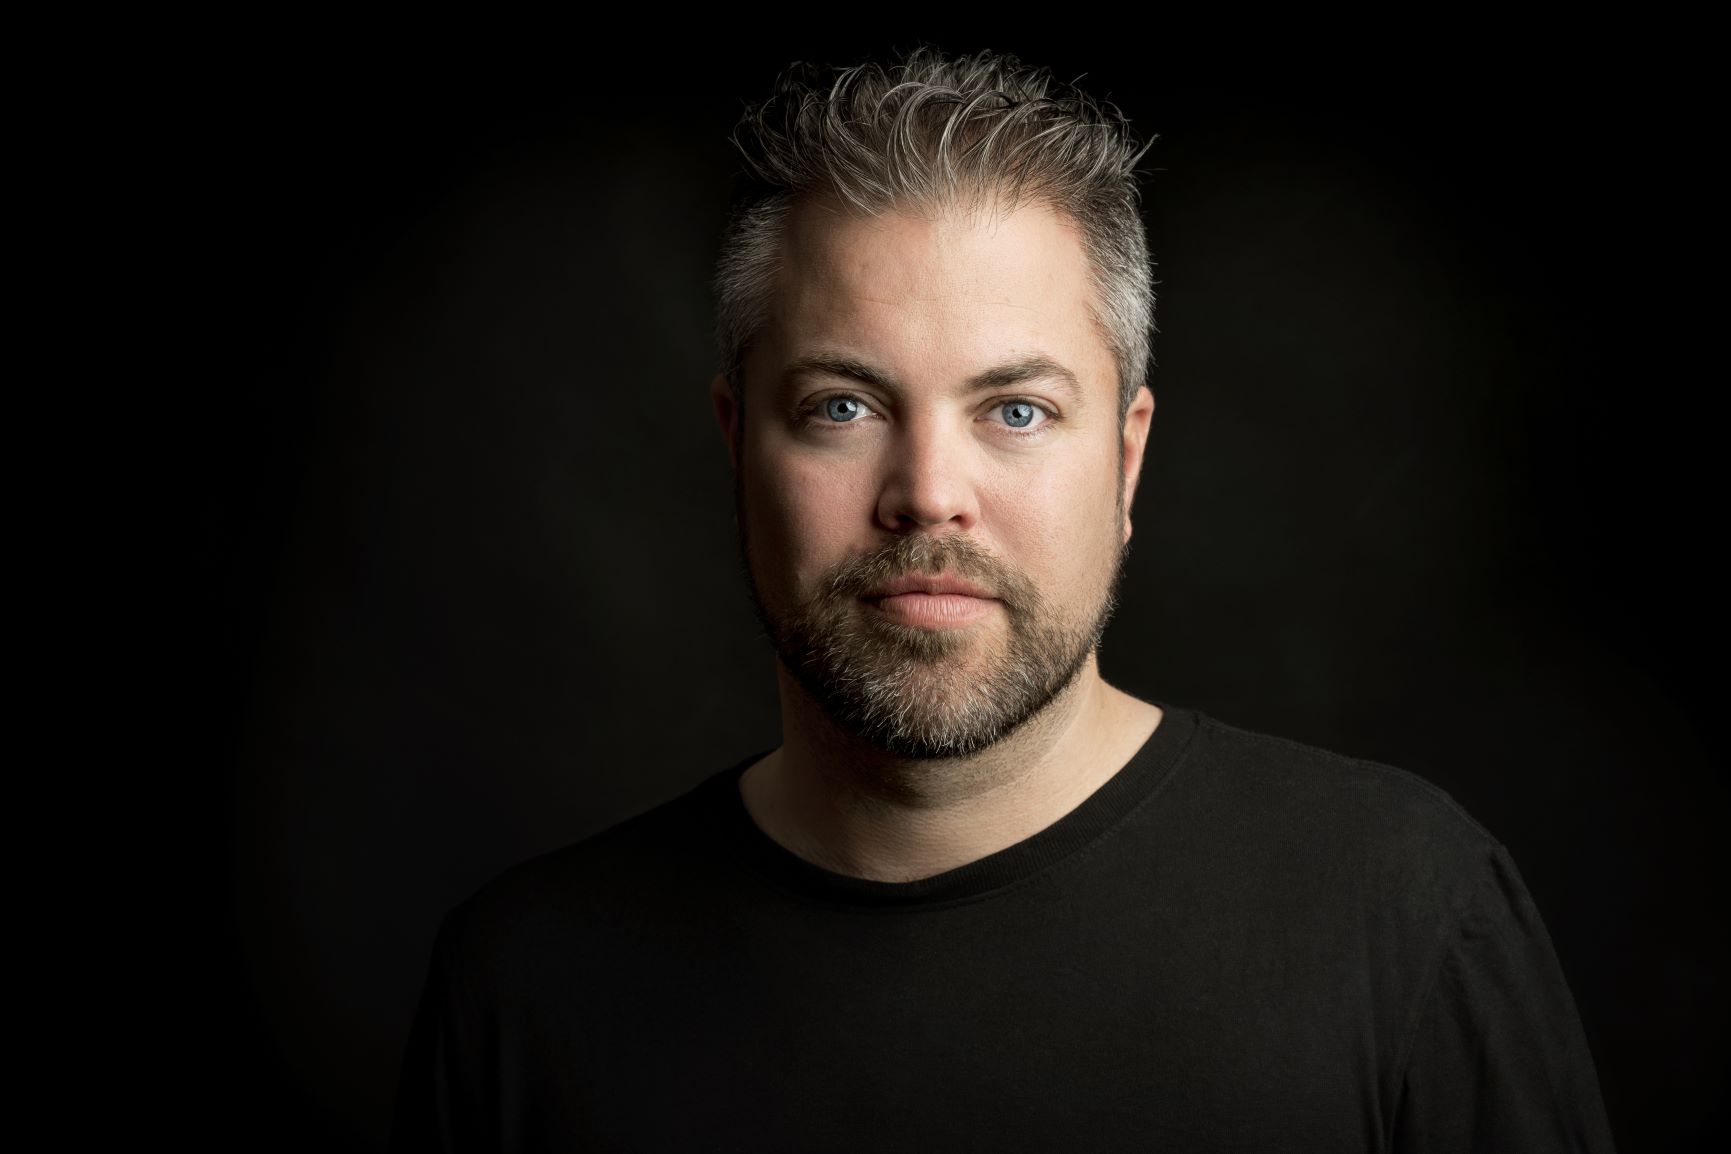
We had the recent opportunity to talk with Maarten Vorwerk about how he’s been using Studio One for his studio work and he was kind enough to share these insights with us. Read more from Maarten himself here.
During the early 2000s, I had some success in The Netherlands and Europe with Hard and Jumpstyle productions, including a Number 1 and several Top 10 hits. Back then I was awarded for being the best dance act in the Netherlands under the pseudonym Jekyll & Hyde. Later on, I veered more into the commercial side of dance music as a ‘ghost’ producer for other artists for whom I’ve produced lots of tracks.
After releasing official remixes for artists like Will.I.Am, Jennifer Lopez, Pitbull, Major Lazor, Deadmau5 and Shakira among others, I started dedicating some more time towards educating the new generation of producers in 2017 and released a best-selling book full of practical studio tips, with a second book on the way.
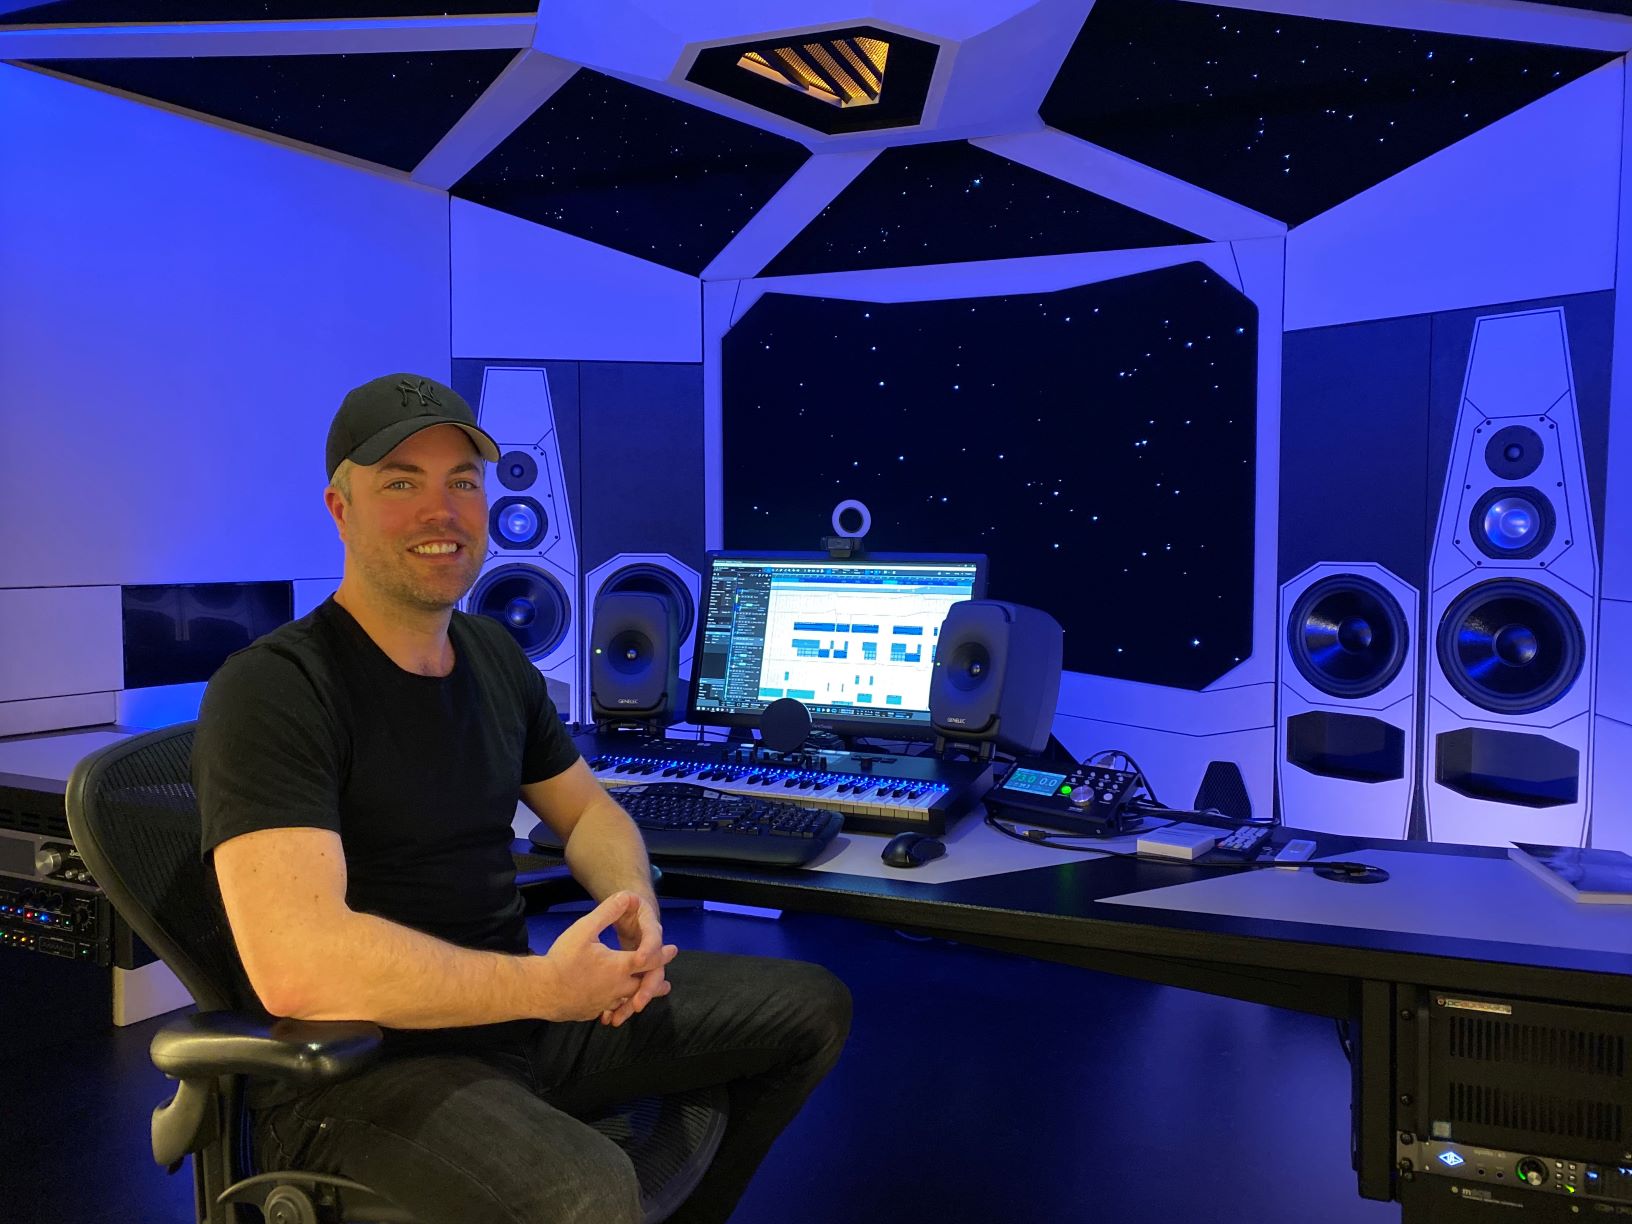
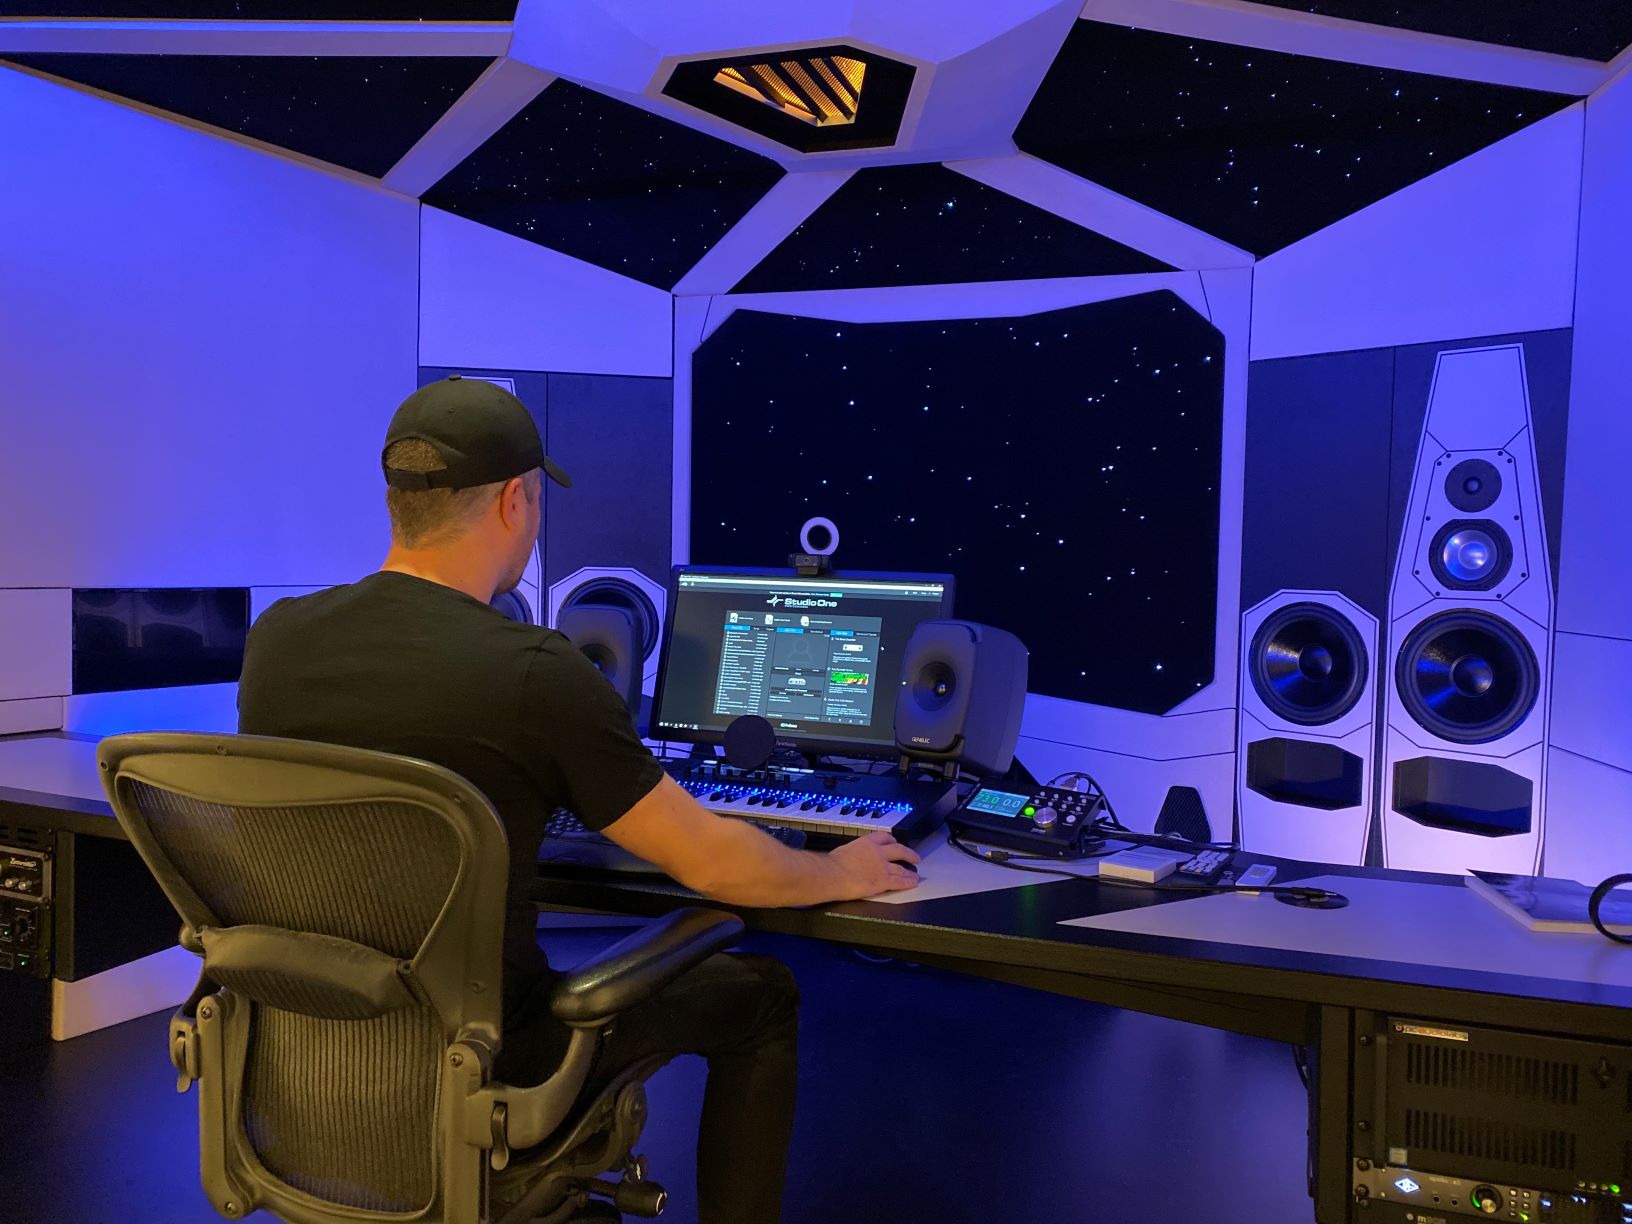
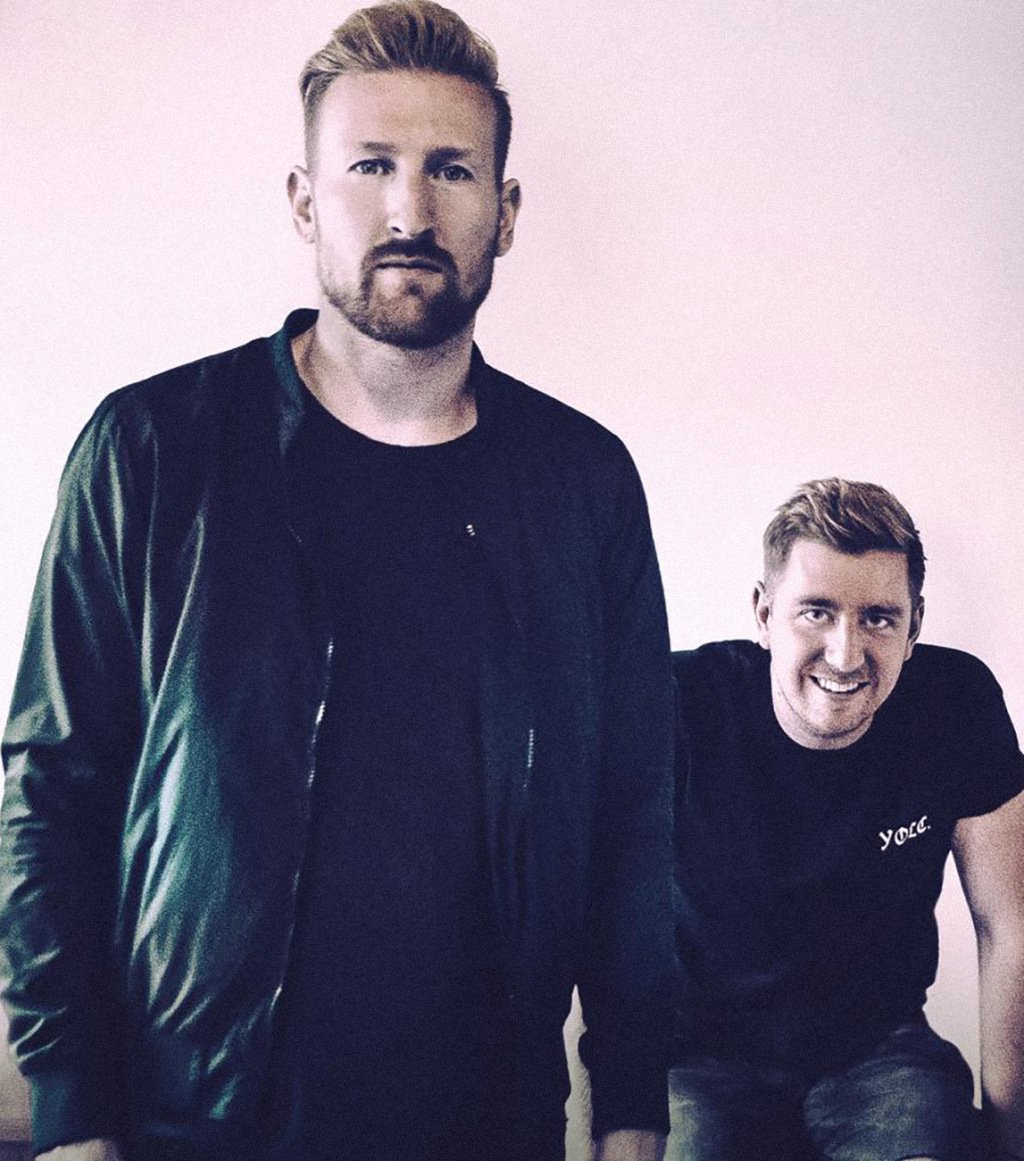
Maarten piloting Studio VRWRK
So I’ve been currently using Studio One as my main production DAW… and purely for Electronic Dance Music production in my home studio. I don’t do much live recording anymore.
I was a Cubase user for all my production career, but I got fed up with the workflow speed. Then I saw a demonstration of Studio One back in 2014. The ease of use and the speed of the workflow really made me want to try it out and I have used it ever since. The transition was easier than I’d expected!
Every DAW has certain features that make them unique. But for me personally, Studio One has the most to offer. It looks good in the sense that you can have everything on 1 screen: Arrangement, Mixer, Browser, Inspector, and it’s still easy to work. So it gives me speed in an easy view space, which means I can fully focus on being creative!
- “Drag and Drop” workflow is a clear winner: you want to save a mixed bass line? Just grab and drag it to the side and it saves everything (Inserts, Melody, Instrument).
- Audio: transposing pitch, time-stretching is right there, withing the Inspector options. Melodyne integration is built-into the engine. Right-click on an Audio clip and send to Sample One XT or Impact XT. All that kind of stuff makes my life a lot easier.
- Automation: you click on a parameter and you’re already editing automation right away.
- The Arranger track view is brilliant. Copying and re-arranging sections including all the automation have never been more easy for me.
There’s one particular feature I really love. Sometimes in the begin stages of the track, my project looks like a mess. So finding a specific track in a mixer can prove to be difficult. In Studio One I just double-click on the track and the mixer pops open with that track highlighted and I can make adjustments right away.
Also, the fact that you can analyze a groove from a specific loop. And then apply that same groove to all your other stuff.

Design and Build by Mischa Jacobi
One important feature that is a bit hidden is the use of ‘ghost notes’. Let’s say I made a chord progression that I want to use as a non-editable overlay for reference, while I’m making the melody. I would go in the piano roll, click on the 4 horizontal lines in the left upper corner and then click on the reference track, making sure to click the pencil tool OFF so it can not be edited but only used as a reference. I know this is a feature that is loved by a lot of dance producers. But I didn’t know Studio One had that until recently!
All in all, I think Studio One has done a great job creating a solid DAW. Looking forward to future versions!!!
Instagram: @maartenvorwerk
Facebook: vorwerkmaarten
Official Website
Häzel Talks Studio One
Häzel is a Grammy-nominated producer, sound designer and mixer based in Melbourne, Australia who has been in the music industry for about 15 years and have worked with people such as Gallant, Drake, The Beatchild, Mad Clown, Joanna Borromeo, TFOX and was part of a duo called Zebrahim with my friend Ebrahim (eebsofresh). He has also composed music for commercials and worked on sound designing for filmmaker Mikael Colombu for a little, along with producing content for The Weeknd and Cee-lo Green among others.
Currently armed with Studio One Professional Version 4 in tandem with a Studio 192 interface, a pair of Eris 8 monitors and an ATOM controller, this is the setup Hazel uses on a daily basis for anything that has to do with music and sound.
Words from the man himself:
“I compose, record and arrange with it, I mix with it and use it for sound designing. I have it on my laptop as well as my workstation in my home studio and I take it with me when working in bigger studios… I actually find that it is becoming more and more common to find it in well-established studios. Cant’ wait until it becomes the industry standard!
Some of my fellow musician friends recommended it to me a while ago and like everyone else at first I was a little skeptical in making the change until the day I felt limited by the functionalities of some other DAW’s, in terms of the cluttered workflow they bring and just how power-hungry most of them are.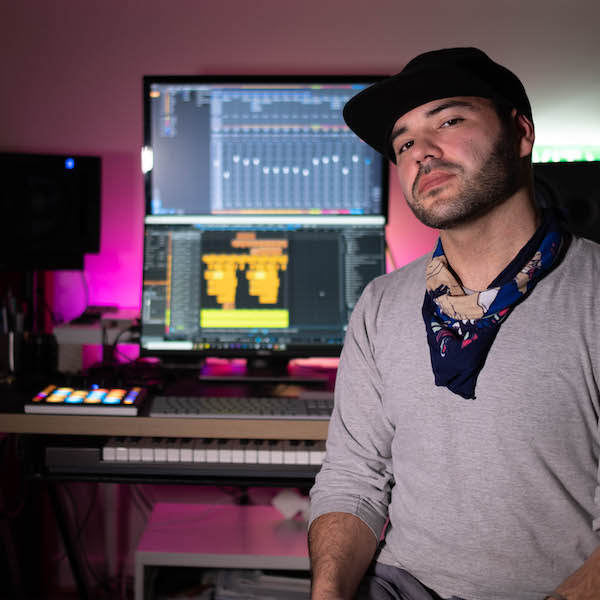
At some points as my ideas were getting more complex, I was forced to use multiple software applications for the different things I was trying to achieve. I needed something new and decided to try Studio One Pro Version 3. I’ve always trusted PreSonus as a brand because I already had a Firebox which served me well for many years. It took me literally one day to make the decision to do the switch. Studio One had everything I needed in one place, it sounded great (if not better) and was very stable ( which I wasn’t used to!), capable of running on anything I could get my hands on and without the need of a dongle. I remember having to bounce or “freeze” tracks before to save CPU, i can’t think of one time I had to do that ever since, even on my bootcamp 12″ MacBook Air.
With every update I get inspired by some new function I didn’t think I needed and then it finds its way into my workflow. You can basically create something or make anything sound good just with the built-in Add-On’s straight out of the box. I love the sound of the Console Shaper, the genius and simple way to sidechain on the latest update, the waveform slip editing and one of the functions I use the most is the event stretching by holding the ALT modifier key.
Fast editing is really key. For me it really just comes to creativity always, I like to test things, sounds, FX, anything really. I like to keep moving and Studio One allows me to do just that. I don’t feel limited or obstructed by the software I’m using. It just feels natural to me.
Anyone who has ever worked in this industry or has ever used a DAW at some point will find it familiar to start with. And when you have an idea of how a function should work, well there’s a big chance that that’s exactly how it works on Studio One, always the most logical and intuitive way in my opinion. Dragging and dropping anything, anywhere or converting file formats with two clicks. I found myself to be a lot more creative with this workflow, I can continuously be doing things, adding/removing sounds and rarely even pause or stop whatever I’m working on. I haven’t found myself missing a function from what I was using before apart from scrubbing which I only used when working to a video, but I can’t think of anything else really.
The only function I can think of that I wish it had so I didn’t have to use anything else would be a manual sample slicing option directly from the Sample One XT virtual instrument (wink, wink!) But there has been so much improvement compared to when I first started within Version 3 so hopefully, that will be coming at some point.
ONE THING: there is a function that I haven’t heard many people talk about which is the waveform slip editing I mentioned previously. When editing an event if you hold ALT and CTRL keys you can slide the waveform left and right. It is an AMAZING tool to make corrections on the fly or simply just to create swing on your drum tracks on. I use all the time and others probably would too, once they discover this feature!
PreSonus has really been setting a new standard with their Studio One DAW and it surpasses everything else with every update. I think that what people like me appreciate the most as a user, is to feel like the company you’re investing yourself on is listening to your opinion and is always working towards improving its products based on your feedback and experience, and it shows.
Every update in the last year only has fulfilled almost every request I can think of and they did it for free. That’s just exemplary to me. And I know that there’s more good stuff coming. Long live PreSonus and Studio One.”
Instagram : @hazeldizzy
Soundcloud: hazeldizzy
Twitter: @hazeldizzy
Gallant – Miyazaki (Prod.Häzel )

Thank you, Häzel… we wish you continued success in all of your creative audio endeavors, bro.
Track Matching with the Project Page
Okay, this is an unusual one. Please fasten your seat belts, and set your tray tables to the upright and locked positions.
Personal bias alert: With pop and rock music, for me it’s all about vocals, drums, and bass. Vocals tell the story, drums handle the rhythm, and bass holds down the low end. For a given collection of songs (formerly known as an “album”), I want all three elements to be relatively consistent from one song to the next—and that’s what this week’s tip is all about. Then the other instruments can weave in and out within the mix.
It’s fantastic that you can flip back and forth between the Project page and a Song that’s been added to the Project page, make tweaks to the Song, then migrate the updated Song back to the Project page. But it’s even better when you can make the most important changes earlier in the process, before you start down the final road of mastering.
Here’s a way to match bass and vocal levels in a collection of songs. This takes advantage of the Project page, but isn’t part of the mastering process itself. Instead, you’ll deploy this technique when the mix is in good shape—it has all the needed processing, automation, etc.—but you want a reality check before you begin mastering.
We’ll cover how to match vocal levels for the songs; bass works similarly, and in some ways, more effectively. Don’t worry, I’m not advocating robo-mixing. A mathematically correct level is not the same thing as an artistically correct level. So, you may still need to change levels later in the process—but this technique lets the voice and bass start from a “level” playing field. If you then need to go back and tweak a mix, you can keep the voice and bass where they are, and work the mix around them.
(Note that it’s important to know what the LUFS and LRA metering in the Project page represent. Rather than make this tip longer, for a complete explanation of LUFS and LRA, please check out this article I wrote for inSync magazine.)
- Create a test folder, and copy all your album’s Songs into it. Because this tip is about a diagnostic technique, you don’t want to overwrite your work-in-progress songs.
- Create a new test Project.
- Open a copied Song, remove any master bus processing, and Choose Add to Project for the test project. Add all the other songs on the album to the test project. Do not normalize the songs within the test project.
- Open the Loudness Information section for each song, and select the Post FX tab. Adjust each song’s individual level fader (not the master fader) so all songs have the same LUFS reading, then save the Project. The absolute LUFS value doesn’t matter; choose a target, like -20 LUFS. (When adjusting levels, 1 dB of level change alters the LUFS reading by 1. For example, if a song registers at -18.4 dB, decrease the level by 1.6 dB to reach -20 LUFS. Check and re-check by clicking on Update Loudness as needed until the LUFS readings are the same.)
- Choose a Song to edit (click on the wrench next to the song title). When the Song opens, solo only the vocal track. Then choose Song > Update Mastering File. Note: If a dialog box says the mastering file is already up to date, just change a fader on one of the non-soloed tracks, and try again. After updating, choose View > Projects to return to the test project.
- Repeat step 5 for each of the remaining Songs.
- Select all the tracks in the Project page, then click on Update Loudness.
- Check the Loudness Information for each song, which now consists of only the vocal (Fig. 1). For example, suppose the readings for six songs are (1) -24.7, (2) -23.8, (3) -24.5, (4) -22.7, (5) -23.1, and (6) -24.3. Those are all pretty close; we’ll consider -24.5 an average reading. The vocals on songs (1), (3), and (6) have consistent levels. (2) and (5) are a tad high, but song (4) is quite a bit higher. This doesn’t mean there’s a problem, but when you go back to using the original (not the copied) Songs and Project, try lowering the vocal on that song by 1 or 2 dB, and decide whether it fits in better with the other songs.
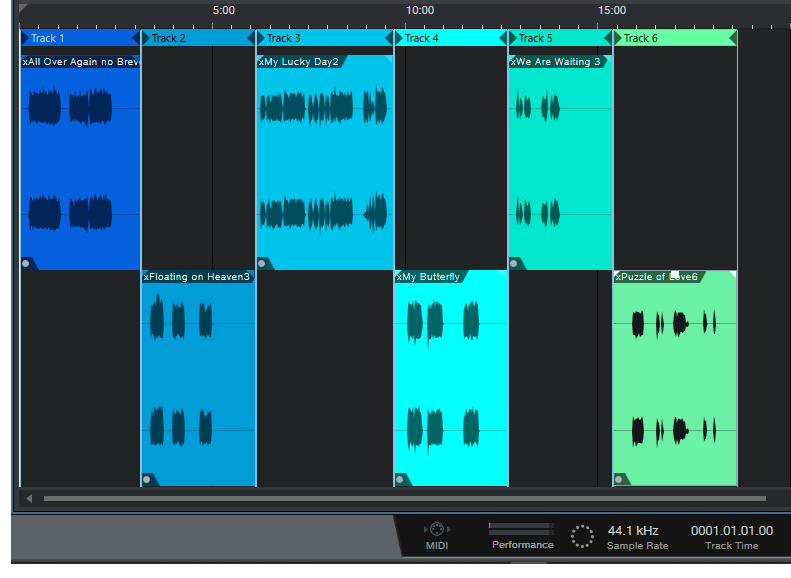
Figure 1: The songs in an album have had only their vocal tracks bounced over to the Project page, so they can be analyzed by the Project page’s analytics.
The waveforms won’t provide any kind of visual confirmation, because you adjusted the levels to make sure the songs themselves had a consistent LUFS reading. For example, if you had to attenuate one of the songs by quite a bit, visually the vocal might seem louder but remember, it’s being attenuated because it was part of a song that was louder.
Also try this technique with bass. Bass will naturally vary from song to song, but again, you may see a lager-than-expected difference, and it may be worth finding out why. In my most recent album, all the bass parts were played with keyboard bass and generated pretty much the same level, so it was easy to use this technique to match the bass levels in all the songs. Drums are a little dicier because they vary more anyway, but if the drum parts are generally similar from song to song, give it a try.
…But There’s More to the Story than LUFS
LRA is another important reading, because it indicates dynamic range—and this is where it gets really educational. After analyzing vocals on an album, I noticed that some of them had a wider dynamic range than others, which influences how loudness is perceived. So, you need to take both LUFS and LRA readings into account when looking for consistency.
For my projects, I collect all the songs I’ve worked on during a year, and release the completed project toward the end of the year. So it’s not too surprising that something mixed in February is going to sound different compared to something mixed in November, and doing something as simple as going back to song and taking a little compression off a vocal (or adding some in) is sometimes all that’s needed for a more consistent sound.
But let me emphasize this isn’t about looking for rules, but looking for clues. Your ears will be the final arbiter, because the context for a part within a song matters. If a level sounds right, it is right. It doesn’t matter what numbers say, because numbers can’t make subjective judgments.
However, don’t minimize the value of this technique, either. The reason I stumbled on it was because one particular song in my next album never seemed quite “right,” and I couldn’t figure out why. After checking it with this technique, the vocal was low compared to the other songs, so the overall mix was lower as well. Even though I could use dynamics processing to make the song reach the same LUFS reading as the other songs, this affected the dynamics within the song itself. After going back into the song, raising the vocal level, and re-focusing the mix around it, everything fell into place.
Friday Studio One Tip: Virtual “Nashville Tuning”
Nashville tuning is a popular sound for rhythm guitar parts, and not just in country music: a few hit songs with Nashville tuning include Wild Horses (Rolling Stones), Dust in the Wind (Kansas), Gimme Danger (Iggy Pop), Phase Dance (Pat Metheny), Hey You (Pink Floyd), Wicked Game (Chris Isaak), and many others. It’s not an alternate tuning in the standard sense, because the strings are still tuned (low to high) E A D G B E. Instead, it adapts a 12-string set of strings, or string sets dedicated to Nashville tuning, to a conventional six-string guitar. The first and second strings are the usual E and B respectively, but the lower four strings are tuned an octave higher than standard tuning.
So what does this have to do with Studio One? Well, the downside to Nashville tuning is that you really need to dedicate a guitar to it; you’ll have to adjust the intonation (maybe the truss rod too), and besides, you don’t want to have to change strings all the time. Granted, after playing with Nashville tuning, you might want to dedicate a guitar to it—but in the meantime, we can create a similar effect with Studio One. Although the sound isn’t technically the same, it produces much of the same result: a bright, present rhythm sound (somewhat like a 12-string, but less dense), that’s mostly layered with a companion guitar part. Here’s how to do it.
- Copy your rhythm guitar track, and select it.
- Type F4 to bring up the Inspector.
- Set Transpose to 12 (Fig. 1).

Figure 1: Tune your copied guitar part up an octave.
That’s pretty much all you need to do, but here are some notes on how to apply Nashville tuning.
- Studio One produces amazingly good octave-above sound quality, but it’s not perfect. Another issue is that with physical Nashville tuning, the 1st and 2nd strings aren’t transposed up an octave. This shouldn’t really matter much, because if you can hear the Nashville-tuned guitar prominently, you’re missing the point—it’s to add texture. However, you might want to roll off the highs somewhat, and give a little upper midrange boost, so the sound sits a bit better in a mix (Fig. 2).
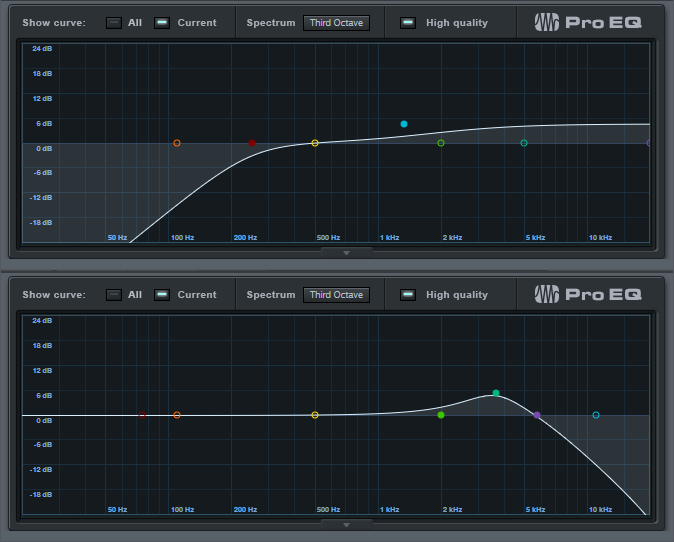
Figure 2: Optional EQ settings for the Nashville-tuned track.
- Often, Nashville tuning is layered with a standard guitar part. Due to slight detunings between two different guitars, you’ll sometimes hear some “shimmer,” like with a 12-string guitar or by adding a chorus unit. However, because the Nashville-tuned track in Studio One is a copy of the original guitar track, the layering is perfect. If you don’t want perfect layering, raise the Inspector’s Tune control by around 10 or 15 cents to add some detuning. (For some reason, I find tuning slightly sharp sounds better than tuning slightly flat).
It’s really that simple, and the bright sound can add a lot to a mix—listen to the audio example, which plays a rhythm guitar part, and then layers the virtual Nashville-tuned guitar part. The copied part is mixed a little than usual to get the point across, but even so, it still sounds pretty cool:
Football, Podcasts and Studio One
Over here stateside, ‘Tis the season for family, over-eating, traveling, watching football, and more eating. You may not be a huge fan of the holidays, but I love them! The holidays have something for everyone, much like a recent podcast I came across on Twitter called The F.A.N. Show.
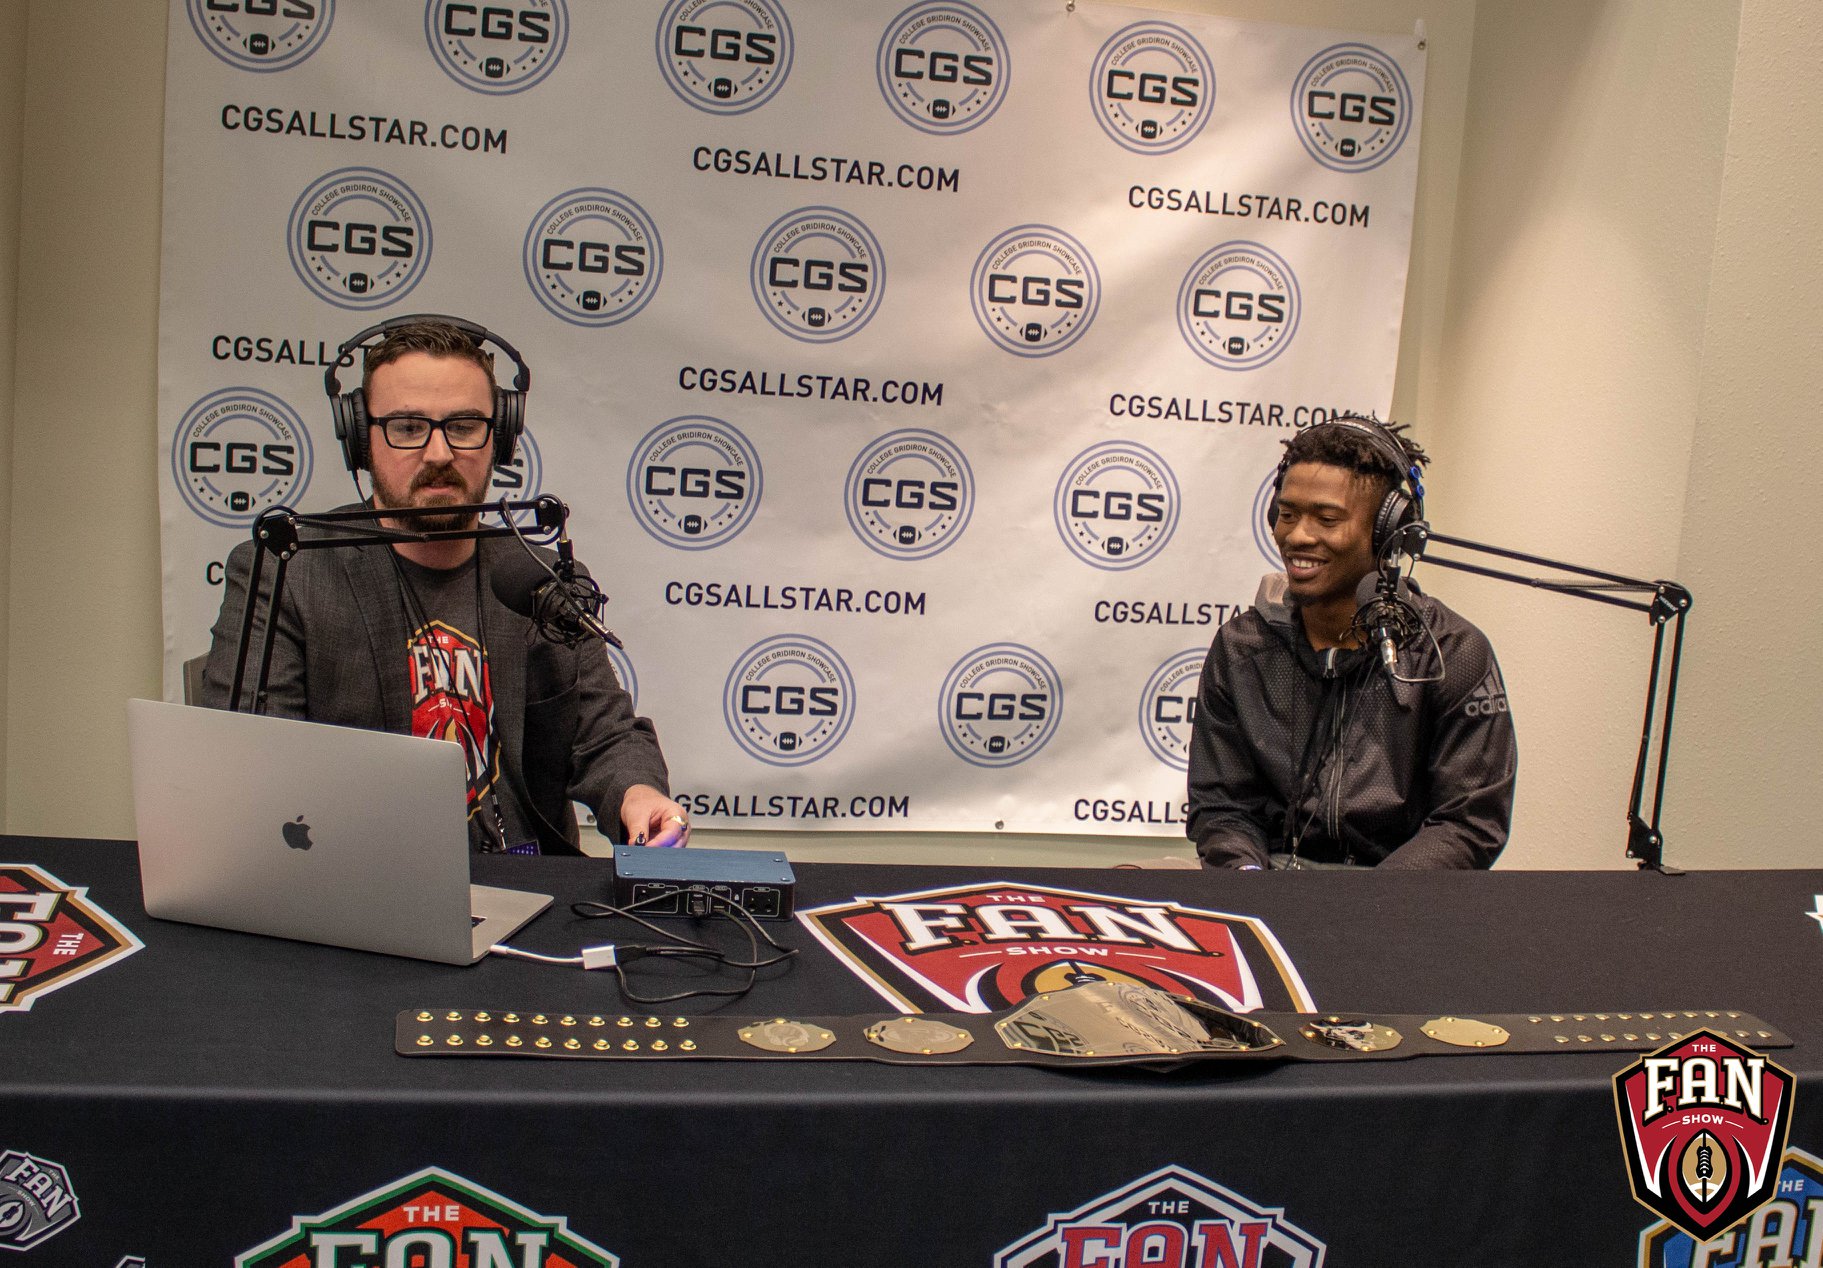
The F.A.N. Show is a one-man, award-winning sports variety show based in Spokane, WA—and it’s in a league of its own. There’s something for every fan. The show is hosted by Richard Tieman, who is a musician, producer, sports fanatic, and Studio One user. After five years of recording 440 podcast episodes on the same AudioBox iTwo he purchased in 2015, Richard shows no signs of slowing down. We wanted to know more about how his podcast came to be so successful.
Tell us about your background. How long have you been in the audio industry?
I was a drummer for a punk rock band since I was 17, and loved music, performing live, and traveling to different cities. I also love a variety of things like football, the outdoors, pop culture, and even pro wrestling. I had a knack for entertaining people, and I’ve always been comfortable on a microphone. I met my wife seven years ago and we’ve been married for five, and she is my single greatest supporter and biggest fan. I’ve been in audio for about 15 years. 10 years ago I got really passionate about it when I started hosting karaoke at a local bar while I was still touring with my band. Then when we broke up five years later, a friend suggested that I should start my own podcast, so I figured… why not?
How has the audio industry changed since your early days? 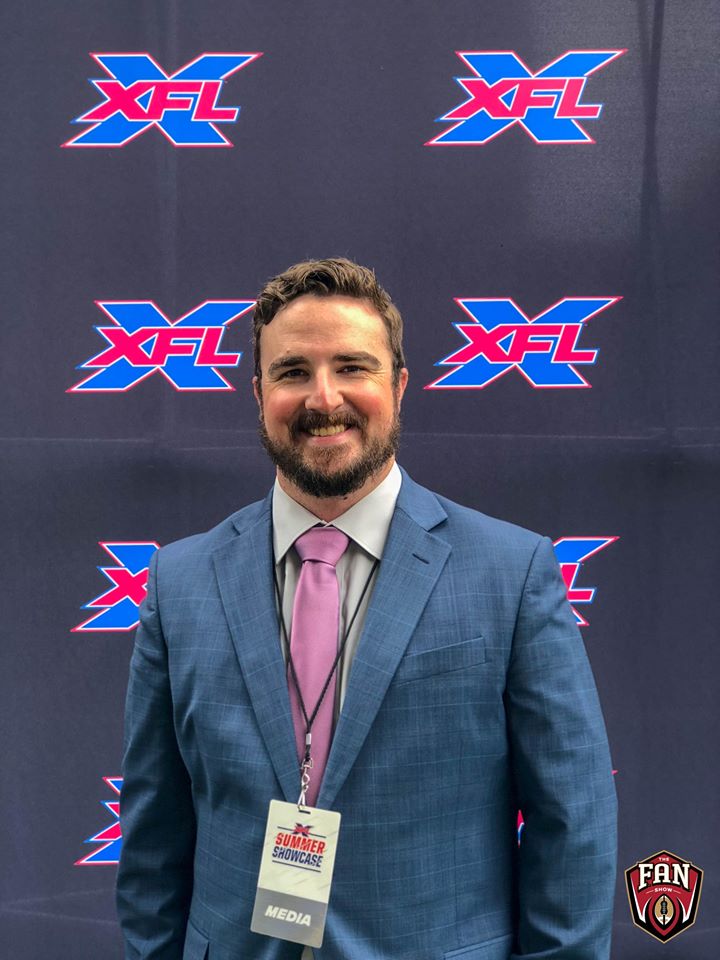
It’s changed quite a bit. When I was in the band, podcasts weren’t very popular yet. Not many people even knew what they were. Recording and editing equipment and software were super expensive, so you had to really have a passion for audio/video in order to justify going all-in on the idea. I remember making a business proposal for starting my own karaoke and entertainment company in 2015, and the money I needed for karaoke equipment and songs, just to get started, was about $3,000. Now, everyone and their mom has a podcast or YouTube channel and the cost to buy a “starter kit” for those is around $300. Quite the difference.
What’s your favorite podcast right now?
As a wrestling fan, he’s one of my favorites. He’s also the frontman for the band Fozzy, and he doesn’t just interview wrestlers. He has a wide variety of different guests and that’s what I love about his show. The mix. I guess his podcast is what inspired me to branch out to talk about more than just football. Yes, I love football, but I love other things as well. Music, comics, the outdoors. Why limit myself?
Tell us about your podcast.
At first, it was just me and my thoughts about football and my 49ers. It’s the sport I know well, and the one I felt the most comfortable talking about. I also hated all the irrelevant news you started to see and hear on mainstream sports media. It was less about stats and highlights and more rumors and gossip. I wouldn’t say I started my podcast out of spite, but the idea of being different was certainly appealing. What was a weekly podcast called The ButtFumble Show is now a live-streamed variety show that airs three times a week and covers a little bit of everything: The F.A.N. Show. “Everyone’s a FAN of something, and we have something for every fan.”
Where did the idea for your podcast come from?
The rooftop of a bar in downtown Spokane where my 10-year high school reunion was happening. My buddy Cameron and I were talking about his Seahawks and my 49ers. and going back and forth about their last season and stuff that needed to happen in the offseason. He was really impressed with not only my knowledge of my team and the league, but that I could carry a conversation and could back up my opinions with facts. So he asked if I had ever thought of becoming a sports analyst, and I laughed and said, no thanks. That’s when he suggested starting my own podcast.
How does your first podcast compare to your most recent?
Oh boy. My first episode was terrible. 20 minutes of me sitting in a chair in the spare room of our house, just rambling on about the upcoming season and what to watch for. I’d never used any PreSonus equipment before, or any podcasting equipment for that matter, so my mic was turned down really low and I didn’t know how to edit the recording. Like I said, terrible. Now, almost 440 episodes later, I have my own intro theme, I have segments, sound effects, I know how to edit and get the best sound quality I want. My best episode is always my next episode.
There are so many podcasts these days. How do you stand out?
In all honesty, I can’t say that I do “stand out.” I know that I’ve learned a lot in five years of doing my podcast, and even though all the changes and trying new things, I’ve always stuck to what I believe and not trying to conform to certain styles just to get clicks or downloads. My fans are my fans, and as long as they tune in and listen, I’ll keep doing it. But I do know what makes my show “different,” is that even after five years, I’m still doing it. Not everyone who has thought “Hey, I can do that,” has actually done it for very long. Some guys I know that started podcasts never made it past 10 episodes. I’m about to do my 440th. I pride myself on constantly wanting to learn and get better. Try new things. And I’m persistent.
 What advice do you have for someone who wants to start a podcast?
Be ready for criticism and be open to feedback. Feedback is one of the hardest things because it’s not all good feedback, but you need people supporting you that will be honest with you and tell you what they liked and more importantly, what they didn’t like. That, and to be consistently persistent. Like I said, I know people that never made it more than 10 episodes. There will be a lot of excuses you can make for yourself, but if it’s really something you’re passionate about, you’ll make it a priority. I’ll tell anyone and everyone what programs or equipment I use, and people think I’m crazy for giving away my “secrets to success.” That’s not the secret. I don’t even have a secret. I just made my show a priority and have built a brand as a result.
How did you first hear of PreSonus?
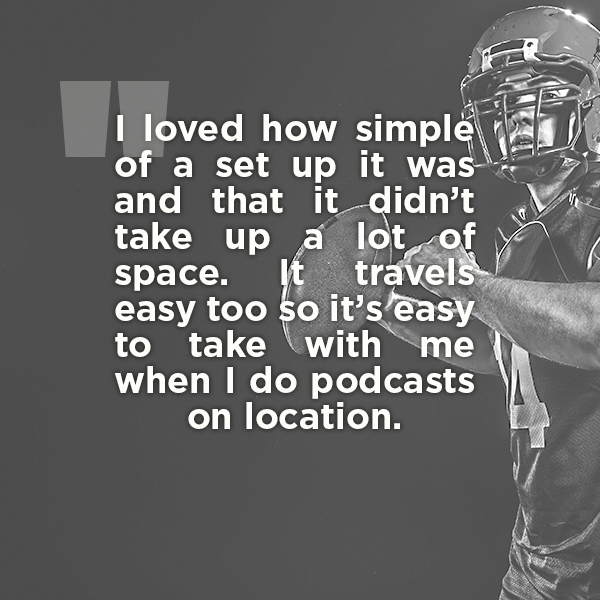
Google. Haha. I talked with my wife about the podcast idea and since the band had broken up and I was going back to school for my AA degree in Business Management, she said I needed a hobby and thought the podcast would be good for me. So we searched “Podcasting kits” and the 2nd or 3rd result was the “PreSonus AudioBox iTwo.” About $220, it came with the AudioBox, mic, mic cord, headphones, and Studio One for editing. Connect it to the USB port on your computer and you’re ready to roll. I loved how simple the set up was, and that it didn’t take up a lot of space. It travels easily too, so it’s easy to take with me when I do podcasts on location.

What PreSonus products do you use?
I still use that same AudioBox iTwo (five years later) and I absolutely love it. I actually want to get another one so I can have one for my studio and one specifically for traveling. Or have one as a backup at the very least. You can never be too prepared when it comes to technology. I’ve since upgraded my mics, but still use Studio One and that same box for my show.
Why was PreSonus a good option for you? Was it easy to learn?
It was convenient, easy to use, and not a lot of extras. The less you have to worry about when it comes to recording, editing, and producing, the better. Not everyone has a producer or even an assistant, so if you’re a “one-man show” like I am, PreSonus is amazing. There was definitely a learning curve. A lot of it was self-explanatory, but I have a lot of audio friends that were happy to help me. YouTube is also an amazing learning tool, haha.
Do you ever take your podcast on the road? 
All the time. I’ll take it to local events like Comic-Con and interview special guests and cosplayers, or I’ll go to the comedy club and interview the comedians in the green room before their show. I’ve even interviewed bands at our local concert house before their shows. But my favorite time of the year is my annual tour. I take the AudioBox and my set up and go to different events across the country like BattleBots, or arena football games and I’ll host tailgate parties and use it for a live stream, or I’ll interview players and coaches after the game. I’ve gotten pretty good at setting up in hotel rooms and at arenas.
Recent projects? What’s next for you?
I just finished my third tour, which was awesome, and I was also hired to do media for different events where I would go and interview players, coaches, staff, cast and crew and publish them as podcasts to help promote the events. The show has a great following and I’ve gotten more and more opportunities like these as a result. I recently accepted the position of Director of Communications for the Sioux Falls Storm. An indoor football team that had heard of me and my podcast and wanted me to be apart of their winning team for 2020. I will be doing that as well as continuing what I do with my podcast. I’m hoping 2020 is my biggest year yet and that moving to a new city will hopefully create new opportunities. The new owners of the Storm were very adamant about me continuing to do my podcast and continuing to grow my brand, so that is what I will look to do next year!
Where can we listen to your podcast?
The F.A.N. Show is available on most major podcasting platforms including:
- iTunes: https://podcasts.apple.com/us/podcast/the-f-a-n-show/id1086005267
- Spotify: https://open.spotify.com/show/5uapKFdFfmrrUIzC8UaFTa
- SoundCloud: https://soundcloud.com/thefanshow
- iHeartRadio: https://www.iheart.com/podcast/53-the-fan-shows-track-28512625/
- Spreaker: https://www.spreaker.com/user/thefanshow
Follow The FAN Show on Instagram!
Follow the FAN Show on Facebook!
Interested in joining the Studio One Family? Click here for the best price all year!
The VoxTool FX Chain
Y’all seem to like FX Chains, so here’s one of my favorites—the VoxTool, a toolchest for bringing out the best in vocals and narration as quickly as possible. You’ll still need to add any desired time-based effects (doublers, reverbs, or whatever), or perhaps some compression, but this will help take care of pops, EQ, peaks/transients, and vibrato during the songwriting process. In fact, this FX Chain may even do the job all the way to the final mix.
You can download the FX Chain from the link at the end of this tip; but let’s cover how the various modules affect the sound, so that (if needed) you can tweak this FX Chain for your particular voice.
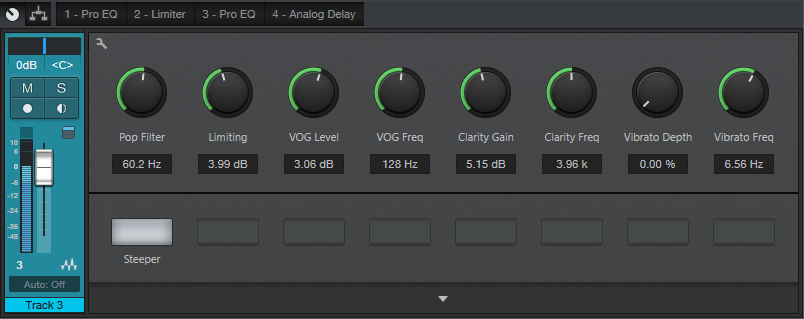
1. PRO EQ
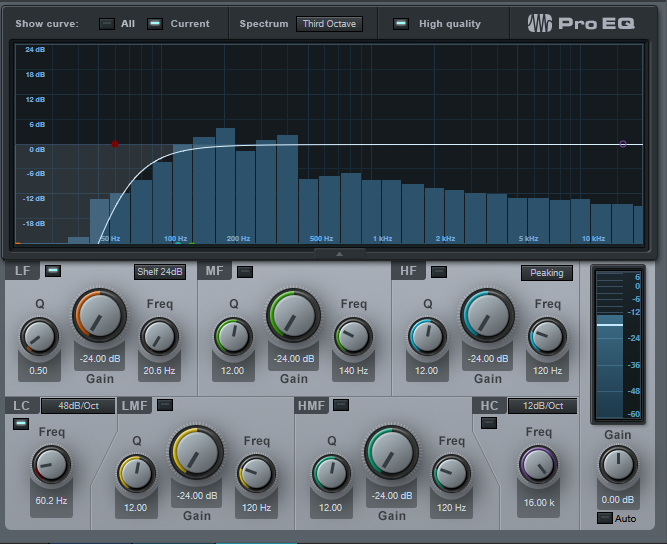
This stage uses the Low Cut Filter, set to 48 dB/octave, with the cutoff frequency controlled by the Pop Filter control. Turning up this control attenuates the low frequencies where pops occur. The Steeper button adds a bit more low-frequency attenuation, aimed specifically at subsonics, by enabling the LF stage.
2. LIMITER
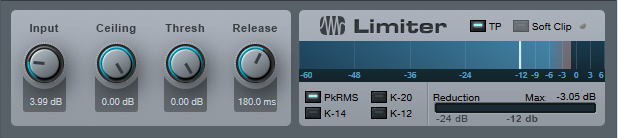
Now that the p-pops are reduced, we can add some limiting to tame any vocal peaks or transients. The Limiting control in the Macro Controls panel turns up the Limiter’s input control to increase the amount of gain reduction.
3. PRO EQ
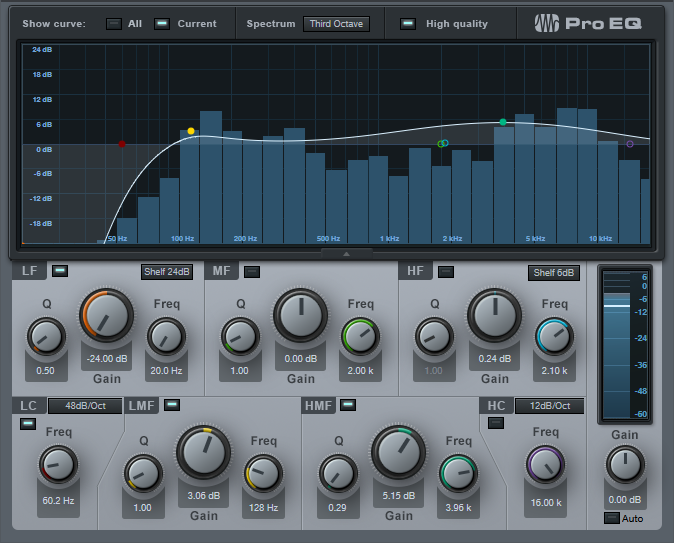
This link in the FX Chain uses four filter stages. Like the first Pro EQ, the Low Cut stage ties to the Pop Filter control for further attenuation of sub-vocal low frequencies, while the Steeper switch enables the LF stage for additional pop filtering. The LMF section provides the VOG effect (what narrators call “Voice of God”). This adds fullness to the bass, like an FM late-night DJ, which can also help restore some low-end depth in the vocal range if removing pops extends a bit into the vocal range. The HMF stage is the engine for the Clarity Gain and Clarity Frequency controls. Increasing Clarity Gain adds intelligibility and articulation to the vocals; vary the Clarity Frequency control to find what works best with your voice.
4. ANALOG DELAY
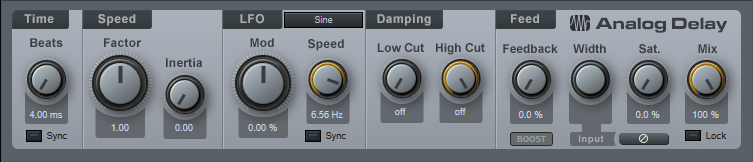
This provides a vibrato effect, with Vibrato Depth and Vibrato Frequency controls applied to the Analog Delay module. You likely won’t want to leave Vibrato Depth up, but instead, control it with automation, a footpedal, mod wheel, or whatever to add vibrato when needed.
That’s all there is to it! So download the VoxTool FX Chain, and bring your vocals up to speed—fast.
Studio One Tutorials!
These PreSonus Studio One Tutorials starring Gregor Beyerle will help you learn how to make beats on Studio One – and more! You’ll find everything you need to know to get started producing in Studio One in this breakthrough series—from set-up and Studio One basics to more advanced topics like the Project page.
Enjoy!
Click here to view the full playlist on YouTube.
Tighten Mixes with the “Tightener” FX Chain
Sometimes when you’re mixing, sounds conflict because they have too much energy in the same part of the spectrum. The usual solutions are to lower the level of the sound deemed less important, or use EQ to try to ensure that each sound carves out its own part of the spectrum. This week’s tip presents an entirely different solution. It’s the kind of tip where people will likely go “yeah, whatever…” until they run into this problem, try the tip, and find that amazingly enough, it works.
But we’ll also take advantage of this tip to describe how to make a simple FX Chain. FX Chains are an extremely powerful Studio One feature, so if you haven’t gotten into creating your own yet, this is a good project for getting started.
HOW IT WORKS
The Tightener creates four sharp, narrow notches in a Pro EQ, at frequencies related to the musical key. For example in the key of A, the notches are at 110 Hz, 220 Hz, 440 Hz, and 880 Hz. If you have, for example, a song in the key of A where the guitar conflicts with the piano, to have less piano and more guitar, insert the Tightener FX Chain for the key of A into the piano track, and increase the depth of the notches. Here’s how to create a Tightener FX Chain.
- Insert a Pro EQ into a track, and open its interface.
- We’ll be using the LF, LMF, MF, and HMF stages. Set the Q for each stage to 24.00.
- Referring to the chart at the end, type a filter frequency into each filter stage. For example, with the key of A, choose 110 Hz for the LF stage, 220 Hz for the LMF stage, 440 Hz for the MF stage, and 880 Hz for the HMF stage (Fig. 1).
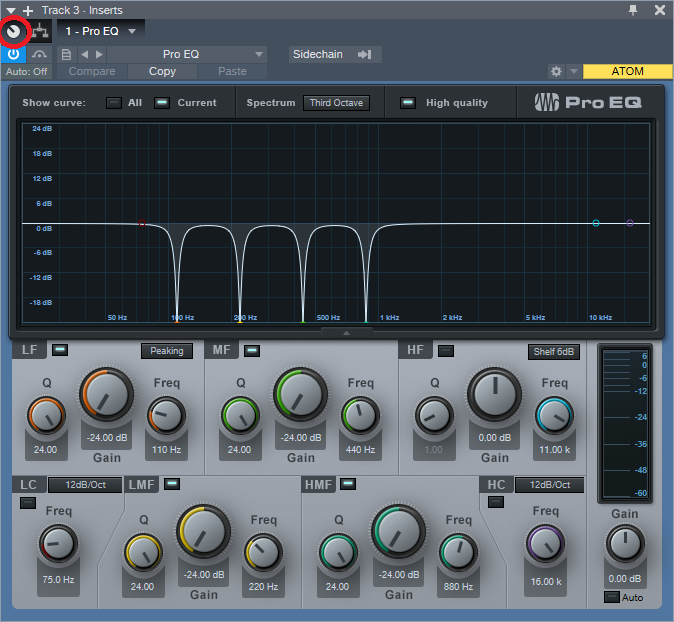
Figure 1: The filter settings for the key of A Tightener, with the notches set to maximum depth.
- Click on the knob icon in the effect’s upper left corner (just above the enable/bypass “power” button; it’s circled in red in Fig. 1). This opens the FX Chain Macro Controls interface. Then, click on the interface’s Wrench icon to open the Macro Controls editor.
- In the right-hand pane, unfold the Pro EQ folder, then unfold the Low Frequency, Low-Mid Frequency, Mid Frequency, and High-Mid Frequency folders.
6. Ctrl+click on LF-Gain, LMF-Gain, MF-Gain, and HMF-Gain to select all four parameters. The FX Chain Editor should now look like Fig.

Figure 2: The FX Chain Editor shows the Pro EQ parameters used for the tightener.
- Now click on Add Targets. The Gain control parameters will appear in the middle pane. They’ll all be controlled by the one knob at the bottom.
- I wanted the knobs to work so that when the control is full up, there’s no notch and the EQ works normally. Then to reduce the energy at a particular key, turning down the control increases the notch depth, producing more of a cut. However, if you turn the Macro control at the bottom of the window and watch the filter response, you’ll see it goes from full notch at minimum, to full boost when turned up. We don’t want the boost.
- Click on one of the Trans graphs, and drag the node in the upper-right-hand corner down to 0. This ensures that when the knob is up all the way, its filter gain is zero. Then, click on Copy (Fig. 3).

Figure 3: Adjust one of the graphs so that the maximum value is 0, then copy and paste to the other graphs.
- Click on the other three graphs, and choose Paste. Now all the Gain controls will track each other.
- Look at the filter, and vary the knob at the bottom of the FX Chain Editor. All the notches will go from maximum notch with the control fully counter-clockwise, to minimum notch with the control clockwise.
- Now double-click on the knob label, and type a name like “Tightener A” or “Tightener C#” or whatever, depending on the filter frequencies.
- Click on the wrench to close the Editor. To save the FX Chain, click the downward arrow in the Macro Control panel’s upper left, and choose where to store your preset (Fig. 4).
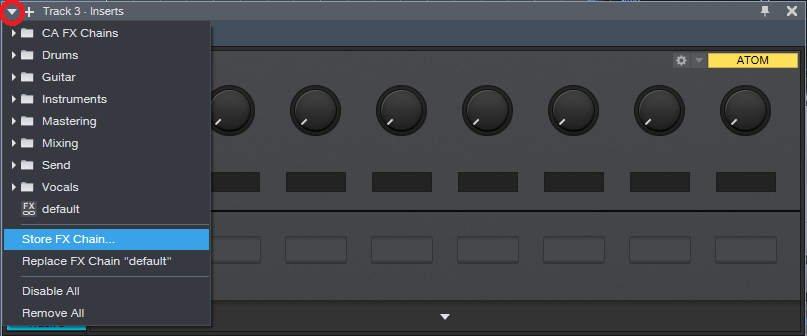
Figure 4: Don’t forget to store your FX Chains, so you can use them again.
And now you have a Tightener FX Chain! But you’ll want one for each key. It’s easy enough to do—type new frequencies into the four EQ bands, rename the control for the appropriate key, and then save the FX Chain under the name of the new key. For example, if you change the frequencies to 147 Hz, 294 Hz, 587 Hz, and 1175 Hz, you now have a key of D tightener. Here are the frequencies for all the keys (Fig. 5).

Figure 5: Frequencies for an octave’s worth of tighteners.
You need to be a little strategic about applying this FX Chain; it’s needed only when you want to help keep instruments from stepping on each other.
So that you can get started experimenting with this as easily as possible, all the Tightener FX Chains are available for download. After downloading, place them in the folder Studio One Songs and Projects\Presets\PreSonus\FX Chains\Tighteners, or wherever you specified the location for presets in Studio One > Options > Locations > User Data.
But even if you download them, try your hand at creating an FX Chain if you haven’t done so already. They’re really handy.
Download ALL 12 Tighteners Here!
New Arcades and Studio One!
Instagram isn’t just for cute, filtered images of yourself and your dog or gear! It’s a great community uniting musicians and artists brave enough to put their best work out there. One of those Instagram accounts is run by our friend and Studio One user, Adam Sullivan—one of the front men for New Arcades, a UK duo inspired by nostalgic memories of 80s cinema and vintage synth sounds. Think of blue skies, urban nightlife, and hazy sunrises and you have the New Arcades!
Studio One is Adam’s go-to DAW since 2.0! He also has a FaderPort and StudioLive 24R.

Give us some background on yourself. How long have you been making music?
I’ve been a musician from a very young age, nowadays I’m a jack of all trades, master of none. I obtained a degree in music technology and sound engineering/composition at Lancaster University (UK). We started creating music and mixing tracks in 2008 and haven’t quit. It has become more and more serious in the last few years. This all in conjunction with being one of the main FOH Engineers at my church in London, Holy Trinity Brompton. Now I mix various artists’ tracks and create my own music for New Arcades. Additionally, my side project is known as “Shred Ministries” which has developed quite a decent following from the church/Christian scene as a comical reproduction of modern worship. Check it out on YouTube for a laugh.
How has the music industry changed since your early days?
Less and less are the labels willing to part with cash in order to promote, the risk is far greater for the artist it seems unless you are manufactured by the giant label themselves. Back in early days with medium independents, there might be a decent(ish) advance in exchange for the master copyright recordings. But it’s tragically at the point now, where for a promise of exposure, and (hopefully) enough money made is usually in exchange for the masters… I think now you have to do so much work, have many friends help push and support you and really drive home the music you create and believe in passionately. I stand by never giving up my masters indefinitely, and I would encourage all artists to be the same even if the promise of a bright future is tempting. Another area: digital music plugins have just stepped up… I now use a kemper when I play live, it’s just fantastic! It sounds incredible and it now would be for me favored over a guitar amp in a room! which I feel is insane! Nothing better than authentically playing the instrument though–somehow that’s always been the same.
Describe the first time you wrote a song? Produced it?
It was a co-write with my fellow band members. I’ve always produced and mixed the tracks but my first one was a pop/Indie/Rock track. I was dead proud! I look back on it now though, it was the early days, I’ve progressed, as has the DAW and the plugins! 😉
Who has been an influence in your life?
Chris and Tom Alge. Absolutely phenomenal mix engineers. Clarity and Punch. Love them.
Have you ever wanted to give up on music? What keeps you going?
A few times I have thought about stopping but I absolutely cannot help my need to create and ultimately, I persevere. I think also having a writing partner and bandmate always helps! Especially when you are both in tune, have similar styles and principles in your songwriting.
What do you like about PreSonus? What caught your eye?
The first thing that caught my eye was back in 2011: Studio One 2.0. It had this simple “Drag and drop” feature. I just loved how easy it was to slap something on the channel… The layout of the mix window and the integration of Melodyne. That, along with the power and depth of the EQ, Room Reverb, and Compressor that came with the package as standard had me hooked!
What PreSonus products do you use?
Studio One 4.5, FaderPort, various bundled software. StudioLive 24R rack mixer. I also use it in conjunction with the StudioLive 24 mix desk that I TOTALLY love!) It works great for all my function work, and is such a flexible setup.
When did you first hear about Studio One?
I was actually referred to it by a friend. They said they’d seen a review in Sound on Sound, which is very well respected. I went home, downloaded the free trial and haven’t looked back!
What features are you most impressed with your gear?
The interface of the Q-Mix and UC Surface app is great. The sound of the preamps in the Series III equipment. Capture 3.0 is fantastic also. Onboard SD card stem recording on the desk itself. I’ve yet to put the StudioLive 24 in with my DAW, but I’ve seen it can be a great surface, along with the remote control iPad app for vocal booth recording.
 Any user tips or tricks or interesting stories based on your experience with Studio One?
Super easy actually! I had a decent understanding of several other DAWs. But Studio One was quite intuitive. I watched a few tutorials and just trial and error massively reap benefits. Studio One 4 is so powerful and versatile. Go exploring!
Where do you go for support?
YouTube, forums, etc. I have friends who are also well-established producers/mix engineers who I can pick the brains of on the regs. But I’m quite independent and I hate being defeated by things—so I usually resolve things myself!
Where do you go for inspiration?
I listen to other artists in the scene or genre I’m in, I watch movies that inspire creativity and put you in a hungry mindset… A bit like watching the movie “Creed” would make you want to train your socks off and chin someone in the ring. 😉 I do similar for my music. There are so many inspiring artists and creators out there, listening to fantastic scores and tracks just make me want to compete to be the best and make something as exciting and epic.
Recent projects? What’s next for you?
I just finished my album for my band New Arcades. I’ve been working on it since 2012! It’s being mastered as we speak, so hopefully won’t be long before it drops. Recently also did a track for well know acoustic/folk artist Roo Panes. He is a fantastic performer and the song we worked on together was called “Thinking Of Japan.” Everything has been recorded and mixed on Studio One. Next, will continue to do loads of live events and functions using all the gear, hopefully, make my own second album and work with more and more artists.
Follow them on Instagram!
Join the Studio One family at the best price all year—NOW!
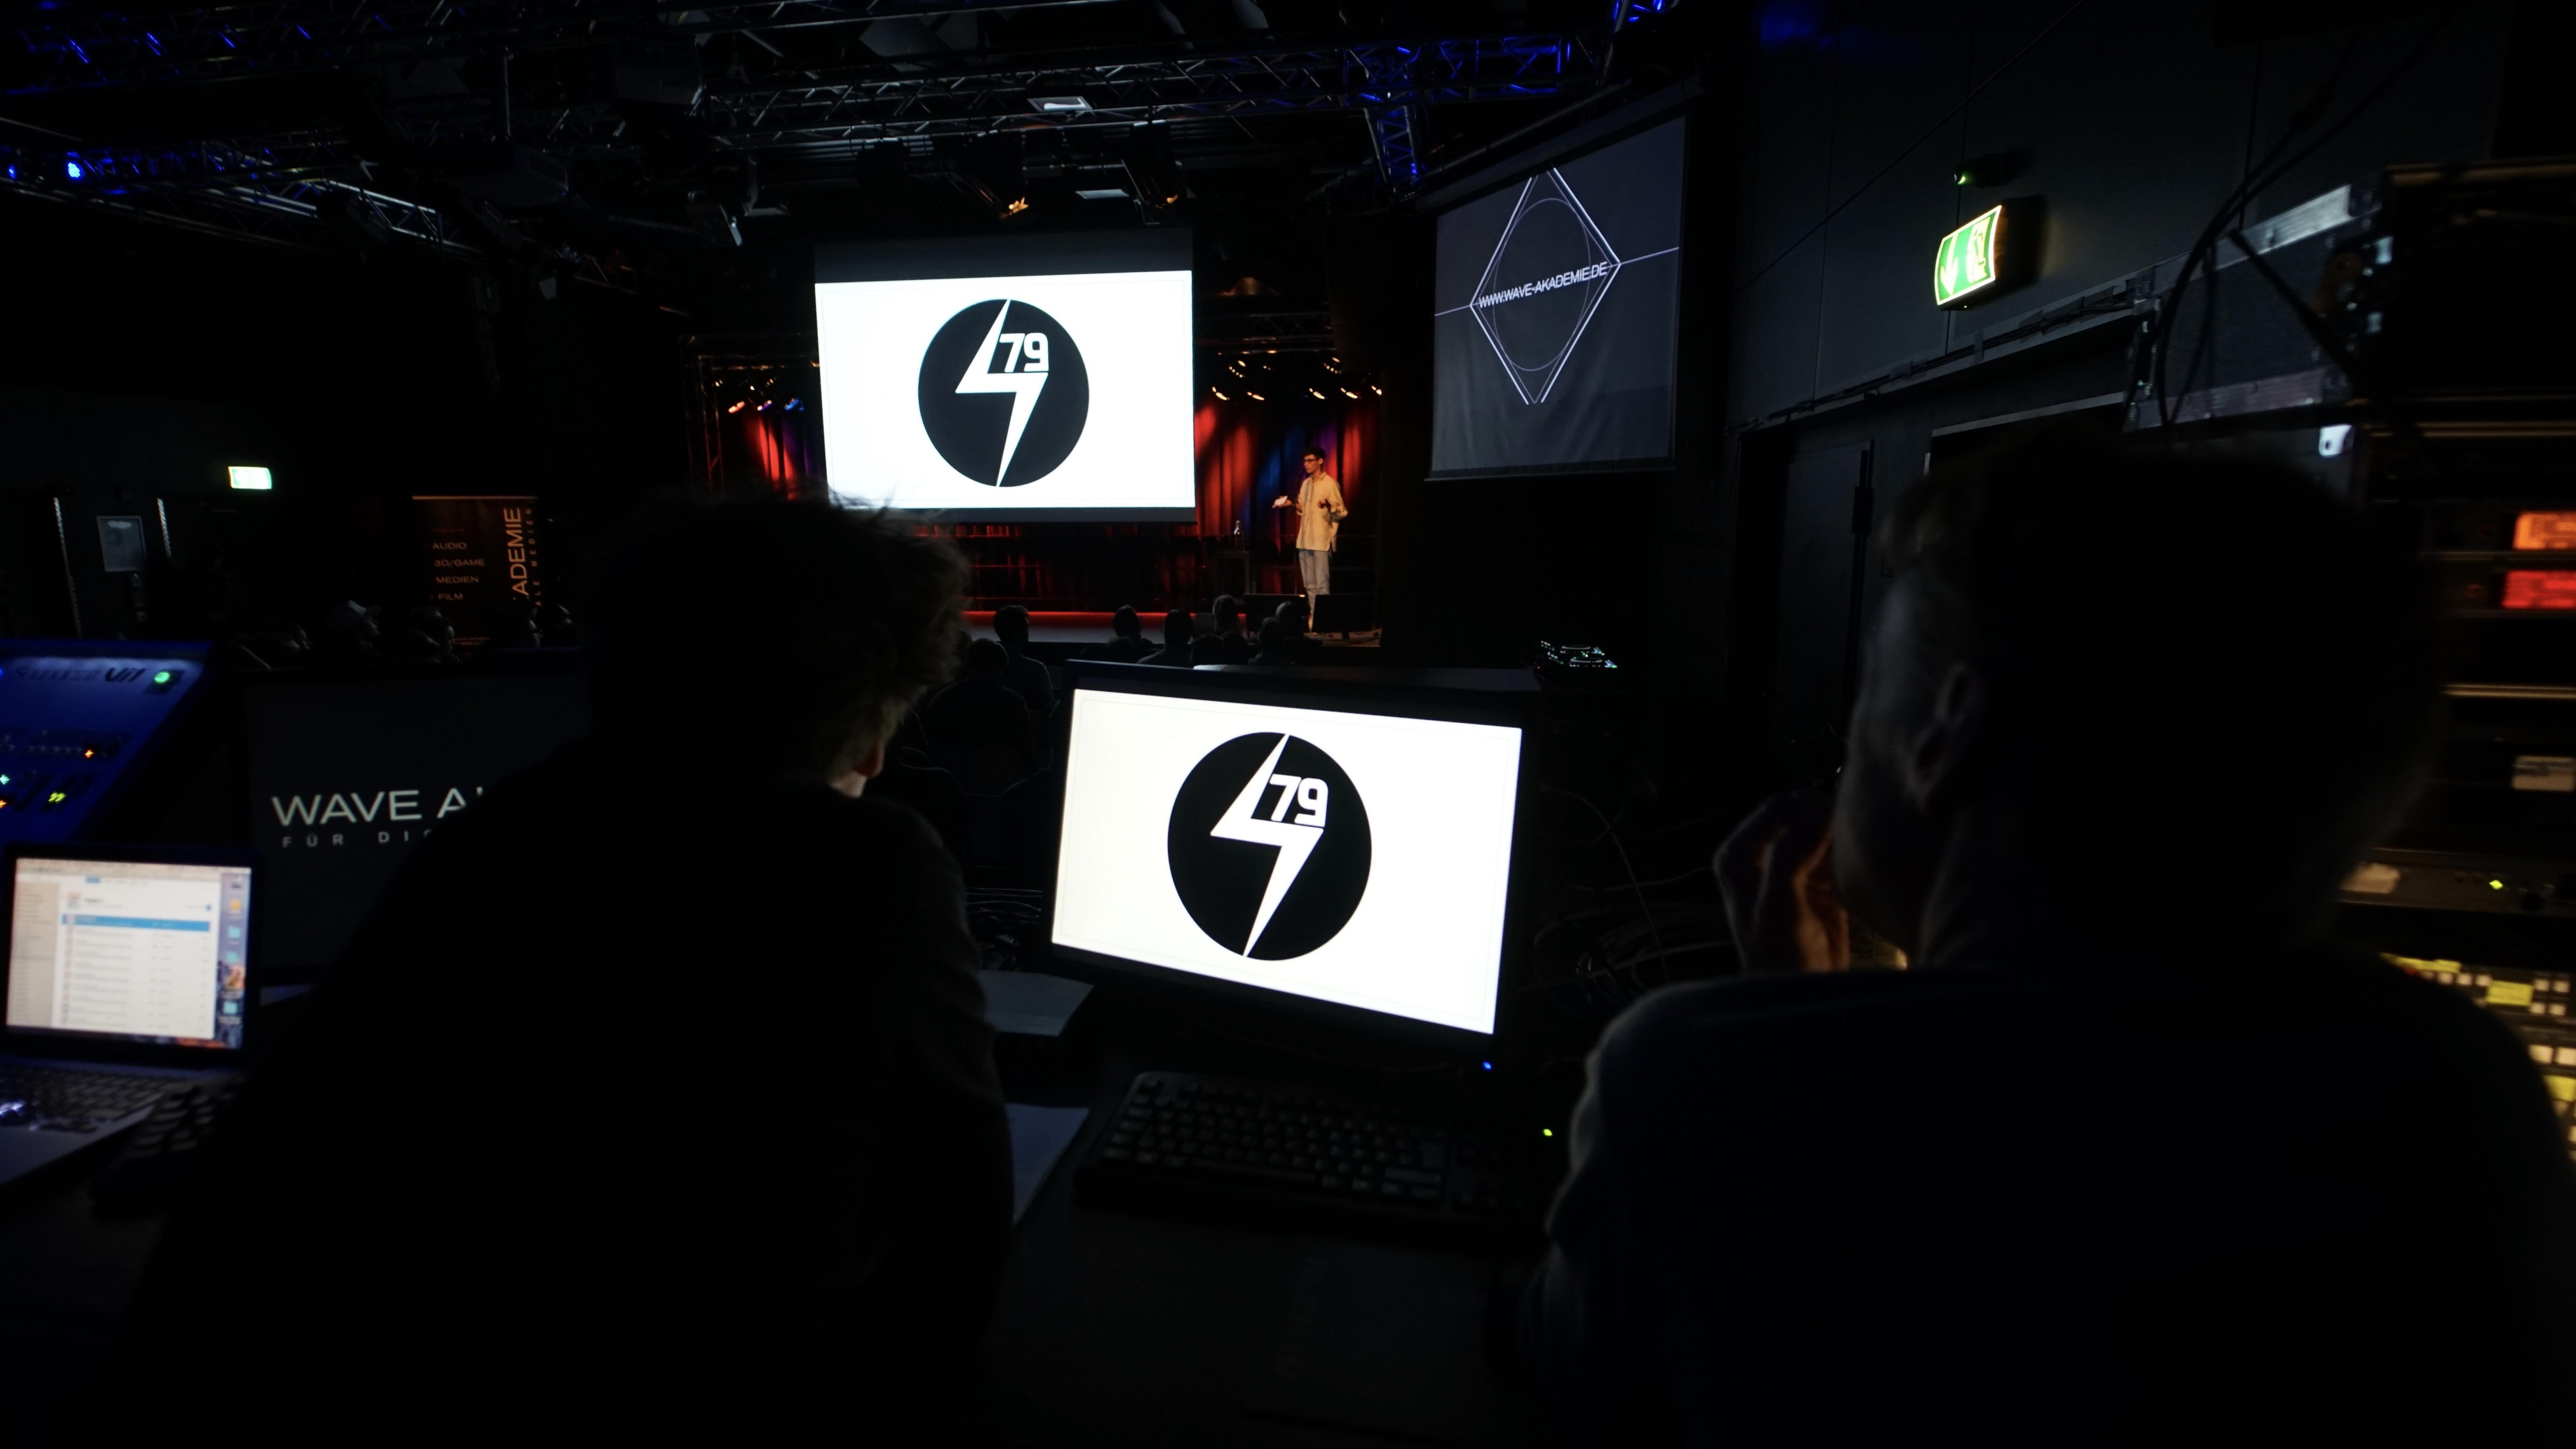
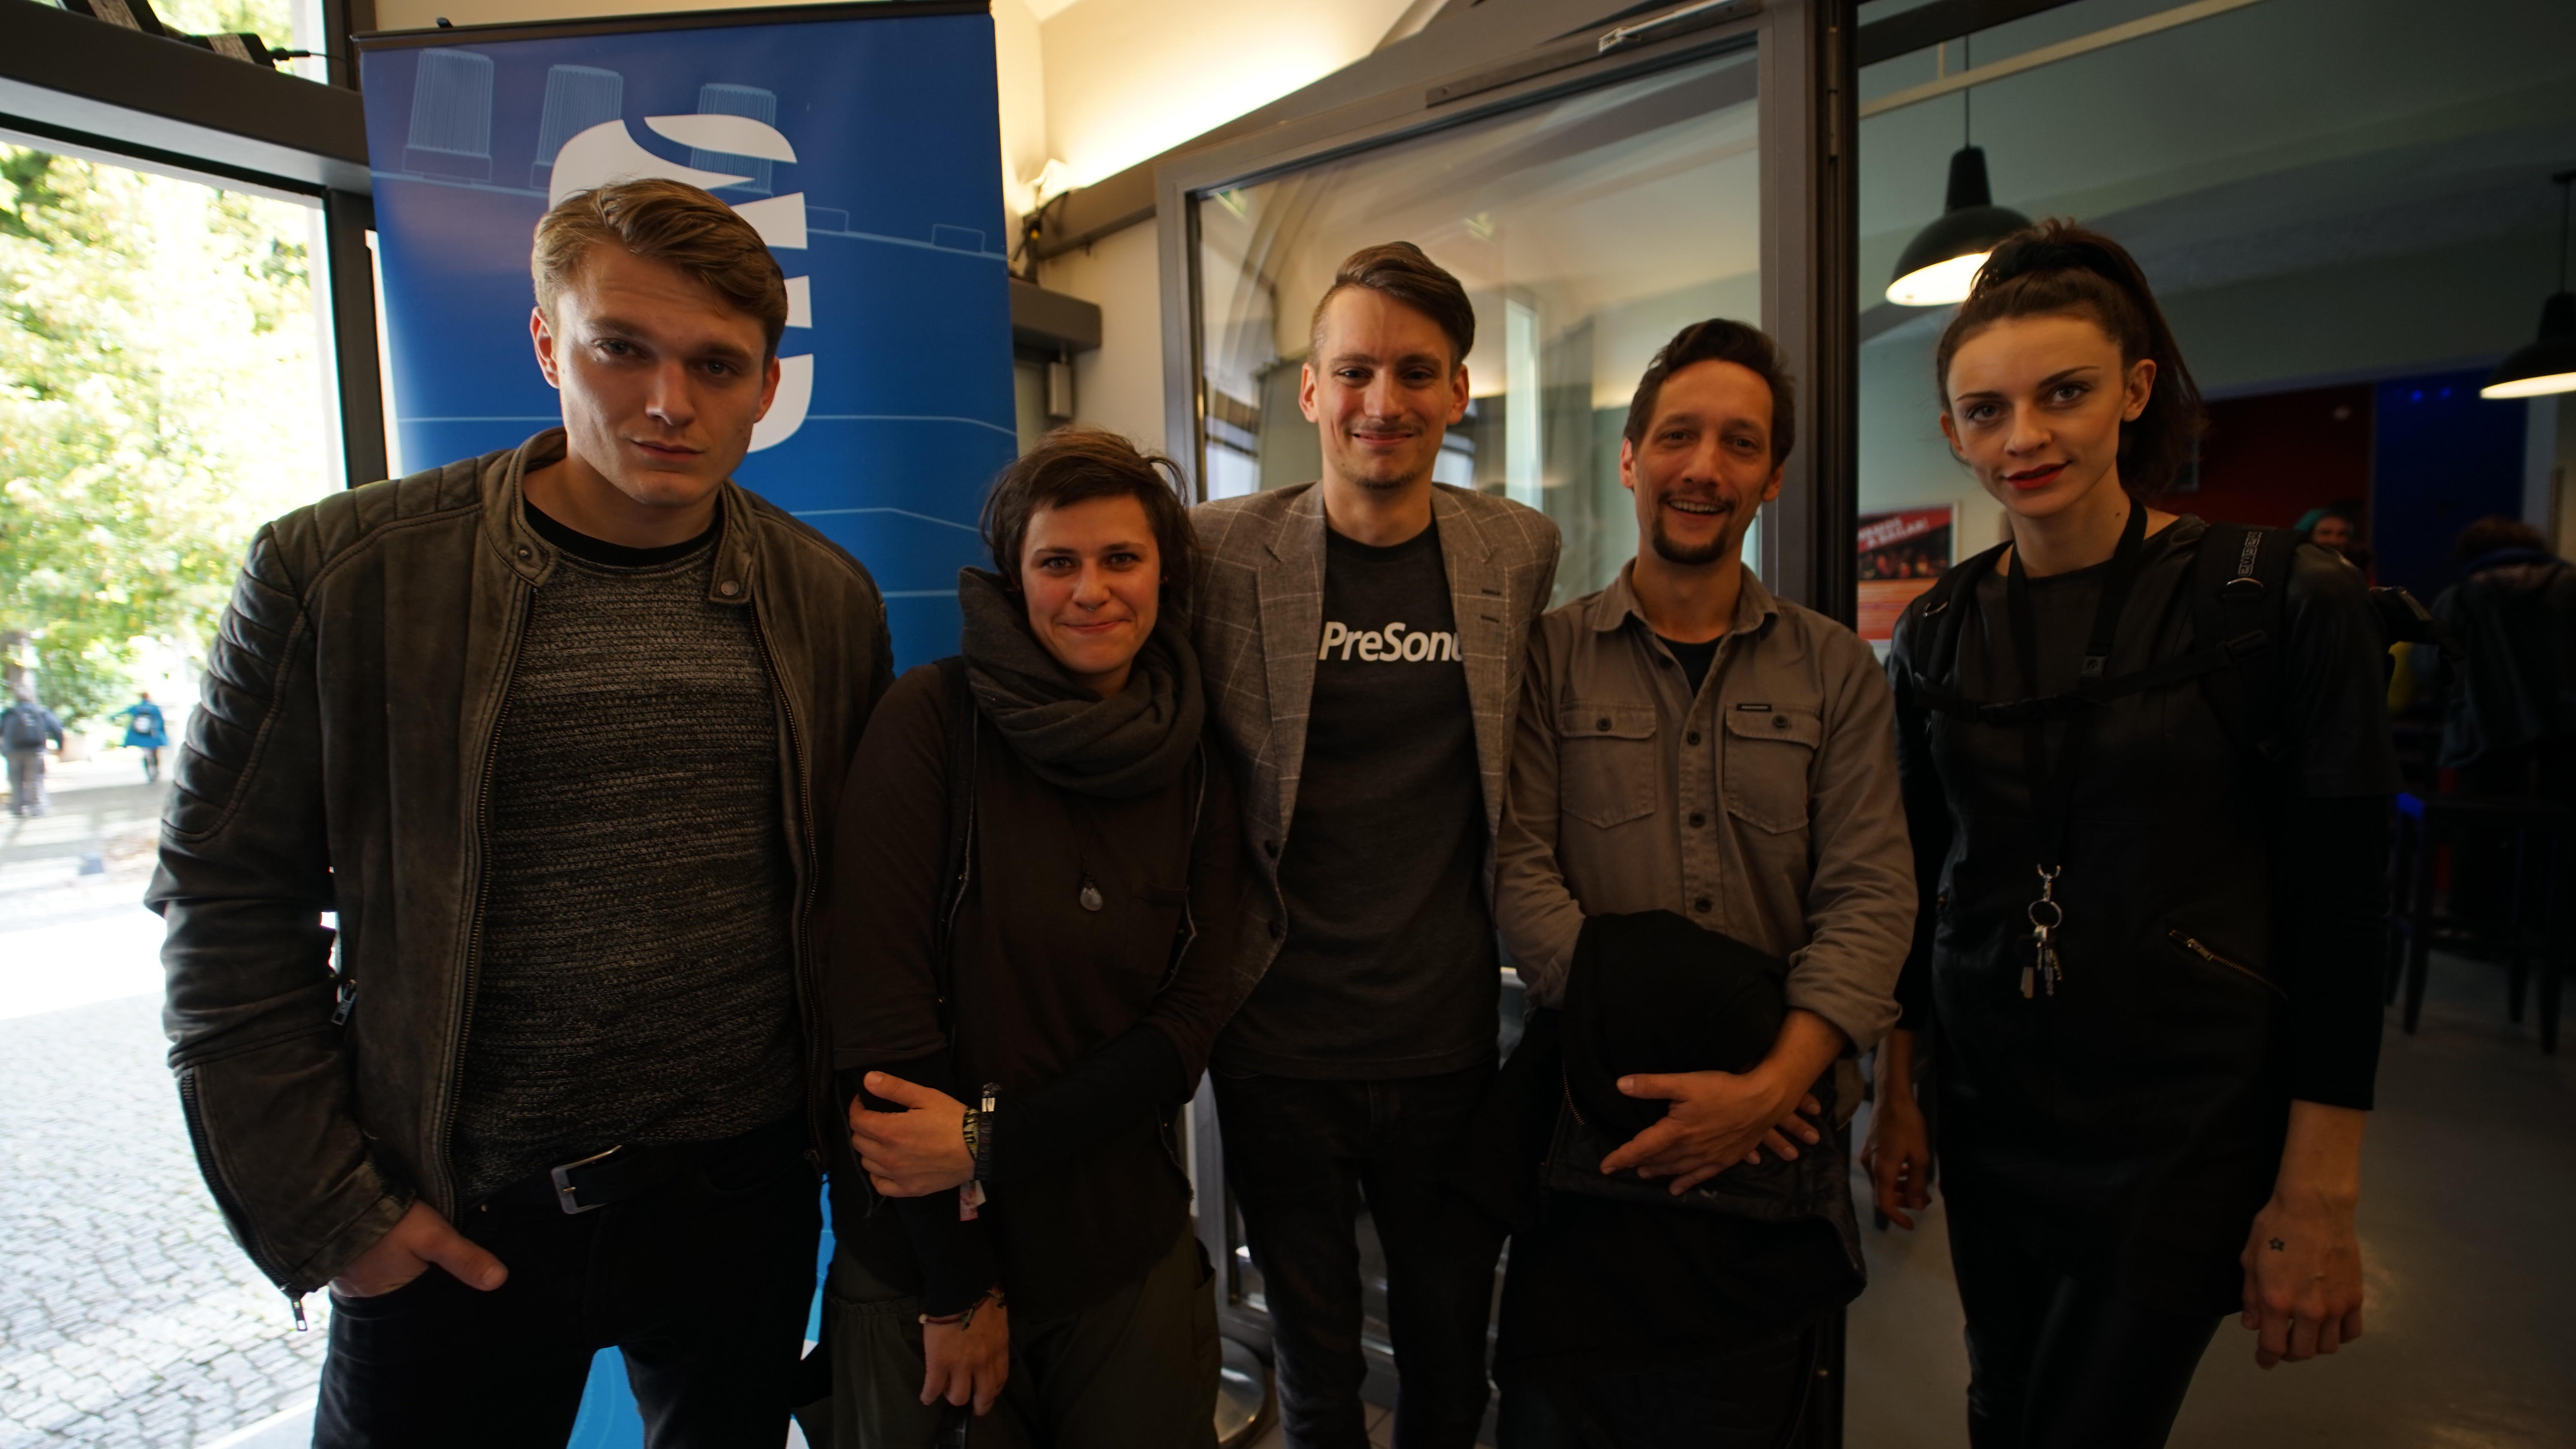
WAVE AKADEMIE was a blast!
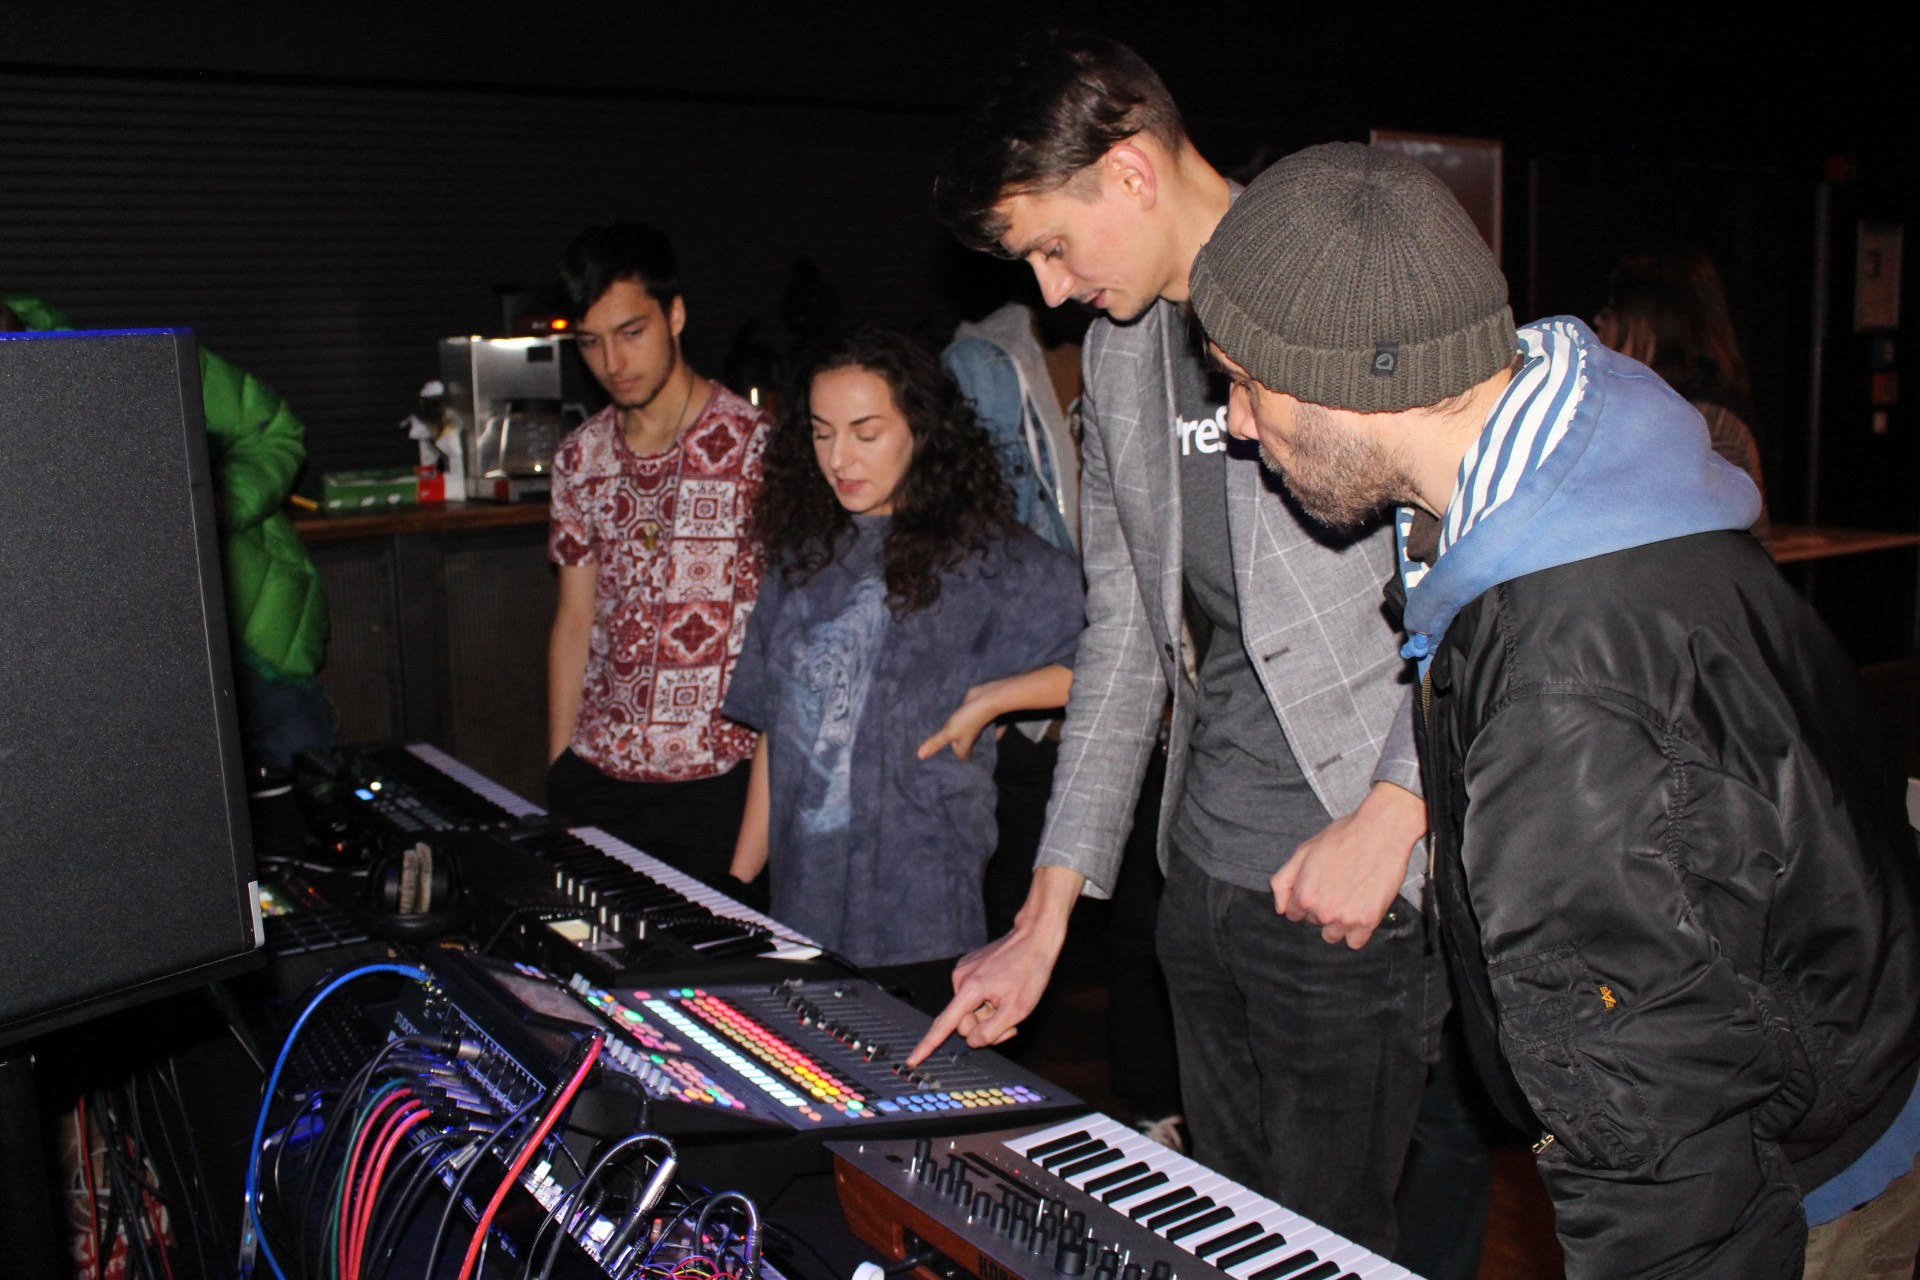
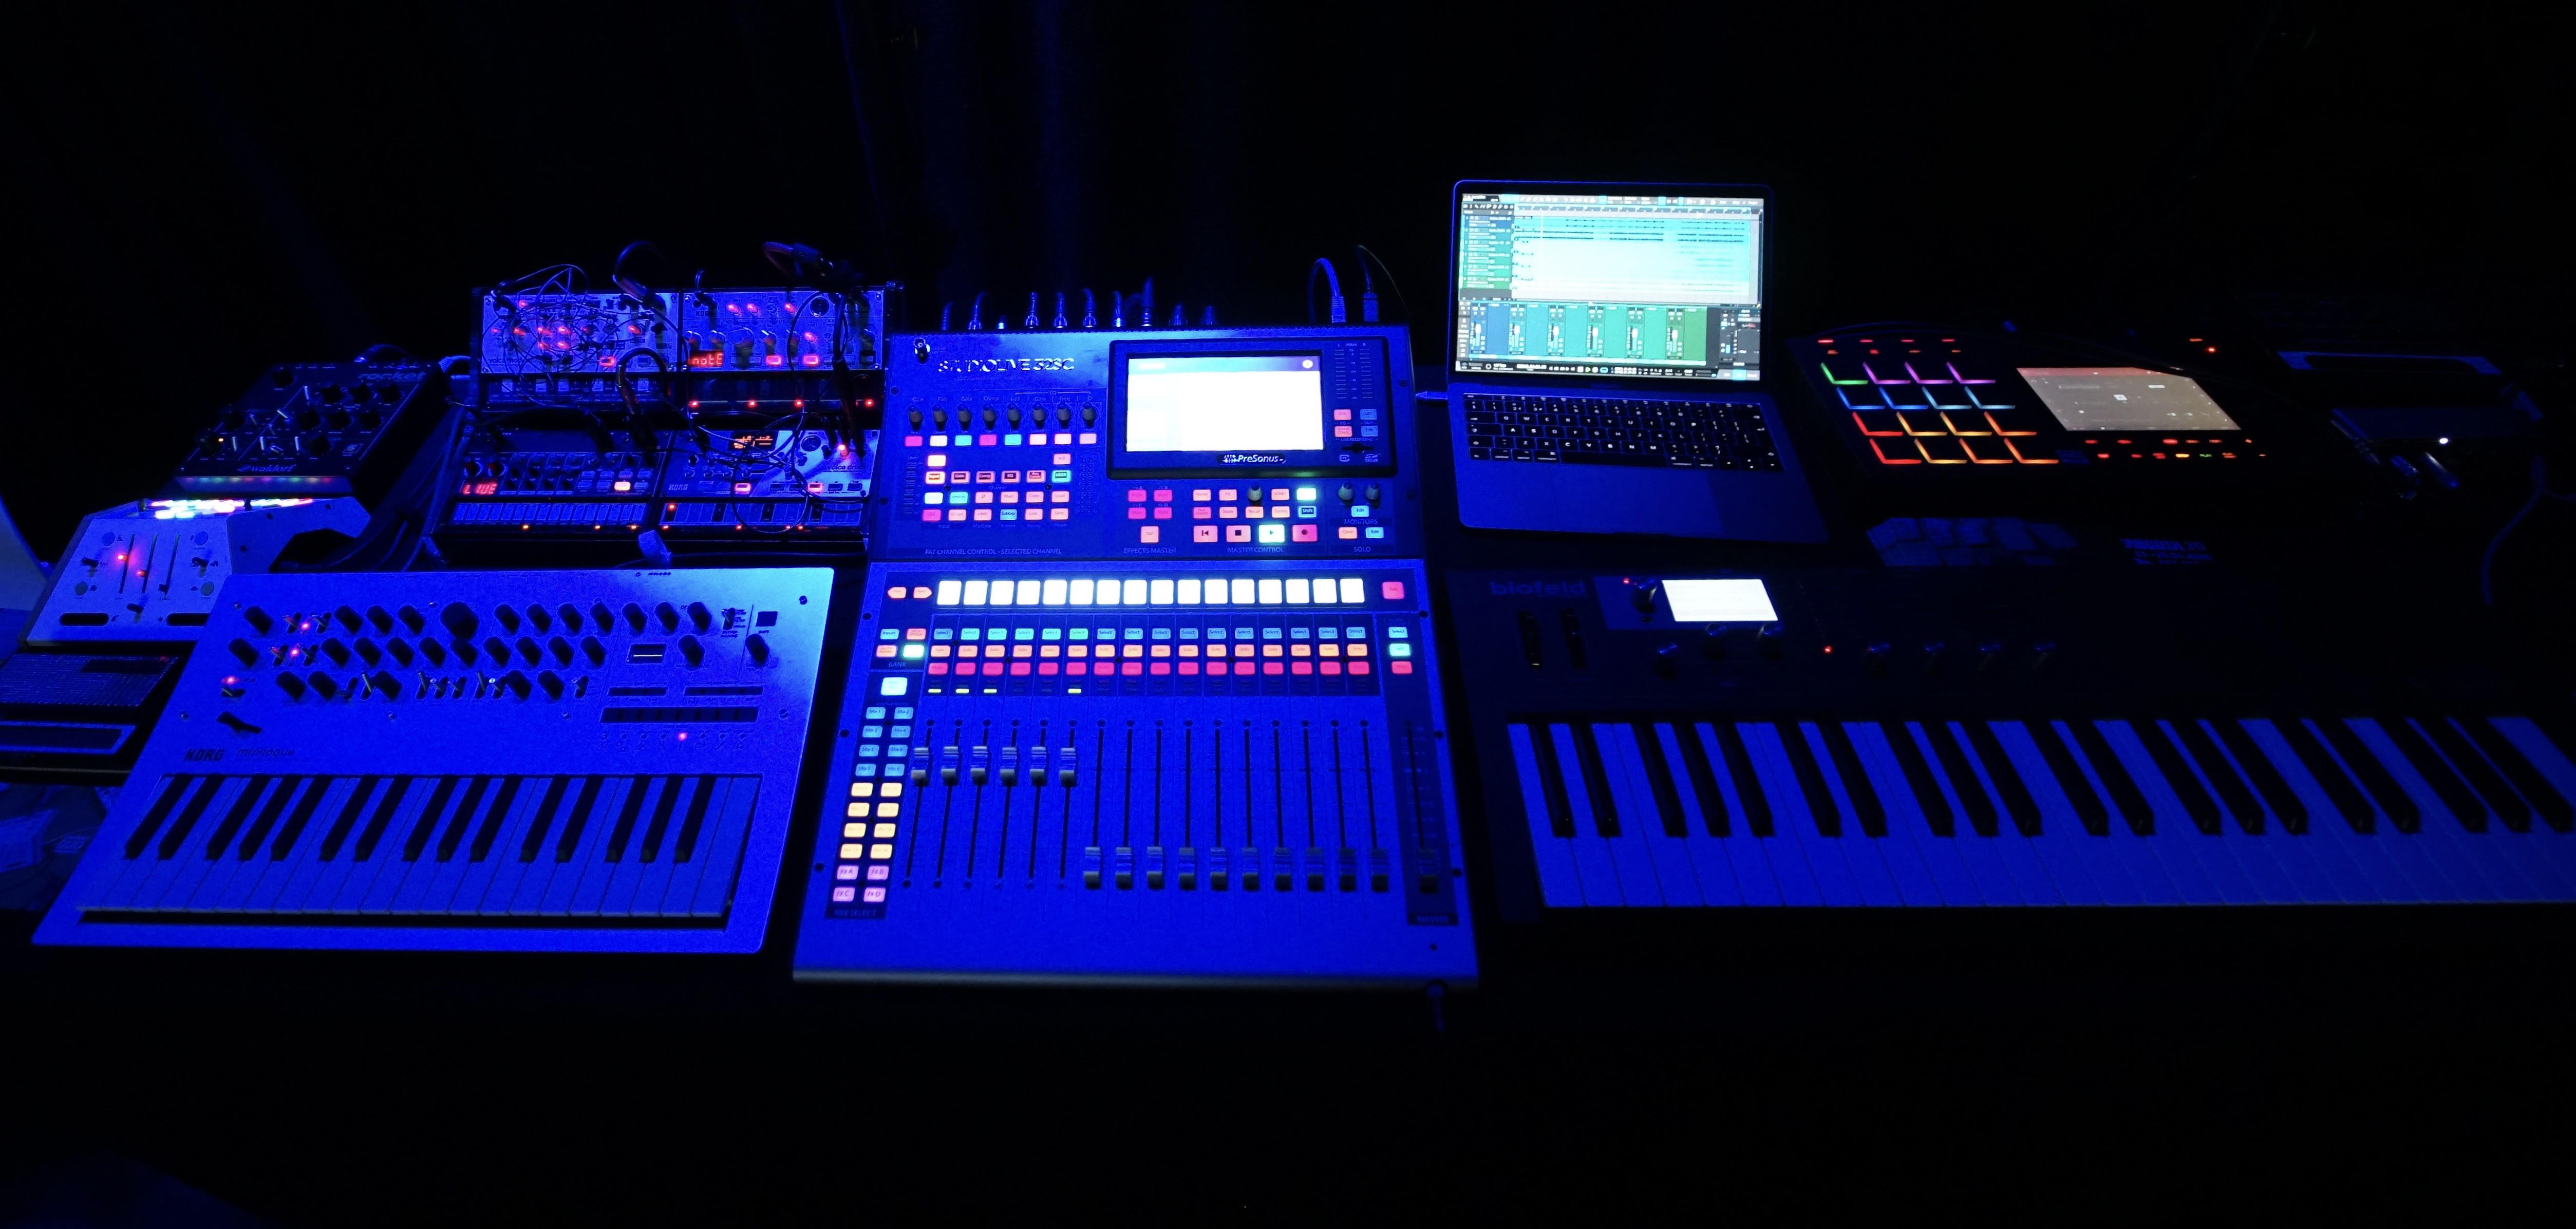
On October 11, our own Software Specialist Gregor Beyerle attended WAVE AKADEMIE Berlin’s Dissertation Presentation of Audio Engineering and 3-D/Game Design to demonstrate the StudioLive 32SC mixer’s DAW mode in conjunction with Studio One. The StudioLive 32SC is the new centerpiece of WAVE AKADEMIE’s “Soundlab,” where a large variety of both hardware and software instruments are accessible to the students.
Students and lecturers alike were amazed by the hybrid workflow of the StudioLive 32SC, which excels at integrating tons of outboard gear (like drum machines and synths) with software instruments, especially when used with Studio One. The ability to assign any channel to send or receive via analog, USB, or network gives WAVE AKADEMIE the flexibility they need in their Soundlab.
The ability to multitrack record jam sessions onto an SD card was also received with great enthusiasm, as it enables the students to record songs directly into the mixer before getting them into Studio One for post production.
Check out photos and video from the event below, and visit Wave-akademie.de for more information on upcoming events!