Tag Archives: Studio One
The Presence 12-String Electric Guitar
It’s difficult to sample a 12-string. The core Presence content includes a 12-string acoustic guitar, but there are no 12-string electrics—so let’s construct one.
One of my favorite guitars ever is the Rickenbacker 360 12-string. Back in my touring days, it travelled tens of thousands of miles with me (Fig. 1).
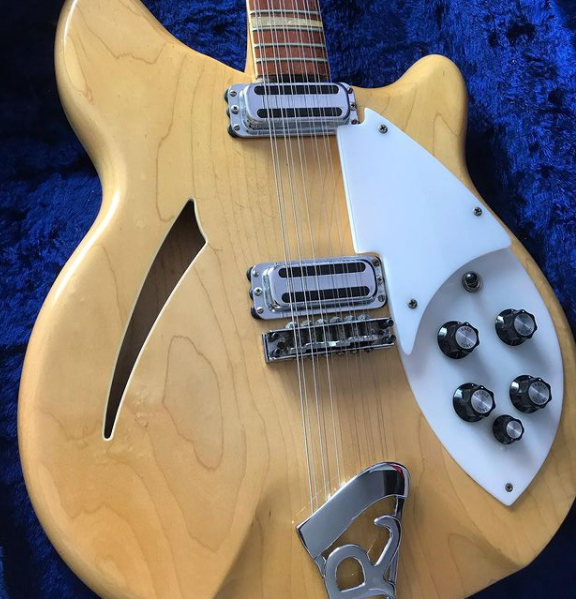
Figure 1: The mighty Rickenbacker 360 12-string guitar. Nothing else sounds like it.
I thought it would be a challenge to try and emulate that iconic sound with Presence. Listen to the audio example, and hear the results.
How It Works
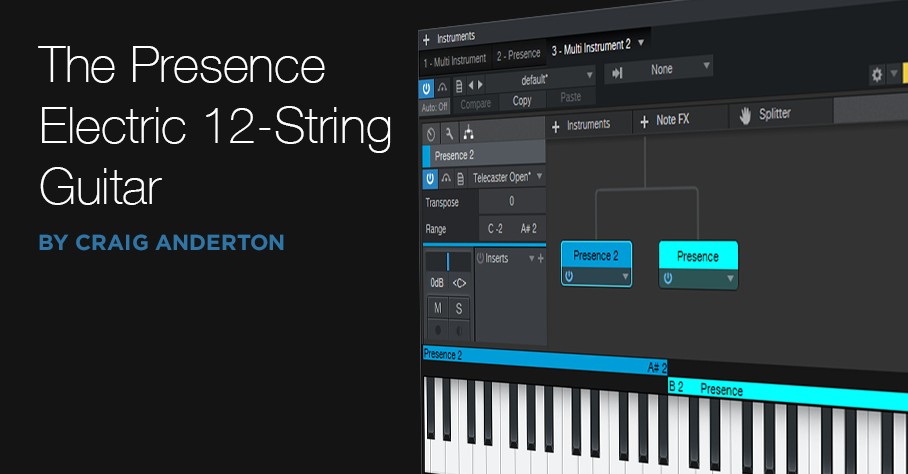
The sound starts with one Presence instance, which uses a 6-string electric guitar preset. Then, we create a second, multi-instrument track with two Presence instances that use the same electric guitar preset. Transposing one of the instances up creates the octave above sound; however, a real 12-string guitar doesn’t have octaves on the 1st and 2nd strings. So, we use the final Presence for a unison sound, and edit the ranges in the multi instrument so they don’t overlap.
Step-by-Step Guitar Construction
- Create an Instrument track with Presence, and load the Guitar > Telecaster > Telecaster Open preset. This guitar sound is closest to a Rickenbacker, but we’ll do some EQ tricks later to get it closer.
- Create a new Instrument track with Presence, and load the same preset. Drag a second instance of Presence into the same track. When asked whether you want to “load the instrument or combine the instrument Presence,” choose Combine. This opens the Multi Instrument window. Load the same preset into the new Presence instance as well.
- In the multi instrument, drag the upper end of one Presence key range down to A#2 (we’ll call this the “Octave Presence”). Drag the lower end of the other Presence key range up to B2 (we’ll call this the “Unison Presence”). Fig. 2 shows the multi instrument window.

Figure 2: The multi instrument window has two instances of Presence—one for the octave above strings, and the other for the unison strings.
- Open the Octave Presence preset. Set Transpose to +12, and Pitch Fine Tune to +5 cents. Then open the Unison Presence preset, and change Pitch Fine Tune to -2 cents.
- Insert an Analog Delay in the multi Instrument channel , with the settings shown in Fig. 3. The reason for the 20 ms delay is because the higher string in a pair of strings gets hit just a little bit late. (We can’t use the Delay in Presence itself, because the mix needs to be 100% delay—no dry sound.) Without this delay, the emulated 12-string doesn’t sound right.
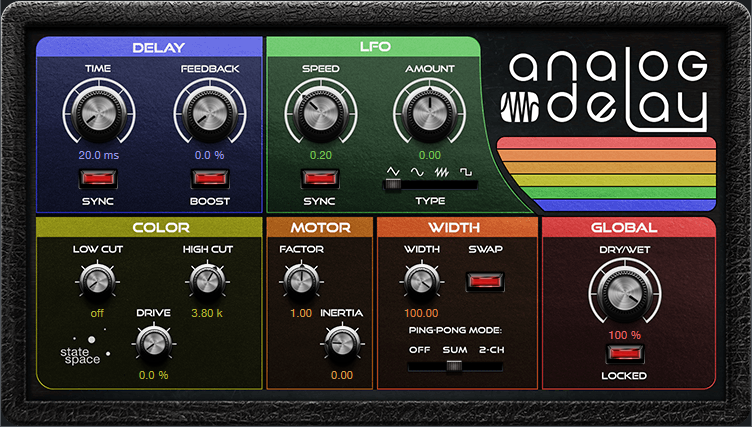
Figure 3: The Analog Delay emulates the delay caused by hitting the octave strings just a little bit later.
Note the High Cut setting—this reduces some of the brightness caused by transposition. The Width settings give a big stereo image, but for a more “normal” sound, turn ping-pong mode to Off.
Your mixer should look like Fig. 4, with two channels (basic guitar, and multi preset).
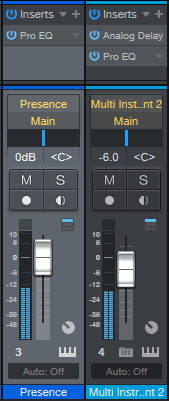
Figure 4: Mixer channels for the 12-string guitar.
Additional Tweaks
The Pitch Fine Tune settings in the multi instrument instances emulate the reality that a 12-string is seemingly never in tune, which accounts for that beautiful shimmering effect. Feel free to adjust your virtual 12-string so that it’s more or less in tune.
Another important tweak is to set the multi instrument channel’s fader about -6 dB below the main guitar sound. The octave strings on a 12-string are thinner than the strings with standard pitch, so they generate less output. This isn’t true of the 1st and 2nd strings, but that’s fine. With the octave strings a little lower, there’s a better balance.
Bring on the EQ
And finally…the coup de grâce to get us closer to the iconic Ric sound. On the main Presence instance, use the EQ in the Bass range. Boost 3 dB 3200 Hz, and pull the lowest slider down all the way. On both multi instrument instances, pull down the highest and lowest sliders (Fig. 4). Then, insert a Pro EQ in each mixer channel.
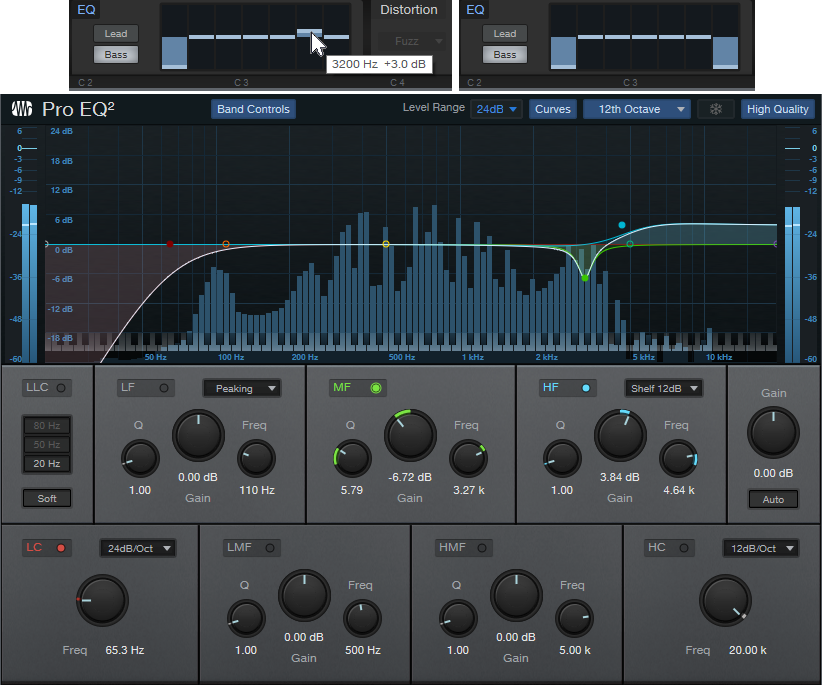
Figure 5: These EQ settings help get “the” sound. Clockwise from top: EQ on main Presence, EQ on the two multi instrument Presence instances, and Pro EQ placed on both mixer channels.
The narrow cut in the Pro EQ at 3.27 kHz helps reduce what sounds like some bridge “ping” in the original Telecaster samples. But all the EQ settings shown are suggestions. Between the broad EQ in Presence and the surgical nature of the Pro EQ, you can shape the sound however you want.
Studio One 5.2 has arrived. Here’s what’s new!

Driven by a one-two combo of user requests and PreSonus Software innovation, Studio One 5.2 boasts over 30 new features and improvements… here’s a quick ten, with a full changelog linked below. This is a free update to PreSonus Sphere members and Studio One 5 owners, and can be obtained from your my.presonus account or by clicking “Check for Updates” on Studio One’s start page.
Arrange your songs live from the Show Page or Song Page
Use Studio One’s Arranger Track on the Show page to trigger different song sections during playback without missing a beat! You can even control your arrangement from the soon-to-be-updated Studio One Remote… and, actually, multiple Studio One Remote users will be able to control different elements of the same Show simultaneously.
You can also use Live Arranging on the Song Page to experiment with new song structures and arrangements without dropping the beat.
Sound Variations
Extensive support for articulations in orchestral libraries has arrived in Studio One via Sound Variations, with a powerful but intuitive mapping editor that provides tools for managing complex articulation maps. Trigger your Sound Variations from remote commands, key switches, hardware controllers, macros, and more. Furthermore, the new Dynamic Mapping API lets third-party developers enable their VST2 and VST3 instruments’ articulations to be queried by Studio One so that Sound Variation maps are automatically generated. Vienna Symphonic Library and UJAM are already on board.
Score View Improvements
We’ve added Drum Notation and Tablature to the Score view! Tablature supports multiple instruments and multiple tunings, for everything from Strats to baritone ukuleles, and you can even view tablature and standard notation simultaneously. Drum Notation has new symbols for open/closed/half-open techniques to be added as well.
And in standard Score View, notes can be entered into multiple voices for a single instrument; up to four voices can be created per staff.
PreSonus Sphere Workspaces in the Browser
PreSonus Sphere workspaces are also now available directly from the Studio One Browser for easy bidirectional file transfer. Drag and drop stuff from Studio One’s Edit window to your PreSonus Sphere workspace folders.
Splitter is now a plug-in
The Splitter—our powerful parallel processing tool in the Channel Editor—now lives alongside other Native Effects Plug-ins in Studio One’s Browser. If you haven’t experimented with this powerful processing option in the past, you should—and now it’s hard to miss!
Arrow tool Improvements
Genius updates to the Arrow tool make it easier than ever to edit Note Events in the Piano Roll.
Hardware Controller Improvements
ATOM SQ and FaderPort 8 and 16 now play better than ever with Studio One. ATOM SQ now supports Studio One’s Autofill command for plug-in control. Furthermore, you now get up to 8 pages of controls in Control Link for up to 64 individual controls. You can also now edit details of individual Pattern Steps with ATOM SQ.
FaderPort 8 and 16 users will be excited to know we’ve implemented grouping! Use multiple FaderPort 8/16s to create a robust mix setup that’s ideal for your space and process! You can also now deactivate Sends from your FaderPort as well as toggle the metronome and control volume level. Lastly, Studio One’s Channel visibility settings will now also be reflected accurately on your FaderPort(s).
Clip Versions
Now you can make edits to an Audio Clip that don’t affect every instance of the Clip in your Song; apply clip-based edits in Gain Envelopes or Melodyne independently!
New Safety Features
Studio One’s new “Boot with options” menu on launch allows you to troubleshoot problematic plug-ins and other culprits by selectively disabling them after a crash.
M1 Mac compatibility
Studio One 5.2 is compatible with M1 Macs running Rosetta 2.
And more…
Mastering: What LRA Means to You
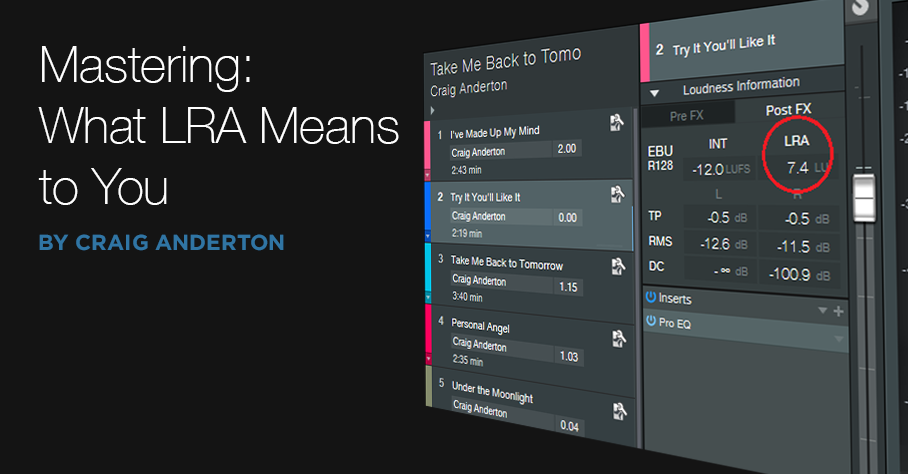 Studio One offers multiple diagnostic tools. We covered the LUFS loudness measurement (based on the R128 loudness standard), in the context of creating consistent levels in a collection of songs. But what about that mysterious LRA reading to its right?
LRA stands for Loudness Range. A complex algorithm measures loudness, analyzes how it’s distributed throughout a song, determines a song’s dynamics properties, and represents that with a number. The lower the number, the less dynamics. (Note that this is not about dynamic range, but rather, musical dynamics.)
Dynamics don’t reflect recording quality. Some songs have lots of dynamics, some don’t. Dynamics may or may not relate to whether the music is compressed or limited—heavily compressed music can still have major loudness differences, whereas music with light compression may not have much dynamics at all.
An Artistic Measurement—Not So Much a Technical One
LRA is more interesting from an artistic standpoint than a technical one. There’s really no “typical” LRA reading for various genres, aside from broad generalities: Classical music is most dynamic, so you can expect LRA readings of 9 or more. Country or jazz will have less dynamics; a reading of 6 to 8 is typical. Rock and EDM often hit around 5 to 6, and hip-hop, 5 or less. But again, LRA readings vary all over the place within any specific genre, as well as within an album. On my most recent album, LRA readings varied from 4 for a slamming, full-tilt track up to 10 for a longer, more nuanced song.
My main use of LRA is checking out soundtracks intended to go behind narration or industrial videos, because excessive dynamics can distract from the messaging. If there’s a high LRA reading, I’ll tweak the level automation as needed to smooth out variations. (Of course, I’d hear any problem variations when assembling the video, but prepping a track beforehand saves time.)
Conversely, if I want some sections in a rock track to really pop in contrast to sections that are more sedate, the LRA reading will confirm whether that goal has been met. If not, I might want to re-consider making the parts that are supposed to be quiet quieter, and then supercharge the dramatic sections. This isn’t only about changing levels. For example, the part that’s supposed to hit harder might benefit from a screaming lead guitar overdub, and more drums.
Do Dynamics Really Matter?
People might assume EDM doesn’t have a lot of dynamics, because they think of four-on-the-floor kick drums. But while researching various pieces of music for this post, I found that my favorite EDM artists tended to make music with more dynamic range—often more than typical rock songs. Coincidence? I’m not sure. But it makes sense that if a DJ wants to take you on a journey over the course of a set, that would involve dynamic variations.
Dynamics are a part of music. If all your songs have LRA readings of 3 or 4, there may not be enough changes in dynamics to keep listeners engaged for more than a few songs…but maybe your intention is to create a hypnotic groove, in which case a low LRA reading could be totally appropriate.
Ultimately, LRA isn’t about rules, but about data. How you use that data is up to you, but I hope you now have a better understanding of what that data means.
Luke Mornay: Twenty Five Ten
We’re extremely excited for our good friend and recording artist Luke Mornay on the release of his new album Twenty Five Ten which has already grabbed a 5-Star review on New Sounds UK!
Let’s find out more about what he’s been up to with this project as a longstanding user of PreSonus hardware and software for his musical endeavors through the years.

Luke: I’m a producer / composer and mixing engineer best known for my remixes for Kylie Minogue (a Grammy-nominated Billboard #1), The Killers, Robbie Williams, Bob Marley and Amy Winehouse–to name but a few–I just produced Twenty Five Ten, an album in homage to my late mother.

It has sounds for here and now, rooted in decades of influences and experiences.
Featuring successful collaborations with Kevin Godley (10 CC, Godley & Creme), model Roxy Horner, Nick Tart (Diamond Head), Rachael & James Akin (EMF), Lucy Pullin (The Isle of Man, Robbie Williams), Melanie Taylor, Flora, Phat Hat.
My 18-track album was recorded in various places such as Brisbane (Australia), Tel Aviv, Mallorca, Brussels, Los Angeles, Dublin, Katowice (Poland), and Baton Rouge (USA).
Besides my emotional motivation to get this project done, I really wanted this record to connect genres, eras, and mix generations. Somehow connect the dots between timelines in a unified story, with its joyful and bonkers moments, with its own directions and contradictions, or more simply put: my story.
I have a rock-solid PreSonus eco-system based around a Quantum 2, FaderPort 16, and ATOM, nothing superfluous—they all have a purpose. The FaderPort 16 is giving me the gestures I’m used to when balancing tracks on a console; the vibe is based on even relationships between instruments.
It’s a different experience, and the decisions I’m making helped me to assign a more prominent role to sounds buried in a mix, with fingers on all faders I’m sorta painting a sonic picture based on my impression. With a mouse it’s also achievable, but it’s more cerebral; it’s laser focused, and less expressive.
The ATOM is perfect when I want to jam with drums or synth shots. It’s perfect for fortunate accidents! I come up with ideas I wouldn’t get from a keyboard. In some of my remixes I like to slice vocals that I then drop into impact to create what we call “vox lox” to build new lines, for example that was a centerpiece of my Kim Wilde Kids In America remix. The new chorus idea was all done with Impact XT and the ATOM.
Quantum 2 is just brilliant, it’s been my companion in so many tasks, it’s never let me down. As musical director for a Native American show I’m in charge of, I used this thing on stage in large venues with thousands of people, the sound was amazing and so stable. I also mixed a full season series for a TV network; a short film for Disney; sound mix for HBO; my album and remixes—it’s been so reliable and with a constant, pristine sound. It fits perfectly in my backpack, so I’m super mobile.
For what applications are you using Studio One Professional?
I’m working 100% in the box and I’m using Studio One for everything and anywhere.
I usually work from home, and when necessary I just take my laptop to a commercial studio, plug my Quantum 2 to their system, launch Studio One, and I’m set. I can do the adjustments I feel are needed and go back home.
My album was also mastered that way, I’ve had a reliable listening environment there, and all songs loaded into the project page. The big plus was when I felt that I was doing too much tweak, I could just open the song, fix whatever was needed with one click and go back.
Lately besides my remixes, I’ve been asked to mix a couple of original songs from the ’80s/’90s on which I’ve been given the multi-tracks, such as Fine Young Cannibals, Shakespear’s Sister, or Bananarama to name but a few.
I could really set up Studio One to be ready at all time and nicely organized like a vintage console, and now with Version 5 Professional, I can switch between an SSL or Neve sound in just 2 clicks. That’s fantastic.
What led you to choose Studio One?
Studio One is just another part of me, it never gets in the way. It’s a companion standing in front of me that is always ready for war.
The interface is very clean and soothing in a way, it always feels like some quietness before the storm. It also sounds great, fully-featured and with the Project page, you can virtually do anything within ONE app.
These days as a musician you have to wear so many hats that the last thing you want is distractions and learning curves on different apps. With Studio One I can produce, compose, mix, and master with features located in familiar places.
What Studio One features have proven particularly useful and why?
The drag & drop concept, be it for sounds, presets, instruments, or FX. This thing is a home run. When I feel that I’m not going to be in a productive mood, I spend a lot of time organizing all of the above for future sessions.
How does Studio One compare to other DAWs you have used?
 This software brings me peace of mind, and that’s priceless. PreSonus shines by making huge steps at their own pace with three priorities: the user experience, consistency and coherence.
They can be the adult in the room in a world where feature lists to sell new major updates are prioritized over the quality of their achievement.
With backward compatibility, if something is poorly implemented from the start, then you’re stuck with it until the end of days. We all love new features, of course, but it shouldn’t come at that price.
So when I see something not yet available in Studio One, I just tell myself: “If you can’t make music with what Studio One has to offer today, maybe you should just quit.” The kid in me is not a fan of that sentence, but it’s a nice motto to move on.
Which Studio One feature or concept doesn’t get enough spotlight (or isn’t talked about enough) in your opinion?
Without a doubt I’d say macros, they can be really powerful, I remember doing one for a friend of mine, he was new to Studio One, he was looking after a way to slice and map samples easily.
So I came up with one that analyzed the loop, detected transients, sliced at transients and sent them to Sample One XT, it was so good that I’ve added it to a shortcut and ended up using it myself. I’m thinking of sharing it with the community.

Any useful tips/tricks or interesting stories based on your experience with Studio One that would be of interest to our user base?
During the lockdown with friends we’ve had some virtual sessions, we were sending ideas back and forth and it appeared that none of them used MusicLoops, they were saving their ideas or overdubs as songs.
I told them that I have a folder called ideas, so every time I try a new synth or jamming with a virtual instrument, I just drag & drop it to that folder, and it then becomes an asset for my future project. Everything is saved in a single file with an audio version, MIDI, presets, and FX used all in one go.
From time to time, I like to browse that folder to see if there’s anything inspiring or useful.
That’s basically the story of the opening track on my album, I’ve had this nasty groove made with Impact XT floating around for some time, and one day it was the right idea for the mood I was in.
Never lose your ideas, phrases and so on, don’t expect to remember anything two years or two months from now with random or cryptic names… Just drag and drop in a place, where you’ll find your sparkles of ideas at all times!
Any final comments about PreSonus and Studio One?
I always found the name intriguing, now that I see how powerful it’s become over the years, and on its way to become the ultimate DAW, I take it that it was not just a name… it was a plan.
PreSonus Sphere Members: check out Luke’s newest Studio One Presets on his Featured Artist Profile!
Facebook | Instagram | YouTube | Spotify
Website : www.lukemornay.com
Pro Tools Multi-Mono Mode with Studio One
A fundamental difference between Pro Tools and Studio One is effects handling, which can be confusing for Pro Tools users switching to Studio One (and yes, this tip is based on a true story). When you add an effect with Pro Tools’ mixer insert, you’ll see options for Multichannel and Multi-Mono effects—which Studio One doesn’t have.
Or does it? Actually, not only can Studio One emulate the Pro Tools Multi-Mono mode for people who’ve switched, but there are some advantages that are relevant to Studio One users.
In Pro Tools, Multichannel effects are like what we’re used to in Studio One (and other programs), where the effect processes a mono or stereo track. However, Multi-Mono effects insert separate effects for a stereo track’s left and right channels. Normally this is transparent to the user because the effects are linked, and have a single interface, so they seem like a Multichannel effect. However, Multi-Mono’s particular talent is that you can unlink the effects from each other, switch between the two channels in the interface, and process the two channels (or more, for surround) separately.
My Pro Tools friend was disappointed, because he would often use this feature when mastering, restoring tracks, working with two-track audio sources, and the like. For example, when prepping a file for mastering, he sometimes limited one channel to tame peaks, left the other channel with minimal limiting, then added a master limiter at the output to provide overall limiting (this isn’t the same as using a conventional stereo limiter, and unlinking the two channels). On occasion, the different channels needed different EQ as well.
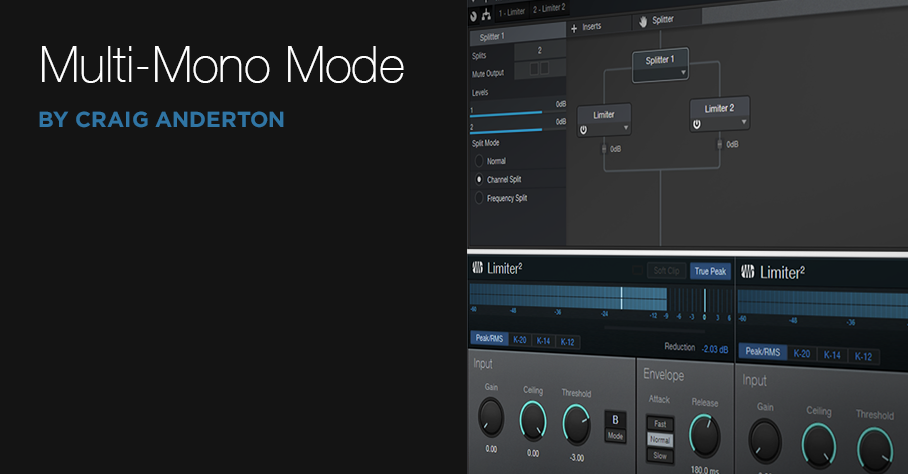
He knew about my Stereo to Virtual Mono blog post, but wanted to have everything in a single track, like Pro Tools. Fortunately, there’s a simple solution (Fig. 1). As an example, let’s use his scenario of wanting different limiters in each channel.
Figure 1: How to implement Pro Tools’ Multi-Mono effects functionality in Studio One.
- Open the Channel Editor, then click on the Routing button.
- Drag a Splitter into the Routing window.
- Set the Split Mode to Channel Split.
- Insert a Limiter2 into each split.
- (Optional) Insert a Limiter2 at the output, to provide the final limiting function.
Done! Now the left and right channels have their own limiters. But the Pro Tools guy also realized there was an advantage to Studio One’s pseudo-Multi-Mono mode: he didn’t have to switch between Limiter interfaces. Instead, he could pin them, and see both at the same time. When I reminded him he could bring out the Gain, Threshold, Ceiling, and Release controls for each Limiter to Macro knobs, save that as an FX chain, and use less screen real estate…let’s just say he was a happy camper.
This isn’t to diss Pro Tools, which (like any DAW) does some things well, and some things not so well. But it does show that when switching from one program to another, concerns you may have about needing to give up a favorite feature could be irrelevant.
Create Ampire Cabs with Pro EQ2
IR-driven cabs are often the weak link with amp sims Fortunately, cab emulations have improved dramatically over the years. Yet like samples, they remain “frozen” to a particular cab—they have their sound, and that’s it.
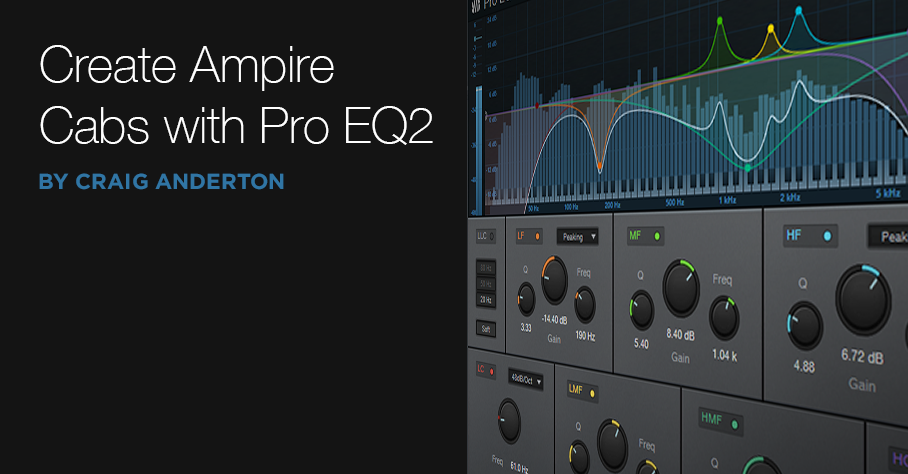
Although some guitar players think that a cab is a magical device, it’s really just a filter. To be sure, it can be a magical filter…but it’s still a filter. So, we can use filters to create our own cabs. They won’t be able to replicate a specific cabinet down to the smallest detail, but that’s not the point. Using the Pro EQ2 filter to create your own cabinet can give responses that IRs can’t give, with a different sound that can be satisfyingly smooth, and…well, “analog.”
I analyzed the frequency response of several cabs, using the Tone Generator’s pink noise along with the Spectrum Analyzer plug-in, then tried to replicate the response as closely as possible with the Pro EQ2. Although sometimes I was shocked at how close this could come to the cab, more often than not I couldn’t help but make some tweaks—it’s almost like I had taken that cab, brought it into a woodworking shop, and made specific changes for my needs.
If you want to experiment…be my guest! Insert Ampire, choose your amp (I particularly like the following curves with the VC30), select no cab in Ampire (important!), insert the ProEQ2 afterward, and rock out. Here are some ideas to get you started. Note that the white curve is the sum of all the other curves, so that’s the curve you actually hear.
This curve is based on a 1 x12 cabinet that’s designed for leads, but works with rhythm parts as well (Fig. 1).
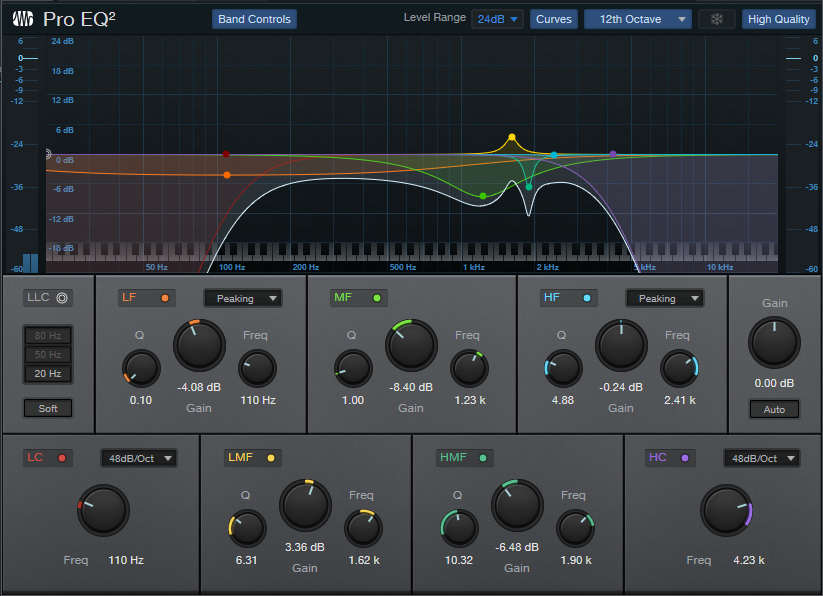
Figure 1
Here’s a curve that’s more “Tweedish” (Fig. 2)
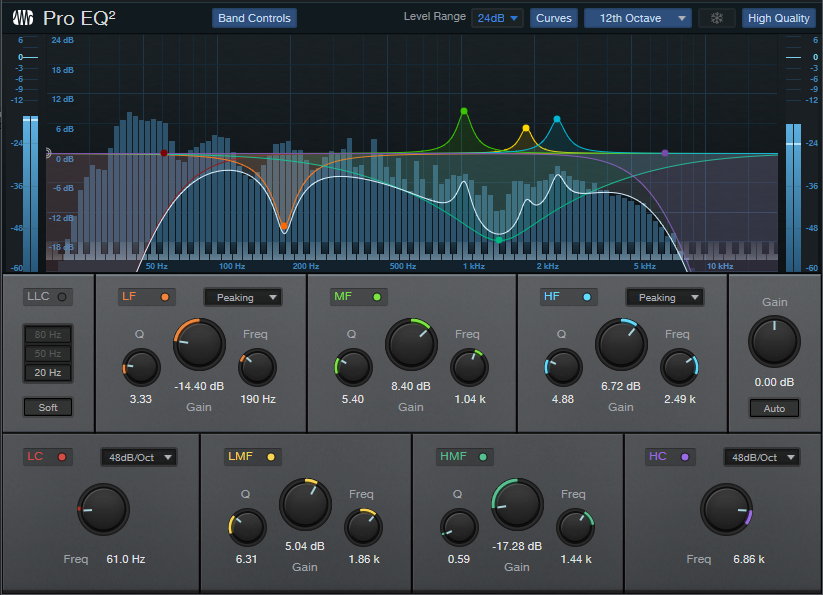
Figure 2
This curve (Fig. 3) is based on an amp by a company that no longer makes amps, but whose name I better not mention so that I don’t have to deal with lawyers. Suffice it to say they’re known mostly for making guitars that are popular with rock guitarists.

Figure 3
And here’s one more…just because we can (Fig. 4)! It’s based on a 2 x 12 cab.
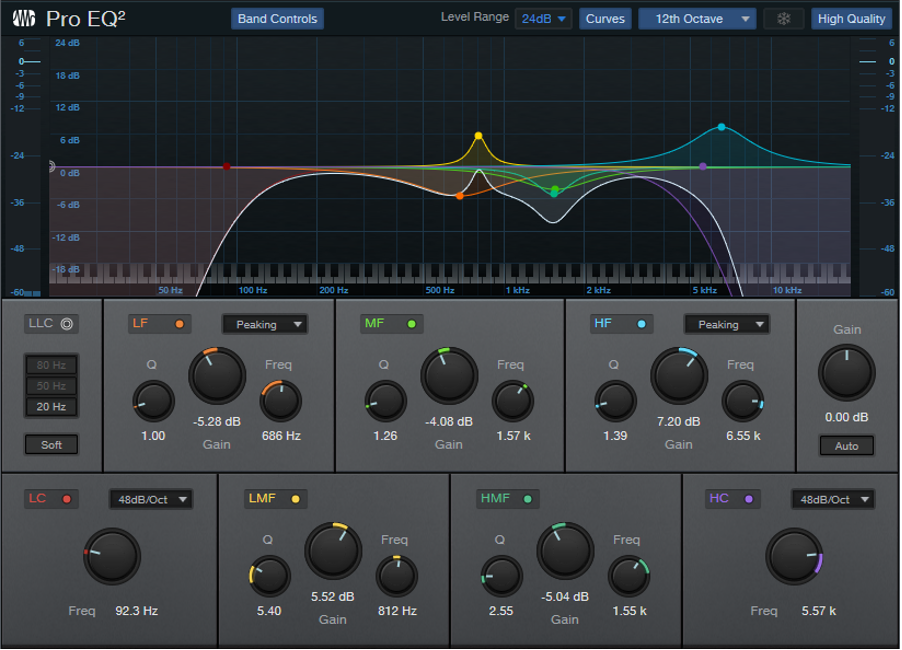
Figure 4
These all have two elements in common: high-frequency rolloffs, and interesting resonances. Although “EQ cabs” may not replace IRs, they’re not supposed to—this is about augmenting your options. Nonetheless, in many of my current productions, I prefer using the Pro EQ2-based cabs because it’s easier to tailor them to fit in with a specific mix.
For this week’s tip, I’m not providing presets because this isn’t about presets—it’s about editing an “analog” cab to give the sounds you need for your productions. So, the “best” curve will depend on what works best with your guitar, playing style, and production goals. In any event, I think you’ll find that constructing your own cabinet can provide a musically useful, and novel, way to expand on what IR-based cabinets can do.
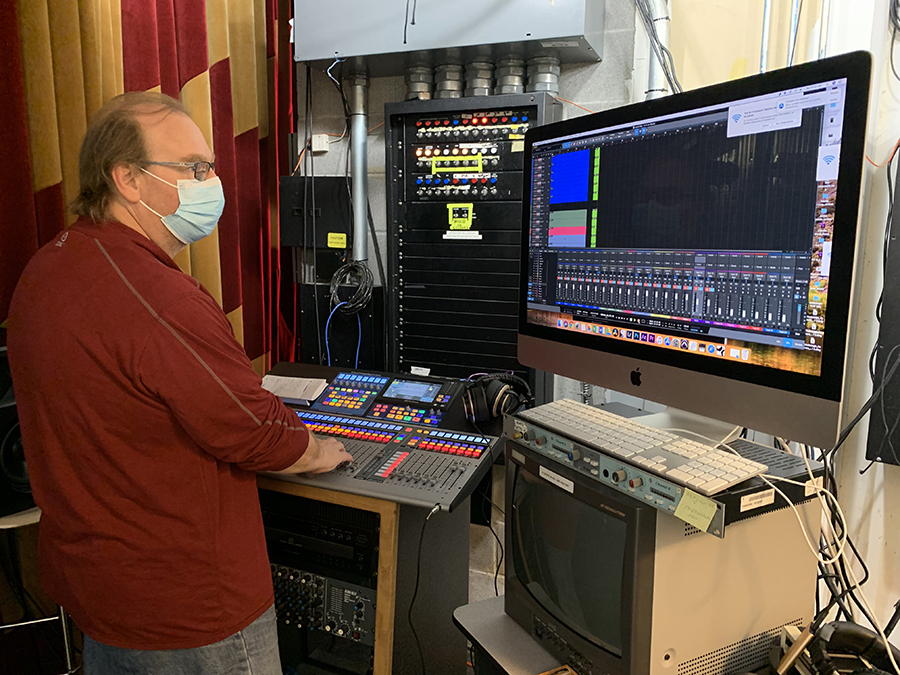
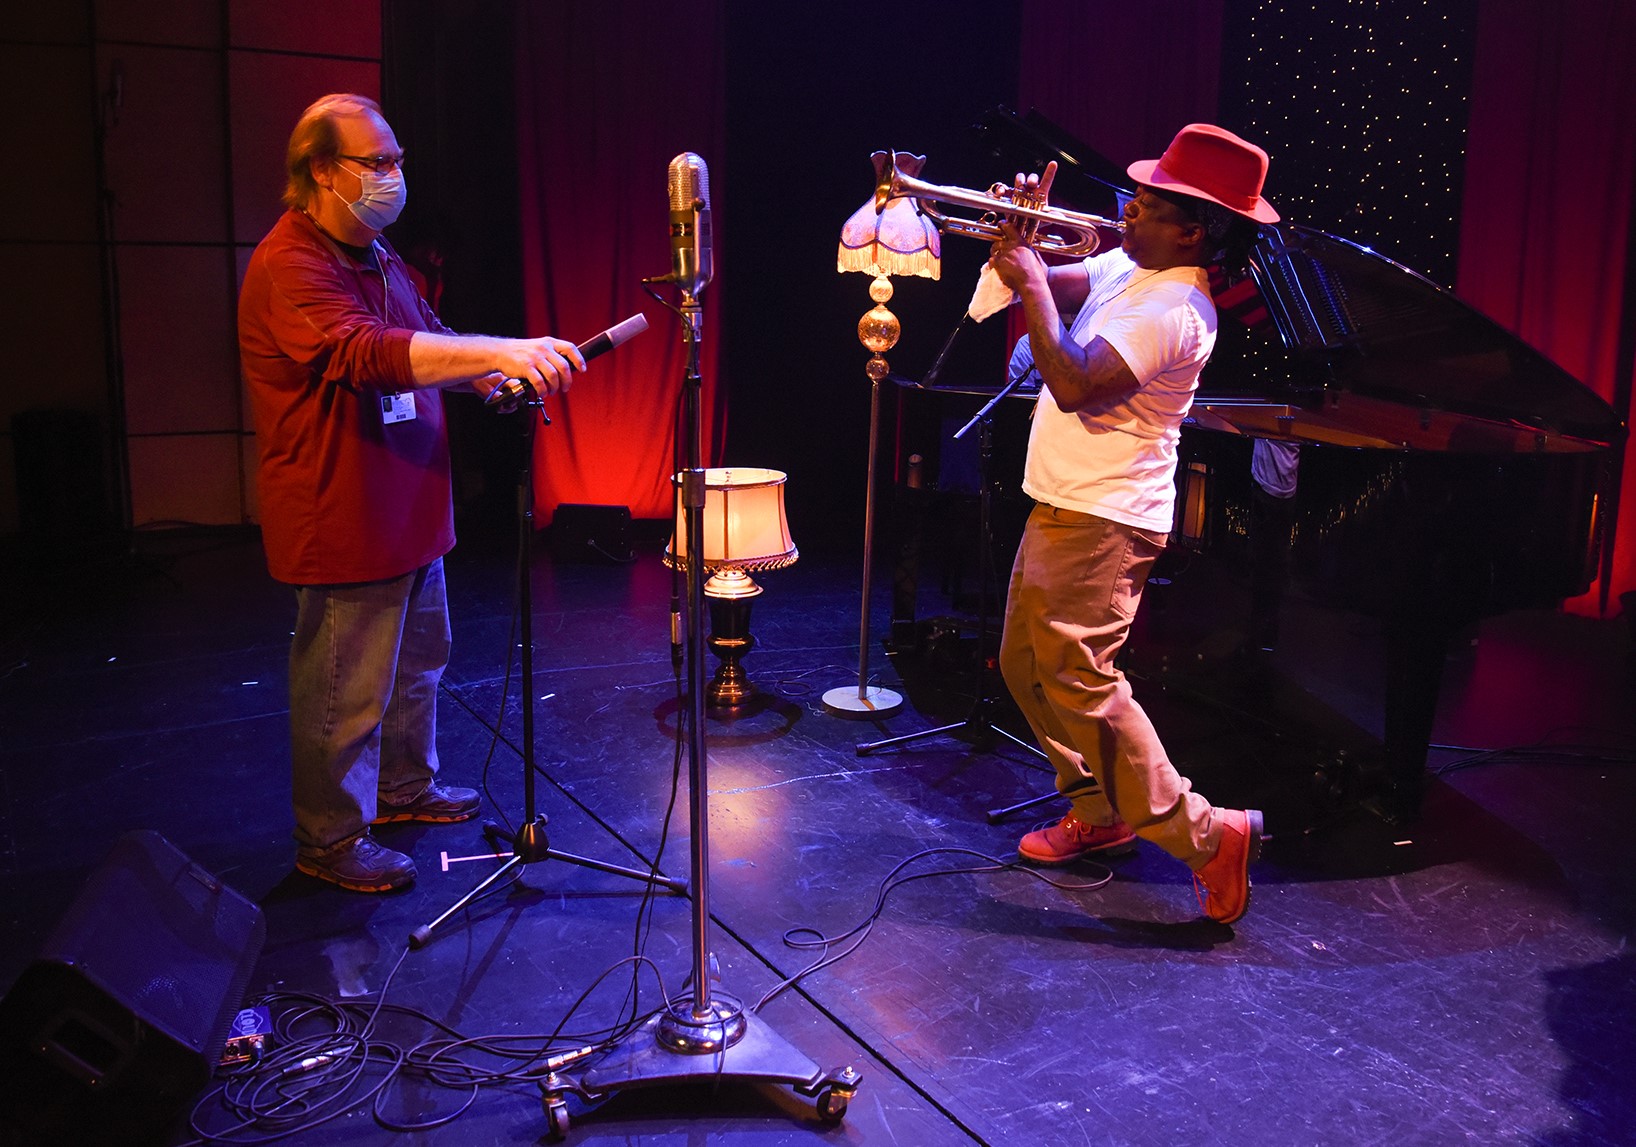
Home For The Holidays: Steve Himelfarb On Using The StudioLive 32S With Studio One At NOCCA
Home For The Holidays is a free virtual concert featuring holiday music by some of New Orleans’ favorite musicians including Jon Batiste, Preservation Hall Jazz Band, Irma Thomas, Kermit Ruffins, John Boutte, and others.

(click photo for NOCCA event details)
The performances by Irma Thomas, John Boutte, and Kermit Ruffins were recently tracked live at the New Orleans Center For Creative Arts (NOCCA) by professional recording engineer and faculty member, Steve Himelfarb using the PreSonus StudioLive 32S digital mixer and Studio One DAW software.
Let’s get to know him a bit better and hear what he has to say about integrating Studio One and StudioLive for use in live recordings!

Steve began working in recording studios around Los Angeles when he was about 18, doing the midnight til 9:00 a.m. cleanup shift at Cherokee Studios. As a result, he had priceless experiences including meeting Mötley Crüe (still one of the loudest he has ever heard to this day) when Roy Thomas Baker was mixing their debut record. Another fond memory was that of Ray Manzarek producing X’s Wild Gift during the heyday of the 80s music scene.
“Cherokee was super rock & roll, yet they were very strict with what they wanted from their cleanup people. I was taught how to conduct myself as a young would-be recording engineer,” Steve fondly recalls.
At 19, Steve began working for Capitol Records in the famed Capitol Studios building putting in a solid five years of work. Some of his album credits include Sheila E’s first album, Crowded House’s Crowded House, Bob Seager’s Like a Rock, Dwight Yoakum’s GTRs Cadillacs and Tori Amos’ Y Kant Tori Read. (Fun Fact: Tori and Steve have been friends since high school.)
Steve moved to New Orleans at the age of 25, and the first record he engineered in town was Buckwheat Zydeco’s On A Night Like This, which was produced by Chris Blackwell and nominated for a Grammy. He subsequently bought the studio that he worked at in the late 80s and rebuilt it with a Neve console and Studer tape machine. In 1993, Steve sold that studio and took a couple years off, sort of. To date, he has worked on 15 gold and platinum records and has five Grammy-nominated record credits to his name.
 Teaching himself to bake, Steve decided to open a small restaurant in the French Quarter of New Orleans called Cake Café, and became affectionately known as “The Cake Man” in the Marigny district. After 13 years of business (fast-forwarding past Hurricane Katrina to about four months ago), he sold the restaurant and wrote a cookbook.
Incidentally, around three years ago (after encouragement from Tori Amos) he started getting back into recording again and dove headfirst into the world of digital recording using Studio One.
Here are some thoughts by Steve, in his own words:
I really like the workflow of Studio One. It feels like I am working on a console and not a computer. The drag-and-drop integration is such a great feature. The plug-ins are very musical. Lately, my go-to has been the VT-1 on the stereo bus.
Using the StudioLive 32S in a live recording situation is wonderful. In all honesty, this type of setup used to be such an involved task with a mobile recording truck and countless hours of set up. The StudioLive 32S, along with the NSB digital stage box, is such a game-changer. Total set-up time takes about an hour. The sound is clean. I like the Fat Channel limiters. They are kinda my safety net against clipping in dynamic situations. I have used the StudioLive 32S on about eight projects over the past year, and it is truly a sturdy piece of equipment for such demanding situations. In live recording situations, you just need to count on your equipment and the StudioLive has always performed excellently.
 I really like how the company has developed the workflow of the recording studio in the current digital age. I could see how, about six years ago, PreSonus was ahead of the pack in their development of studio ecosystems. Now everyone is building small-format consoles and integrated systems.
Developing young artists has always been a large part of the work I have done. Teaching at New Orleans Creative Center For The Arts (NOCCA) is a natural extension of the work I love.
To learn more about this historic pre-professional arts training center for high school students in Louisiana, please visit and support them at: https://noccainstitute.com/ and https://www.nocca.com/
Extended Range Guitars With Ampire: Meet The Bunn, Nick Hill & Gary Hiebner
 The Bunn

The Bunn (a.k.a. Scott Sokoloski) is a stoked dude from Canada who makes low-tuned, heavy music despite wearing guitars incredibly high, with very short straps.
After a life of touring and gigging throughout North America in bands, The Bunn started producing his own music, back around 2010. Super-low tuned stuff. Not djent though, and not with 7 or 8 string guitars. The tunes are a post-sludge/ doom kind of thing and with extra long-scale, 6 string baritone guitars.
Besides creating and producing material for Foreigns, Wetlands, & Venns, “The Bunn” is forever busy sharing production and practical techniques in working with super-low tuning and getting music done on his YouTube Channel.
Nick Hill
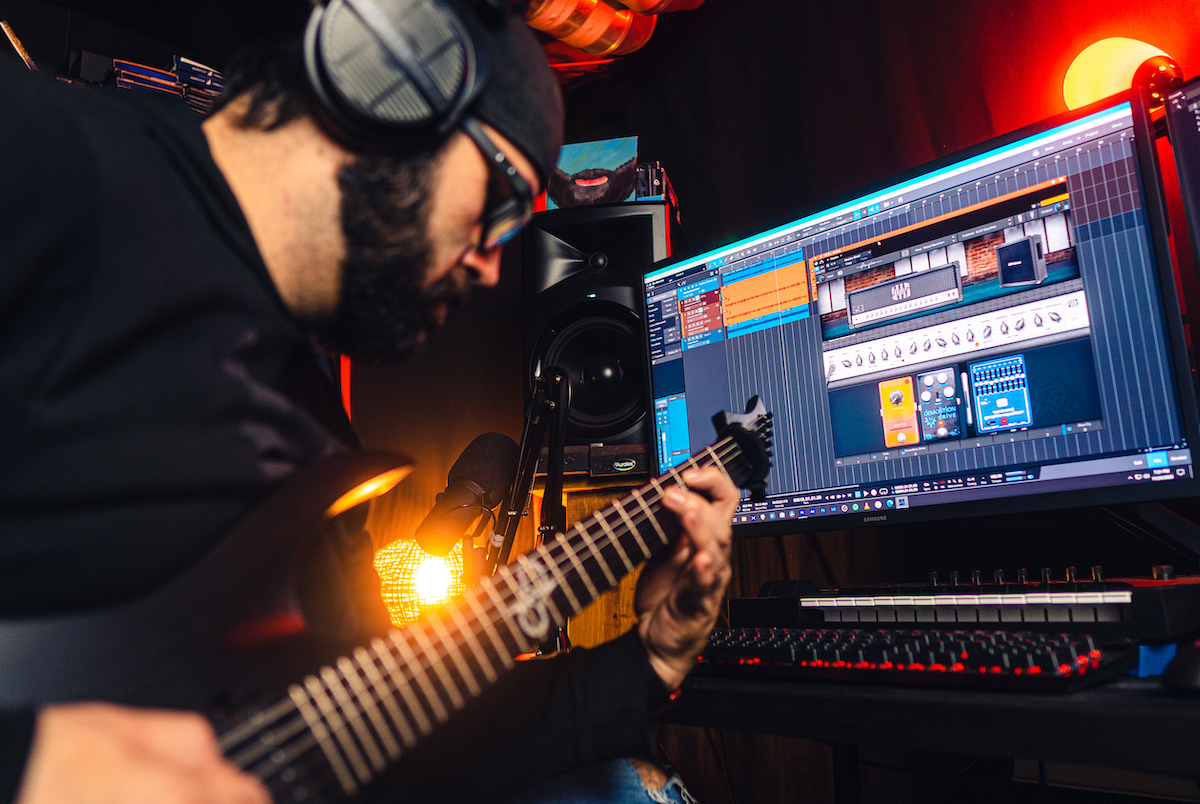
Guitarist, producer, sound engineer and Solar Guitars Artist, Nick Hill runs his YouTube Channel focuses on mixing, metal, and tones. There, he shows how to create modern metal guitar tones, mix, master, and learn the process of music production.
He operates on Spotify both a solo artist and as part of a project called The Partisan Component with Jeff Plewa, an amazing metal vocalist.
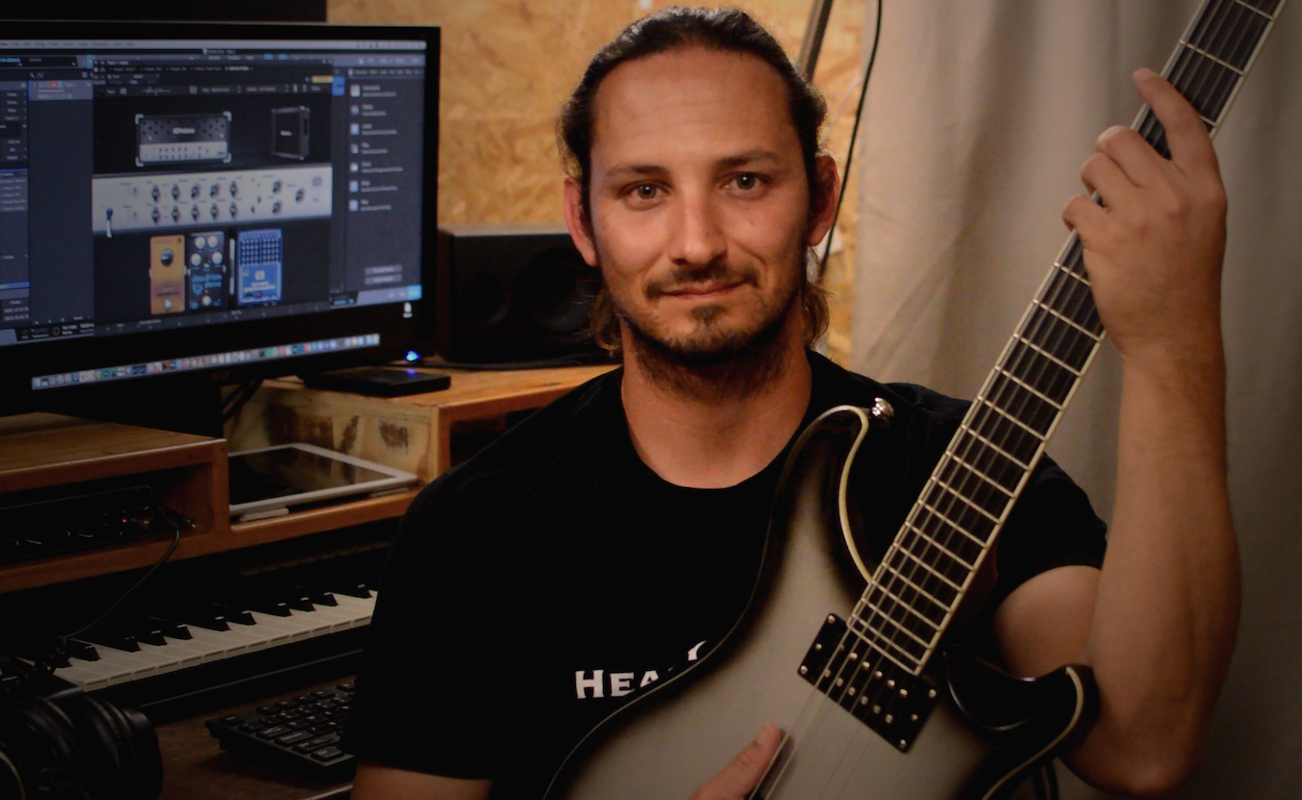
Gary Hiebner
Gary Hiebner is a South African guitarist, music producer, content creator, and YouTuber. He started off as a guitarist in the South African music scene in the early 2000’s and from there gathered an interest in music production.
Through learning the different software audio applications available Gary developed a keen interest in music tuition and for the last 8 years he has been creating and providing music tutorials courses on many of the audio DAWs, plugins and effects available on different teaching platforms.
Currently he is a course creator at Groove3 and he also runs a YouTube Channel (Heavy Tones) where it focuses on heavy, low tuned guitars productions and how to get the most out of your heavy low tuned guitars… from dialing in a killer tone for low tuned guitars all the way to guitars setups for low tuned guitars. Also, be sure to check out his new series at Udemy: Advanced Tips and Techniques in Studio One
Because of their depth of work and respect in the extended range guitar online community on YouTube, PreSonus was so fortunate to have these three gentlemen so graciously and enthusiastically help out with creating most of the Presets (and sound examples on our website) for the recent PreSonus Ampire High Density software add-on pack that was just released. Thank you so much for your time and effort guys!
Let’s get to know them a bit better and how their workflow history intersects with PreSonus hardware and software.
PreSonus: How did you discover Studio One?
GH: I started off working in ProTools probably in about 2004, and then moved over to Logic in about 2006 and used that for a good couple of years. But around 2012 I started using Studio One alongside Logic. But I found myself preferring the workflow of Studio One. The interface is smoother and cleaner and with the new updates they have really been adding some great features that help my workflow.
TB: Initially through owning PreSonus hardware (since the FirePod and FireStudio, currently STILL using an AudioBox22 VSL which has been super solid for the last 5 years!). Bundled with the interface was an “Artist” version of Studio One. I’ve really taken to it in recent years (Studio One Pro) since connecting and collaborating with fellow YouTuber, Nick Hill. Nick is a veteran Studio One user and a great mixer. In our musical collaborations everything happens in twin setups of Studio One so that Nick can seamlessly go to the mix stage.
NH: I was definitely a little late to the Studio One party. I recall my early days of audio recording exploration, this would have been the early 00’s, using early versions of DAWs like Digital Orchestrator Pro and then moving into Reaper thinking THAT jump was massive. I tried various other offerings and my best friend Lenny had discovered this DAW called Studio One. At this point, it may have been toward the end of Version 2’s life cycle but we jumped in headfirst and the rest, as they say, is history.
PreSonus: If you explored Ampire in previous versions of Studio One, what are your thoughts on it now versus then?
TB: I started to pay attention to Ampire in Version 4, of particular interest was the “Double”. I’m a huge fan of Rectifiers and needed to try it. The amp itself sounded pretty great, however Ampire as a environment was missing some key functionality and features in order to make it part of my regular routine.
NH: I remember trying early iterations of Ampire and thought, “oh this is neat, but I won’t really use it.” The personal workflow I’ve developed and grown to feel most comfortable with has been hardware or externally based ie audio interface, using mics, capturing real sounds/amps/acoustic instruments, and then on to using hardware like the Line 6 Helix but as Ampire improved, I found myself using it for various mixing and layering tasks, adding in some melody lines, ambient guitar parts and overall “ear-candy” to some of my mixes and projects.
GH: In the beginning, like in version 2 where I started, Ampire was very basic. I was jumping for other Amp sim plugins to get the tone I was after. But I only really started exploring Ampire again with the new State Space Modelling. The Amps sound sooooo much better now. More realistic on getting that sound that you hear from a real amp. Where it sort of sounds like you can feel the air pushing out the speaker. So yeah the new version of Ampire has really come leaps and bounds from the earlier versions.
PreSonus: What do you think about the 3 new amp models in the Ampire High Density add-on pack?
NH: Having had some time to play with the new High Density stuff, It’s safe to say that these newly modeled amps stack up against some of the big-name, 3rd party offerings.
GH: I love all the new amps. Obviously I am more inclined towards amps catering towards high gain. So these new amps are exactly the tones I’m looking for. My favorite being the German sounding Gasoline EMC2. I’m a big fan of the brand it’s being modelled after, so yeah you guys really nailed it with that amp model.
TB: The new amps and cabs sound really good offering a satisfying level of feel and spirit as in the real-life hardware. Both the new drive pedals, the Wild Drive and Demolition Drive really help to shape, tighten, and add dimension to the amps. The new Space Reverb is a very nice addition that I could easily use in a number of different scenarios. Very soft and organic vibes.
PreSonus: How easy was it for you to dive in and start coming up with presets?
GH: Yeah, I could jump in straight away and build up presets quite easily. I’m not into building up big huge chains of amps and pedals. I like to keep the chain quite simple. So with the interface it was easy for me to dial up the sounds I was after. Sometimes just an amp head, speaker cabinet, gate, overdrive and EQ. That’s it.
TB: Ampire, for me, needed no instruction. I just opened it and started using it. Maybe the only thing I got tripped up on was looking for features that I expected that do not exist. Hahaaa!
NH: I wish that I could say I labored for hours and hours over the process but the fact of the matter is, I spent more time jamming on my presets and making the final 1-2% finishing touches than I did creating the actual tones. The new High-Density Amps are straight up, easy to work with and I think users will see that.
PreSonus: What’s the best feature you like about Studio One?
TB: That you don’t need any 3rd party plugins other than perhaps a virtual acoustic drum suite (if you don’t work with a drummer) to produce finished, commercially viable tracks. Typically I need 3rd party dynamics, EQ’s and spatial effects to actually make a track. Studio One closes that gap, especially with the addition of Ampire. The only similarly competing platform in this way would be Logic.
NH: Having used Studio One for years now, I’ve grown to love so much about this DAW. It seems to get out of my way and lets me create but the coolest or the best thing about it speaks to PreSonus as a whole and that is their willingness to work WITH the artists, producers, mix engineers, and musicians who use it. They take feedback, suggestions, and input from the community and continually try to make Studio One better with every update. It won’t always be a perfect process and pleasing everyone is a fool’s errand, but they get marks for trying in my book.
GH: I really like the Pitch Shift pedal effect. I have been through some of the other pitch shifting emulations around and a lot of them suffer from adding too many artifacts when the sound is transformed up and down. But this one works great. I really like the sound and use of it.
PreSonus: What are your thoughts on 2020?
NH: What can I say about 2020 that hasn’t already been said? It’s been rough and scary but with challenge comes growth. I focused on making my community a positive place, a creative place, and a sort of escape from the world and the at times, overwhelming negativity. Not as a way to put on blinders, but as a coping mechanism. I’ll tell you one thing, it’s given me much more appreciation for all of the things we all seem to take for granted when life isn’t on its head, that’s for sure.
GH: 2020 has been a strange year, I’m sure for all. With the whole pandemic and lockdown restrictions. Luckily for me I work from home, and don’t do much gigging and performing outside of the studio anymore. So I haven’t been affected too much in that way like many others have.
But it’s been a great year for guitars. There’s been some great releases focused towards guitarists. And I have been spending more time this year than ever dialing in the tones I want for my guitars and fine tuning them to a level where I finally like the productions I’m getting. So if anything 2020 has been a year for me to dive deeper into my guitar productions.
From my side in the future I’m going to be focusing more on Studio One tutorials courses across the platforms I use. And working hard at my Heavy Tones guitar YouTube channel as am having a lot of fun with that and it seems to be growing nicely. So if you haven’t seen my channel yet I would highly appreciate you stopping by, watching a video or two and leaving your thoughts on what you think.
TB: It’s an interesting, transitional period for music production. Pro audio and bedroom producer spaces are melding into the same space. I think that the trends going forward are going to be software that runs really light, ultra clean and simple GUIs that go away from trying to look like in real life, and software that makes global collaboration accessible and easy.
With Studio One and Ampire specifically I would like to see the gate, smoothed out and further developed (the Fortin Zuul is an incredible gate if you need inspiration). As well, it would be nice to see the cab shaping tools expanded so as to be able to launch a single instance from the inserts that offers a fully refined tone without the need for any additional inserts in the FX rack. This is the big reason that I favour the Helix platform, (and previously BiasFX) and also why I don’t use Neural DSP or STL plugins. I want a single instance that sounds awesome, needs no additional plugins, runs light on my system, and gets out of my way so that I can focus on playing and being creative. Additionally I’d like to see a clean GUI without IRL graphics. Much of Studio One is leaning already in this direction, it would be nice to see it go all the way!
Overall, I really like the single platform for creators approach of Studio One. Just needs a killer acoustic drum suite. No other cross-platform DAW offers such a comprehensive list of pro level tools. And the cross platform thing (Mac/PC) is huge.
We hope that you have enjoyed this round-table discussion by 3 of the most down-to-earth and formidable extended range guitar players online who took the time out to share their personal thoughts here with us.
Visit their YouTube Channels:
The Bunn | Nick Hill | Gary Hiebner (Heavy Tones)
Studio One used on Taylor Swift’s TWO Surprise Records, Folklore and Evermore
While binging some Taylor Swift videos a couple of weeks back, Peyton (our very own Inside Sales Coordinator) stumbled upon this video:
Imagine our surprise when Studio One, a FaderPort 8, and a pair of Scepters are prominently displayed with Taylor’s music in the background. We had to find out more about this project, the studio, the engineers, and how Studio One helped TWO of Taylor’s secret albums come to life, Folklore and Evermore. Here’s our interview with Jonathan Gautier, sound engineer and owner of Sound House Studio in Lakeland, FL.
-
- Sound House Studio
Give us some background on yourself. How long have you been making music?
I started playing the piano at age five. My parents pretty much nurtured rather than forced learning music, so I latched on rather quickly. From 5th grade to 8th grade, I went to a performing arts school, Rochelle School of the Arts, where my mother taught shortly after we moved from Boston to Lakeland. While there, I played cello in the orchestra and sang in the choir. After middle school, I got accepted into Harrison Arts Center for piano. Throughout this whole time, I was playing in church and playing in bands. After high school, I went to the University of Central Florida where I studied Digital Music/Music Production and later received my master’s degree in Music/Music Technology.
How has the music industry changed since your early days?
I’m 36, so I am not sure if I would be considered “old school,” but I feel like the music industry is changing for the better since I started. More tools are accessible than when I started, and you can definitely make music at a better quality. I started out on the original Mbox and a Tascam 4-track in high school, and now people are making better quality music on their phones than I ever did. I also feel that artists are being more responsible with their songs, especially on how they brand themselves, where they want to record, and how they want to use streaming platforms.
Who has been an influence in your life?
My dad was one of my major influences in my life. He, along with my mother, definitely understood the dream that I had to be a producer and own a studio. My dad always would tell me that the world needs dreamers.
Can you please share with us about the Taylor Swift project?
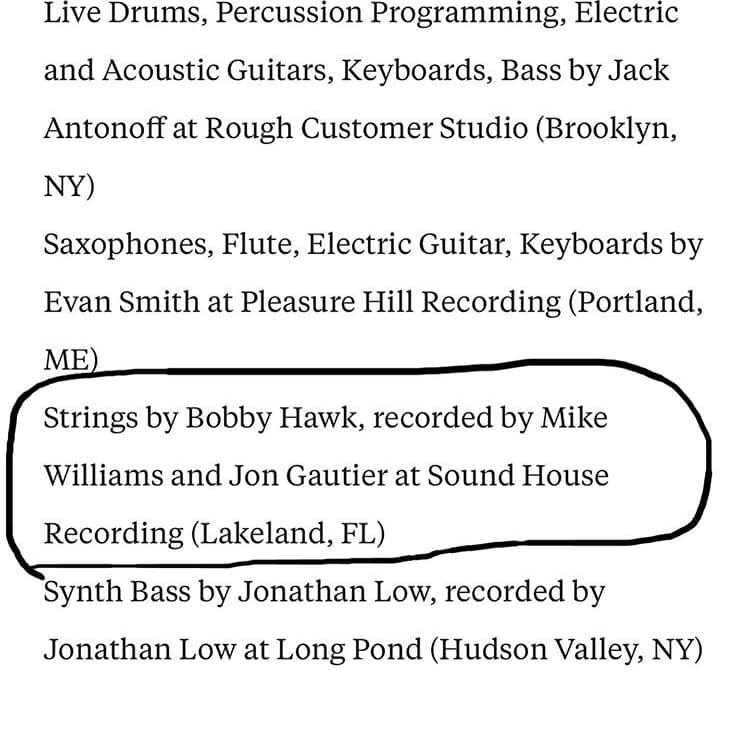
One of our clients, Rob Hecht, aka “Bobby Hawk,” comes to the studio frequently to record violin for various artists, all of which are not disclosed to us. Not even a day before Folklore is released, we get a text from Bobby and he tells us that we have a credit on Taylor Swift’s new album. It was definitely a surreal experience because it came out of nowhere. I almost didn’t want to believe it and when Bobby sent us the link to the credits, sure enough on the song “August” there it is: violins by Bobby Hawk recorded at Sound House Studios by Jonathan Gautier and Michael Williams! (Michael is our other engineer.) We also received another credit on her sister album, Evermore, which was just released on the song “Gold Rush.”
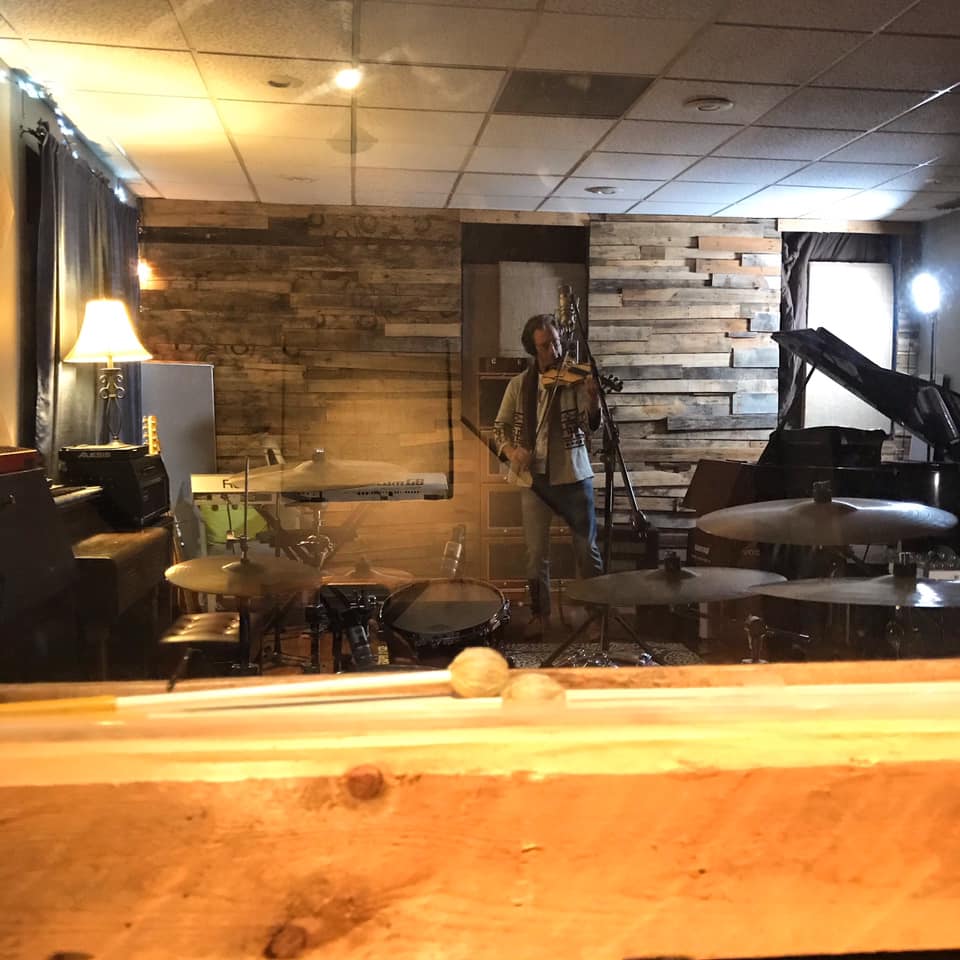
Violinist Bobby Hawk in Sound House Studios
What was your first PreSonus product? What all do you have now?
I have known about PreSonus for a while now. They were one of the first products that I started to build a studio around. My first PreSonus product was the two-channel tube preamp, the BlueTube, and then I had the Digimax LT that I used for an extra eight channels along with my Digi003 rack. Now I use Studio One for my DAW, a FaderPort 8 production controller, Eris 8s as monitors, and a DigiMax DP88.
When did you first hear about Studio One?
Definitely Joe Gilder and Home Studio Corner even before he was heavily involved with PreSonus. Also, the tech director at our church talked about it a lot.
Any user tips or tricks based on your experience with Studio One?
One of my favorite features in Studio One is the Pipeline XT plugin that allows you to use your outboard gear as plug-ins. That was a game-changer for me. I also think pocketing audio tracks using the cursor and Option-Command to line things up over global quantizing is better, at least for me.
How easy/difficult was Studio One to learn?
Coming from Pro Tools, I felt that the learning curve was easier than I thought it would be. I also love the wealth of online resources there are for Studio One, so I never felt stuck. Since making the switch to Studio One and having other PreSonus gear, I have felt that I have been able to be more productive in my studio than ever before.
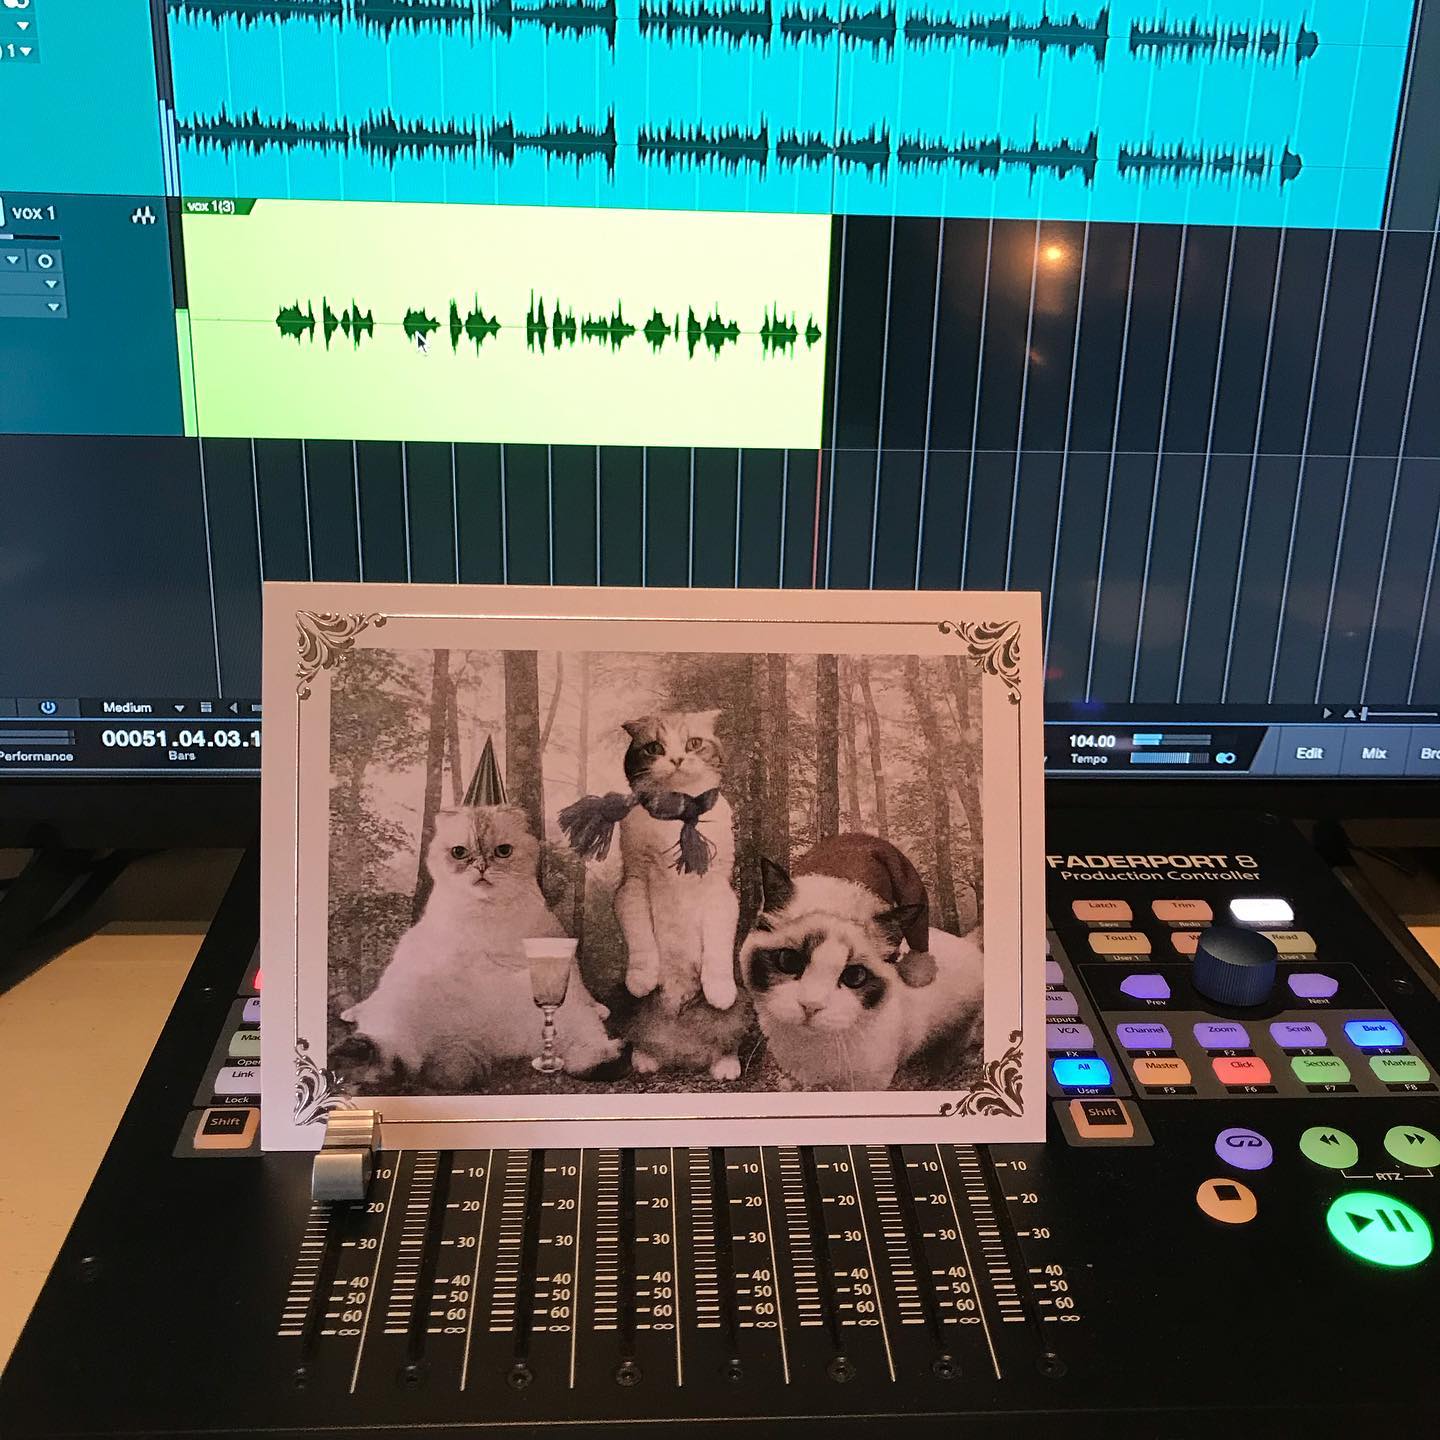
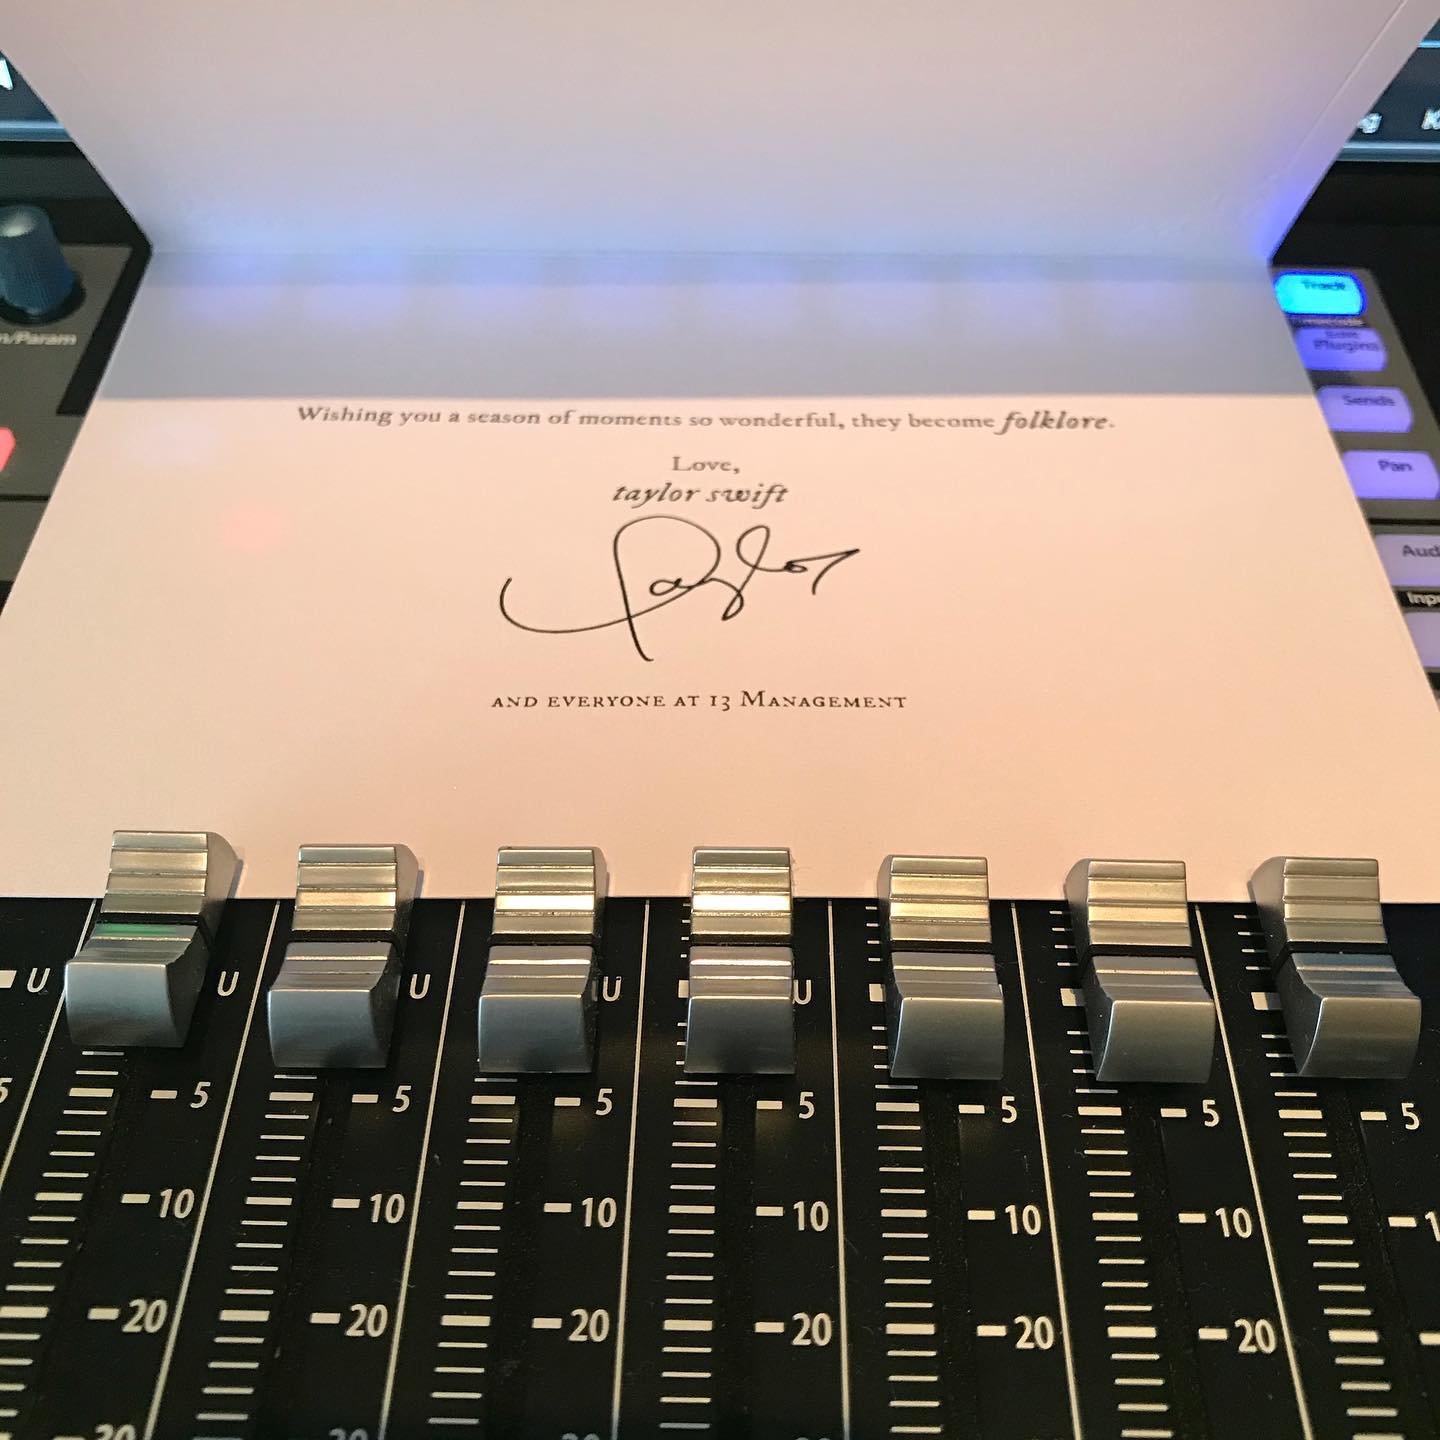
Taylor Swift’s personal Christmas card atop a FaderPort 8
Recent projects? What’s next for you?
Well, aside from the Taylor Swift stuff, I produced an album project for my church, Access, and another church, Redemption Church. Currently producing album projects for a few local artists: Hana McCartnety and Giselle Gutierrez, as well as mixing virtual choir performances for schools around the country and live recording and mixing for churches for their live streaming. You can check out our new releases on our Spotify Playlist!
HUGE congrats to Jonathan and Bobby for all their success from everyone at PreSonus… and Happy Birthday to Taylor Swift!
Connect with Sound House Studio on Instagram here!
Listen to Sound House Studio’s Artist playlist here!
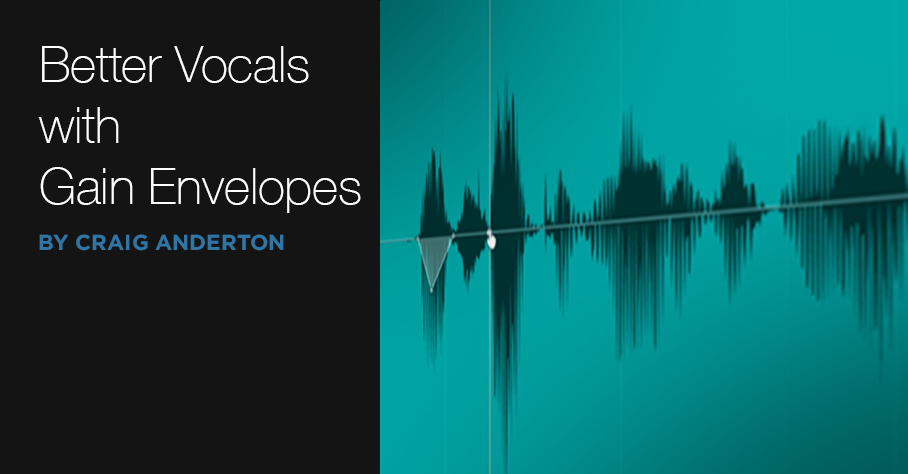
Get Better Vocals with Gain Envelopes
Several of the comments have mentioned wanting me to do some video tips, and this week’s tip is well-suited to a video treatment—so here you go.
Gain envelopes have many uses, but one of my favorites is using them to bring down peaks with vocal and narration to allow boosting the overall level. This is a further refinement of the phrase-by-phrase normalization technique I’ve mentioned in the past, which is basically like compressing without a compressor. As a result there are none of the artifacts associated with compression or limiting, so the resulting sound is totally natural.
Showing this with a video makes it easy to see how placing nodes strategically simplifies taming peaks, and how clicking and dragging on a single node can control your dynamics, quickly and efficiently.
View this post on Instagram
If you like the video, let me know in the comments section, and I’ll do more videos in the future if I think they can convey a concept better or more efficiently than text.
And while we’re on the subject of videos…if you’re not aware of Gregor Beyerle’s playlist of Studio One video tips, they’re well worth watching. Unlike so many YouTube “tips” videos, after watching his videos you’ll feel you learned useful techniques that will help you use Studio One more efficiently—not wasted several minutes of your life you’ll never get back ?. Even when I’ve known much of what he covers, there are always some little gems I hadn’t discovered before.