Tag Archives: Studio One
Friday Tip: Using DX and DXi Plug-Ins with Studio One
Using DX and DXi Plug-Ins with Studio One

The DX and DXi (instrument) plug-in formats for Windows were developed in the late 18th century, shortly after the invention of the steam-powered computer. Okay, okay…they’re not really that old, but development of new DX plug-ins ceased years ago when VST became the dominant plug-in lifeform for Windows. Regardless, you may still have some DX plug-ins installed on your computer from other programs, and want to use them.
Like many other programs, in theory Studio One doesn’t support DX/DXi plug-ins. However, it does support shell plug-ins (e.g., like Waves uses). This means you can use a wrapper that makes DX plug-ins look like they’re VST types. With this workaround, Studio One can “see” and load DX and DXi plug-ins because it thinks they’re VSTs.
I’ve tested the following with many DX and DXi plug-ins, from several manufacturers, in 64-bit Studio One. They can’t do sidechaining, and 32-bit plug-ins that were never updated to 64 bits aren’t compatible with 64-bit Windows, but otherwise they work as expected. Here’s how to make your DX and DXi plug-ins productive members of Studio One society.
- Go to https://www.xlutop.com/buzz/zip/
- Download the zip file dxshell_v1.0.4b.zip
- Extract it.
- Copy the files dxshell.x64.dll and dxishell.64x.dll to the folder where Studio One looks for VST plug-ins.
That’s pretty much all there is to it. Open Studio One, and you’ll see all the DX and DXi plug-ins—the screenshot shows plug-ins from Cakewalk, rgc:audio, and Sony. The Instruments tabs will show any available DXi plug-ins.
I don’t have a 32-bit system so I didn’t test this with 32-bit DX shells. But if it works like the 64-bit one, you should be covered there as well.
Granted, this is a bit of a hollow victory because if a DX plug-in’s functionality is available with Studio One’s VST plug-ins, you’re better off using the VST versions. But there are still some DX effects that have no real equivalents in the modern world—and now you can use them.
New Packs from Sample Magic
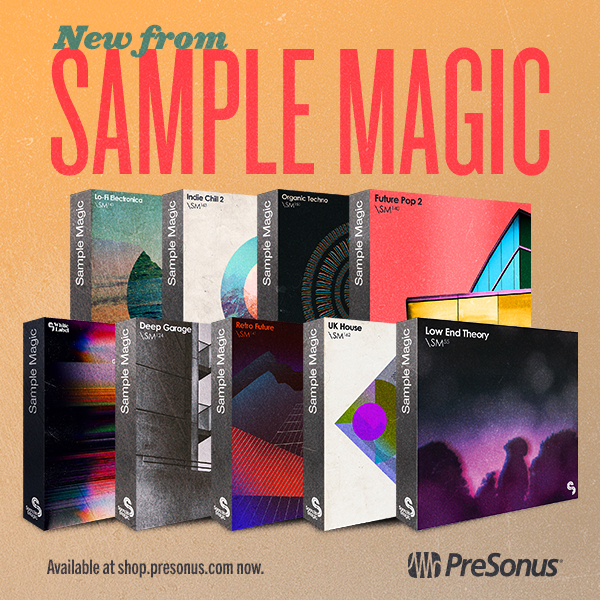
Sample Magic is back! Well, they never really went away. But it has been a little while since they’ve had new stuff available at shop.presonus.com, and this time around they brought a whopping nine sample packs for your Studio One productions!
These loop and sample packs sound incredible, (almost magical, right?) and are compatible with Studio One Prime, Artist and Professional (Version 3.5.6 and higher). They also include Impact preset kits for making your own beats.
Assorted live instrumentation, Tycho-esque melodics and processed beats are the foundations of Indie Chill 2: Over 700 MB of overdriven keys, live bass guitars, and palm-muted Gibsons—this collection comes stocked with euphoric sounds blending the best of chilled electronica to ambient and indie rock/alternative. Featuring even more sounds, drum hits and high-quality guitar and bass loops, Indie Chill 2 is the perfect toolkit for any and all types of electronica and ambient music.
Future beats with a distinct retro flavour… The ultimate oxymoron brings succulent synths together with machine-drummed beats in Retro Future – a 900MB+ assortment of era-defining pop sensibilities and epic synthesized landscapes. Dive into an action-packed excursion of soundtrack themed melodics, pumping arpeggios, Disco-drummed beats and Tron-hinged analogue heaven.
An artful collage of west coast hip-hop, sample-heavy electronica and chilled trap – pulling in elements of jazz, funk and soul along the way – Low End Theory is a 799MB exploration of the influential LA beat scene made famous by the likes of Flying Lotus, Gaslamp Killer and Daedelus.
Spanning the edgy and experimental to the hazy and hypnotic, Low End Theory comes packed with punchy low-slung beats, thick and fuzzy bass, languid keys, kaleidoscopic synths, skittish percussion, wildly pitched vocals, heavily processed FX and stacks of characterful drum hits and melodic shots expertly crafted from over 100 hours of analogue jams, field recording trips and late-night studio sessions.
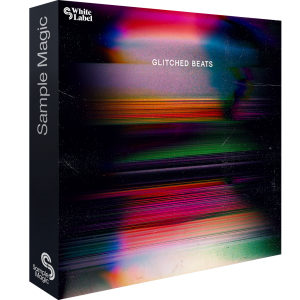
Fusing the leftfield sound of downtempo, trip hop, LA Beat and IDM; Glitched Beats delivers 390MB+ of futuristic rhythms, wavetable bass, abstract elements and glitched textures. Including an assortment of WAV and MIDI, Glitched Beats is produced using cutting-edge sound design software and processing to give instant, top quality inspiration-starters.
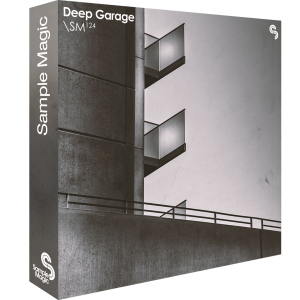
Deep, contemporary garage beats and lush melodics for ambient and evolving tracks. Classic vocal vibes combine with experimental electronics and modern sound-design for a diverse and slamming collection. Get to grips with over 500MB of shuffling acoustic rhythms, booming subby basslines, lush chord stabs, hooky vox shots and more.
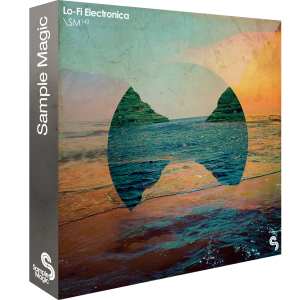
From the creators of the best-selling Chillwave Trilogy comes Lo-fi Electronica, an 840MB+ collection of dusky beats, polaroid-tinged music loops, and beach-hazed melodics. Inspired by a leftfield approach to chillout, indie and synth-pop, Lo-fi Electronica is the product of a love affair with thrift store synths, garage-sale guitar pedals, and tape machines.
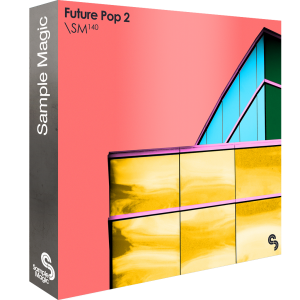
Modern beats, warm subs, and club-ready melodies: Future Pop 2 blends the best of the digital era’s hip-hop, R&B, and trap scenes. Processed through the finest hardware, we’ve once again gone all out with this 550MB+ futuristic collection of fat one-shots, pulsating loops, and ethereal FX.
Powerful, deep, and emotive – Organic Techno is an energetic and vigorous assortment of the very latest in modern techno production. Armed with analogue sequences, fluttering arps, harmonically-intriguing mallets, hypnotic percussive drums and immersive atmospheres, this collection is guaranteed to get the inspiration flowing and the mind creative.
Friday Tip of the Week: The “Harmonic Tremolo” FX Chain
I did a Harmonic Tremolo as a Sonar FX Chain tip, and it was very popular—so here’s a Studio One-specific version. For those not familiar with the term, some of the older, Fender “brown” amps used a variation on the standard, amplitude-oriented tremolo which the company called “harmonic tremolo.” It splits the signal into high and low bands, and then an LFO amplitude-modulates them out of phase so that the while the highs get louder, the lows get softer and vice-versa. The sound is quite different from a standard tremolo, and many players feel the sound is “sweeter.” But unlike a guitar amp, you can sync this tremolo to the rhythm—and that makes it a useful addition to groove-oriented music as well.
Here’s the FX Chain “schematic.”
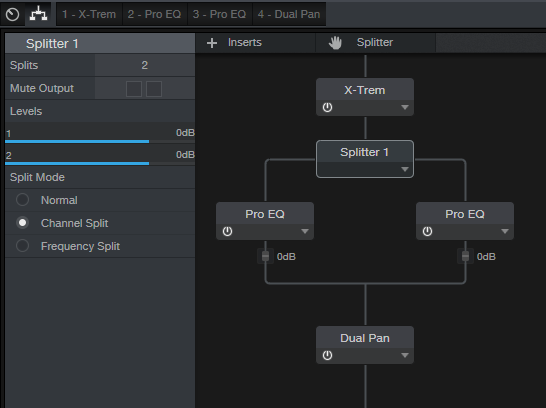
X-Trem needs to be in Pan Mode or this won’t work. As a result, this FX Chain must be inserted in a stereo track—a mono track switches X-Trem to Tremolo Mode (although a mono file inserted in a track set to stereo will work). If you switch a stereo track to mono accidentally and then switch it back to stereo, you’ll need to click on the Reset button in the FX Chain to return X-Trem to Pan Mode.
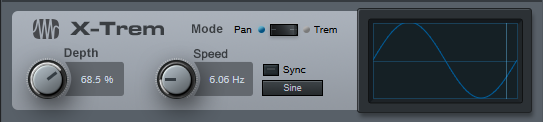
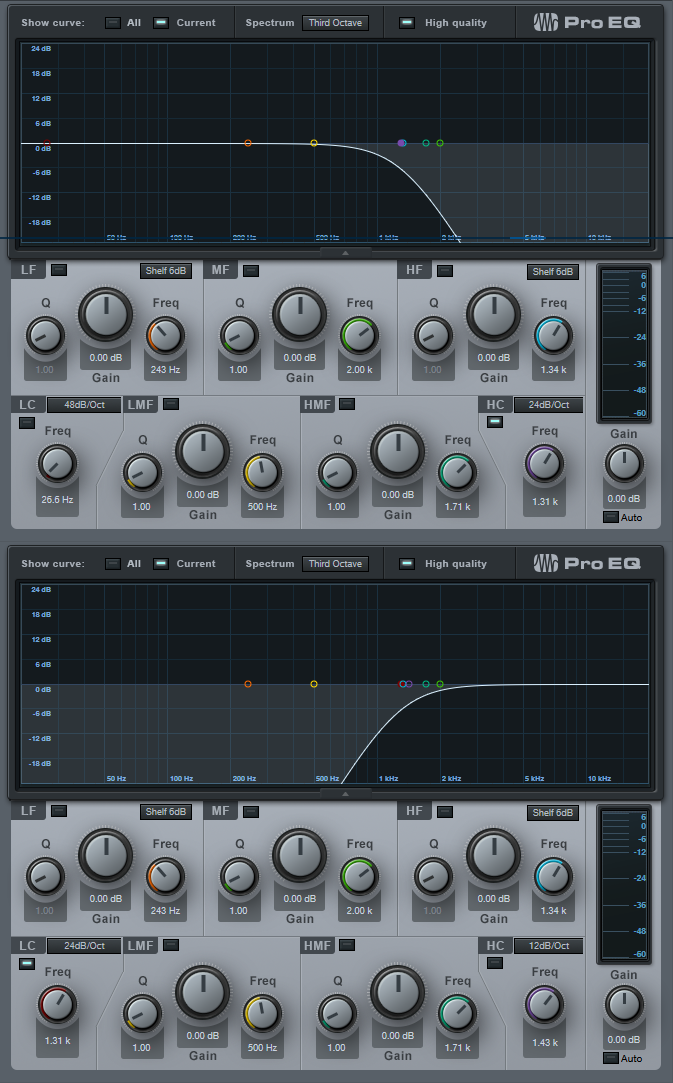
In Pan mode, while the left X-Trem channel gets louder, the other becomes softer and vice-versa. The Splitter (in Channel Split mode) sends the left split to a Pro EQ set to High Cut, while the right split goes to a Pro EQ set to Low Cut; their frequencies track to set the split point between the high and low bands.
Finally the two outputs go to a Dual Pan, which provides several functions.

Creating the FX Chain:

Crossover links the Pro EQ HC and LC Freq controls so you can adjust the split frequency between the high and low bands. At either the full clockwise or counter-clockwise position, the Harmonic Tremolo acts like a conventional tremolo.
Reset connects to the X-Trem Mode so you can reset it to Pan if needed.
LFO Speed controls the X-Trem speed from minimum to about 15 Hz. This control is inactive if the LFO Sync switch is on.
LFO Beats chooses the X-Trem sync rhythm and requires that the LFO Sync switch be on.
LFO Depth controls the X-Trem depth.
LFO Type chooses among the four standard waveforms (triangle, sine, sawtooth, square).
Lo/Hi Balance ties to the Dual Pan’s Input Bal knob. Fully counter-clockwise gives only the low band, clockwise gives only the high band, and the settings in between set the balance between the two bands.
Width controls the Dual Pan’s Width control. For the most authentic sound, leave this centered for mono operation (the Dual Pan should have Link enabled, and Pan set to <C>.
After assigning the controls, congratulations! You have your own Harmonic Tremolo… no soldering or guitar amps required!
Click here to download the effects chain described above. Just drag and drop it directly into a channel in Studio One!
Friday Tip of the Week: Through-Zero Flanging
Flanging that Actually Sounds Like Vintage Tape Flanging
Personal bias alert: I like digital flangers, but most can’t do what true, analog-based, tape flanging could do. Back in the day, the sessions for my band’s second album were booked following Jimi Hendrix’s sessions for Electric Ladyland. His flanging setup remained after the session, so we took advantage of it and used it on our album… and the sound of true, tape-based flanging was burned into my brain. This tip is about obtaining that elusive sound.
The tape flanging process used two tape recorders, one with a fixed delay and one with variable speed. As you sped up and slowed down one recorder, it could lag or lead the other recorder, and the time difference produced the flanging effect. If the audio path for one of them was out of phase, as one tape recorder pulled ahead of the other one (or fell behind after pulling ahead), the audio passed through the “through-zero” point where the audio canceled. This left a brief moment of silence when the flange hit its peak.
To nail “that sound,” first you need two delays. One has to be able to go forward in time, but since that’s not possible without violating the laws of physics (which can lead to a hefty fine and up to five years in jail), a second delay provides a fixed delay so the other can get ahead of it. Second, don’t use LFO control—if you don’t control the flanging effect manually, it sounds bogus.

In this implementation, a Splitter in normal mode feeds two Analog Delays. One of them goes through the Mixtool to flip the phase for the through-zero effect. Start with the Analog Delay settings shown in the screen shot; they’re identical for both delays, except for the Factor control on the delay that feeds the Mixtool.
To hear the tape flanging effect, move the Factor control from full counter-clockwise to clockwise. At the center point, you’ll hear the through-zero effect as the signals cancel. (Actually you can move either Factor control as long as the other one is pointing straight up.)
Variations on a Theme
It’s also fun to make an FX chain to allow for more variations. The left-most knob controls the Factor knob, whose parameter is called Delay Speed. Delay Time chooses how low the flanger goes. It’s scaled to a range from 1 ms to 13 ms; I find 4 – 9 ms about right (copy this curve for the second Analog Delay, because you want their times to track). Delay Inertia uses the control on the same Analog Delay as the Factor knob being controlled. This adds a bit of “tape transport inertia vibe” when you move the Factor knob.
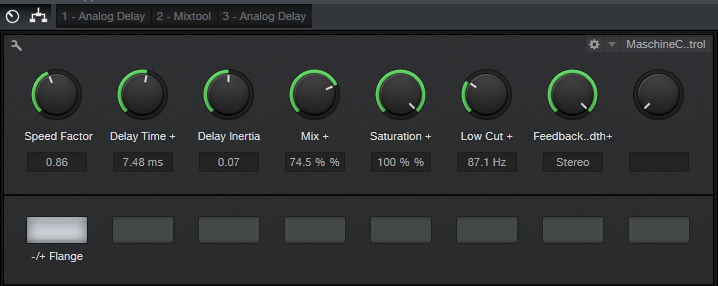
The Mix knob controls the mix on one of the delays from 0% to 100%. (Note that if the Mix controls on both delays are at 0%, the audio should cancel; if it doesn’t, adjust the Mixtool Gain knob until it does.) 100% gives the most dramatic flanging effect, but back in the day, cancellations weren’t “digitally perfect” so setting Mix for one delay to 60-75% gives a smoother through-zero sound. Saturation controls the Saturation parameter on both delays when you want a little more grit, and a Low Cut control for both Analog Delays reduces some of the muddiness that can occur with long Delay Time settings. The Feedback control also ties to both Analog Delays. You’ll usually want to leave this in the stereo position (full clockwise). Finally, -/+ Flange controls the Invert Left and Invert Right buttons on the Mixtool module. Enable them for through-zero (“negative”) flanging, disable for positive flanging.
So does it really sound like tape flanging? Listen for yourself. I took an excerpt from a song on my YouTube channel, applied flanging to it, and posted it as an audio example on craiganderton.com (click on the Demos tab).
Bonus fun: Stick Binaural Pan after the two splits mix back together, and set Width to 200%. If Feedback is set to stereo, this produces a variation on the flanging effect.
Click here to download the preset described in this post! (Updated 4-10-18 with multipreset link)
Friday Tip of the Week—How to Gain Better Vocals
Vocals are the most direct form of communication with your audience—so of course, you want your vocal to be a kind of tractor beam that draws people in. Many engineers give a more intimate feel to vocals by using dynamics control, like limiting or compression. While that has its uses, the downside is often tell-tale artifacts that sound unnatural.
The following technique of phrase-by-phrase gain edits can provide much of the intimacy and presence associated with compression—but with a natural, artifact-free sound. Furthermore, if you do want to compress the vocal further, you won’t need to use very much dynamics control because the phrase-by-phrase gain edits will have done the majority of the work the compressor would have needed to do.
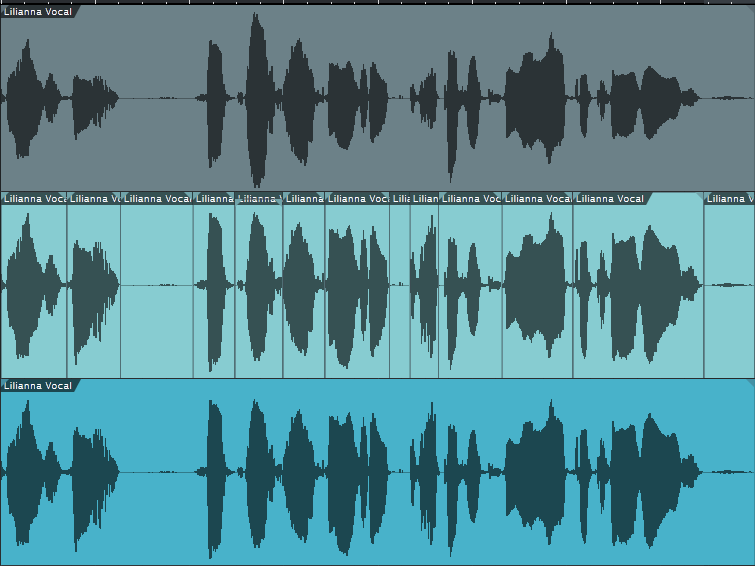
The top track shows the original vocal. In the second track, I used the split tool to isolate sections of the vocal with varying levels (snap to grid needs to be off for this). The next step was clicking on the volume box in the center of the envelope, and dragging up to increase the level on the sections with lower levels. Although you can make a rough adjustment visually, it’s crucial to listen to the edited event in context with what comes before and after to make sure there aren’t any continuity issues—sometimes soft parts are supposed to be soft.
The third track shows the finished vocal after bouncing all the bits back together. Compared to the top track, it’s clear that the vocal levels are much more consistent.
There are a few more tricks involved in using this technique. For example, suppose there’s a fairly loud inhale before a word. A compressor would bring up the inhale, but by splitting and changing gain, you can split just after the inhale and bring up the word or phrase without bringing up the inhale. Also, I found that it was often possible to raise the level on one side of a split but not on the other, and not hear a click from the level change. Whether this was because of being careful to split on zero crossings, dumb luck, or Studio One having some special automatic crossfading mojo, I don’t know…but it just works and if it doesn’t, you can always add crossfades.
That’s all there is to it. If you want to hear this technique in action, here’s a link to a song on my YouTube channel that uses this vocal normalization technique.
New Loops from MVP!
New MVP Loops at Shop.PreSonus.com!
MVP Loops offers nothing but the best in sample sounds, loop libraries and music software. Their team are responsible for millions of records sold worldwide and have worked on some of the biggest projects of this generation.
Lust and Loyalty 
Lust & Loyalty from MVP Loops is a modern R&B product that gives you the best of both worlds. Whether you are looking to make a modern ballad or something a little more trap dirty, Lust & Loyalty has what you need: 12 melodic construction kits with 625 amazing loops, riffs, and samples. The sounds have all been processed through the best gear and converters to give you the sound that you have come to expect from MVP Loops.
All keys and tempos have been provided, and the sounds are amazing. In the style of modern day hit makers such as Chris Brown, Rihanna, Beyonce, and more, Lust & Loyalty has what you need to make modern R&B and modern R&B trap.
Get Lust and Loyalty here.
Sound Mob- Live Edition – Vol. 2 
Sound Mob Live Edition Vol. 2 is here from MVPLoops! Following up on the huge success of the Sound Mob series, this version boasts 2.51 gigs of sounds containing 1,449 loops, riffs, one-shots and samples in an incredible package. Recorded at our facility in Los Angeles using the best musicians and gear, Sound Mob Live Edition Vol. 2 is a special product. Whether you are looking to create a hit like “It’s a Vibe” from 2 Chainz, Jhene Aiko, Trey Songz, and Ty Dollar Sign or a classic sample-based Jay-Z style hit like “Show Me What You Got,” Sound Mob Live Edition Vol. 2 has what you need.
Get Sound Mob Vol. 2 here.
DREAM
Looking to produce a big song to grab the Top 40 crowd, get placed in a movie, or expand an album? Look no further than DREAM, a new product from MVP Loops that represents the current drama-drenched, Top 40, uplifting sound! Music is coming back to the forefront of productions, and artists are looking to bring in as many people as possible—whether it’s Beyonce, Adelle, Wiz Khalifa, Sam Smith, or many other chart-toppers—they have found a formula for making a hit for the masses. DREAM represents this style.
DREAM contains construction kits, loops, samples, riffs, and multi-formatted kits in Audioloops and Impact kits. The sounds are big, featuring bold piano melodies, strings, huge synths, leads, basses, and cracking drums. DREAM is perfect for collaborations of hip-hop and R&B.
Get Dream here.
Smoke Shop 
Welcome back to the West Coast. Smoke Shop features ten modern West Coast construction kits in the style of Kendrick Lamar, SchoolboyQ and YG.Smoke Shop is filled with tons of content including drum one-shots, riffs, full mixes, drum and instrument mixes, giving you the flexibility to sample grooves or individual instruments to create your next masterpiece.
Get Smoke Shop here.
Mapping Another Program’s Shortcuts to Studio One
Studio One comes with keyboard shortcut mappings for Cubase, Logic, and Pro Tools, so those switching to Studio One can use the keyboard shortcuts with which they’re familiar—as well as navigate the trial version without having to learn a lot of new shortcuts. To add to that list, I mapped Sonar’s shortcuts to Studio One; these mappings are included as an alternate key scheme in the most recent update. What I learned in the process might be useful if you want to create mappings for a program you were using prior to migrating to Studio One.
Spoiler alert: Ultimately I think it’s best to learn Studio One’s keyboard shortcuts unless you use multiple DAWs and don’t want your brain to explode learning all the variations. Many of Sonar’s shortcuts are based on the traditional Windows approach of using control keys to navigate quickly through menus rather than calling up functions directly. Also, many functions for which Sonar has few or no keyboard shortcuts (e.g., automation) have shortcuts in Studio One, and assigning some shortcuts to Sonar can overwrite useful Studio One shortcuts, so you need to create a new shortcut for any you remove. For example, Studio One’s reverse audio shortcut is Ctrl+R—the same as Sonar’s shortcut to refresh the Media Browser. A Sonar user will more likely want the refresh function, although that means creating a new shortcut for reverse audio.

Another example is for Sonar users who miss its ProChannel. Yet Studio One has a functionally similar Console feature when you open the channel—you see what effects are inserted, and a thumbnail of their settings. So I mapped Studio One’s Open Channel to Ctrl+I (the screenshot shows assigning this in the process of creating the key scheme), Sonar’s shortcut for opening the ProChannel. Although this overwrote Studio One’s shortcut for Invert Selection, I think Sonar users will be willing to sacrifice Invert Selection for having something similar to opening up the ProChannel. The shortcut I is another conflict, which opens Sonar’s Inspector. In Studio One, I enables auto-punch, which you can also enable by clicking on a transport button—but since Sonar users have always enabled auto-punch via a Control Bar button anyway, it made sense to give up I for the Inspector.
Then there are the design differences. For inserting effects in clips (Events), Sonar includes an FX rack that behaves like the one in its Track or Console view. In Studio One, the equivalent appears in the Event’s Inspector. However, having already mapped a Sonar shortcut to open the Inspector, I assigned Studio One’s Insert Event FX to Sonar’s Open Clip FX Rack shortcut. Sonar users can use that to insert an Event FX quickly, and hopefully they’ll realize they can open up the Inspector to see all the options for Event FX.
Nudge is another example of accommodating a common Sonar function. In Studio One, the number keypad is more for navigation and marker recall and with Sonar, nudge operations. So I assigned Sonar’s “greatest hits” nudge functions to the keypad.
Then again, sometimes you get lucky. For example, Studio One’s Audio Bend panel relates to what Sonar’s AudioSnap does, so I just assigned the AudioSnap shortcut to it. And while there’s a shortcut to hide selected tracks in Studio One, I find Studio One’s Track List the most convenient way to manage track hide/show. Sonar’s Track Manager handles show/hide well, so I used its shortcut to open the Track List. Another sneaky trick is that
Studio One doesn’t have a dedicated Navigator pane like Sonar, but if you reduce the track heights to the absolute minimum, the visual representation of a song is very similar.
Studio One doesn’t have screensets per se, but the five Console Scenes for which shortcuts exist are similar, so I assigned number keys 1-5 (which Sonar uses for screensets) to the scenes. Only problem is the tool shortcuts also use number keys, so I changed them to Ctrl+Shift+[function key] because Sonar users are familiar with using function keys to call up tools.
Finally, note that Sonar has many functions that aren’t assigned to default keyboard shortcuts, yet some of these functions do have default keyboard shortcuts in Studio One. So if you’ve created your own custom shortcuts in Sonar or another DAW, if Studio One has a similar function it may already have a default shortcut. If not, you can create similar (if not identical) custom shortcuts in Studio One. Another nice touch: When you open the list of keyboard shortcuts from Help, they reflect whichever mapping you’ve chosen—not just the Studio One defaults. And don’t forget you can create Macros to re-create another DAW’s workflow in Studio One, and then assign the Macro to a shortcut.
Still, after spending way too many hours going over the similarities and differences between Sonar’s and Studio One’s keyboard shortcuts, I have to say that I’ll be learning Studio One’s shortcuts. It’s clear a lot of thought went into choosing and assigning them, so I believe a little effort spent now will save a lot of time overall. My recommendation for learning shortcuts is to print out the list, and learn a new one every few days—you won’t regret it.
Click here for further notes on Sonar’s Shortcut Mappings in Studio One. [PDF]
Friday Tip of the Week: Fun with Tempo Tracks
Fun with the Tempo Track
Creating tempo changes can add a significant amount of emotional impact to a piece of music, and you can create these changes with the Tempo Track. MIDI will follow tempo variations, as will Audio Tracks in Timestretch mode and also, Acidized WAV clips. To open the Tempo Track, click the Clock icon in the Track Column.
It’s important to remember that tempo changes remain in effect until any subsequent tempo changes, and the Transport tempo indicator always reflects the current tempo. Note that unlike other programs where the timeline doesn’t change, a very useful Studio One feature is that the timeline reflects tempo changes. For example if you change two measures to half the original tempo, those two measures will last twice as long graphically as the other measures in the timeline. This also means that if you draw a linear series of tempo changes (see below), they will appear to have a curve but the changes themselves are still linear—it’s just that the timeline display reflects whether the tempo is speeding up or slowing down. That’s pretty cool.
So why would you change the tempo?
I was hoping you’d ask…
I mainly use three types of tempo changes, because each has their use.
Short changes. These happen over a short range, like slowing down the tempo slightly during the measure before going into the big chorus, or speeding up a little during a couple measures before a solo comes to an end.
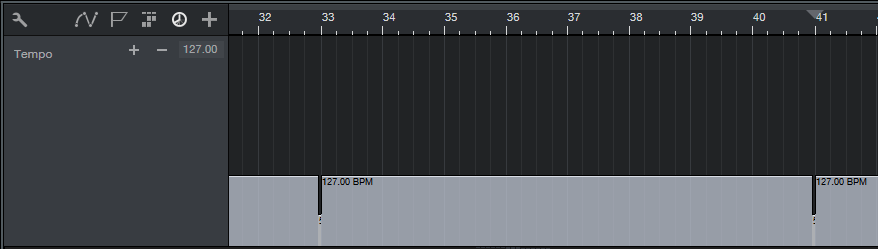
Long-range changes. Here’s a good example of why tempo changes can be really handy. For a particular set, there was a song at 127 bpm followed by one at 133.33 bpm (locked groove tempo). I started a linear tempo change about 2/3 of the way through the first song, slowly increasing the tempo to 133.33. It took long enough that you didn’t really notice the tempo was changing, but it added a feeling of anticipation and segued perfectly into the second song.
It’s easy to create a linear series of tempo changes. Choose the tempo change resolution with the Quantize parameter (it doesn’t matter if Snap to grid is on or off). Hold [Option/Mac] or [Alt/Windows], click, and draw the line. While still holding down the modifier key, you can drag up or down to change the final tempo. Holding the shift key gives 0.1 BPM resolution. For finer resolution, place the cursor in the section containing the tempo change, and enter the number in the Tempo Track field. (Note that the screen shot doesn’t show the fine resolution of the tempo changes, but they’re there.)
“Time Traps.” Suppose you want to add a short, almost subliminal “dramatic pause” at some point, like just before some booming snare drum hit signals the start of the chorus. Although you could shift your tracks over a bit or insert some space, it’s much easier just to do a radical tempo drop (e.g., from 120 to 50 bpm) for a fraction of a beat where you want the dramatic pause. This sloooooows everything down enough to add the pause. (Ideally, you’d want something that sustains over the pause—silence, a pad, held note, etc. but that’s commonly what will be happening anyway.)
Studio One has a neat trick for doing these: you can edit non-consecutive tempo changes simultaneously. This is important because the amount of tempo change is pretty crucial to get the desired effect, so if you want to add more than one time trap in a song, adjusting one can adjust them all. Simply use the Arrow tool to click and drag over the tempo change you want to edit, then hold down Shift and use the Arrow tool to click and drag over any additional tempo changes you want to edit. Editing one edits them all.
Modifying the tempo track can allow a song to “breathe,” like what happens when musicians play together. If you haven’t experimented with subtle (or even dramatic) tempo changes, you’re in for a treat when you do.

New Studio One Add-ons from SonalSystem
We’ve got two tremendous new sample/loop collections from SonalSystem, the brilliant minds who brought us the lauded “Biscuits and Gravy” drum loops a while back. Now, they’ve got a killer hip-hop pack and an indie guitar pack, and each is available in three editions: Gold, Silver, and Platinum and are compatible with Studio One Prime, Artist, and Professional (Versions 3.5.4 and higher). Click here to shop!
 Echo Park – Indie Pop Guitars: was meticulously sound designed with contemporary genres in mind and features a blend of inspiration from the vibrant Echo Park neighborhood in Los Angeles, CA.
Crafted with a focus on composition, this library is a perfect companion for producers, film/tv composers and songwriters across genres who are looking for inspiration along with studio quality sounds to complete their vision.
- Silver: Mono/Stereo FX Loops
- Gold: Silver edition plus 300+ Dry Loops
- Platinum: Gold edition plus 300+ DI Loops and 100 Ampire XT Presets
Click here to shop!

Music City Drums vol.2 – Boom Bap: These hip-hop drums were recorded using an extensive collection of vintage drums, classic mic pres, and choice microphones. Because Sonal System took an old-school approach to recording and sampling, the timeless and gritty vibe of hip-hop’s golden era can now be a bold, colorful addition to your sonic palette.
- Silver: A collection of 500+ Stereo Loops
- Gold: Silver edition plus 3000+ Multitrack Loops (presented in sessions for added convenience)
- Platinum: Gold edition, plus three Impact kits and 100+ MIDI Loops
Click here to shop!
Friday Tip of the Week: Upsampling in Studio One, Part 2
In the previous Friday Tip of the Week, we covered how recording soft synths and amp sims at higher sample rates (like 96 kHz) can give higher sound quality in some situations. However, we also discussed some issues involved with recording at higher sample rates that aren’t so wonderful.

So this week, it’s time for a solution. Offline upsampling to higher sample rates can let you retain the CPU efficiencies of running at a lower sample rate, while reaping the sonic benefits of recording at higher sample rates… and you can do this in Studio One by upsampling in a separate project, rendering the file, and then importing the rendered file back into your original project.
But wait—wouldn’t you lose the benefits of upsampling when you later convert the sample rate back down to 44.1 kHz? The answer is no: Rendering at the higher sample rate eliminates any foldover distortion in the audio range, sample-rate converters include an anti-alias filter to avoid this problem, and 44.1 kHz has no problem playing back sounds in the audio range.
However, note that upsampling can’t fix audio that already has aliasing distortion; upsampling audio to 96 kHz that already contains foldover distortion will simply reproduce the existing distortion. This technique applies only to audio created in the computer. Similarly, it’s unlikely that upsampling something recorded via a computer’s audio interface will yield any benefits, because the audio interface itself will have already band-limited the signal’s frequency range so there will be no harmonics that interfere with the clock frequency.
UPSAMPLING IN STUDIO ONE
We’ll assume a 44.1 kHz project sampling rate, and that the virtual instrument’s MIDI track has been finalized but you haven’t transformed it to audio yet. Here’s how to upsample virtual instruments.
- Save the virtual instrument preset so you can call it up in step 5.
- Select the entire MIDI clip driving the instrument, and drag it into the Browser (or right-click on the MIDI clip, and choose Export Selection). In either case, place the MIDI .musicloop so it’s easy to find later.
- Close the existing Song.
- Create a new Song at a higher sample rate, like 88.2 or 96 kHz.
- Insert the virtual instrument you used previously, and then load its preset.
- Drag the MIDI .musicloop clip into the Instrument track.
- Right-click on the track header and choose Transform to Audio Track. You can uncheck everything in the dialog box.
- Drag the audio file into a findable location in the Browser, then close the Song.
- Open the original Song with the 44.1 kHz sample rate.
- Import the upsampled audio; Studio One will convert the sample rate back down to 44.1 kHz automatically. Use this as the transformed instrument audio instead of what you would have obtained in the 44.1 kHz project.
That’s all there is to it. If you want to upsample an amp sim, the process is similar: export the (presumably guitar) track, save the amp sim preset, render at 96 kHz, then import the rendered file into the 44.1 kHz project.
FINAL THOUGHTS
Listen to the audio example “Upsampling with Amp Sim,” which plays the sound of an amp sim at 44.1 kHz and then after upsampling to 96 kHz. The difference isn’t as dramatic as last week’s synth example, but you’ll still hear that the upsampled version is clearer, with more presence.
Do bear in mind you may not want the difference caused by upsampling. When I did an upsampling demo at a seminar with a particular synthesizer, most people preferred the sound with the aliasing because the upsampled sound was brighter than what they expected. However when I did upsampling with an amp sim, and with a different synth, the consensus was that the upsampled version sounded much better. Regardless, the point is now you have a choice—hear the instrument the way it’s supposed to be heard to decide if you like that better, or leave it as is. After all, distortion isn’t necessarily that horrible—think of how many guitar players wouldn’t have a career without it!
Although upsampling isn’t a panacea, don’t dismiss it either. Even with synths that don’t oversample, upsampling may make no audible difference. However, sometimes synths that do oversample still benefit from upsampling; with some sounds, it can take 4x or even 8x oversampling to reproduce the sound accurately. As always, use your ears to decide which sound works best in your music.