Category Archives: Studio One
New Packs from Sample Magic
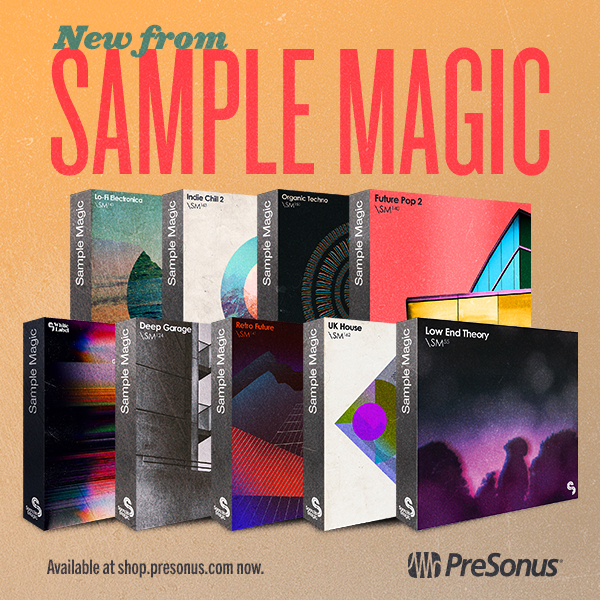
Sample Magic is back! Well, they never really went away. But it has been a little while since they’ve had new stuff available at shop.presonus.com, and this time around they brought a whopping nine sample packs for your Studio One productions!
These loop and sample packs sound incredible, (almost magical, right?) and are compatible with Studio One Prime, Artist and Professional (Version 3.5.6 and higher). They also include Impact preset kits for making your own beats.
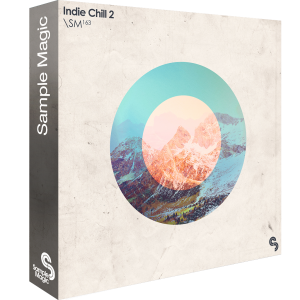
Assorted live instrumentation, Tycho-esque melodics and processed beats are the foundations of Indie Chill 2: Over 700 MB of overdriven keys, live bass guitars, and palm-muted Gibsons—this collection comes stocked with euphoric sounds blending the best of chilled electronica to ambient and indie rock/alternative. Featuring even more sounds, drum hits and high-quality guitar and bass loops, Indie Chill 2 is the perfect toolkit for any and all types of electronica and ambient music.
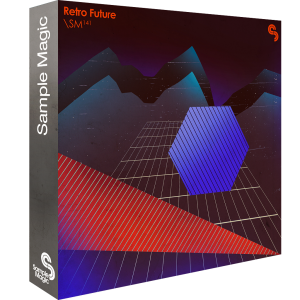
Future beats with a distinct retro flavour… The ultimate oxymoron brings succulent synths together with machine-drummed beats in Retro Future – a 900MB+ assortment of era-defining pop sensibilities and epic synthesized landscapes. Dive into an action-packed excursion of soundtrack themed melodics, pumping arpeggios, Disco-drummed beats and Tron-hinged analogue heaven.
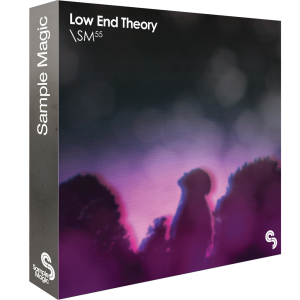
An artful collage of west coast hip-hop, sample-heavy electronica and chilled trap – pulling in elements of jazz, funk and soul along the way – Low End Theory is a 799MB exploration of the influential LA beat scene made famous by the likes of Flying Lotus, Gaslamp Killer and Daedelus.
Spanning the edgy and experimental to the hazy and hypnotic, Low End Theory comes packed with punchy low-slung beats, thick and fuzzy bass, languid keys, kaleidoscopic synths, skittish percussion, wildly pitched vocals, heavily processed FX and stacks of characterful drum hits and melodic shots expertly crafted from over 100 hours of analogue jams, field recording trips and late-night studio sessions.
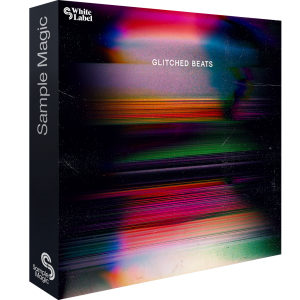
Fusing the leftfield sound of downtempo, trip hop, LA Beat and IDM; Glitched Beats delivers 390MB+ of futuristic rhythms, wavetable bass, abstract elements and glitched textures. Including an assortment of WAV and MIDI, Glitched Beats is produced using cutting-edge sound design software and processing to give instant, top quality inspiration-starters.
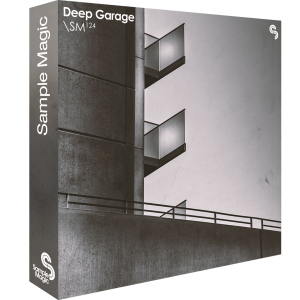
Deep, contemporary garage beats and lush melodics for ambient and evolving tracks. Classic vocal vibes combine with experimental electronics and modern sound-design for a diverse and slamming collection. Get to grips with over 500MB of shuffling acoustic rhythms, booming subby basslines, lush chord stabs, hooky vox shots and more.
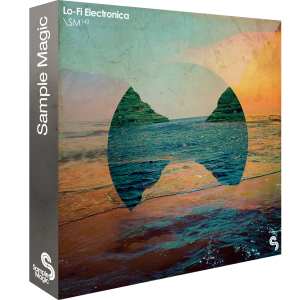
From the creators of the best-selling Chillwave Trilogy comes Lo-fi Electronica, an 840MB+ collection of dusky beats, polaroid-tinged music loops, and beach-hazed melodics. Inspired by a leftfield approach to chillout, indie and synth-pop, Lo-fi Electronica is the product of a love affair with thrift store synths, garage-sale guitar pedals, and tape machines.
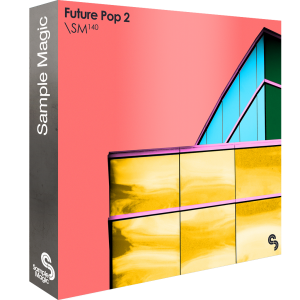
Modern beats, warm subs, and club-ready melodies: Future Pop 2 blends the best of the digital era’s hip-hop, R&B, and trap scenes. Processed through the finest hardware, we’ve once again gone all out with this 550MB+ futuristic collection of fat one-shots, pulsating loops, and ethereal FX.
Powerful, deep, and emotive – Organic Techno is an energetic and vigorous assortment of the very latest in modern techno production. Armed with analogue sequences, fluttering arps, harmonically-intriguing mallets, hypnotic percussive drums and immersive atmospheres, this collection is guaranteed to get the inspiration flowing and the mind creative.
Friday Tip of the Week: The Sparkler!
Sometimes it seems that certain recorded sounds, like acoustic guitar attacks and percussion, just don’t have the “sparkle” you hear when they’re playing live. The Sparkler is a sophisticated brightening FX Chain that adds definition—without treble equalization.
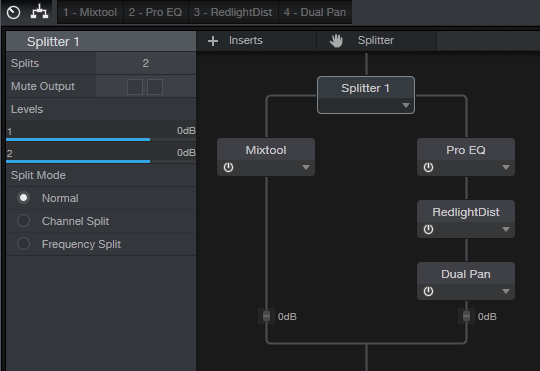
The Sparkler is a parallel effect. Referring to the FX Chain structure, a Splitter in normal mode creates a dry path through the Mixtool. This increases the level by 6 dB to compensate for the volume drop that occurs when bypassing an FX Chain where one of the splits contributes no significant level. The other split goes to the Sparkler effect, which consists of the Pro EQ, Redlight Dist, and Dual Pan.

How it works. First, the signal goes through the Pro EQ, set for a steep (48 dB/octave) high-pass filter that leaves only the very highest frequencies intact. The Low Cutoff control varies the cutoff from 7.6 kHz to 12.5 kHz. The Redlight Dist synthesizes harmonics from those high frequencies. (Even though it has a High Freq control, that’s not drastic enough a cutoff—hence the Pro EQ.) The Soft/Hard control chooses between 1 or 2 distortion stages; stage 1 is my preference because it sounds more natural, but people with anger management issues might prefer 2 stages, which gives a nastier, more aggressive sound.
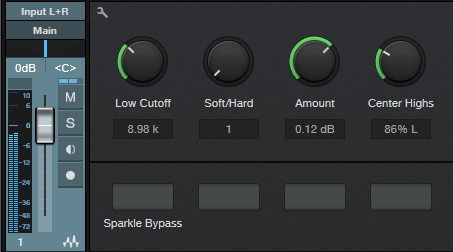
The Amount control sets the Redlight Dist output, which determines how much Sparkle gets added in parallel with the main signal. Use the Sparkle Bypass button to compare the sound with and without the Sparkle effect.
The reason for the Dual Pan module requires some explanation. The Sparkle FX Chain is intended for individual tracks, buses, and even master mixes when used subtly. Highs are very directional, so if with a bus or master there’s a trebly instrument mixed off to one side, like tambourine, the Sparkle effect can “tilt” the image toward the channel with more highs. The Center Highs control, when turned clockwise, brings the Left and Right “sparkle” channels more to center until when fully clockwise, the highs for both channels are centered.
Applying the Sparkle. To learn that the Sparkle effect does, it’s best to listen to the effect by itself and manipulate the controls to hear the results. Unfortunately you can’t assign FX Chain controls to Splitter parameters, so if you want to hear the Sparkle sound in isolation, go into the FX Chain and bring down the post-Mixtool level control all the way. As you tweak the Sparkle sound in isolation, grab only the highest audible frequencies, and avoid harsh distortion—you want just a hint of breakup, and only at the highest frequencies.
When using the Sparkle effect in context with a track of bus, start with the Amount control at minimum, and bring it up slowly. Use the Bypass button for a reality check—you want just a subtle brightening, not highs that hit you over the head and make dogs run away in panic. It takes a little effort to master what this effect can do, and it’s not something you want to use all the time. But when used properly, it can really add—well, sparkle—to tracks that need it.
Friday Tip of the Week: The “Harmonic Tremolo” FX Chain
I did a Harmonic Tremolo as a Sonar FX Chain tip, and it was very popular—so here’s a Studio One-specific version. For those not familiar with the term, some of the older, Fender “brown” amps used a variation on the standard, amplitude-oriented tremolo which the company called “harmonic tremolo.” It splits the signal into high and low bands, and then an LFO amplitude-modulates them out of phase so that the while the highs get louder, the lows get softer and vice-versa. The sound is quite different from a standard tremolo, and many players feel the sound is “sweeter.” But unlike a guitar amp, you can sync this tremolo to the rhythm—and that makes it a useful addition to groove-oriented music as well.
Here’s the FX Chain “schematic.”
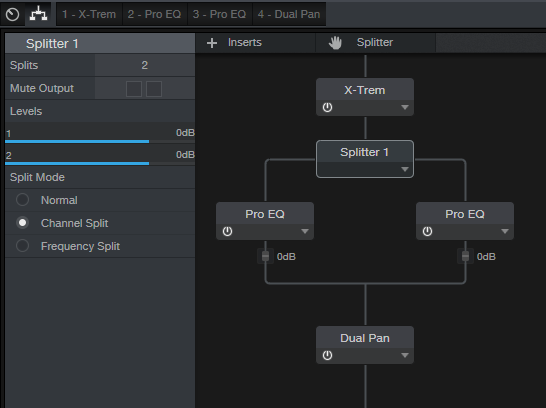
X-Trem needs to be in Pan Mode or this won’t work. As a result, this FX Chain must be inserted in a stereo track—a mono track switches X-Trem to Tremolo Mode (although a mono file inserted in a track set to stereo will work). If you switch a stereo track to mono accidentally and then switch it back to stereo, you’ll need to click on the Reset button in the FX Chain to return X-Trem to Pan Mode.
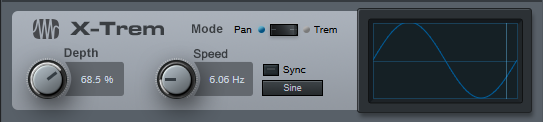
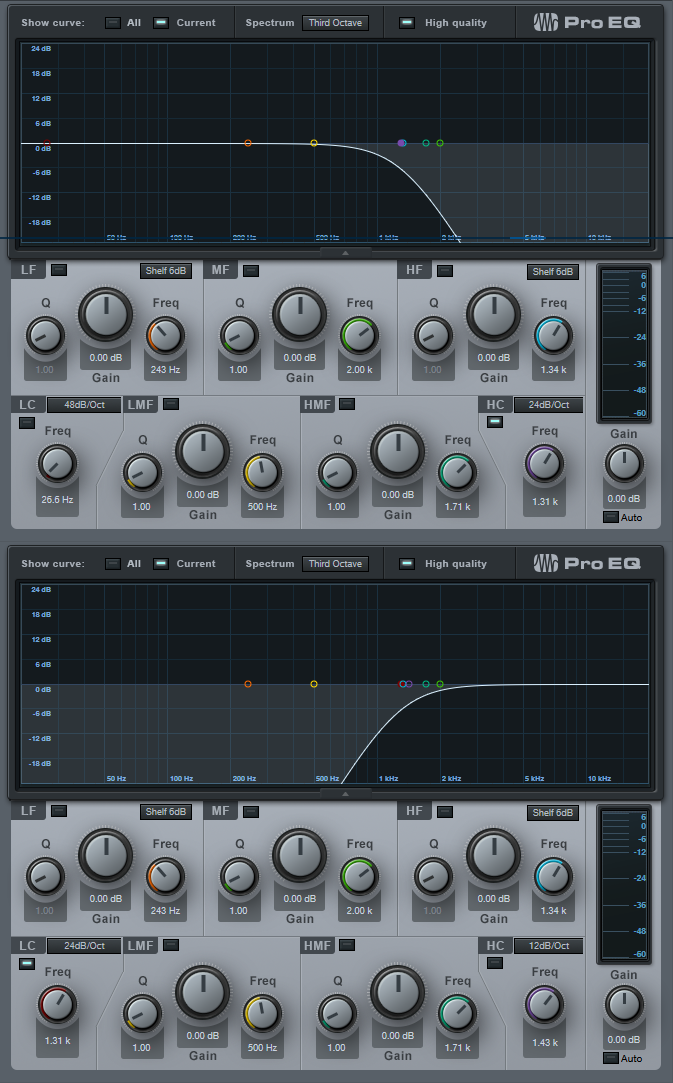
In Pan mode, while the left X-Trem channel gets louder, the other becomes softer and vice-versa. The Splitter (in Channel Split mode) sends the left split to a Pro EQ set to High Cut, while the right split goes to a Pro EQ set to Low Cut; their frequencies track to set the split point between the high and low bands.
Finally the two outputs go to a Dual Pan, which provides several functions.

Creating the FX Chain:

Crossover links the Pro EQ HC and LC Freq controls so you can adjust the split frequency between the high and low bands. At either the full clockwise or counter-clockwise position, the Harmonic Tremolo acts like a conventional tremolo.
Reset connects to the X-Trem Mode so you can reset it to Pan if needed.
LFO Speed controls the X-Trem speed from minimum to about 15 Hz. This control is inactive if the LFO Sync switch is on.
LFO Beats chooses the X-Trem sync rhythm and requires that the LFO Sync switch be on.
LFO Depth controls the X-Trem depth.
LFO Type chooses among the four standard waveforms (triangle, sine, sawtooth, square).
Lo/Hi Balance ties to the Dual Pan’s Input Bal knob. Fully counter-clockwise gives only the low band, clockwise gives only the high band, and the settings in between set the balance between the two bands.
Width controls the Dual Pan’s Width control. For the most authentic sound, leave this centered for mono operation (the Dual Pan should have Link enabled, and Pan set to <C>.
After assigning the controls, congratulations! You have your own Harmonic Tremolo… no soldering or guitar amps required!
Click here to download the effects chain described above. Just drag and drop it directly into a channel in Studio One!
Friday Tip of the Week: Through-Zero Flanging
Flanging that Actually Sounds Like Vintage Tape Flanging
Personal bias alert: I like digital flangers, but most can’t do what true, analog-based, tape flanging could do. Back in the day, the sessions for my band’s second album were booked following Jimi Hendrix’s sessions for Electric Ladyland. His flanging setup remained after the session, so we took advantage of it and used it on our album… and the sound of true, tape-based flanging was burned into my brain. This tip is about obtaining that elusive sound.
The tape flanging process used two tape recorders, one with a fixed delay and one with variable speed. As you sped up and slowed down one recorder, it could lag or lead the other recorder, and the time difference produced the flanging effect. If the audio path for one of them was out of phase, as one tape recorder pulled ahead of the other one (or fell behind after pulling ahead), the audio passed through the “through-zero” point where the audio canceled. This left a brief moment of silence when the flange hit its peak.
To nail “that sound,” first you need two delays. One has to be able to go forward in time, but since that’s not possible without violating the laws of physics (which can lead to a hefty fine and up to five years in jail), a second delay provides a fixed delay so the other can get ahead of it. Second, don’t use LFO control—if you don’t control the flanging effect manually, it sounds bogus.

In this implementation, a Splitter in normal mode feeds two Analog Delays. One of them goes through the Mixtool to flip the phase for the through-zero effect. Start with the Analog Delay settings shown in the screen shot; they’re identical for both delays, except for the Factor control on the delay that feeds the Mixtool.
To hear the tape flanging effect, move the Factor control from full counter-clockwise to clockwise. At the center point, you’ll hear the through-zero effect as the signals cancel. (Actually you can move either Factor control as long as the other one is pointing straight up.)
Variations on a Theme
It’s also fun to make an FX chain to allow for more variations. The left-most knob controls the Factor knob, whose parameter is called Delay Speed. Delay Time chooses how low the flanger goes. It’s scaled to a range from 1 ms to 13 ms; I find 4 – 9 ms about right (copy this curve for the second Analog Delay, because you want their times to track). Delay Inertia uses the control on the same Analog Delay as the Factor knob being controlled. This adds a bit of “tape transport inertia vibe” when you move the Factor knob.
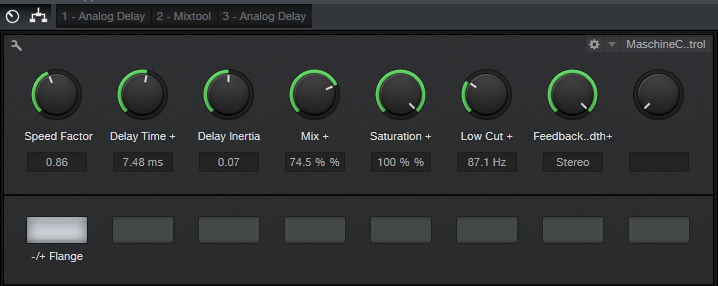
The Mix knob controls the mix on one of the delays from 0% to 100%. (Note that if the Mix controls on both delays are at 0%, the audio should cancel; if it doesn’t, adjust the Mixtool Gain knob until it does.) 100% gives the most dramatic flanging effect, but back in the day, cancellations weren’t “digitally perfect” so setting Mix for one delay to 60-75% gives a smoother through-zero sound. Saturation controls the Saturation parameter on both delays when you want a little more grit, and a Low Cut control for both Analog Delays reduces some of the muddiness that can occur with long Delay Time settings. The Feedback control also ties to both Analog Delays. You’ll usually want to leave this in the stereo position (full clockwise). Finally, -/+ Flange controls the Invert Left and Invert Right buttons on the Mixtool module. Enable them for through-zero (“negative”) flanging, disable for positive flanging.
So does it really sound like tape flanging? Listen for yourself. I took an excerpt from a song on my YouTube channel, applied flanging to it, and posted it as an audio example on craiganderton.com (click on the Demos tab).
Bonus fun: Stick Binaural Pan after the two splits mix back together, and set Width to 200%. If Feedback is set to stereo, this produces a variation on the flanging effect.
Click here to download the preset described in this post! (Updated 4-10-18 with multipreset link)
Friday Tip of the Week—How to Gain Better Vocals
Vocals are the most direct form of communication with your audience—so of course, you want your vocal to be a kind of tractor beam that draws people in. Many engineers give a more intimate feel to vocals by using dynamics control, like limiting or compression. While that has its uses, the downside is often tell-tale artifacts that sound unnatural.
The following technique of phrase-by-phrase gain edits can provide much of the intimacy and presence associated with compression—but with a natural, artifact-free sound. Furthermore, if you do want to compress the vocal further, you won’t need to use very much dynamics control because the phrase-by-phrase gain edits will have done the majority of the work the compressor would have needed to do.
The top track shows the original vocal. In the second track, I used the split tool to isolate sections of the vocal with varying levels (snap to grid needs to be off for this). The next step was clicking on the volume box in the center of the envelope, and dragging up to increase the level on the sections with lower levels. Although you can make a rough adjustment visually, it’s crucial to listen to the edited event in context with what comes before and after to make sure there aren’t any continuity issues—sometimes soft parts are supposed to be soft.
The third track shows the finished vocal after bouncing all the bits back together. Compared to the top track, it’s clear that the vocal levels are much more consistent.
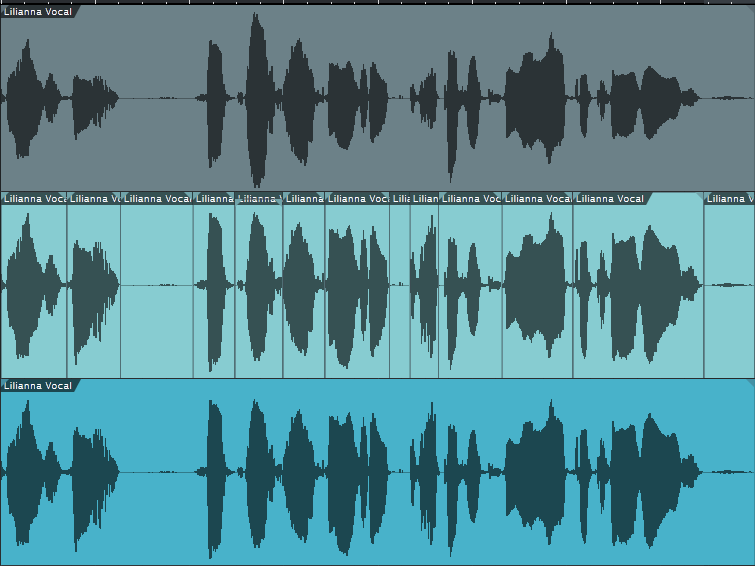
There are a few more tricks involved in using this technique. For example, suppose there’s a fairly loud inhale before a word. A compressor would bring up the inhale, but by splitting and changing gain, you can split just after the inhale and bring up the word or phrase without bringing up the inhale. Also, I found that it was often possible to raise the level on one side of a split but not on the other, and not hear a click from the level change. Whether this was because of being careful to split on zero crossings, dumb luck, or Studio One having some special automatic crossfading mojo, I don’t know…but it just works and if it doesn’t, you can always add crossfades.
That’s all there is to it. If you want to hear this technique in action, here’s a link to a song on my YouTube channel that uses this vocal normalization technique.
New Loops from MVP!
New MVP Loops at Shop.PreSonus.com!
MVP Loops offers nothing but the best in sample sounds, loop libraries and music software. Their team are responsible for millions of records sold worldwide and have worked on some of the biggest projects of this generation.
Lust and Loyalty 
Lust & Loyalty from MVP Loops is a modern R&B product that gives you the best of both worlds. Whether you are looking to make a modern ballad or something a little more trap dirty, Lust & Loyalty has what you need: 12 melodic construction kits with 625 amazing loops, riffs, and samples. The sounds have all been processed through the best gear and converters to give you the sound that you have come to expect from MVP Loops.
All keys and tempos have been provided, and the sounds are amazing. In the style of modern day hit makers such as Chris Brown, Rihanna, Beyonce, and more, Lust & Loyalty has what you need to make modern R&B and modern R&B trap.
Get Lust and Loyalty here.
Sound Mob- Live Edition – Vol. 2 
Sound Mob Live Edition Vol. 2 is here from MVPLoops! Following up on the huge success of the Sound Mob series, this version boasts 2.51 gigs of sounds containing 1,449 loops, riffs, one-shots and samples in an incredible package. Recorded at our facility in Los Angeles using the best musicians and gear, Sound Mob Live Edition Vol. 2 is a special product. Whether you are looking to create a hit like “It’s a Vibe” from 2 Chainz, Jhene Aiko, Trey Songz, and Ty Dollar Sign or a classic sample-based Jay-Z style hit like “Show Me What You Got,” Sound Mob Live Edition Vol. 2 has what you need.
Get Sound Mob Vol. 2 here.
DREAM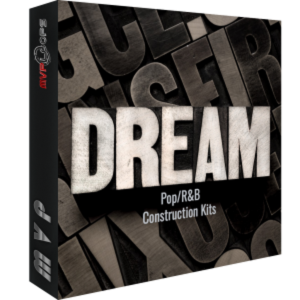
Looking to produce a big song to grab the Top 40 crowd, get placed in a movie, or expand an album? Look no further than DREAM, a new product from MVP Loops that represents the current drama-drenched, Top 40, uplifting sound! Music is coming back to the forefront of productions, and artists are looking to bring in as many people as possible—whether it’s Beyonce, Adelle, Wiz Khalifa, Sam Smith, or many other chart-toppers—they have found a formula for making a hit for the masses. DREAM represents this style.
DREAM contains construction kits, loops, samples, riffs, and multi-formatted kits in Audioloops and Impact kits. The sounds are big, featuring bold piano melodies, strings, huge synths, leads, basses, and cracking drums. DREAM is perfect for collaborations of hip-hop and R&B.
Get Dream here.
Smoke Shop 
Welcome back to the West Coast. Smoke Shop features ten modern West Coast construction kits in the style of Kendrick Lamar, SchoolboyQ and YG.Smoke Shop is filled with tons of content including drum one-shots, riffs, full mixes, drum and instrument mixes, giving you the flexibility to sample grooves or individual instruments to create your next masterpiece.
Get Smoke Shop here.
Friday Tip of the Week: Strums Made Easy with Step Recording
One of the main differences between guitar and keyboard is chord voicing. Guitar chords typically have six widely separated notes, whereas keyboard notes tend cluster around two areas accessible by each hand. For example, check out the notes that make up an E major chord on guitar.

If you’re a keyboard player using chords to define a chord progression, it’s easy enough to have chords hit on, for example, the beginning of a measure. But “strumming” the chord can add interest and a more guitar-like quality. Although you can edit the notes in a chord so that successively higher notes of the chord have increasing delay compared to the start of the measure, that’s pretty time-consuming. Fortunately, there’s an easy way to do guitar voicings—and strum them.
Stepping Out. The core of this technique is step recording, which is easy to do in Studio One once you’ve inserted a virtual instrument. Steps are keyed to numbers on the screen shot. This assumes the strummed chord will start on the beat.
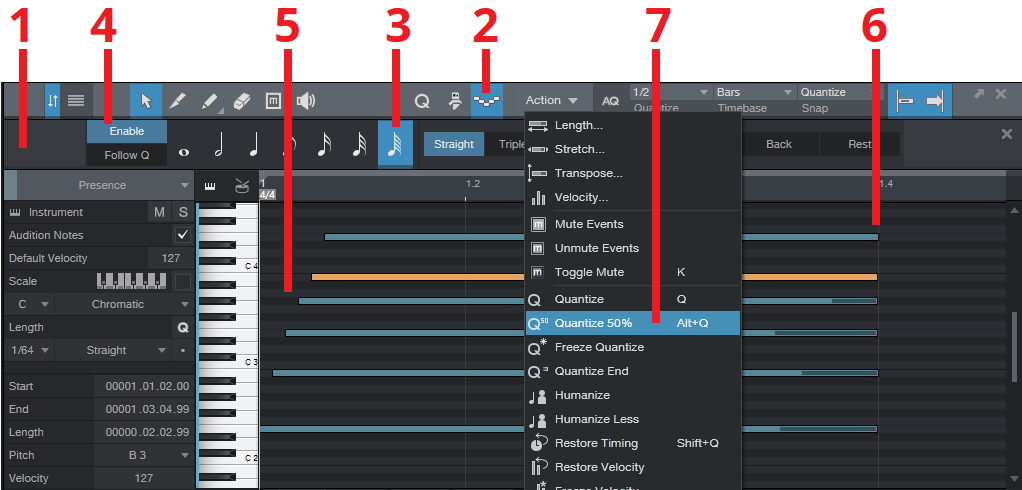
- Define your MIDI region, then open it in the Editor (F2).
- Click on the Editor’s Step Recording button—the one that looks like stairs going down and up.
- Choose a note length value of 64th notes.
- Click Enable.
- Play the notes of the chord, from low to high (or strum down from high to low), starting from the beginning of a measure.
- You’ll probably want to extend the note lengths.
- This will be a fairly slow strum, and there may be too much time between notes. No problem: select the notes, set quantization as appropriate to move the strummed notes closer to the first note (e.g., a half-note in the example above), and then choose Action > Quantize to 50%. Moving the notes closer to the first note speeds up the strum.
The moral of the story is that chord notes don’t always need to hit right on the beat—try some strumming, and add variety to your music.
Friday Tip of the Week: Synthesize OpenAIR Reverb Impulses in Studio One
Convolving white noise with audio produces reverb but frankly, the results aren’t all that inspiring compared to the impulses obtained from “sampling” real rooms. However, there are ways to make white noise impulses that provide a unique, “idealized” sound compared to standard impulses.

- You need a noise source, so insert Mai Tai and create a noise-only preset.
- Sculpt the noise to emulate a “room.” Suppose you want a 2.0 second reverb from a highly damped room. Use the amplitude envelope to provide a 2 second fadeout, and the filter envelope to damp the sound. I also add a little delay to make the noise a wider image.
- Transform the instrument sound to an audio track.
- Normalize the audio, then bring the peak level down by about 7 or 8 dB. Open Air seems happiest with impulses that don’t use up all the available headroom.
- Export the WAV file.
Now bring the WAV file you just saved into Open Air, and check out the clarity and smoothness of the sustain—it has an “idealized” quality, sort of like how CGI is an idealized version of an image. Listen to the audio example processing some percussive sounds from Impulse, and you’ll hear what I mean.
Here are a few other hints:
- When you shorten the reverb in Open Air, it sounds more gated. Once you find an impulse you like, generate versions at different lengths, and then you can choose the length that’s appropriate for the music.
- Create short reverb impulses and reverse them—you’ll hear the best reverse reverb sounds ever.
- Make a bright, sparkly vocal reverb by filtering out the lows, or to create the Taiko Drum of Doom, create a long impulse but filter out all the highs.
- Try different effects, like “chopping” the noise for rhythmic effects.
The bottom line is this is an incredibly flexible way to come up with reverb sounds…and you can end up with different reverb sounds than any other reverb processor on your hard drive. Have fun!
Friday Tip of the Week: The Ultra-Tight Rhythm Section
Last week, we used the Gate for drum replacement. This week, let’s use it to tighten up an electric bass part—and end up with a rhythm section that’s tighter than a comic book superhero’s costume.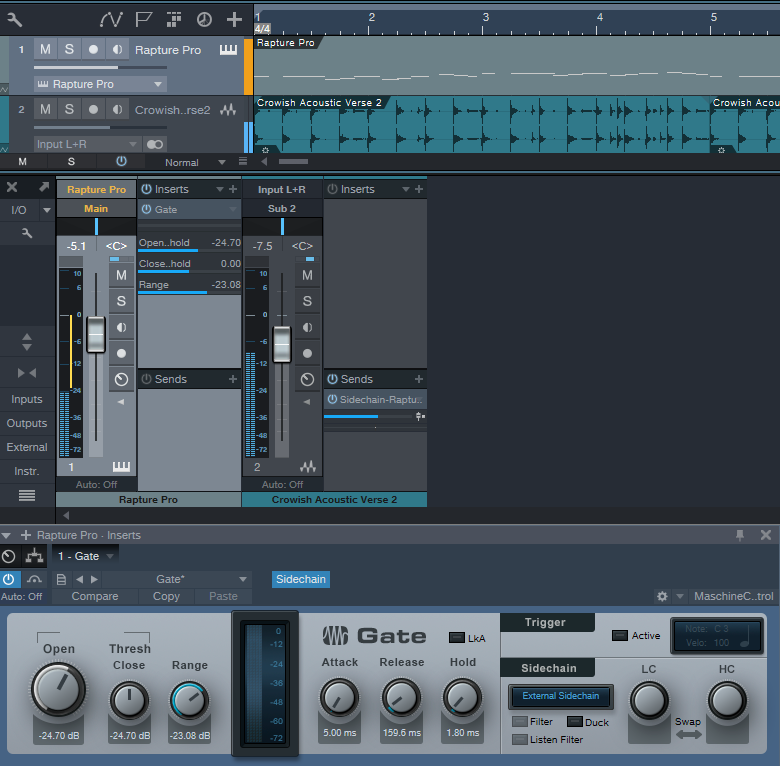
We’ll use a fairly basic example of sidechaining to create this tightness. While most people understand the principles behind sidechaining, I haven’t heard very many people actually use this particular application. But with electric bass, using a drum sidechain signal to gate the bass adds a percussive overlay to the bass’s melodic character that fits perfectly with drums.
For the bass sound, in this example I’m using my bass expansion pack for Cakewalk’s Rapture Pro (I’ll be porting the samples over to Presence XT soon). The drum loop track has a send that drives a Gate inserted in the bass track, with the Gate’s sidechain set to External so it’s triggered by the drum’s audio.
Although different situations call for different Gate settings, I find the key to getting good results with electric bass is the Gate’s Release control. Because bass has a natural decay, a little release time prevents the bass from sounding too percussive—the attacks are all properly in place, but the bass note trails off gracefully, even though the drum transient may be long gone.
However with more electro-oriented material, using a sharp decay with an electric bass provides an unusual type of effect—you have the organic, natural sound of the electric bass modulated by the clipped, percussive decays caused by gating with the drums. As always, experimentation can yield interesting—and sometimes delightfully unexpected—results. Try it!
It’s Not Voodoo—it’s PreSonus Studio Magic 2018

We’ve updated Studio Magic Plug-in Suite for Mac and Windows! Worth more than $400 but provided free to new and existing registered owners of any currently available PreSonus audio interface or mixer, the 2018 Studio Magic Plug-in Suite software bundle includes seven popular plug-ins in VST, AU (Mac), and AAX formats. All you have to do to get Studio Magic 2018 is register your qualifying hardware at my.presonus.com!
Learn more about Studio Magic 2018 here:
Take a closer look at each plug-in in the YouTube playlist below!