Category Archives: Studio One
Rediscover your ATOM with these tips—and a flash sale!

SURPRISE! For a short time, the following ATOM-enhanced loops are 50% off. This offer ends March 22!
Click here to shop all qualifying products!
You can save 50% on any of the following:
- Tom Brechtlein Drums Vol. 1 – Stereo
- Tom Brechtlein Drums Vol. 1 – HD Multitrack
- Tom Brechtlein Drums Vol. 2 – Stereo
- Tom Brechtlein Drums Vol. 2 – HD Multitrack
- Sample Magic – Ambient House 2
- Sample Magic – Ambient Techno
- Sample Magic – Chill Trap
- Sample Magic – Future Pop Sessions
- Sample Magic – Lo-Fi Pop
- Sample Magic – Neon Disco
- Sample Magic – Raw Techno 2
- Sample Magic – Retrowave 2
- Sample Magic – Soulful Beats
- Sample Magic – Soulful Trap
And while saving a few bucks on loops is always nice, let’s take a look at some ATOM developments for a minute. Now that the product has been out for a while, users have been discovering the instrument’s full potential. Combine the tips below with some of the loops above and add some new beats AND new techniques to your production workflow.
Want to become a finger-drumming master? If you bought your ATOM after October 20, 2019, you get free lessons from Melodics! Go to your MyPreSonus account to redeem them!
This Craig Anderton blog features a lot of tricks you can do with ATOM that have nothing to do with drums. Yeah, you read that right. Good ol’ Craig, always thinking outside the box.
Here’s our very own ATOM with Ableton Live playlist:
And our Studio One ATOM playlist:
The Various Sound-Worlds Of Anna Clark
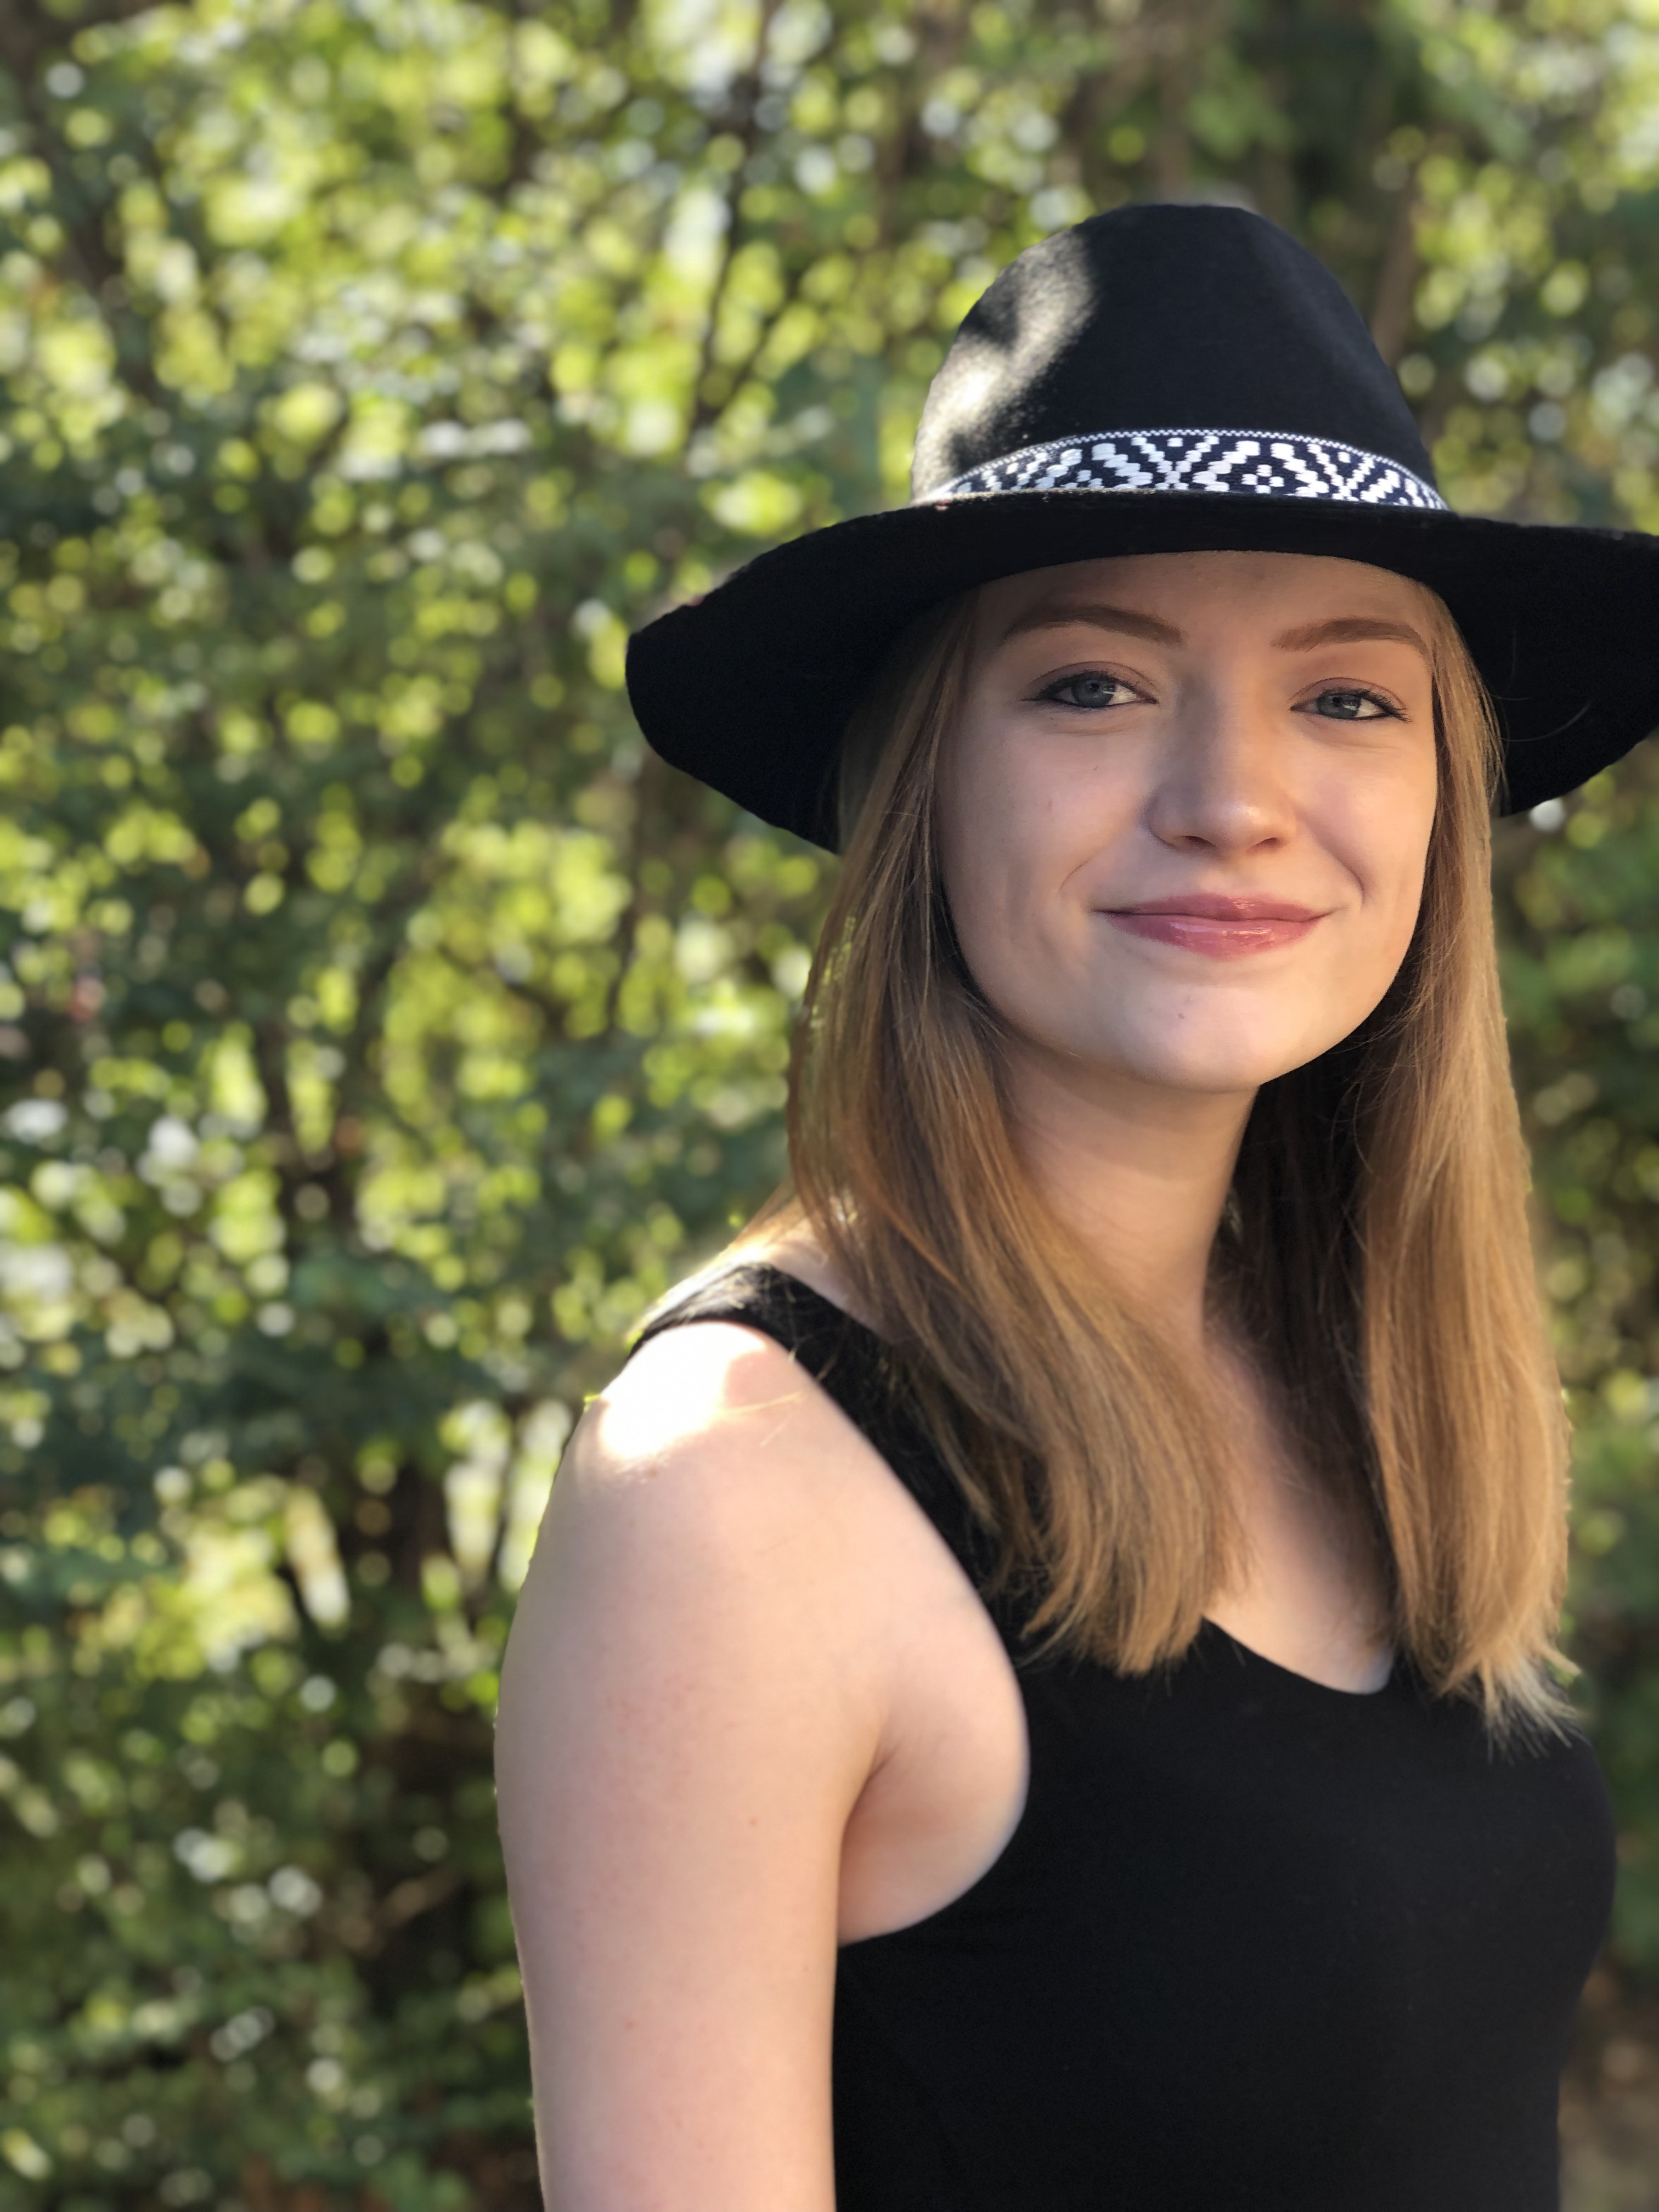 Nineteen year-old Anna Clark works as a Grammy-nominated vinyl mastering engineer at Welcome to 1979 Industries. Nine years ago, she founded 501(c)(3) organization Guitars 4 Gifts, which has given over 1,000 youths access to their first musical instrument.
As a lifelong singer/songwriter/musician, Anna has performed live on Lightning 100 (Nashville’s premier independent radio station), she holds a Certificate in Music Business from the Berklee College of Music and is currently on track to graduate from Belmont University in 2022.
When not working on one of her passion projects, Anna loves to spend time with her dogs or attend concerts with her friends and family.
Let’s find out more about how she’s been navigating through and actualizing all of these different creative sonic environments!
What hardware and software tools help you with your audio work at home these days?
I currently use a StudioLive 16 mixer, a Central Station Plus, HP4 headphone amp, a pair of Sceptre S6 monitors, and Studio One DAW software.
Originally, a friend introduced me to your monitors and I basically fell in love with using them. Because I work in many different areas of audio engineering, I needed products that I could use for any area that I was working in, so that I wouldn’t have to have different setups.
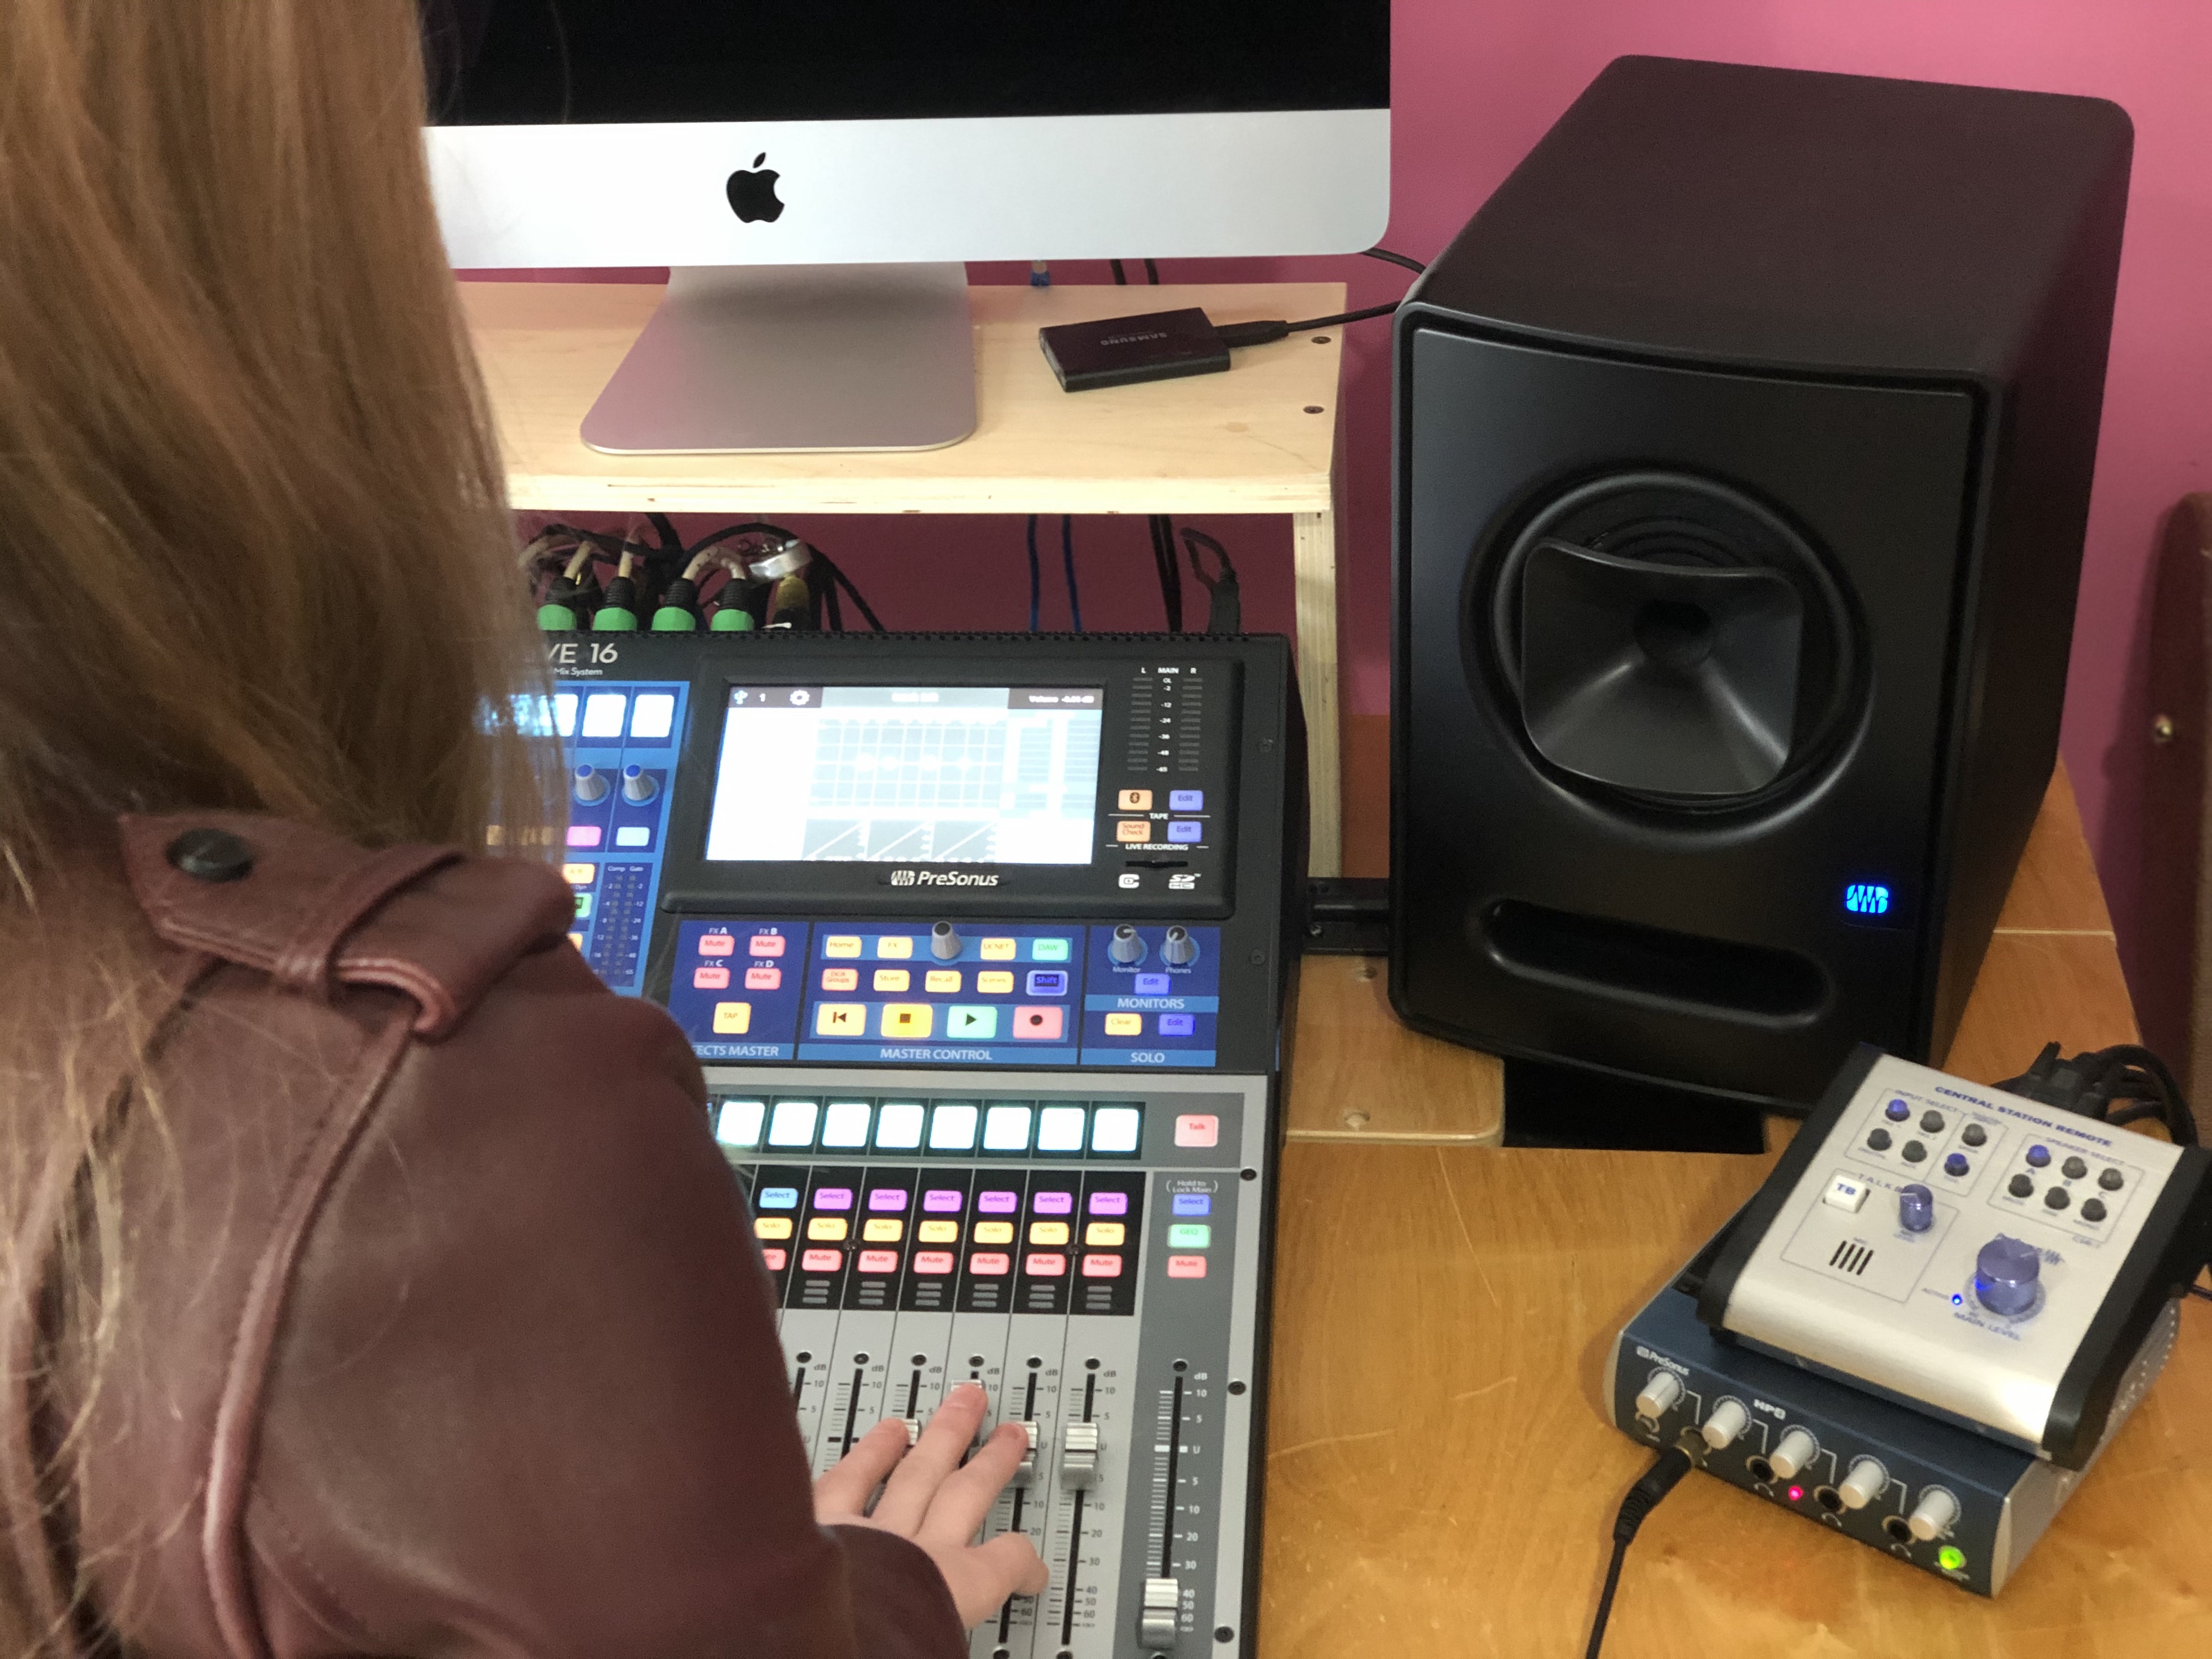 I use my StudioLive mixer pretty much every day. It is great because I save different scenes so that if I am recording a guitar/vocal demo, I have some EQ and compression settings saved, and I can bring them up super easily. I love that I can A/B EQ settings using the A/B button, and I also love the vintage EQ and tube compressor. I also have scenes saved for full band sessions, piano/vocal sessions, and more. The StudioLive mixer makes it super convenient for me to walk up and start working. I will also say that I carry it with me everywhere to run sound for live shows and recordings, and have even used it for a live broadcast of a show. It has never let me down and has always been very easy to set up! Because I am able to save settings from my recording sessions, it makes it even easier to set up for a live show.
Basically, I have various synths, mics, instruments, etc. that I leave set up so that I can record an idea at any time and they go directly into the mixer. From there, I use the Central Station which outputs to my Sceptre monitors along with other monitors and a PreSonus HP4.
We’re curious about your work as a vinyl mastering engineer… can you tell us about that sound-world?
The first thing I do when I’m mastering a project for vinyl is look at all of the files and create a session for them.  I then check the length of both of the sides. For each speed and size of disk, there are certain limits for how long the side can be. Next, I typically adjust the overall level of the project. Usually, the project is too loud, even if it hasn’t been mastered before. The louder the project is, the wider the grooves are. If the grooves are too wide and take up too much space, the project won’t be able to fit on the lacquer (the type of disk I cut on to make a vinyl master). I then mono the low end and use an EQ to filter out any frequencies that may give me problems. Sometimes if the vocal has too much sibilance it can cause issues, especially if there are also a lot of hi-hats/cymbals. I then run the project down to make sure it will fit and also to make sure there won’t be any trouble areas. If everything looks good, I’ll cut the project after that! Before I cut a lacquer, though, I have to use a microscope to look at a couple test cuts and make sure the stylus is working properly and that there is enough space in between the grooves.
Moving back to your home studio working environment; tell us more about how you’ve been using Studio One and what led you to our DAW?
For producing, tracking, mixing, and mastering. I will also occasionally use it for live recordings with my StudioLive 16 mixer. It has been a very helpful tool!
One of the main factors that lead me to it was when I was producing, being able to bounce between ideas easily and combine ideas from different files. I tend to either work with an “engineer” mindset or a “creative” mindset. Because of how easy Studio One is to use, I am able to start tracking a song while I am writing it, and I am able to keep my “creative” mindset. It helped me when I would be writing and producing at the same time, because it allowed me to be able to keep my creative hat on while still being able to engineer a track.
What Studio One features have proven particularly useful and why?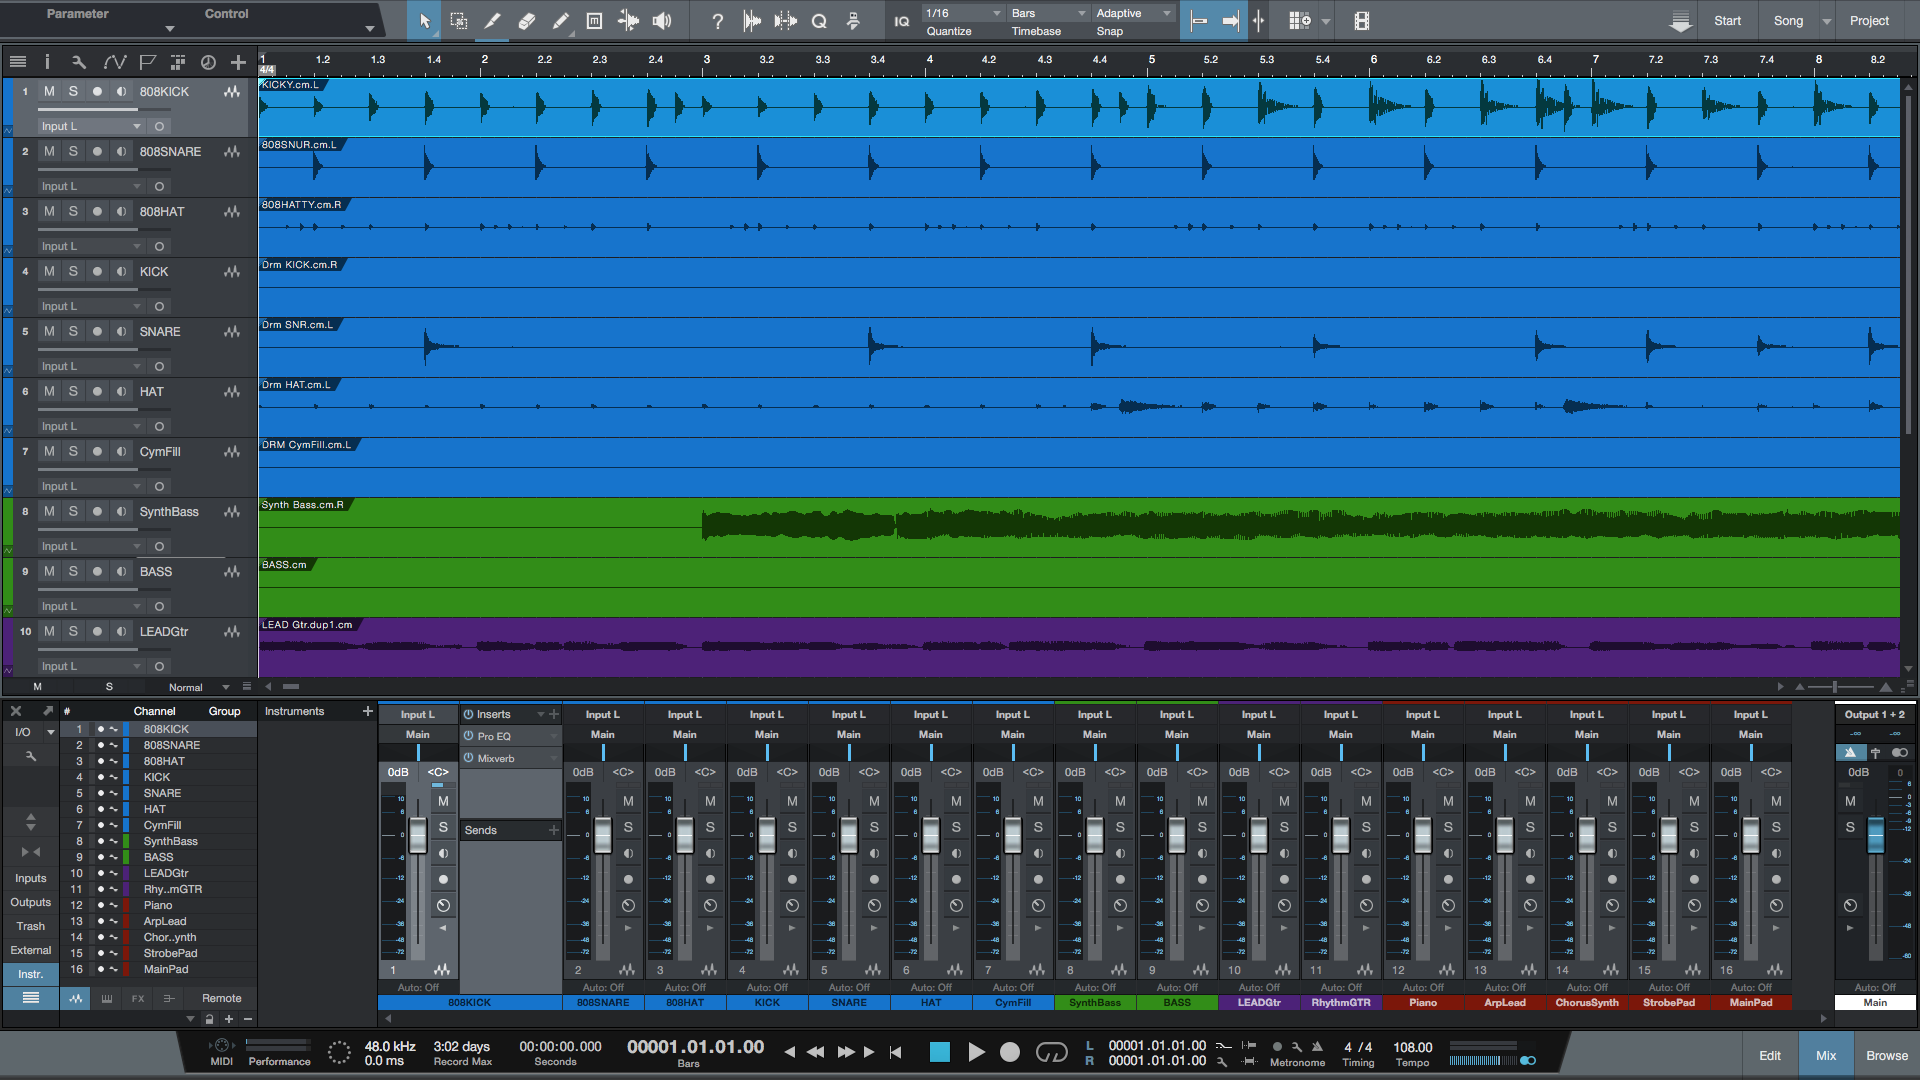
It is very quick and easy to use, which is helpful when recording live shows. It makes the show go a lot smoother when you’re not having to worry about having to spend a lot of time setting up a session, etc. I also love how well all of the PreSonus gear works together; it is extremely nice to have products that all communicate together so that I’m not wasting time trying to fix something. If I have an idea, I can walk right into my studio and know that I’ll be able to get everything down fast.
This was especially helpful when I was just getting started as an engineer, because everything was very straightforward when I was setting it up.
All of the PreSonus products work in many different settings. For example, I originally purchased my StudioLive board for live events, but I use it in a studio setting as well and love it there, too!
Finally, let’s talk about you as a creative musical artist!
My main influences for my own music are artists like Maggie Rogers, Florence and the Machine, and St. Vincent. I have a love for analog synths and was lucky enough to get my hands on a couple for this project. I used a Roland Juno 6 and a MOOG Sub Phatty for most of the songs, and then had a drummer/guitarist/bassist add parts to each of the songs as well. I love using basic tools like EQ and reverb to make new sounds that I haven’t heard before. Typically, I will use the Pro EQ plugin that comes with Studio One to take out certain frequencies. The majority of EQ’ing I do is subtractive, because I like to make sure that every instrument has its own space in my songs. A lot of my time is spent experimenting with lots of different effects to try to get the sounds that I can hear in my head. I love the depth that an analog synth and live instruments can bring to a session, but I also love being able to edit a project easily. Even though I’ll record a lot of different instruments, I like to be able to edit each of the parts so that you can feel the song “build up” from each of the verses to the chorus. Studio One makes it really easy for me to audition different parts and figure out what I like. I am also known for creating a bunch of different versions of the same song, and Studio One is able to make my workflow seamlessly. I use the Scratchpad function because I typically write a song while I am also recording it, so I am able to try out different ideas without having to commit. That is one of the things that Studio One does best, is it works for Engineers, but also Songwriters, Artists and Producers of creative content these days online.
I feel very lucky that I found your products because it has really helped me grow my studio and career. Thank you, PreSonus!
Website | Instagram | Facebook
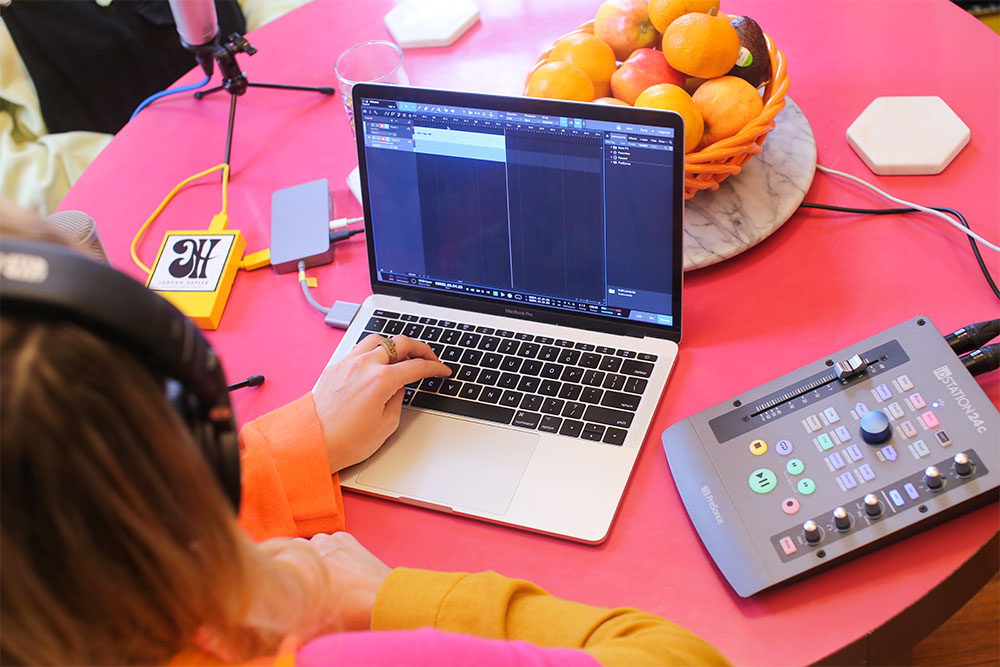
5 Quick Steps to Jump Start your Podcast
Before you read this, go take a shower. You may be quarantined but that’s no excuse to look like an extra on The Walking Dead.
Done? Great.
Now is the time to start that podcast you’ve been thinking about for months. No more excuses. You have the time and we’re here to help. In fact, PreSonus provides all the tools you need to make your podcast sound like the pros which is why so many podcasting professionals rely on PreSonus. Here are 5 quick steps to get your podcast rolling!

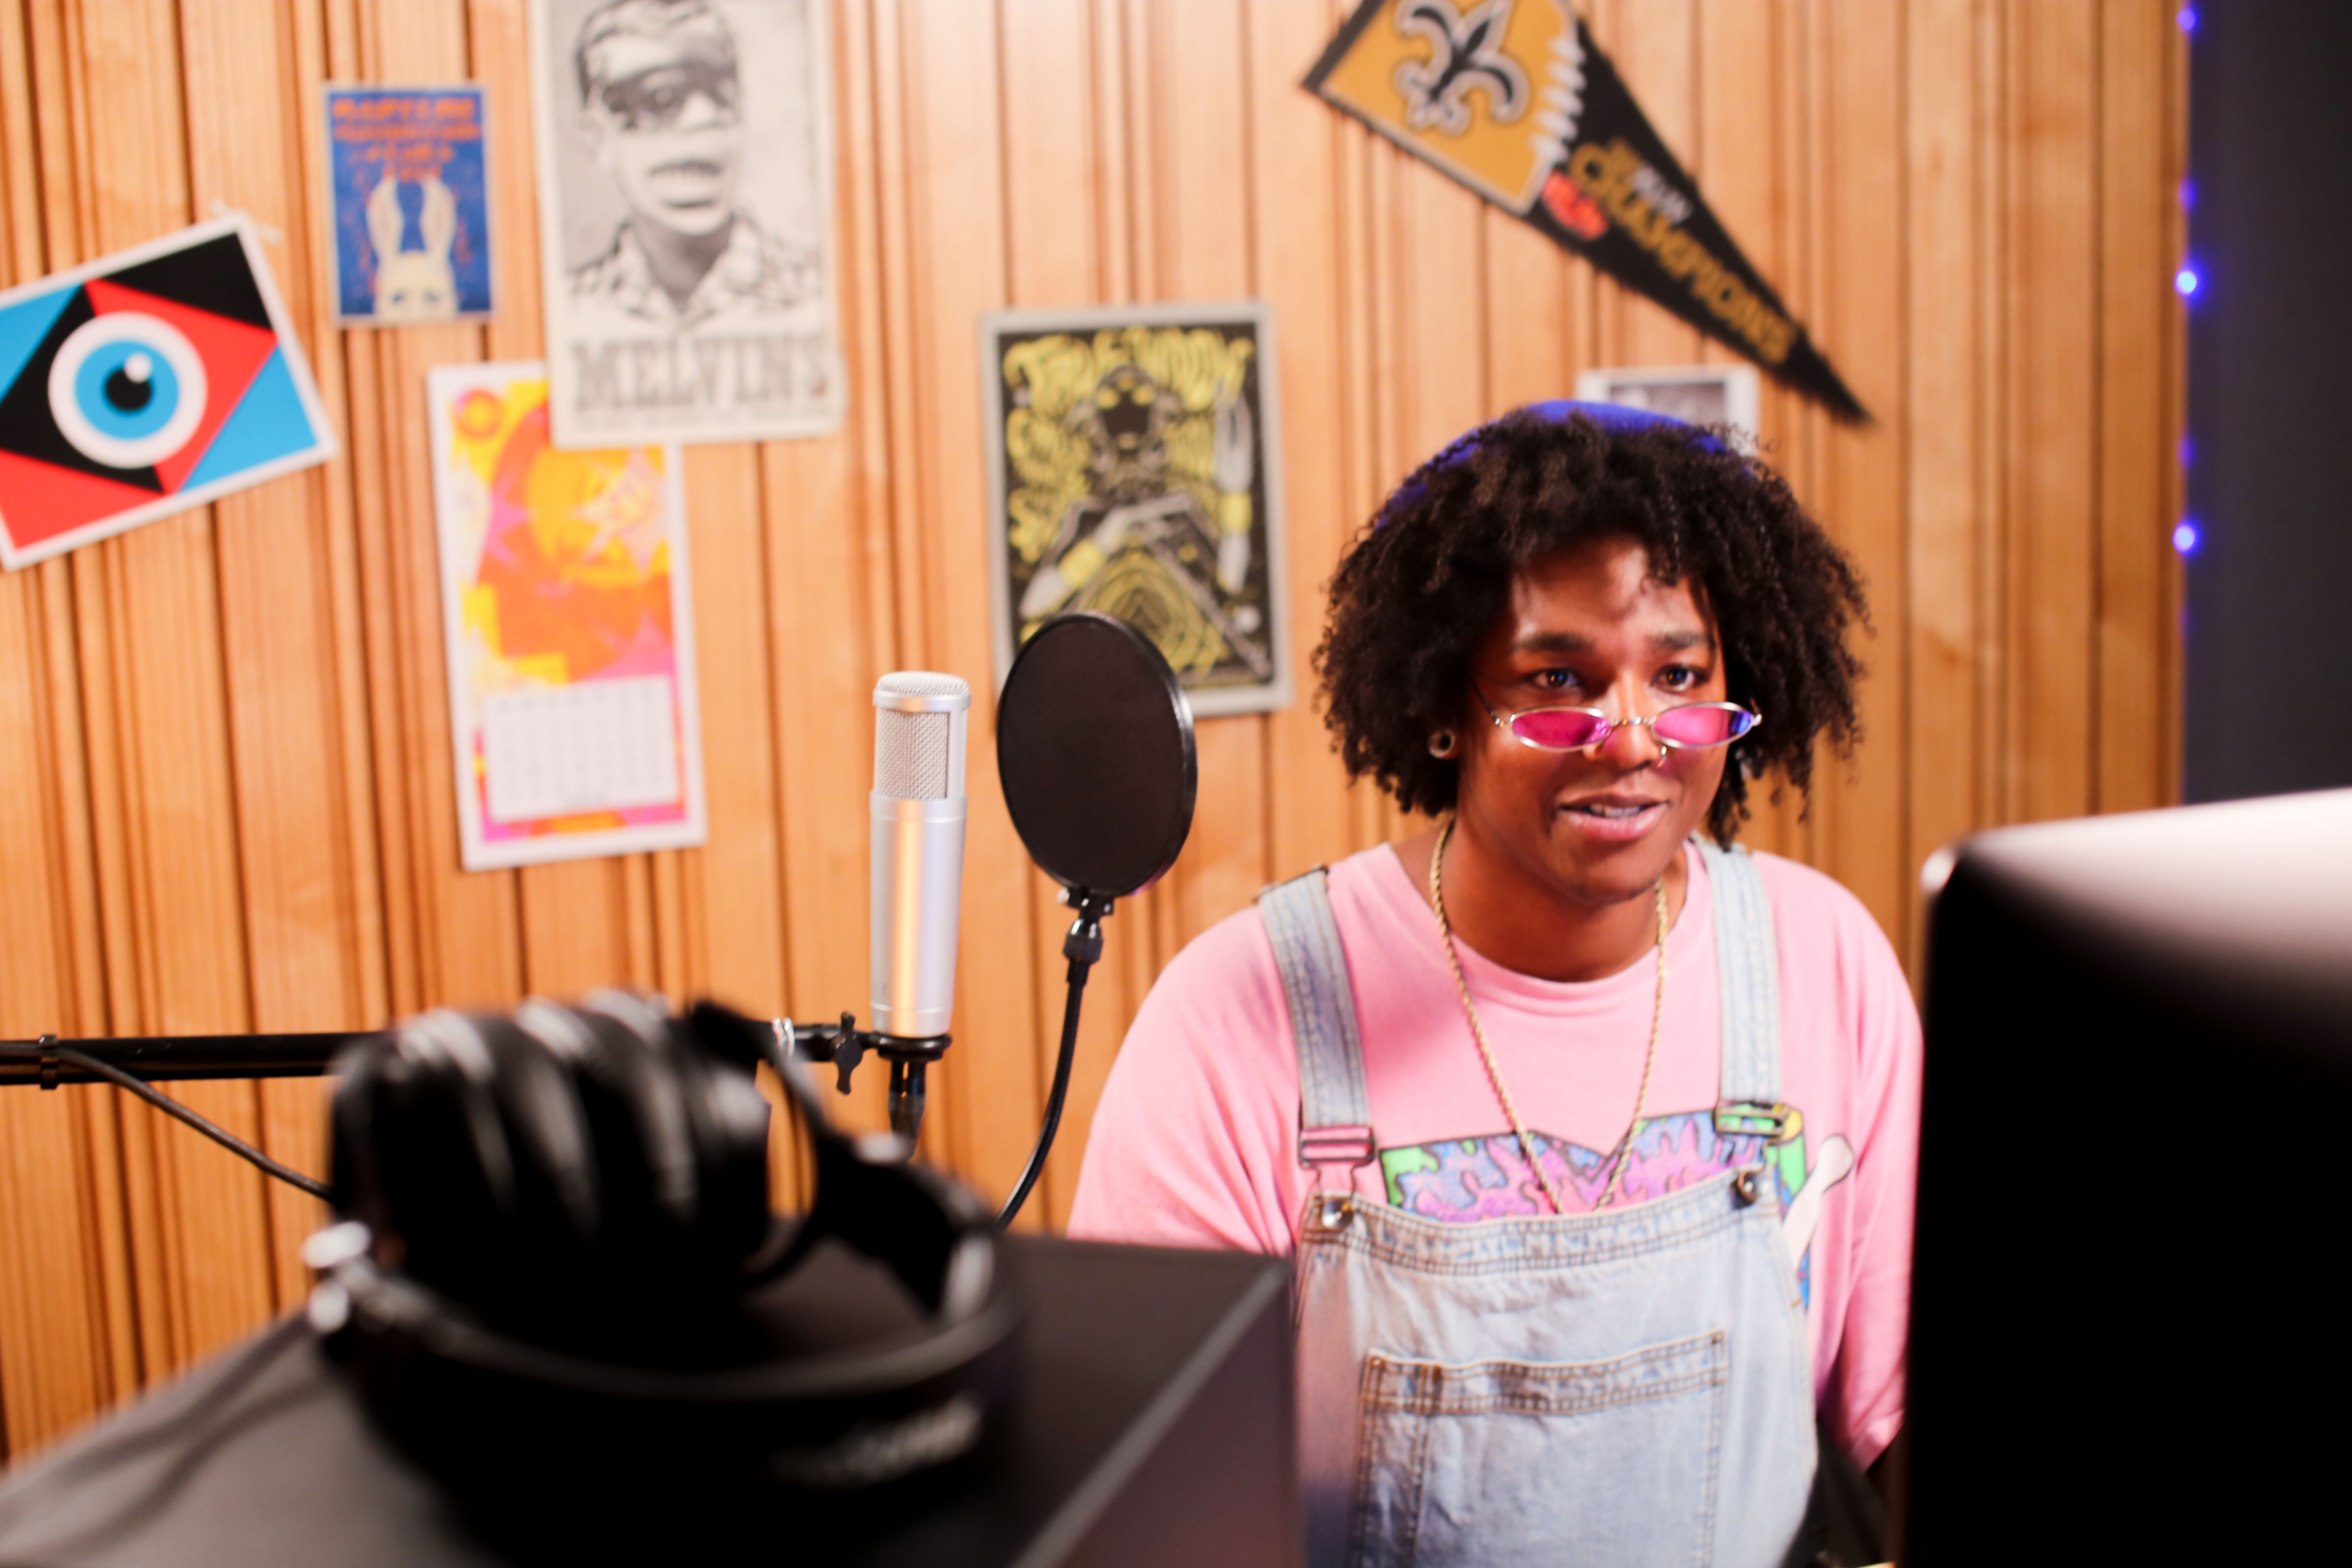
Listen to Do What You Want Radio with Jordan Hefler
-
Listen to the experts who are already podcasting well.
- The F.A.N. Show is a one-man, award-winning sports variety show based in Spokane, WA—and it’s in a league of its own. There’s something for every fan. The show is hosted by Richard Tieman, who is a musician, producer, sports fanatic, and Studio One user. After five years of recording 440 podcast episodes on the same AudioBox iTwo he purchased in 2015, Richard shows no signs of slowing down. Read more about his experience in the podcasting world here.
- Recording Studio Rockstars is a #1 iTunes podcast that invites you into the studio to learn from recording professionals so that you can make your best record ever and be a “Rockstar” of the studio yourself. Lij started the podcast because he had loved the excitement of being an intern in the control room during a real session with professional recording engineers and producers. He remembered listening in on the amazing stories they would tell and realized that he had a chance to help people everywhere have that same experience through podcasting. Read more about Lij here
- Heartcast Media is a dedicated full-service studio in Washington, D.C. that works with clients to create high quality, authentic podcast content that inspires, educates and connects. Molly Ruland and her team specialize in working with entrepreneurs, visionaries, and businesses of all sizes who have an impactful point-of-view. Learn from Molly here.
-
Setup a podcasting home studio.
- Here’s the hard truth: If your podcasts sounds bad, nobody will listen to it. The more listenable your podcast is, the more your audience will want to listen to it. Fortunately, it is simple to get a great sound for your podcast. You will need a computer, an interface, a microphone, monitors and of course, software. This article covers everything you will need.
- In general, rooms that are 10 x 10 feet or less will get great results with some combination of absorption material. If you are mixing in a larger space, you might want to add some diffusers to deaden it.
-
Select the RIGHT Podcasting Microphone!
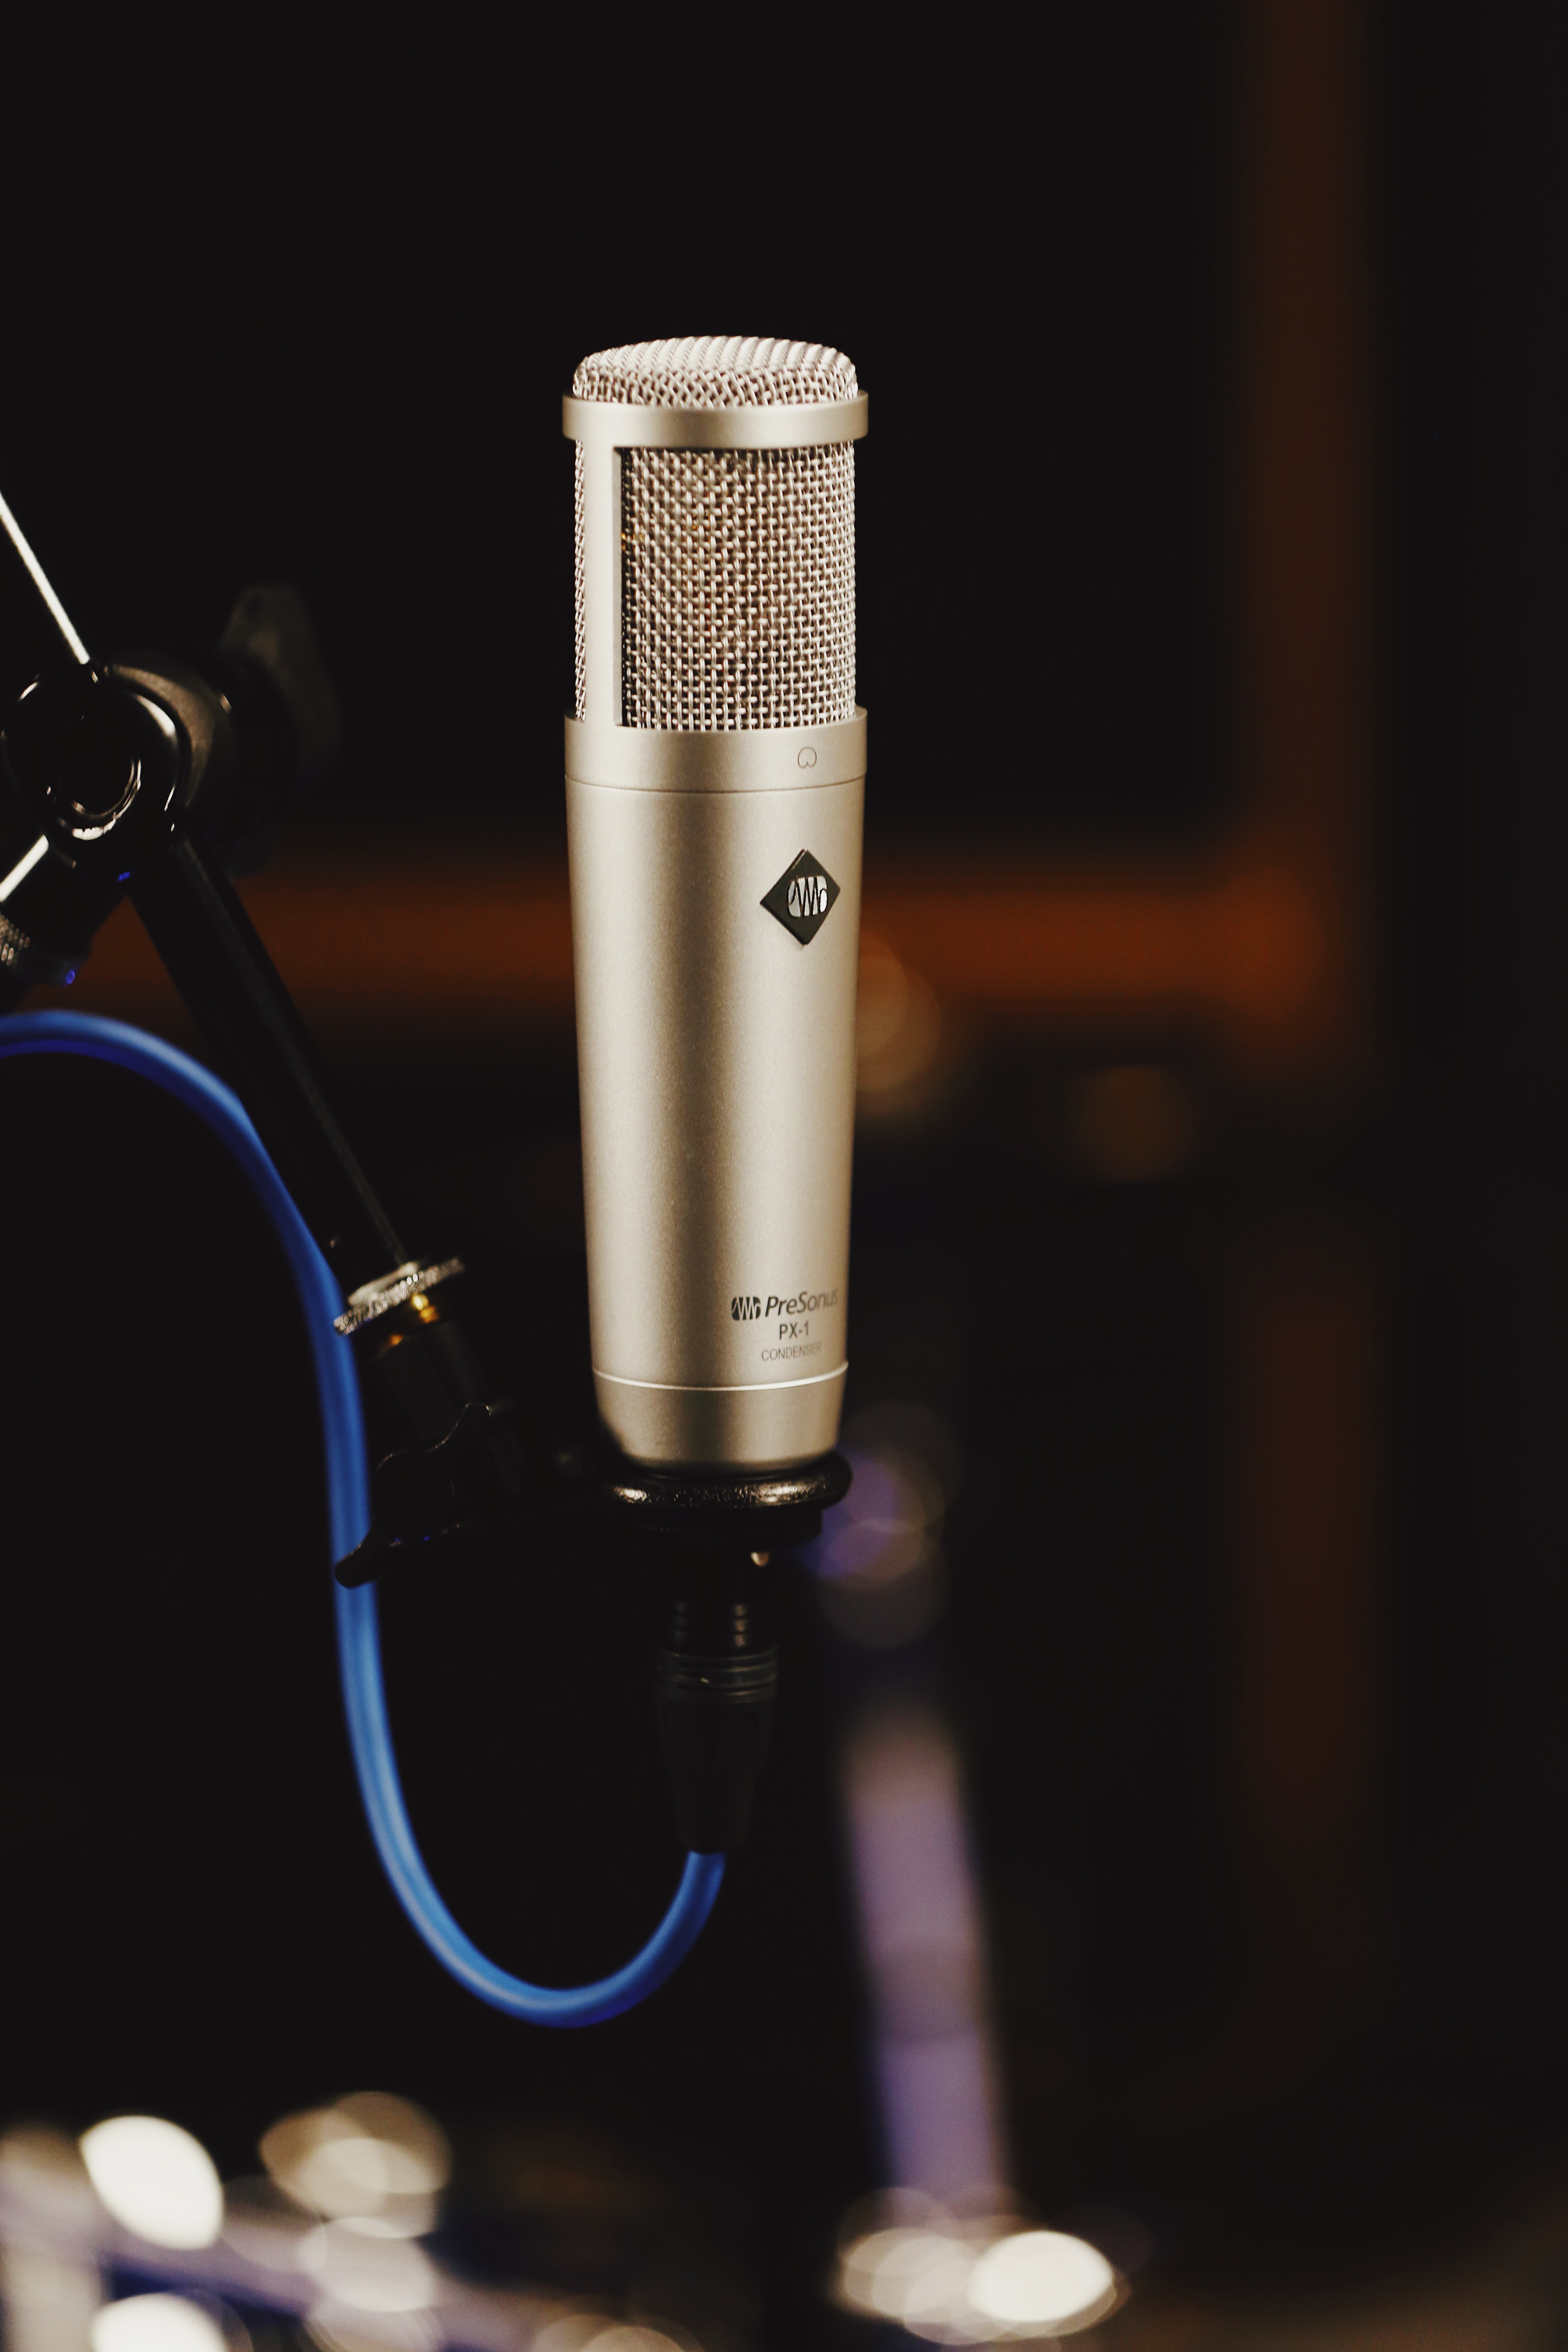
Check out the PX-1
- Choosing the right microphone is critical to the sound quality. The most common type of microphone for recording vocals is a large-diaphragm condenser microphone like the new PX-1 Microphone. This mic is ideal for podcasters. Getting familiar with your microphone and becoming comfortable speaking into it will yield amazing results when you’re doing it right.
- Learning to use a microphone is part skill, part art. Check out this article for some helpful tips!
-
Choose a DAW!
- Studio One Prime is a free recording application that provides all the tools you need to create a professional podcast. PreSonus even offers you a series of articles that will walk you through the process from installation to publication. Seriously, there’s a lot!
- Check out Studio One Prime here.
-
Listen before you post!
- It’s always a good idea to listen to your podcast before you post it. This gives you the opportunity to catch any audio anomalies that detract from your content. Once you achieve a sound that you’re are pleased with, professional DAWs like Studio One allows you to create a template. In Studio One, this template will launch with all the tracks and plugins you normally use already set and ready to go. This great feature makes it easy to reproduce the sound you want for your podcast every time.
BONUS:
- Brand new to podcasting? Here’s a quick start guide for everything you need to consider!
SANGUINE: Cold Blood(ed) With Studio One
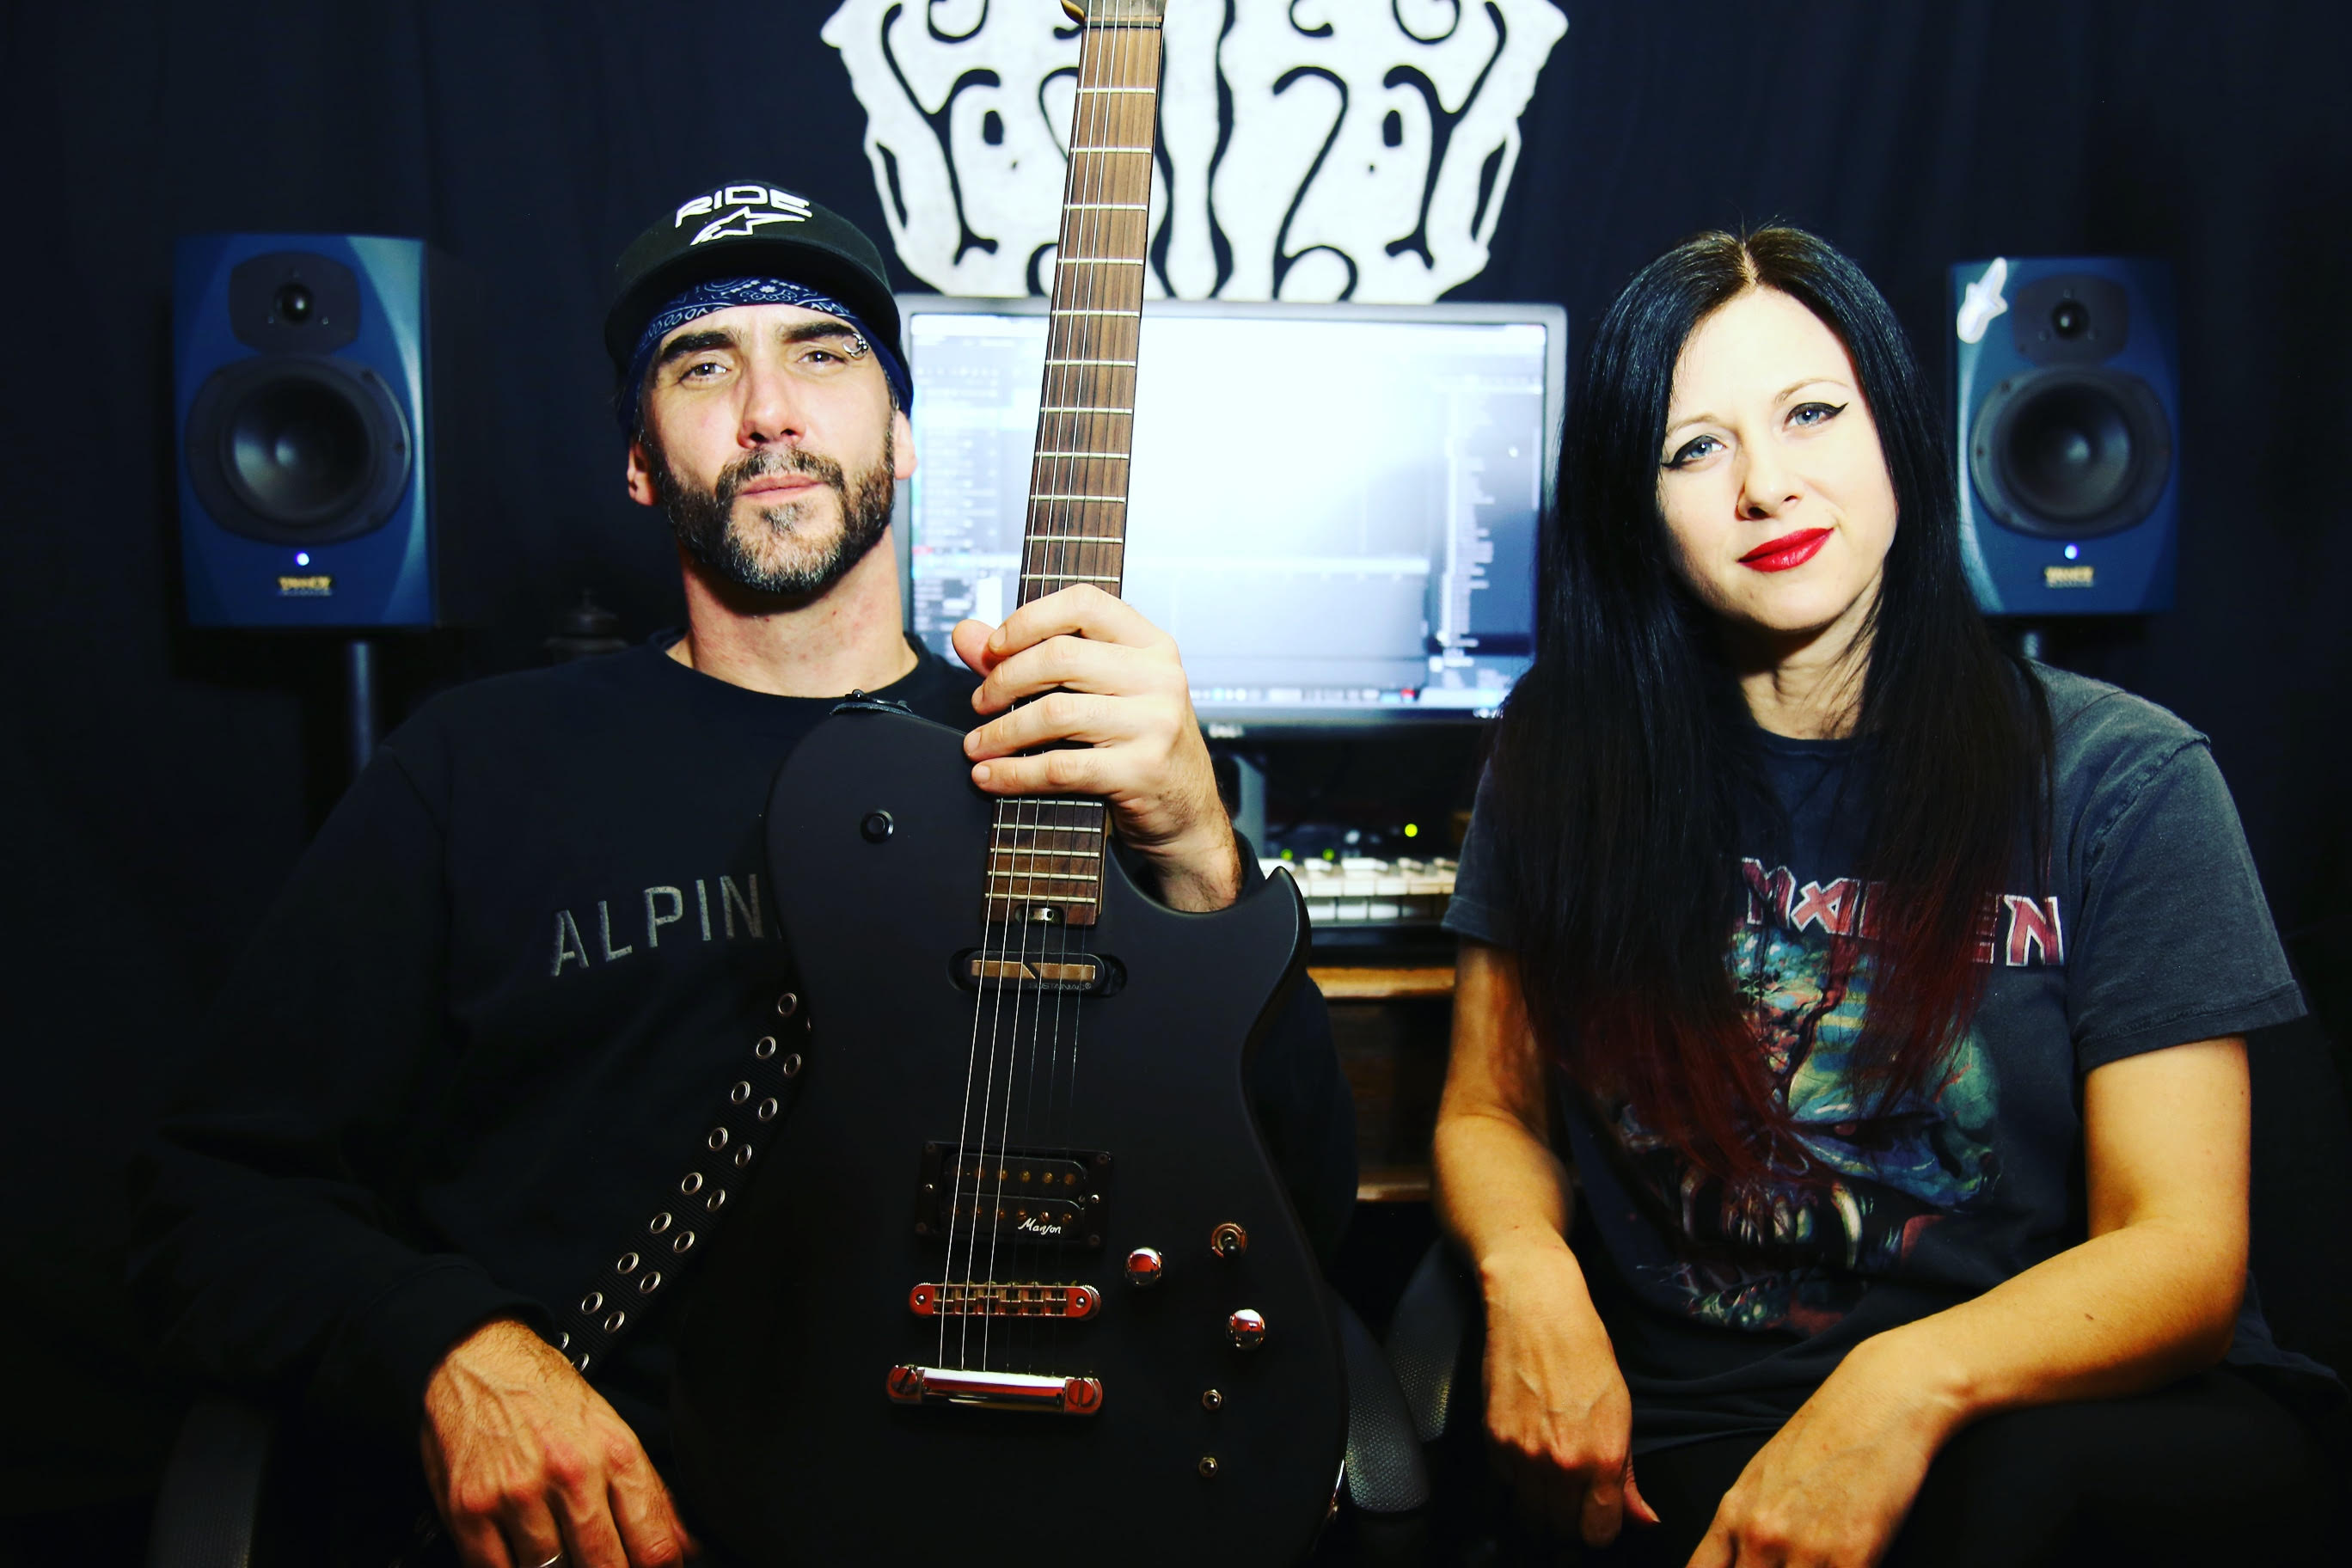
SANGUINE are an Alternative Rock Metal band from Exeter in the UK, led by singer Tarin Kerrey and guitarist Nick Magee.
The band released their first Album, Black Sheep, in 2016, co-written by Jesper Stromblad from Grammy Award-winning band In Flames. It gained incredible reviews, and Sanguine went on to tour the UK and Europe with many notable acts including Fear Factory, Megadeth, Skindred, MushroomHead, Hellyeah, Cancer Bats, OPM, Zebrahead, and many more.
“Save Me” single from Black Sheep
Following the tour cycle, SANGUINE returned to the UK to record the follow-up album. They tried various producers, but found the energy wasn’t really connecting and wanted it to feel right. At the same time, they had been playing around with the free version of PreSonus Studio One—Studio One Prime. They found it incredibly intuitive, and as their skills improved they began making higher and higher quality demos. They started showing the recordings to the labels, sponsors, and their inner circle… and the feedback was extremely positive.
When it came to the final decision of who to record with, SANGUINE mixed up the recordings with versions of the same songs from professional producers done in other studios, and asked people to choose their favorite based just on sound. The majority of them picked the band’s version recorded in Studio One.
This inspired the band to fully embrace the program and learn as much as they could in a very short time.
The result is Cold Blood, which like its predecessor has received stunning reviews from both mainstream and underground press/blogs/fanzines.
“Ignite,” single from Cold Blood
In a modern climate where music makes very little revenue compared to the cost of making it, getting the cost of an album down is crucial. The average cost of a rock album is about £10-£20K. Cold Blood cost under £500 to make in total because of Studio One. SANGUINE only used the plug-ins that came with Studio One—as there was plenty to work with!
Perhaps one of the most impressive things about Studio One is its user-friendly interface. Nobody in the band was particularly computer-minded. None of us had any previous experience engineering at all. That alone is a testament to how logical the layout is. The only regret SANGUINE have is not going down this path earlier, because the benefits have been so instant and rewarding.
PreSonus: What PreSonus products have you used and which do you currently use?
SANGUINE: We actually have a really simple and achievable setup. We use Studio One Professional, Tannoy monitors, and a range of mics. We have brought additional plug-ins like Izotope and VSTs, but to be honest 90% of what we ended up using for the album came free with the software. It’s a seriously comprehensive range of sounds to get started with. You could spend weeks alone exploring just them!
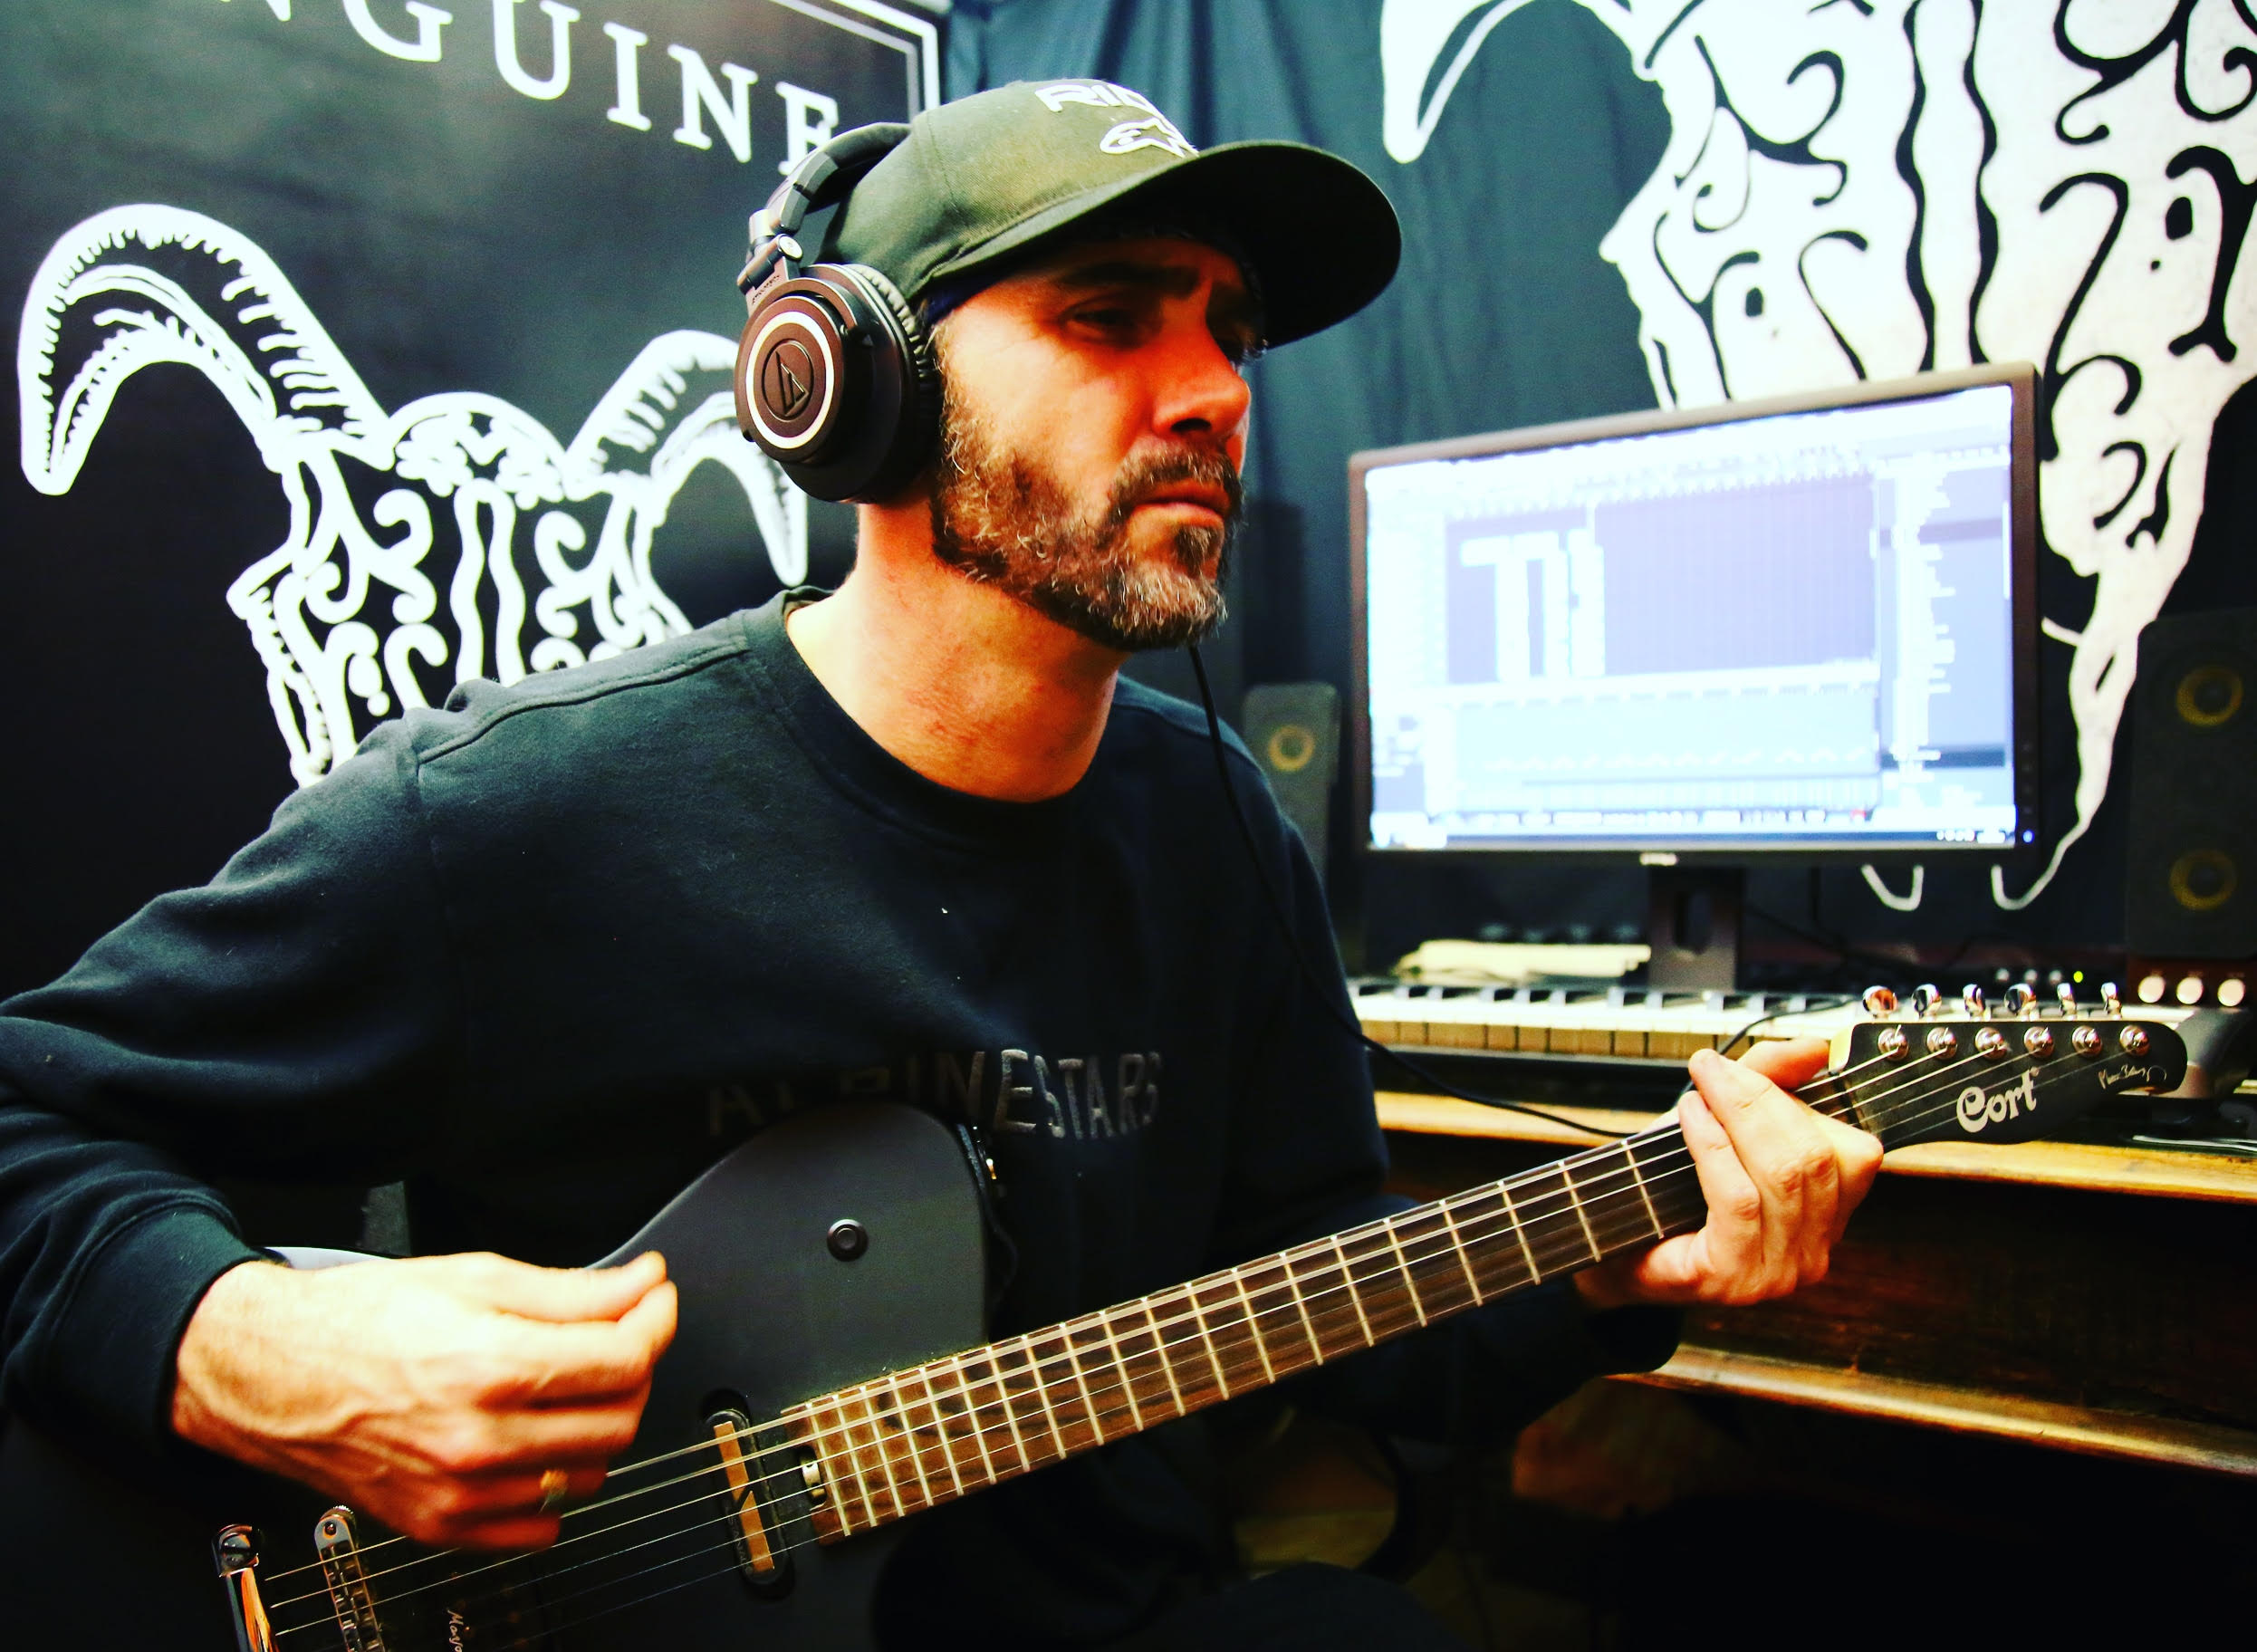
We are looking at buying more expansion packs for the next round of recordings. We compensate for our lack of outboard studio gear by using VST plug-ins and extremely high-quality instruments and mics. Nick uses a Manson MBC-1 with Pro Sustainiac Sustainer and Ross uses a Fender Precision bass with Nordstrand Audio custom pickups. Changing to Mansons and Nordstrand gear changed our game quite a bit both live and for the studio. We have learned that having high-quality source sounds, good quality microphones/pre-amps, and a decent soundcard is absolutely key to the end product sounding good.
PreSonus: What led you to Studio One? Was it the company’s reputation, audio quality, ease of use, specific features, price, other factors?
SANGUINE: To be honest it kind of found us! Producer Daniel Flores introduced us to the program during the recording of the Black Sheep album. We had never heard of this DAW before, but Daniel is a true pro, so the fact that he was using it alone was a big validation. You could tell he was excited by the functionality of the program and throughout the recording, he would often show us some of the cool things you could do with it. This sparked our interest.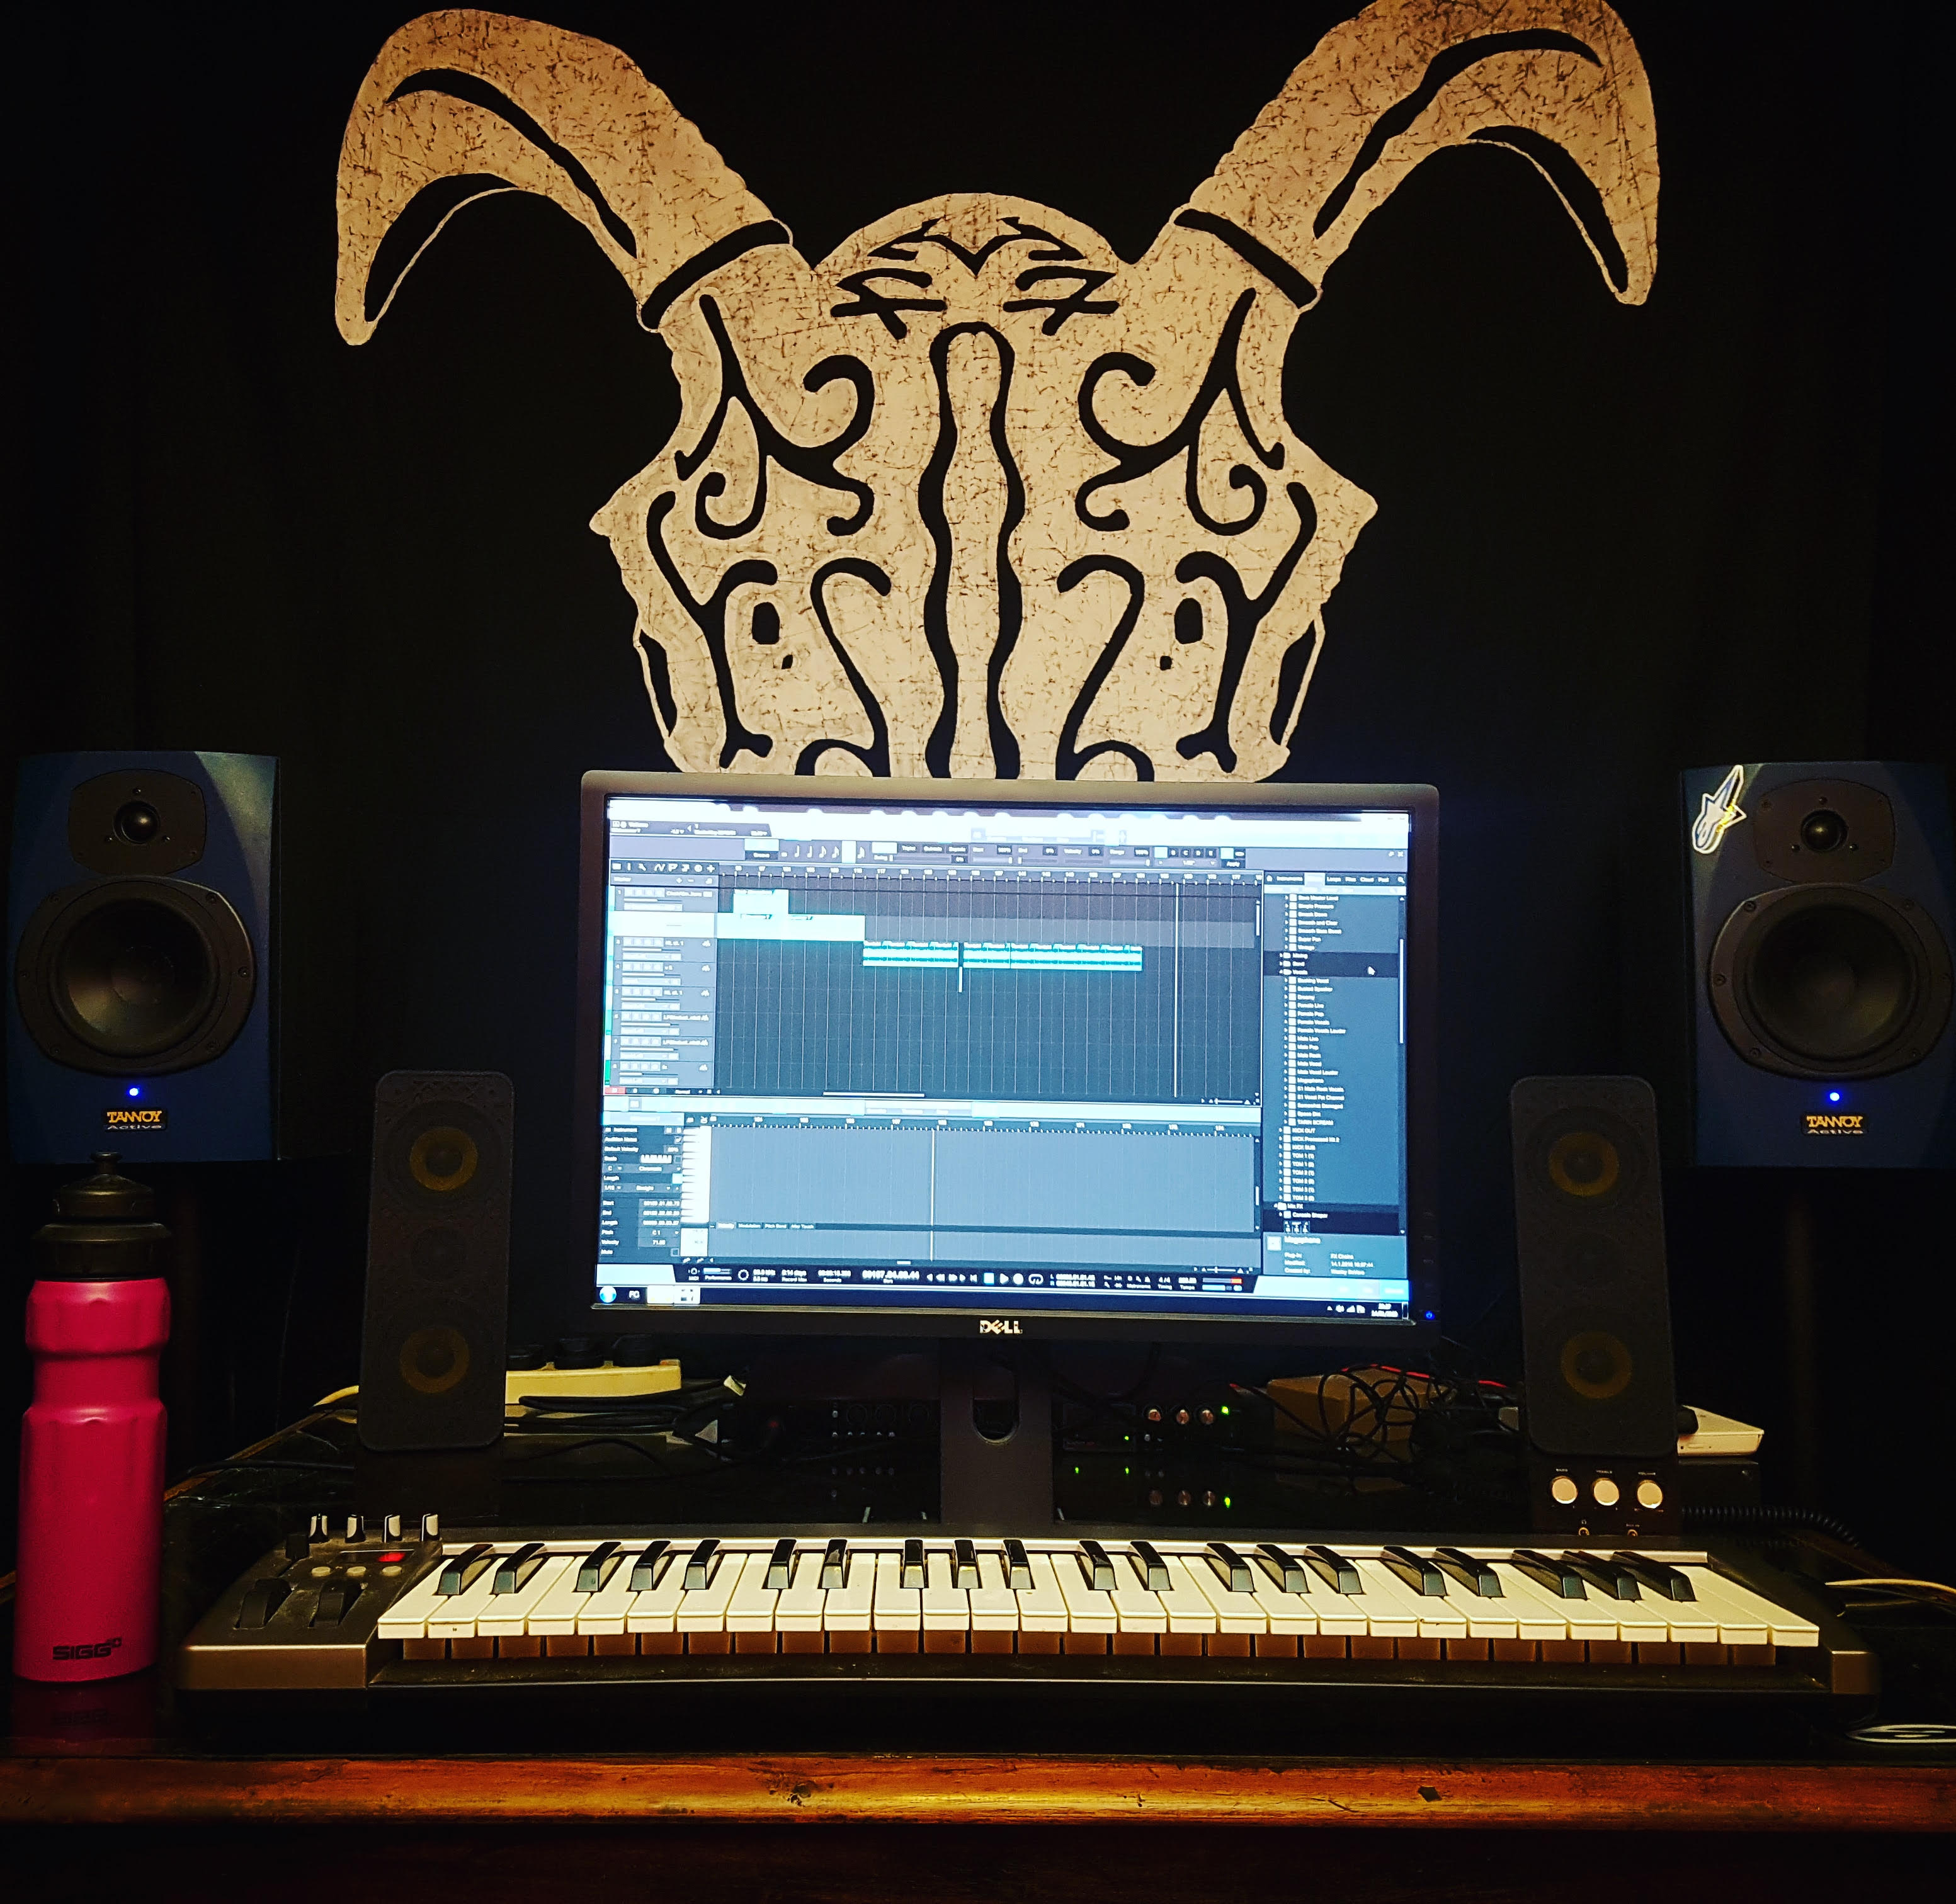
Studio One has a really intuitive layout unlike other DAWs, things are where you would want or expect them to be rather than hidden away in obscure menus. Studio One is easy to use; we rarely have to look up where to find functions and that is a big advantage to the writing process.
We knew that Studio One was being widely used by studio producers but we were uncertain about its capacity to record a live band… we were wrong, it’s just as good as Pro Tools and we would now recommend it as the only option for musicians.
PreSonus: What Studio One features have proven particularly useful and why?
SANGUINE: There is so much included with Studio One, features include everything that their competitors are offering and MORE!
We started the Cold Blood album recording process by recording a live demo of the songs in our band room. We then used Studio One to help us make a decision on which ones to record for the album.
We set up our album project at 96kzHz and recorded the drum stems in a professional studio with an acoustically treated room, and brought the tracks back to our studio to edit, quantize and process. This was nerve-racking for us, as we had never quantized drums before, but again PreSonus delivered by making the drum quantizing and triggering process a breeze. We then laid all the other instruments in our studio using Studio One; it was easy to try something and undo it if it didn’t sound right. We used a mixture of real sounds and plugins to achieve the final result.
For SANGUINE we have found the VSTs, sound packs, synths, and loops included with Studio One Professional inspired us to create and record our new sound. We downloaded a few plug-ins and VSTs but mostly used the free Add-Ons provided by Studio One. SANGUINE always felt like it needed an extra sound in some songs, not enough to warrant a full-time extra member—more just the odd effect, ping, or some other sound to pick up the ear and keep it interesting. Lots of bands do this in our genre like Linkin Park, Slipknot, Skindred, Bring Me The Horizon, etc. The Studio One sounds were exactly what we were looking for, there is a huge range of sounds, but also the ability to forge, combine and bend the audio to pretty much anything you can think up. We now run our extra production sounds live.
PreSonus: How does Studio One compare to other DAWs you have used?
SANGUINE: We played around with Cubase in the early days but it just felt like climbing a mountain. It’s not very motivating as an artist if you can’t get into a good writing flow. We personally didn’t find it intuitive at all. We tried Logic but didn’t find it very logical! After seeing colleagues spend thousands on Pro Tools, we saw a cycle of money going out but never coming back in! In an industry where it is hard to make money, it seemed to us that Pro Tools was only for people with more money than sense!
 For an untrained eye, most DAWs look complex and difficult to use. None of the band are qualified sound engineers, so usability was the first priority. Studio One offered an interface that was easy to use and a high-quality sound.
Originally we just intended to record demo’s on Studio One – but after a while, we started to prefer our versions of the songs to the other Producers we were using. We found that you could use Studio One to experiment quickly with new ideas. It’s changed how we write – writing used to take place in the room but now we often have Studio One running so we can try different beats quickly or see how a section sounds if you add strings. Everything has improved as a result.
In simple terms, Studio One has made it easy for an everyday person with no previous engineering experience or ability, to create professional studio quality recordings without having to spend thousands hiring a traditional studio. That alone blows our minds. We used to spend around £1000 per song. So an album could chalk up £10K pretty easily. The modern music industry just doesn’t provide the economy of scale to make sense of those numbers. Hundreds of thousands of Spotify plays will earn you about £50 for example – so you would have to have millions of streams to earn that back.
By learning Studio One we have essentially eliminated that cost and empowered ourselves to have the freedom to write and release anything we want, whenever we want. As artists, we can’t think of what could be better than having 100% autonomy over our output. Most artists play for the love of music, but due to the towering expense involved with being in a touring band, at some point they have to turn it into a business to continue doing what they love. We have seen so many amazing bands who have exhausted themselves and essentially burnt out trying to make sense of the money side of the business. The bottom line is that eliminating cost makes it easier to return a profit and survive.
PreSonus: Which Studio One feature or concept isn’t talked about enough in your opinion?
SANGUINE: A BIG feature for us was the ease of adding ISRC codes. We had friends who were releasing records at the same time as us who were struggling to get theirs embedded for a sensible price—can’t say that we didn’t feel a bit smug knowing we could do ours within the session—it took us about an hour to sort out. Again, we learned and executed a new task in an hour using only free internet tutorials. That is one of the many examples of how Studio One makes our life easier and cheaper. It’s another process that we previously would have paid someone to do.

Also, I think the depth you can go inside a sound is slightly overlooked—when you start really playing with the parameters of an effect, layering them up/combining you can approximate virtually any sound within reason. Initially, we assumed that we would need to keep topping up the extension packs more frequently – however the deeper we explored the program the more we found. I would advise anyone using this program to spend at least two weeks just exploring the sounds and how you can manipulate them. At first, we grouped sounds that we liked and made notes of their location— after a while though we started using sounds that we never thought we would ever need—for example, sounds that sound irrelevant on their own but amazing within the context of a mix.
We heard that Studio One is very popular with EDM Producers—it’s easy to see why because of the quality of recording produced, sound packs and ease of use. However, we are a rock band, so 90% of the sound we record is played on drum/bass/guitar/vocals. We think if more rock/metal bands knew how radically Studio One could impact their output, many more would jump on board. Our advice would be don’t wait to be told, spend time on it, try it for yourself… and most importantly trust your ears!
PreSonus: Any useful tips/tricks or interesting stories based on your experience with Studio One that would be of interest to our user base?
SANGUINE: This is probably the most relevant question to us out of all of them. Historically every time we tried to record ourselves the programs just seemed too complicated. We would spend hours on a recording in Cubase and obtain a very average result. We put this down to none of us being a qualified sound engineer, but when we moved over to PreSonus suddenly our recording quality went up! We realized it wasn’t our talent it was the usability of the program that was holding us back.
After you master a DAW system you realize that 50% of the songwriting is achieved via the recording and production process. You may have noticed over the last few years that producers are often credited before artists on songs. It’s like the guys that used to be kept in the backroom are now thinking ‘Hang on a minute—who’s the talent here?!’ Mark Ronson is a good example. We don’t blame them—after all the song is only 50% of the process—the production and recording are what makes it viable.
We see a future where the only artists who can survive are the ones who create and record their own music from scratch. SANGUINE have taken this DIY ethic to the extremes and for our latest album, Cold Blood, we literally created every visual and sound ourselves. It meant many nights of reading, trial and error, and a few headaches… but we are now in a position where we can create everything for almost zero cost. The bottom line for any recording is spending hours grooming through the takes until you have the right sound and delivery. When you are being charged in a studio you are “on the clock” and you don’t always achieve the best take or treatment of sound. By taking control of our own recording environment we can spend hours recording and playing around with the music until we have the exact sound we are looking for… I don’t think we could have afforded to pay an engineer or producer for that!
People can overlook how psychological the recording process is – we realised how much our insecurity over our ability to pull this off was impacting us as artists/writers. We had to really learn to trust our ears and what WE thought sounded good.
We blind tested this by recording the same song three ways:
- record with a named producer from scratch
- sending our own recordings to producers and asking them to do a mix
- recording and mixing the song ourselves.
After a blind test listen of these three options we asked our fans and managers to chose which they preferred, surprisingly option 3 was the winner, so we decided to record the album ourselves with no help! Not because the other producers were bad at what they did, more that they simply couldn’t compete with the AMOUNT OF TIME we had to spend on it. Time is free after all, so it is one of an artist’s biggest assets. This confirmed our self-belief that we could do it and we found that energy very motivating—the more positive feedback we got, the more hours we put into it and the better the result. One of the frustrating things is that as you get better you find yourself looking back at songs and pulling them apart/finding fault. Having a studio at your fingertips means you can re-visit those issues and iron them out.
I haven’t met an artist yet who has left a studio being 100% blown away and happy with what they have created with another producer. In fact, it’s more often the opposite. Sure you can go back to a studio and make corrections but it isn’t very practical or spontaneous and you will always be working to someone else’s timetable. Why pay thousands for something you don’t even like that much? Studio One puts our entire catalog at our fingertips. It also means if we need to make alterations like removing vocals for a soundtrack, we can just fire up the computer and do it ourselves. Even a simple task like that would set you back £200 if you were to get a studio to do it for you.
We were joking recently that Studio One is our fifth band member—we feel so in tune with the system it almost feels sentient at times! We might start offering it coffee when we pull a late one…
Finally—something which we didn’t expect was that other bands started asking us to record them and mix their music after hearing ours. This provides an additional revenue stream that we didn’t account for. More money is never a bad thing and it’s a huge compliment to us that after two years we are being asked to do these things. If you had told us this five years ago we definitely would have laughed at you.
PreSonus: Any final comments about PreSonus and Studio One?
 SANGUINE: Even if you have never been good with computers or tried a DAW system before we would urge you to at least play around with the Demo (full-featured Professional version, 30-day license). The gear we listed above is all we used for our record and the entire set up can be brought for a few thousand pounds. This relatively small investment for infinite recordings seems like a no brainer to us. We managed to learn how to record/mix/master and release a record in 2 years from scratch. If Studio One wasn’t as easy to navigate then how would that be possible? The proof is in the pudding.
It’s pretty rare for us to get this excited about a DAW but it has fundamentally changed everything from our recording all the way down to how we write and the business models that we use. We now have 1/10th of the previous outgoings and this has allowed us to scale the band much faster than previously. What was once by far the biggest expense a band has now reduced to practically zero. The more we use it the more we will improve which is also exciting.
Finally… artists need to understand that the music industry has fundamentally changed forever. The days of making millions from music are long gone and eventually, only those who can sustain will be able to survive. We predict a future where only producer/writer/performers will realistically be able to survive. It’s no longer enough to just be a musician. Recording is the bread and butter of any band so if you do one thing this year: try Studio One.
For us, it changed everything!
Website | Instagram | Twitter | Facebook
FIVE Things to do While You’re in Isolation… Booth.
See what we did there?
So you’re stuck at home social distancing yourself, you’ve watched everything on TV, nothing new is streaming, you probably should shower—but here you are reading another blog post. Welcome to the club. We thought it would be helpful to suggest some things you can do during this time of isolation.
-
- Check out PreSonus’ latest YouTube series, the River City Sessions. This monthly, genre-agnostic online series features hand-picked up-and-coming artists from Louisiana and beyond, offering them a chance to record a few songs and a video in exceptional fidelity—for free. Each episode is intended to capture the live, performative spirit of the artists, with minimal attention to overdubs, layering, etc. We just published a new performance today by Palomino Darling! Watch the whole playlist here:
- Add a bunch of stuff to your Amazon Wishlist
- From the bedroom producer to the professional home studio, there is a ton of gear out there. You don’t need the most expensive gear, you need the RIGHT gear. Check out this article on curating the ultimate home recording equipment.
- Keep the creative juices flowing!

- Let’s be honest, life is boring without music. We need to help each other stay in a creative space and keep making music. Go back to your first ever mix or recording, listen again with a fresh pair of ears and consider what you would change. What did you like then that you don’t now? How has technology changed since then? Open a book, go through old photos, cook a meal, check out #PreSonus on Instagram and see what other musicians are working on all over the world.
- Brush up on those audio terms that everyone seems to know so well.
- Here’s a list of them… Hypercardioid Microphone Pattern is a thing. ?
- Calibrate your Studio Monitors… FINALLY!
- Proper studio monitor placement and calibration is critical to get the best experience in your listening environment. Taking the extra time to set up your studio monitors will make mixing easier and ensure that your mixes translate well from speaker to speaker. You’re not going anywhere, so just do it. Read more on how-to here.
I know it seems like the end of the world as we know it… but it’s not. We’ll look back and remember the time Covid-19 tried to ruin 2020… and we might even write some songs about it to share as well.
The show must go on. How to live stream your gigs in the time of COVID-19.

With concerns about COVID-19 canceling gatherings of all sizes, from SXSW to the Pearl Jam tour, musicians might be finding their own gigs also canceled or suddenly playing to an empty house. In this new and temporary era of social distance, live streaming your band’s performances might be the solution.
Live streaming is a great way to gain new fans, continue to entertain your loyal fanbase, and sell more content when you can’t play at the local summer festival or proceed with your tour as planned—but getting started can be a little daunting. Whether you’re an established band with a devoted following or an emerging artist looking to building your fanbase; live streaming is perhaps the best way to share your talent and music with a limitless audience.
PreSonus has put together this guide to help provide some tips and tricks to get started live streaming and keep the music going.
Start Small

If you’re like most musicians, the quality of your performance improves when you’re in front of an audience that is participating in your performance, applauding and cheering you on. This is perhaps the biggest challenge when beginning live streaming: you must find a way to bring that same energy to a camera in an otherwise empty room.
One way to get started is to create brief excerpts of a rehearsal to use as a story in your band’s Facebook or Instagram feed. This takes off some of the pressure because the video can’t be very long. Another method is to bring the audience to you. If you’re self-isolating with your family or roommates, put them to use and use them as your audience. This lets you merge your physical and virtual audiences, giving you some comfort with the medium before the camera becomes the only member of the crowd.
Choosing a Streaming Medium
 When you’re first beginning to create live streams for your band, controlling the cost to your band’s budget is critical. And while there are paid services that will allow you to create a private live stream that is ad-free and customizable, until you have an established audience, the cost for these services may not be justifiable. Services like YouTube Live, Facebook Live, and You Now will let you broadcast your performances for free and are designed to help you create a relatively stress-free live stream. Some free services will even let you preview your live stream before it goes live so you can make sure the quality is exactly what you want to broadcast. The trade-off is that these free services will interrupt your broadcast with ads, but this is a relatively small price to pay. Additionally, these free services already have millions of users who may stumble on your live stream, providing greater access for more impressions.
Choosing your Camera and Connection
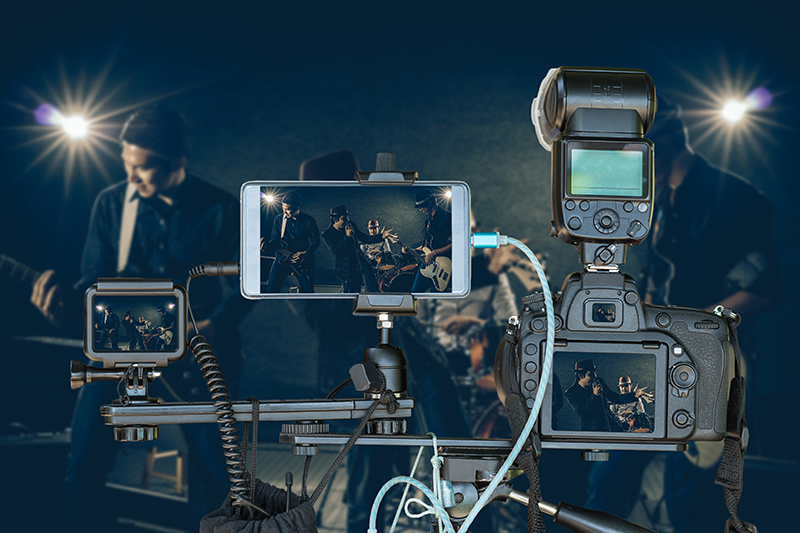
Making your live stream look and sound as professional as possible is the best way to attract attention. After all, nobody likes to watch a video that looks bad and sounds worse. To live stream your band’s performances, you’ll need some basic video production equipment to represent yourself well. There are several options based on your budget, but here are the essentials:
- Camera. Webcams are often the first thought when considering live streaming, but inexpensive doesn’t usually mean quality. We recommend using an HD camcorder, DSLR, or Mirrorless Camera with excellent video quality. 1080p is the current standard in resolution, however many 4K cameras are becoming more affordable. (It’s important to note that consider some streaming platforms will not output in 4K.) Be sure to investigate how a camera performs in low light; some cameras, like those designed for action, may not perform in low light situations that are more suitable for creating the right vibe for a live performance. And remember, just like an audio interface or a mixer, a good camera can be an investment into photography or video recording other than your live stream, so buy something that will fit all your needs. The good news is than an excellent camera that will suit all your needs can be purchased for less than $500.
- Lens. Camcorders can have great quality and you don’t need to purchase any lenses. That being said, they aren’t as versatile and won’t have the same video quality of a DSLR or Mirrorless camera. Many cameras will come with a kit lens that has a variable focal length and a low F-Stop that will most likely work for you.
- Light. Don’t forget about lighting before you record your live stream. Even if you just use a well lit room or have a large window, it can make a huge difference. There are many options for lighting such as LED, fluorescent, and tungsten. It is important to match the white balance of your camera to your lights as well as diffuse the light so it isn’t just bright, but also soft and photogenic.
- Tripod or Mount. You are going to need something to setup, frame, and stabilize yours shots. Every tripod has a suggested weight limit, so get one based on your needs.
- Power. When you’re live streaming your band’s performance, you don’t want to run anything on batteries. Make sure every piece of equipment has a power system to ensure your camera doesn’t die out during a long broadcast.
- Video encoder. A video encoder is a piece of hardware or software that takes your video content and converts it to a digital format so that you can stream it on the Internet. There are many different types of encoders on the market and with just a little research, you can find one to suit your needs and your budget.
- Video Switcher (optional). A single camera shot will work well for many live streams, but if you want to take yours to the next level, a multi-camera shot will add another dimension to the final product. Investing in a video switcher will allow you to switch between multiple cameras or video sources and will cost around $1000. Be sure to look for a device with XLR audio inputs to bring in your audio.
- Internet Connection. A strong internet connection is required if you want to live stream. HD streaming requires 3 to 5Mbps, and 4K will require 25Mbps.
Choosing your Audio Interface
The way you record the audio for your live stream is the difference between standing out and turning off your audience. If the sound quality on your live stream is professional, your band will be presented at its best. After all, your music is what will attract your audience!
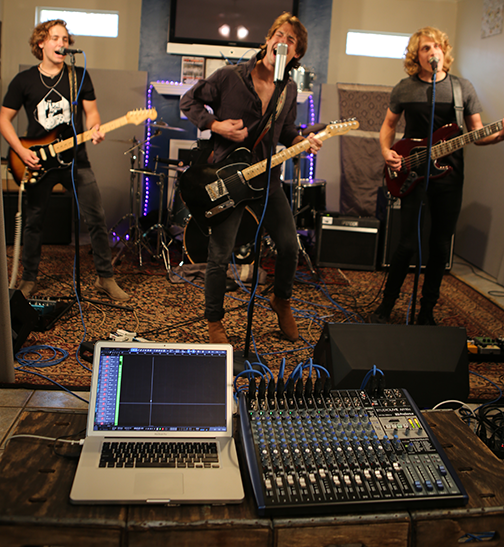
The easiest way to record your band for a live stream is to use a mixer with stereo recording capability. This will allow you to create a live mix (much in the same way you create a mix for a live performance). If your band is already gigging and rehearsing, chances are you’re already looking for a good mixer. The great news is that many modern mixers offer some level of audio recording ability. Whether analog or digital, a mixer with onboard recording can provide a cost-effective solution to create an amazing live stream sound. Let’s take a look at both approaches:
Analog Mixers
 At their core, most analog mixers share many of the same features and functions. The biggest advantage of analog mixers is that they’re generally less complicated and less expensive than digital mixers of the same frame size. The disadvantage is that analog mixers usually have fewer onboard features than digital mixers, and their sound quality depends entirely on the quality of the analog circuitry.
Some analog mixers, use great-sounding analog circuitry, provide EQ on every channel, offer monitor mixing options, and include an onboard effects processor for reverb and delay effects with an integrated audio interface. Depending on the mixer model, this audio interface might be a simple stereo output so you can record the main mix or provide you with a full 24-bit, 96 kHz multitrack recording interface that lets you capture every input channel, plus the main mix. These hybrid analog mixer/audio interfaces are give you all the tools you need to create your live streams and high-quality studio tracks.
Digital Mixers
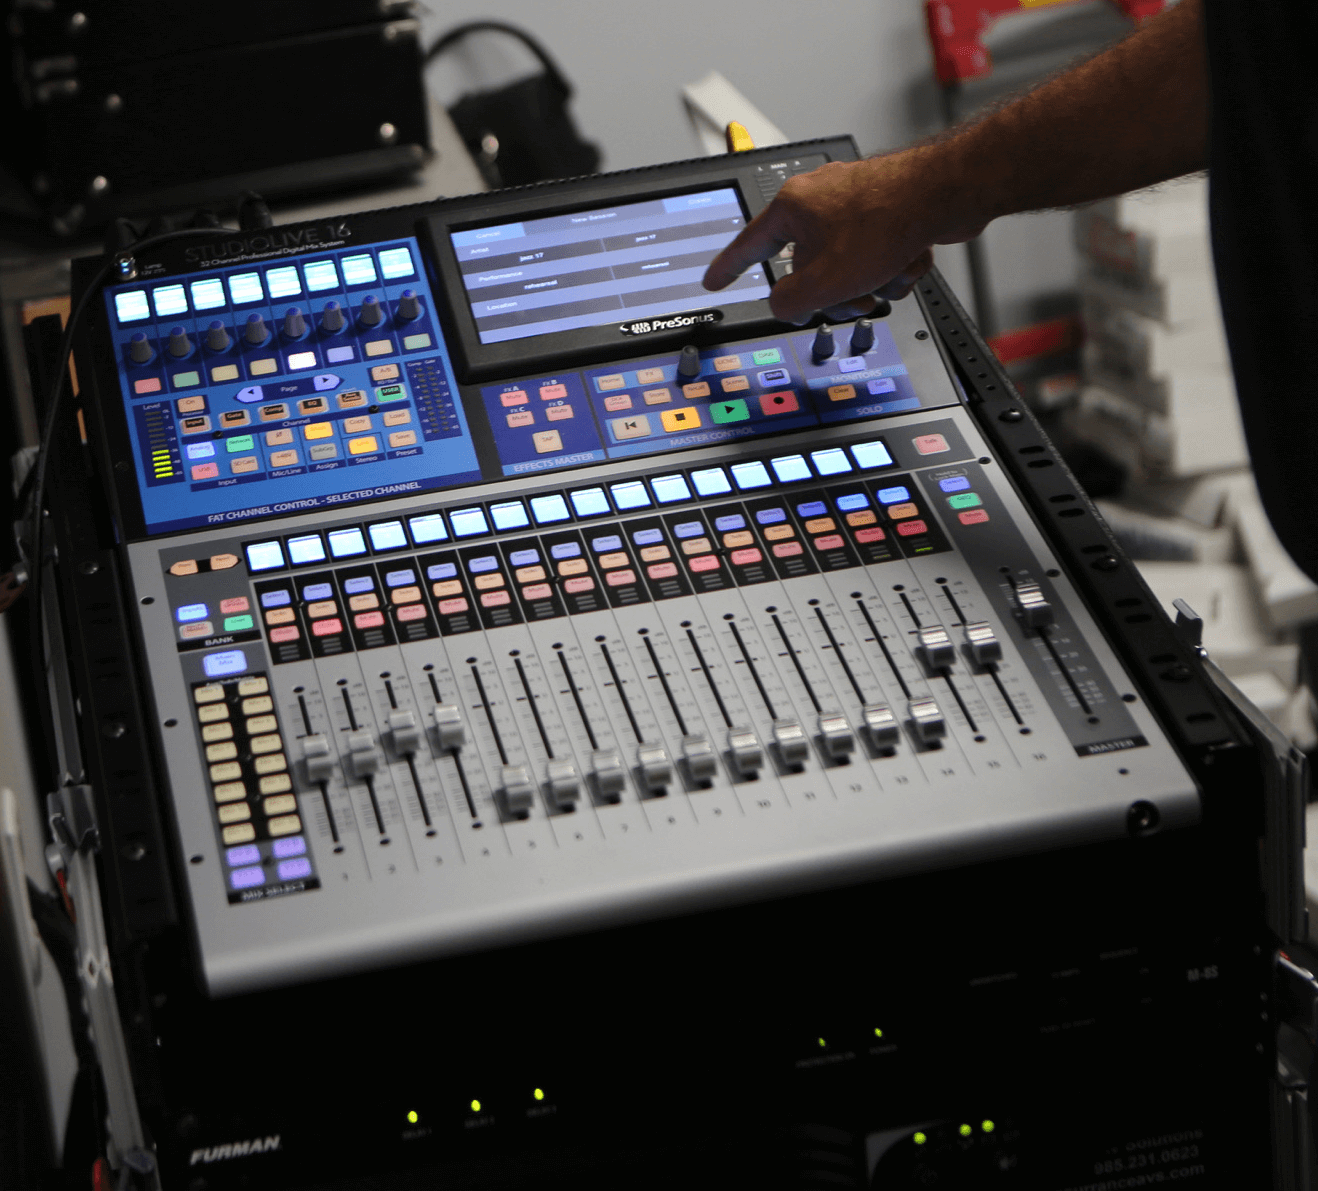 Digital mixers include the basic functions provided by their analog cousins and add many tools that save you money by eliminating the need for expensive outboard equalizers, compressors, noise gates, multi-effects processors, and the like. While you don’t need these processors just to mix audio, they are essential for producing better-sounding, more polished mixes. All these tools are done courtesy of an onboard digital signal processor (DSP). This processor is responsible for routing, level control, and so on. Full-featured digital mixers provide plenty of graphic and parametric EQ, dynamics processing, and more.
Some digital mixers combine the simplicity of an analog mixer with the processing power of a digital mixer and include an onboard audio interface. Because the parametric EQ, compression, noise gate, and limiter are available on every input and output, you save the cost of outboard gear and mountains of cables, as well as the hassle of connecting it all so your live stream will sound great.
Digital mixers also provide simple ways to manage a large mix, making it even easier to manage high channel count mixes in a live recording situation by providing DCA groups. Each group is given a master level control so you can control the overall level of the group while maintaining each channel’s relative balance in the mix. In this way, for example, you can create a single fader to control every mic on the drum kit, making it easier to control the overall level in the main mix.
Many digital mixers also provide an onboard audio interface, so all you need to do is connect your gear and your computer and you’re ready to record.
Audio Interfaces
 If you have a studio production background and are comfortable mixing in a DAW, a traditional audio interface may be an excellent solution for you. When using an audio interface, you must route the main output from your DAW to a set of inputs on your audio interface. These inputs will be the stereo audio source for your live stream.
At this point, you will need to create a loopback for your live stream. An easy way to do this is to use the S/PDIF input and output that many interfaces. S/PDIF is a stereo digital audio standard that is ideally suited for this workaround; this is what we will be using for the loopback in this example:
- In your DAW, patch the main output to the S/PDIF out on your audio interface.
- Patch the S/PDIF output to the S/PDIF input on your audio interface using a S/PDIF cable.
- In your live stream software, select the S/PDIF input as the audio source. Make sure that the S/PDIF input is not enabled for recording in your DAW.
When using an audio interface for live streaming, you will want to select one that also allows you to monitor your performance. Some audio interfaces offer an onboard DSP that provides low-latency monitor mixes. Other audio interfaces provide a fast enough transport speed that you can monitor your performance through the plugins and mix engine in your DAW.
Choosing a Computer
Audio and video production require a powerful CPU to ensure the best performance. The computer you use can be a Mac® or Windows® PC, so you can continue to use whichever operating system with which you’re most comfortable. The first thing you’ll need to check is the system requirements for the streaming application you’d like to use. Keep in mind that the “minimum system requirements” published by any accessory hardware or software manufacturer are just that: The bare minimum computer specs that you need to get the bare minimum level of performance.
The better your computer specs are, the more smoothly your live streaming will go.
Lights, Camera, Action

After some practice runs and careful preparation, it’s time to launch your live stream. Unlike a live performance at a local venue, the audience will be as close to you as your camera. When filming the band together, being camera-conscious means that band members should select coordinating outfits that will not distract or detract from your musical performance. It’s always a good idea to simply film a few performances and critique your camera presence before launching your live stream. Great visuals to go with your polished music production will go a long way to attract new followers and grow your audience.
But I’m Not an Audio Engineer
One of the biggest challenges when creating your live stream might be the fear that your audio will not sound its best. Now is a great time to team up with a local live sound engineer in your area. With so many gigs being canceled, many audio engineers have lost their steady source of income. So, why not reach out and hire an audio engineer to run your live stream show for you? Even better, get a few mixing lessons so you can continue to live stream when life returns to normal. And it will go back to normal.
From your friends at PreSonus—be safe, be inspired, and keep creating.
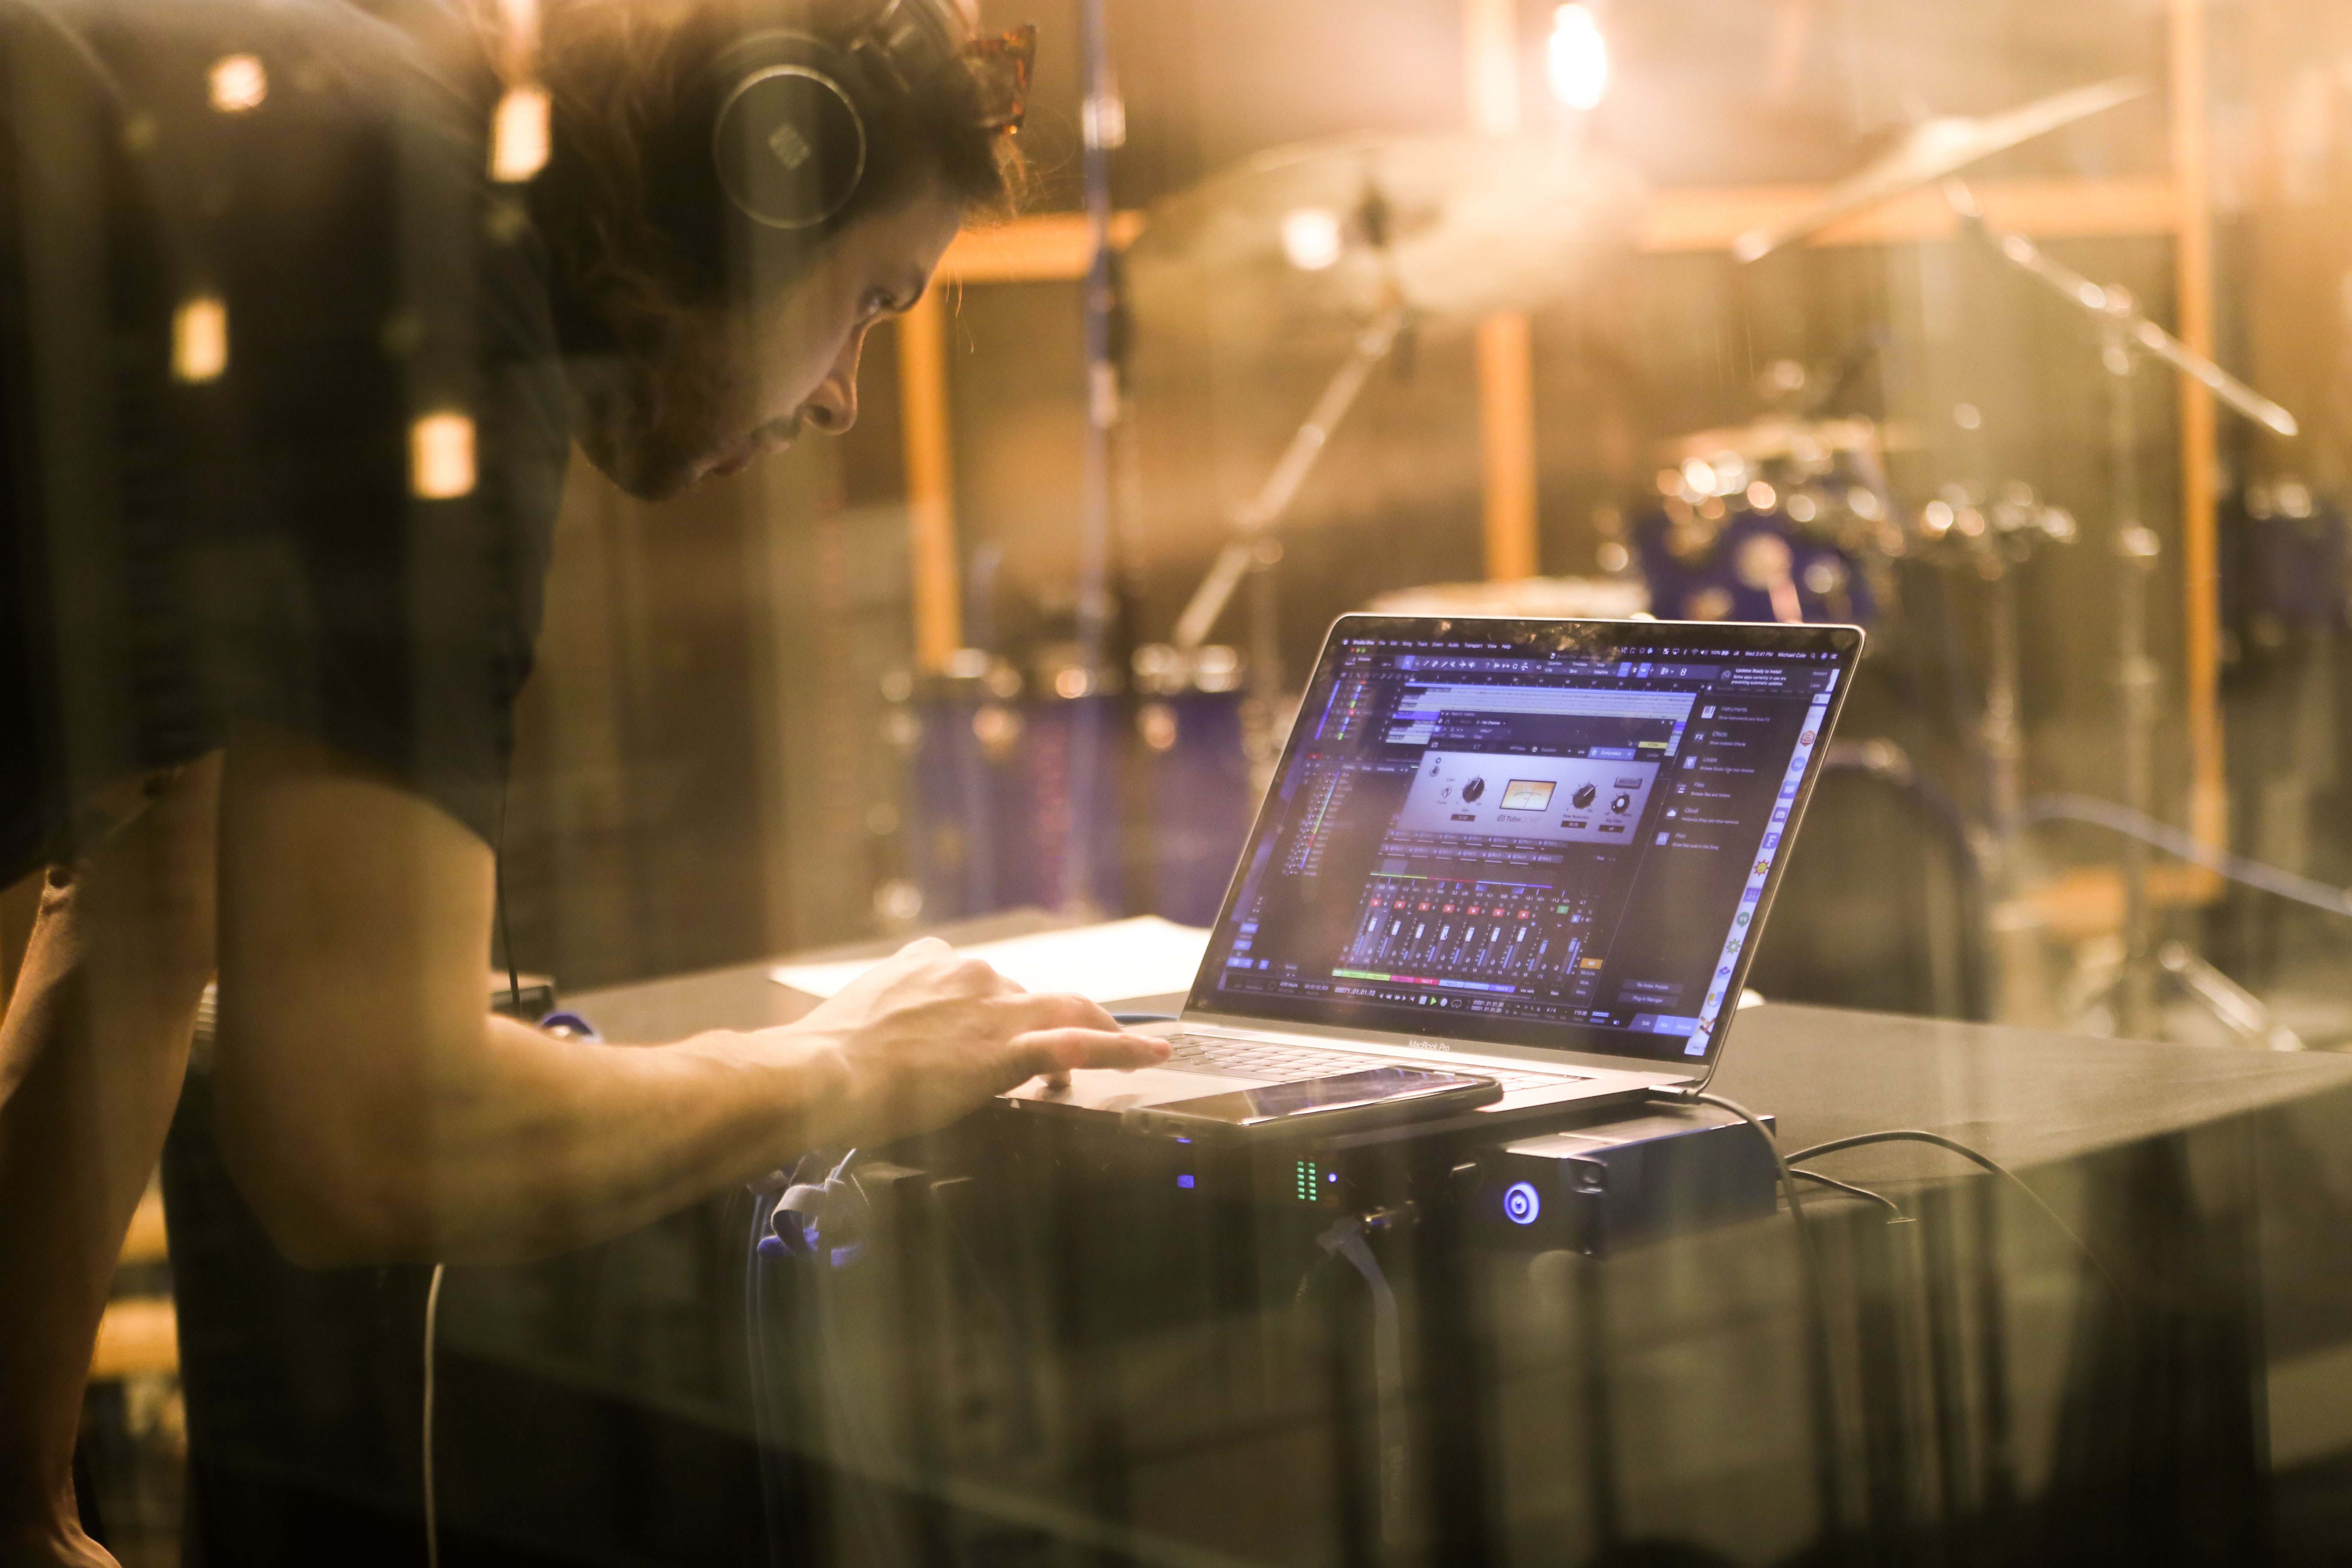
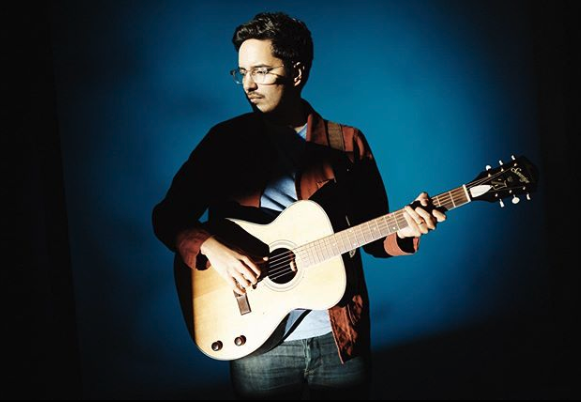
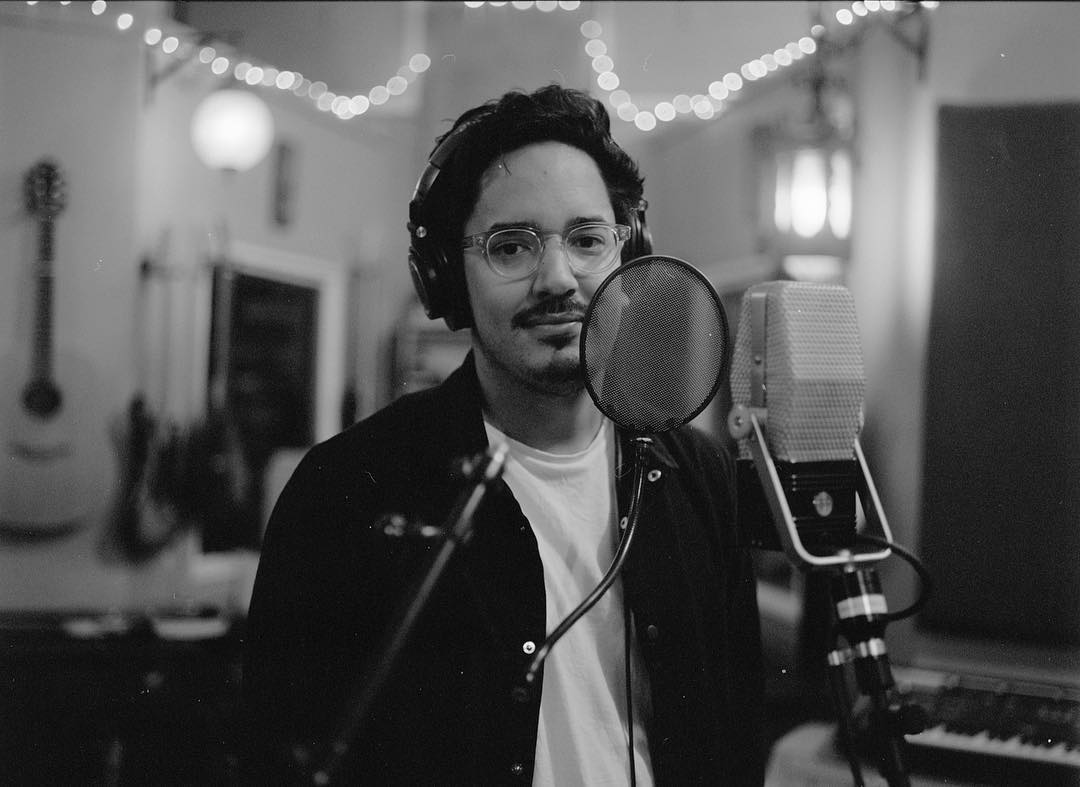
LA Based Singer-Songwriter Talks Studio One: Luke Sital-Singh
Luke Sital-Singh is a British singer-songwriter based in Los Angeles. He sings and writes songs of love, loss, longing, grieving, hope, and basically the whole gamut of the human experience. His voice is haunting and personal… and his lyrics? Profound. With three studio albums, one live album, seven EPs, a ton of singles and a TED Talk in 2018, Luke’s gift is exceptional and rare, and we’re glad he’s sharing it with us.
We connected with Luke on Instagram and immediately became huge fans. What’s made this friendship better is that he’s new to the Studio One family. We took some time to get to know him better and hear how his experience with Studio One has been so far.
Give us some background on yourself. How long have you been making music?
I’m an artist and songwriter from the UK currently based in LA. I released my first EP in 2012 and have been making and releasing music ever since. My latest album came out in 2019, and right now I’m currently working on writing my fourth album whilst trying my hand as a songwriter working with other artists and writers on their projects.
How has the music industry changed since your early days?
In so many ways but I think the most obvious to me day-to-day at the moment is the impact of social media and keeping your online persona updated every second of the day. It’s a horror show and if I were starting out again today it would be enough to send me running for the hills.

Watch Luke’s TED Talk
Describe the first time you wrote a song? Produced it?
Hmm, I don’t remember details but I can imagine it was an easy, pure, uncomplicated. I most probably thought nothing of it. It was almost definitely a rip off of the Goo Goo Dolls (who were my favs at the time). I never had a lightbulb moment in where I knew I was gonna write songs. It was such a gradual process. I just wanted to give it a try, and I kept trying and trying… and I’m still trying today.
Who has been a musical influence in your life?
I would say my eldest brother Matt was the first major musical influence in my life. He introduced me to some cool music when he was a teenager and it was his guitar I stole when I started learning. He was also a bit of a computer geek so he helped me record some early demos and covers in his bedroom. I still have some of those recordings. Truly awful songs! But it got the ball rolling.
Have you ever wanted to give up on music? What keeps you going?
Yes, many times. It’s often overwhelming and ever-changing. So you once you feel like you get a handle on a way forward, the industry changes and you’re left scrambling around again. Also the pressures of always being on. I always feel guilty when I’m not writing or gigging or posting on social media. It’s hard to find downtime without feeling like you’re losing time and opportunities. Unfortunately and fortunately it still pays all my bills and I’ve got no other life skills to fall back on. Also when it’s good. It’s really good.
 So you’re new to Studio One. When did you first hear about Studio One?
I was looking for a change from the DAW I was using. And I started to see a lot more people talking about Studio One online. I found myself watching loads of YouTube videos about the features and reasons why it’s better than the other DAWs. It piqued my interest enough to try a demo and see what I thought of it myself.
What features are you most impressed with?
As a jobbing artist, the price was pretty compelling, for one thing. Perhaps that sounds a little unexciting, but it matters for people like me. I don’t have tons of cash to drop on all this software whenever I want.
I’m still learning Studio One, but I’m finding it a lot faster than what I’ve used before. The drag and drop functionality is so great. In general, and incoming from another DAW, I’m just finding it more intuitive. Studio One is faster and compliments the workflow habits I’ve developed using other software. As I use it more I’m excited to see how my workflow develops around Studio One’s unique functionally. As of now, I’ve only produced a handful of tracks using it and I’m loving it and I’m excited to keep learning.
I also find the chord track functionality brilliant for songwriting and trying out ideas I would never think of on the guitar.
 How easy/difficult was Studio One to learn?
Very easy. I especially found that the ability to map the keyboard shortcuts to match other DAWs made it so much faster to get up and running. Now I’m slowly transitioning to the Studio One keyboard shortcuts.
Where do you go for support?
I haven’t had to yet! Knocks on wood…
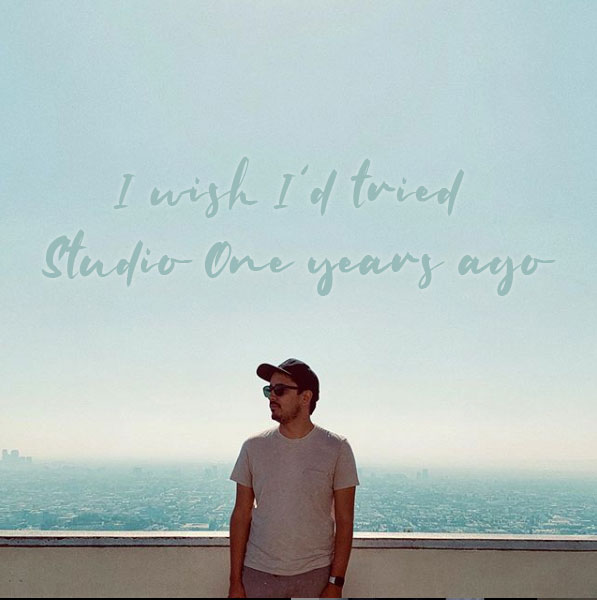
Any other thoughts on Studio One or PreSonus gear?
I just think PreSonus is great! For whatever reason, it’s not the sexiest name in music gear but it should be. I feel like I wish I’d tried Studio One years ago. I find I go into sessions with other people these days and tell them I use Studio One and they turn their nose up. When I tell them the kind of functionality it offers, everyone is impressed and surprised. It’s one of those unfortunate things about the music recording culture and I suppose just general culture when it comes to brands etc. People like the cool stuff even if it’s actually no better or perhaps it’s worse than lesser-known brands. I hope more people start to see how great Studio One is and PreSonus in general!
Recent projects? What’s next for you?
I’ve got a new EP dropping in April, a few tracks are available online. Also, I’m going on tour in Europe and the UK in April/May and I’m hoping to play some more shows around the US later this year. Other than that I’m busy writing my next record and working with other artists as a songwriting collaborator.
Check out Luke’s Tour Dates
Follow Luke on Instagram here
Subscribe to Luke’s YouTube here
Stream Luke’s Music
Watch Luke’s TED Talk!
Join the Studio One family today!
Six Reasons EDM Producers Should Add Studio One with Ken Bauer!
Swedish DJ and Producer Ken Bauer has several successful releases under his belt over the span of his career and has recently been making the transition into the Future House scene with each single. His latest collaboration with J-Rob MD with “Feels Just Right” has certainly cemented his place as one to watch in 2020! With all his success, he has become an expert in the EDM music scene alongside Studio One. Here he shares in his own words, six reasons everyone should consider adding Studio One to their workflow.
Follow Ken on Instagram
I was asked by the esteemed online music school nextlevelsound.com if I could write a blog post giving 5 reasons why any EDM producer should consider Studio One. When starting to think about it I realized it was impossible to only mention 5 reasons so I asked if I could write a series of blogposts instead. But the theme will always be 5 reasons or features why you should consider Studio One.
This time I will be looking at 5 features that make it easy to start a new track idea with Studio One. One small disclaimer though, some of the features I will mention requires the Pro version of Studio One.
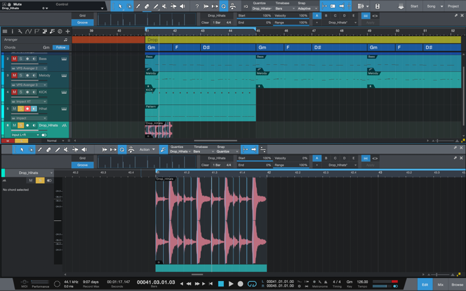
1. Arranger track
When I start a new track it can sometimes feel overwhelming. We all know how easy it is to come up with an 8 bar killer idea and then after hearing the same loop for 4 hours you don’t like the idea anymore and you try to come up with a new 8 bar idea and the process repeats itself. What I do is that I always start by drawing the blocks for the arrangement. I study the latest trends for the genre I produce in and then I draw down the arrangement blocks in the Arranger track in Studio One. If it is a club-oriented EDM track I would probably come up with something like:

The cool thing is that you can move and copy these arranger blocks with drag and drop. This will actually move and copy everything, such as events, parts and automation. This means that you can save a lot of time by working on the first drop and then just copy that block to the second drop and then just tweak the second drop to your liking.
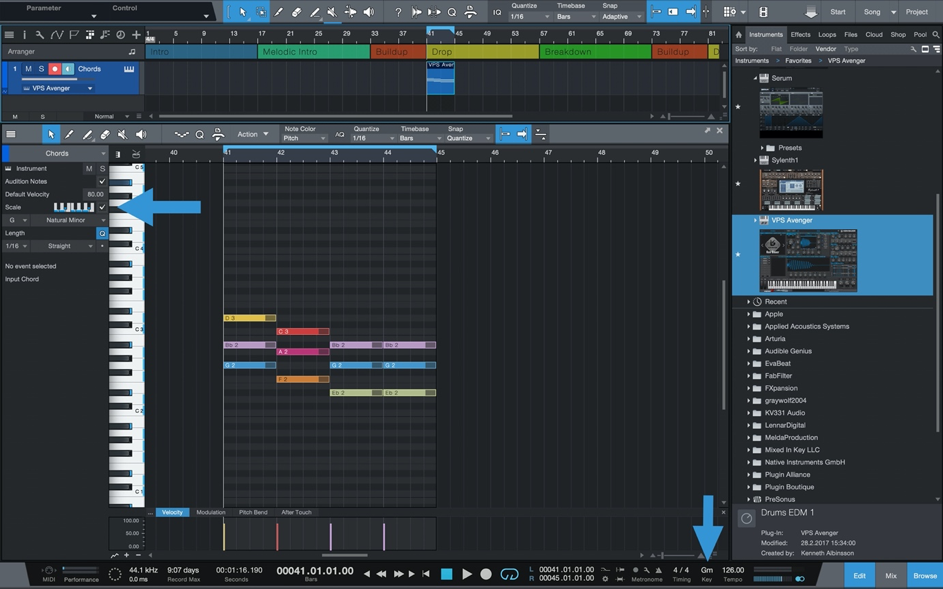
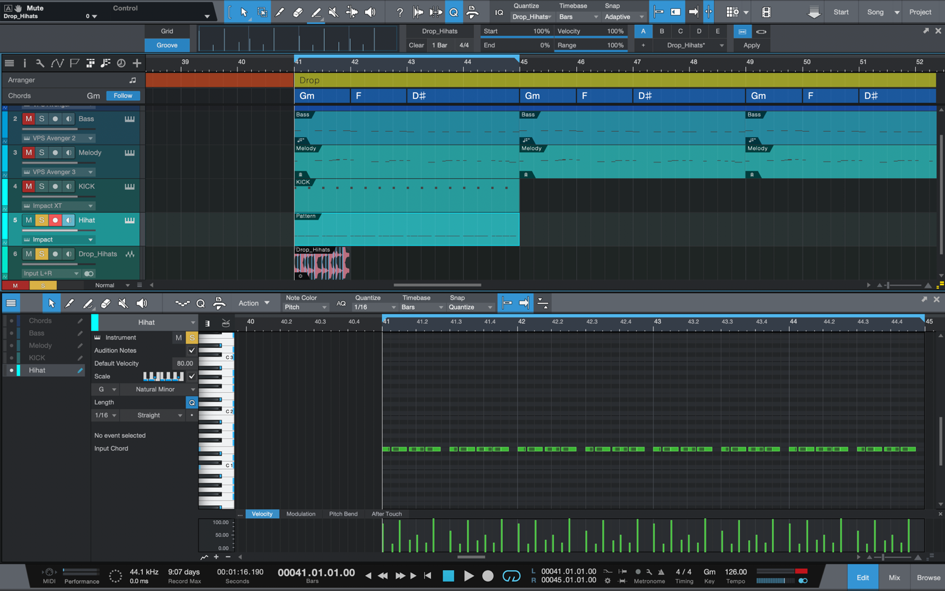
2. Midi Scale Lock
To be honest, I haven’t studied music theory as much as I should even though I know the basics. For me, any help I can get with musical composition is highly appreciated. This is where the Midi Scale Lock comes in. First, we have to decide on a key for the track. You can easily do this when creating the song but you can change it in the bottom of the arrangement view as well. In this example, I have chosen G minor. When you double click on a midi event or just creating a new one by clicking on an empty area you will see the musical event inspector on the left. Click on the checkbox next to the small keyboard where it says scale. Now Studio One only allows you to enter notes in the key of G minor. However, you can override this by moving the existing notes with your arrow keys or just disable the checkbox again. This makes it super easy to input 3 musically correct chords in the key of G minor. In this example, I have added G minor, F major and D# major
3. Chord track
OK, now we have a great starting point. A chord progression. Let’s see how we can use this to continue on our idea. Studio One has a chord track that you can enable. After enabling the chord track we can right-click on our midi event with the chord progression we just did and find something called “Extract to Chord Track”. Studio One will now analyze the midi event and extract the chords to the chord track as you can see in the picture below.

Now let’s go ahead and add another VST instrument with a bass sound. Then I will just add a bass rhythm playing the same note, in this example, just the note G.

Now I will open the track inspector for the Bass track by clicking on the “i” button on the top left. There I will find something called “Follow Chords” which is Off by default. Now go ahead and choose “Bass”. Now, this Bass track will follow the bass of the chords. See below how the bass pattern changed to follow the chords:

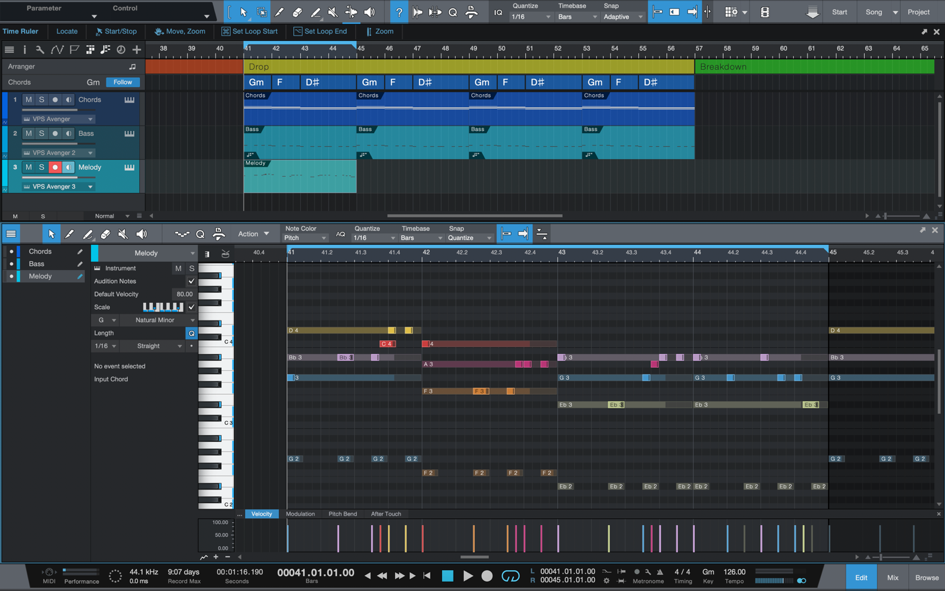
4. Multi-Lane Midi Editor (Ghost Notes)
Now we have to come up with a melody and to make sure we use only the right notes I will be using two great features in the Midi editor. The first one is coloring all the notes by Pitch. This means I can easily see that the bottom bass note in the example has the same note as the bottom G-note in the chord above. The second awesome feature is the “multi-lane” button in the middle left (blue box with 4 white lines). This lets you choose any track from your list of Instrument tracks to have it being displayed while editing the midi of another track. In the example below I am displaying both the chord track and bass track together with my new melody track. However, the only track that I will edit is the track having a “blue pencil” which in this case is the Melody track. Now I can easily find notes belonging to the chords as well as making sure they time well with the bass rhythm.

In this example, I have added a melody.
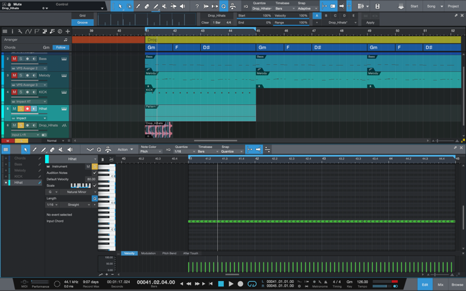
5. Groove Assistant
After adding a 4X4 KICK and a straight hi-hat pattern I realize that the hi-hat pattern needs a better groove. I go to Splice and download a cool hi-hat loop. However, I don’t want to use the loop, I just want to use the groove from the loop. In the pictures below you can see my original hi-hat pattern and the loop I downloaded from Splice.
Then I will enable the Groove Assistant by clicking on the “Q” icon on the toolbar and select Groove. Now all I have to do is drag the audio loop event at the bottom to the Groove area as you can see below.
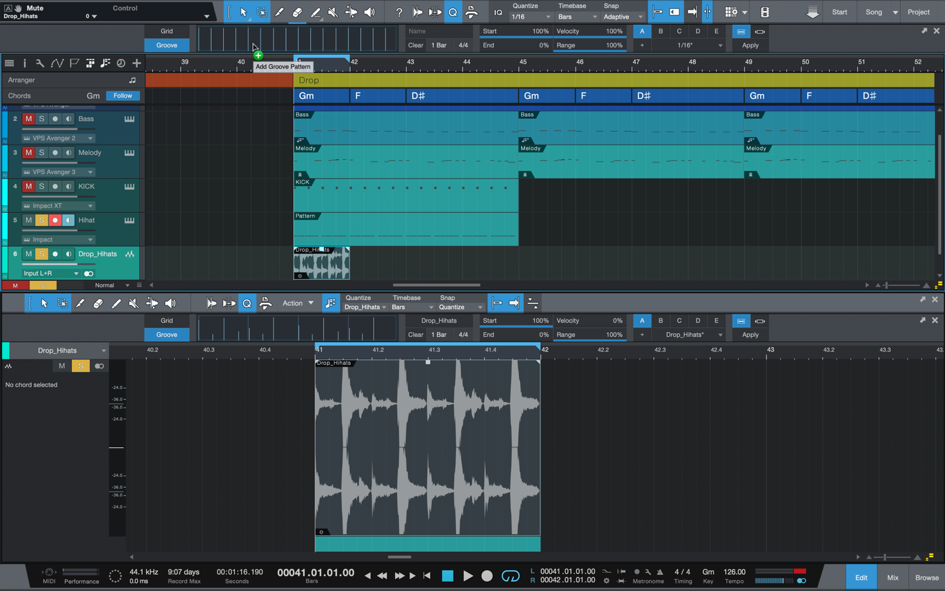
The groove is now extracted, and you can now use it as a Quantize template and/or save it for later use. Now I click on my hi-hat event and press “Q” for quantize. Voila, the straight 1/16 hi-hat pattern have now inherited the groove from the audio loop. Now if I would like to, I could use this groove pattern for all my basslines and melodies to keep everything in the same groove.
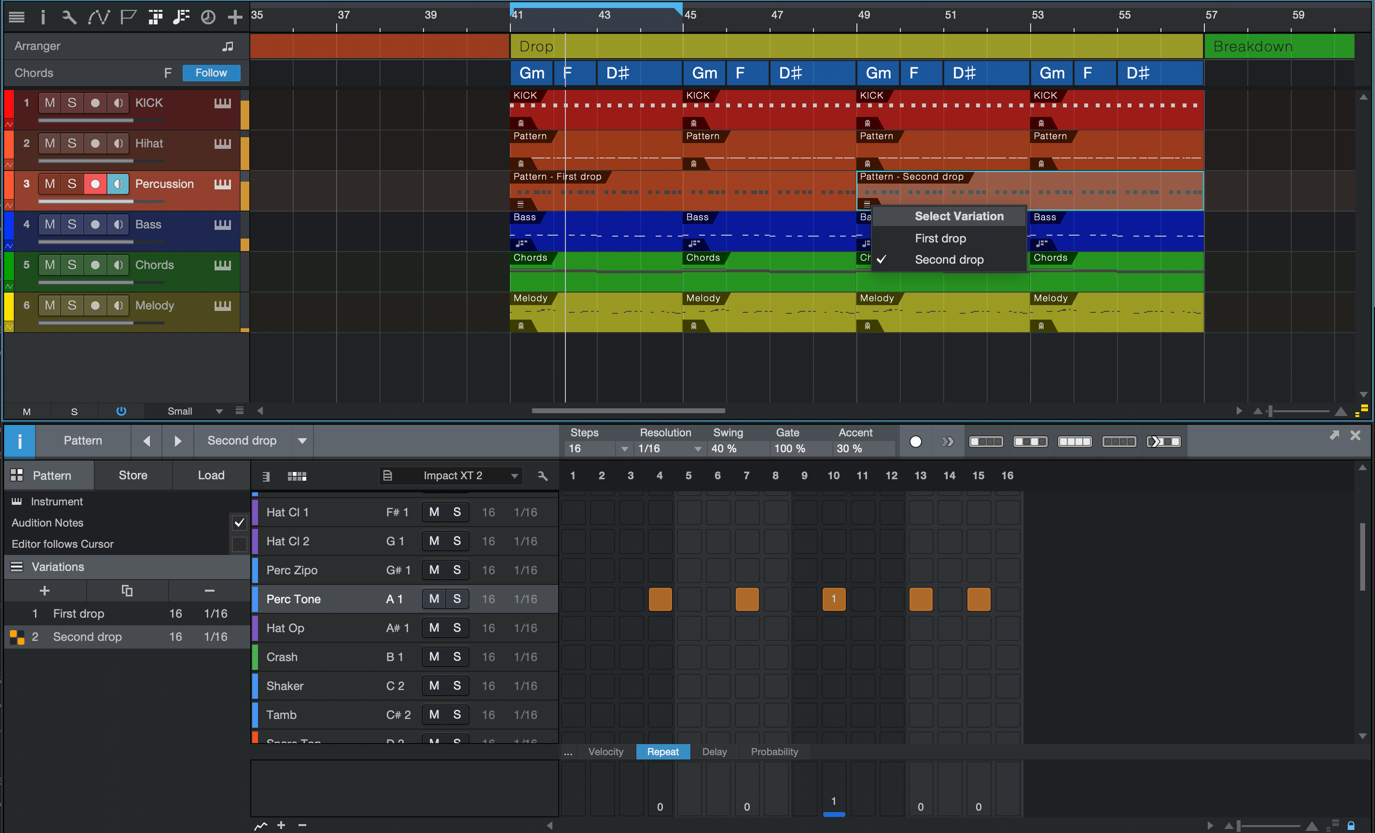
6. Pattern editor
Wait. Didn’t we say 5 features? In my opinion, it would be impossible to have a Studio One EDM tutorial without mentioning the excellent pattern editor. I will now add an Impact instrument with a percussion. To create a pattern, I just have to double click an empty area together with my option key. Now a drum machine kind of sequencer appears and I can easily draw in my pattern as I would in any drum machine editor. This is virtually like having a built-in drum sequencer in the arrangement. With patterns, you can simply drag the right edge of the part to extend/loop it. My preferred way of arranging with patterns is to loop the part to the full length of the song, then cut the long part in places you want to hear a different variation. Then use the local pull-down menu on the part itself to select the variation. It’s really that simple.
Summary
All in all, these six features help me start a new track quickly, the arranger tracks give me a great overview and sort of a to-do list. The Midi Scale makes sure that I create my chords in a key. The Chord track is great for having all my other tracks, such as the bassline, following the same chord progression. The multi midi editor (Ghost Notes) makes it is easy to draw in a melody that is in key and sounds good together with my chords and bassline. The groove editor is great for “borrowing” grooves from both audio and midi files. Finally, the pattern editor makes it super easy to create drum beats and bass patterns.
Follow Ken on Instagram here: https://www.instagram.com/kenbauersweden/
Listen to Ken Bauer on Spotify here:
Using 3rd-Party Cabs with Ampire XT
There’s an old joke about guitarists:
“How many guitars does a guitar player need?”
“Just one more!”
…and sometimes I feel the same way about amp sims, because all of them are different. Ampire XT benefits from PreSonus’s “State Space” technology, and if you have no other amp sims, its collection of amps has pretty much all the essentials.
What’s more, you can load thrid-party cabinet impulse responses (IRs) that re-create the sound of various cabinets, mics, and mic positions. These go into the User Cabinet, whose unique feature compared to typical IR loaders is being able to load individual IRs for the three mics.
But you can take impulses even further by turning off an amp’s cabinet altogether, and following Ampire XT with the Open Air convolution processor. Although most people probably think of Open Air as a way to create a variety of reverb and other space-based effects, it’s also a flexible impulse response loader that plays nice with cabinet impulses.
There are many free cabinet impulses on the web to get you started. Admittedly, the sound quality varies—some are fine, some aren’t, but there’s also a middle ground where tweaking the Open Air controls can give the sound you want. http://cabs.kalthallen.de is a popular source for free impulses (click on the Free tab), but there are many other companies that offer free samples, or sell impulses commercially.
The Setup
Create an FX Chain with Ampire XT followed by Open Air. The Impulse Responses are only for cabinets, so set up Ampire XT’s amp and effects however you want, but turn off the cabinet section (Fig. 1).

Figure 1: Click the cabinet bypass button (middle left, outlined in white) and the cabinet field will show None (upper right, outlined in white).
Follow Ampire XT with the Open Air, and start with its Default preset. Drag an impulse into the Open Air waveform display window (or click on the impulse name field to open the file selector, and then navigate to the impulse you want). Turn Mix to 100% so that you hear only the cabinet output, and none of the pre-cabinet amp sound (Fig. 2).
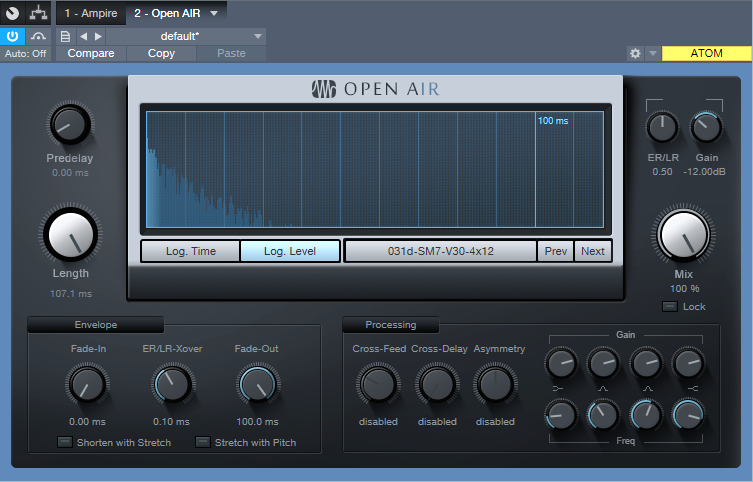
Figure 2: Make sure you set the Open Air Mix control to 100%, so that you don’t hear the pre-cabinet amp sound.
Tweaking the Tone
The Kalthallen impulse shown in the screenshot above didn’t need tweaking to sound good, but you’ll find that with a lot of the free impulse responses, you’ll need to tweak the Gain and Frequency controls. Often the main problem is a “thin” sound and Fig. 3 shows some tweaks that help remedy this issue—pull back on the highs, and boost the low end for a bigger, beefier tone.
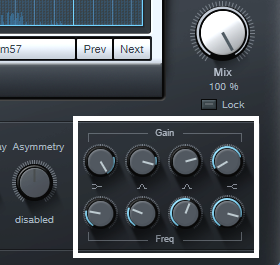
Figure 3: These EQ settings can help tame free impulse responses that sound too thin.
But the most dramatic tweaks come by enabling Shorten with Stretch and Stretch with Pitch, then varying the Length control. This can produce sounds that are similar to different mikings, or even cab sounds you’ve never heard before. The Predelay, ER/LR-Xover, and ER/LR controls can also affect the sound, although the differences aren’t as dramatic as stretching with the Length control.
Finally, although it’s great to have options, you don’t want to suffer from option overload (“maybe trying just one more impulse will give the sound I want…”). If you download a bunch of impulses, create a folder of favorites in a place where it’s easy to open it up, and drag-and-drop impulses into Open Air. If you find one you really like, save it as an Open Air preset for future use.
Open Air: Much More Than Just Reverb
After doing some fairly “normal” tips for the last few Fridays, let’s go a little crazy—and explore some interesting sound design and rhythmic possibilities.
Open Air is a wonderful convolution processor, but it’s helpful to remember it can load any audio file, not just room and reverb impulses. I’ve said many times it’s more fun to ask “what if?” than “how do I?”, because “what if” is all about experimentation. So I asked “What if I’m using a drum loop, and also load that same loop into Open Air as an impulse?” You might not use the resulting sound all the time, but give this technique a try—you’ll hear an entirely new type of percussive effect.
- Make sure the loop itself matches the song’s tempo, and it isn’t just stretched to fit. If it was stretched to fit, select the loop and type Ctrl+B to make the length change permanent.
- Copy the loop (e.g., to an empty track). Open Air doesn’t seem to like high-level drum loop impulses, so drag down the top envelope handle to reduce the level by at least -6 dB. Again, select the loop and type Ctrl+B to make this change permanent.
- Drag the copied loop into the Open Air waveform window, and now you have a cool drum impulse.
- The odds are it will sound pretty dreadful; if needed, start by reducing the Open Air Gain control to prevent distortion.
- The EQ settings are really important (Fig. 1). I’ve had the best results by cutting back on the low frequency shelf, and boosting the high frequency one. To adjust EQ, temporarily set the Mix to 100% so you can hear the results of any changes easily; after the EQ is tweaked, adjust the Mix amount to taste.
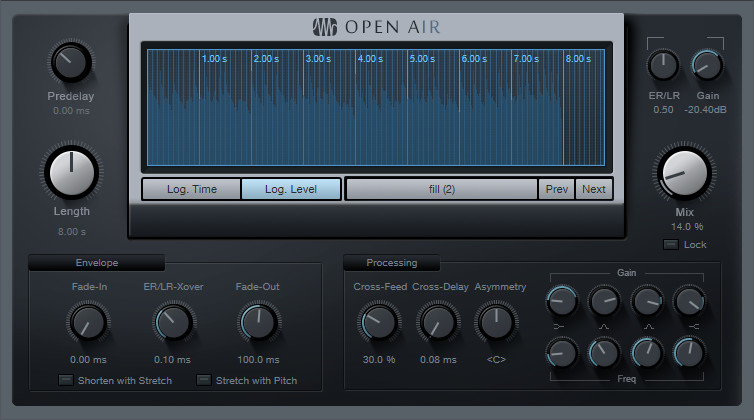
Figure 1: Typical Open Air settings when modulating a drum loop by itself.
Remember that the drum loop is still acting like a reverb, so it will build up a bit over time until the level stabilizes, and the processed sound will have a tail as long as the loop.
Next, there are several ways to add variations. First, you don’t have to convolve a loop with itself—check out the audio example.
The first four measures are a drum loop convolved with itself. The second four measures convolve the original drum loop with a tom loop, while the final four measures convolve the original drum loop with a percussion loop.
Altering the Open Air Length can create interesting effects, especially when using a rhythmically related length—like half or 1/3 the length. With sparse loops, longer lengths can work too, like 1.33, 1.5, or 1.66 the length (get out your calculator, and work with the number that’s shown under the Length control). Additional EQ and processing can add even more interest.
And remember to experiment with other types of impulse as well—pads, voices, guitar chords, whatever! You never know what you’ll discover.