Category Archives: Studio One
James F. Reynolds: VOXPOD Studios and Studio One
So why is BTS (방탄소년단) “Fake Love” official video shown above?
Because their hit song was mixed in Studio One Professional by our latest PreSonus Sphere Featured Artist, James F. Reynolds!
Let’s catch up with the man himself and find out more about what he’s been up to lately:
 I started off my mixing career mixing Tinie Tempah’s triple-platinum album Discovery. Prior to this I wrote and produced music and was signed to labels such as Virgin and Defected Records. Since mixing Tinie’s album I have been busy mixing records for many artist including BTS, Sigrid, Dua Lipa, Kodaline, The Disciples, Sigma and most recently Shane Cod and his platinum single, “Get Out Of My Head.”
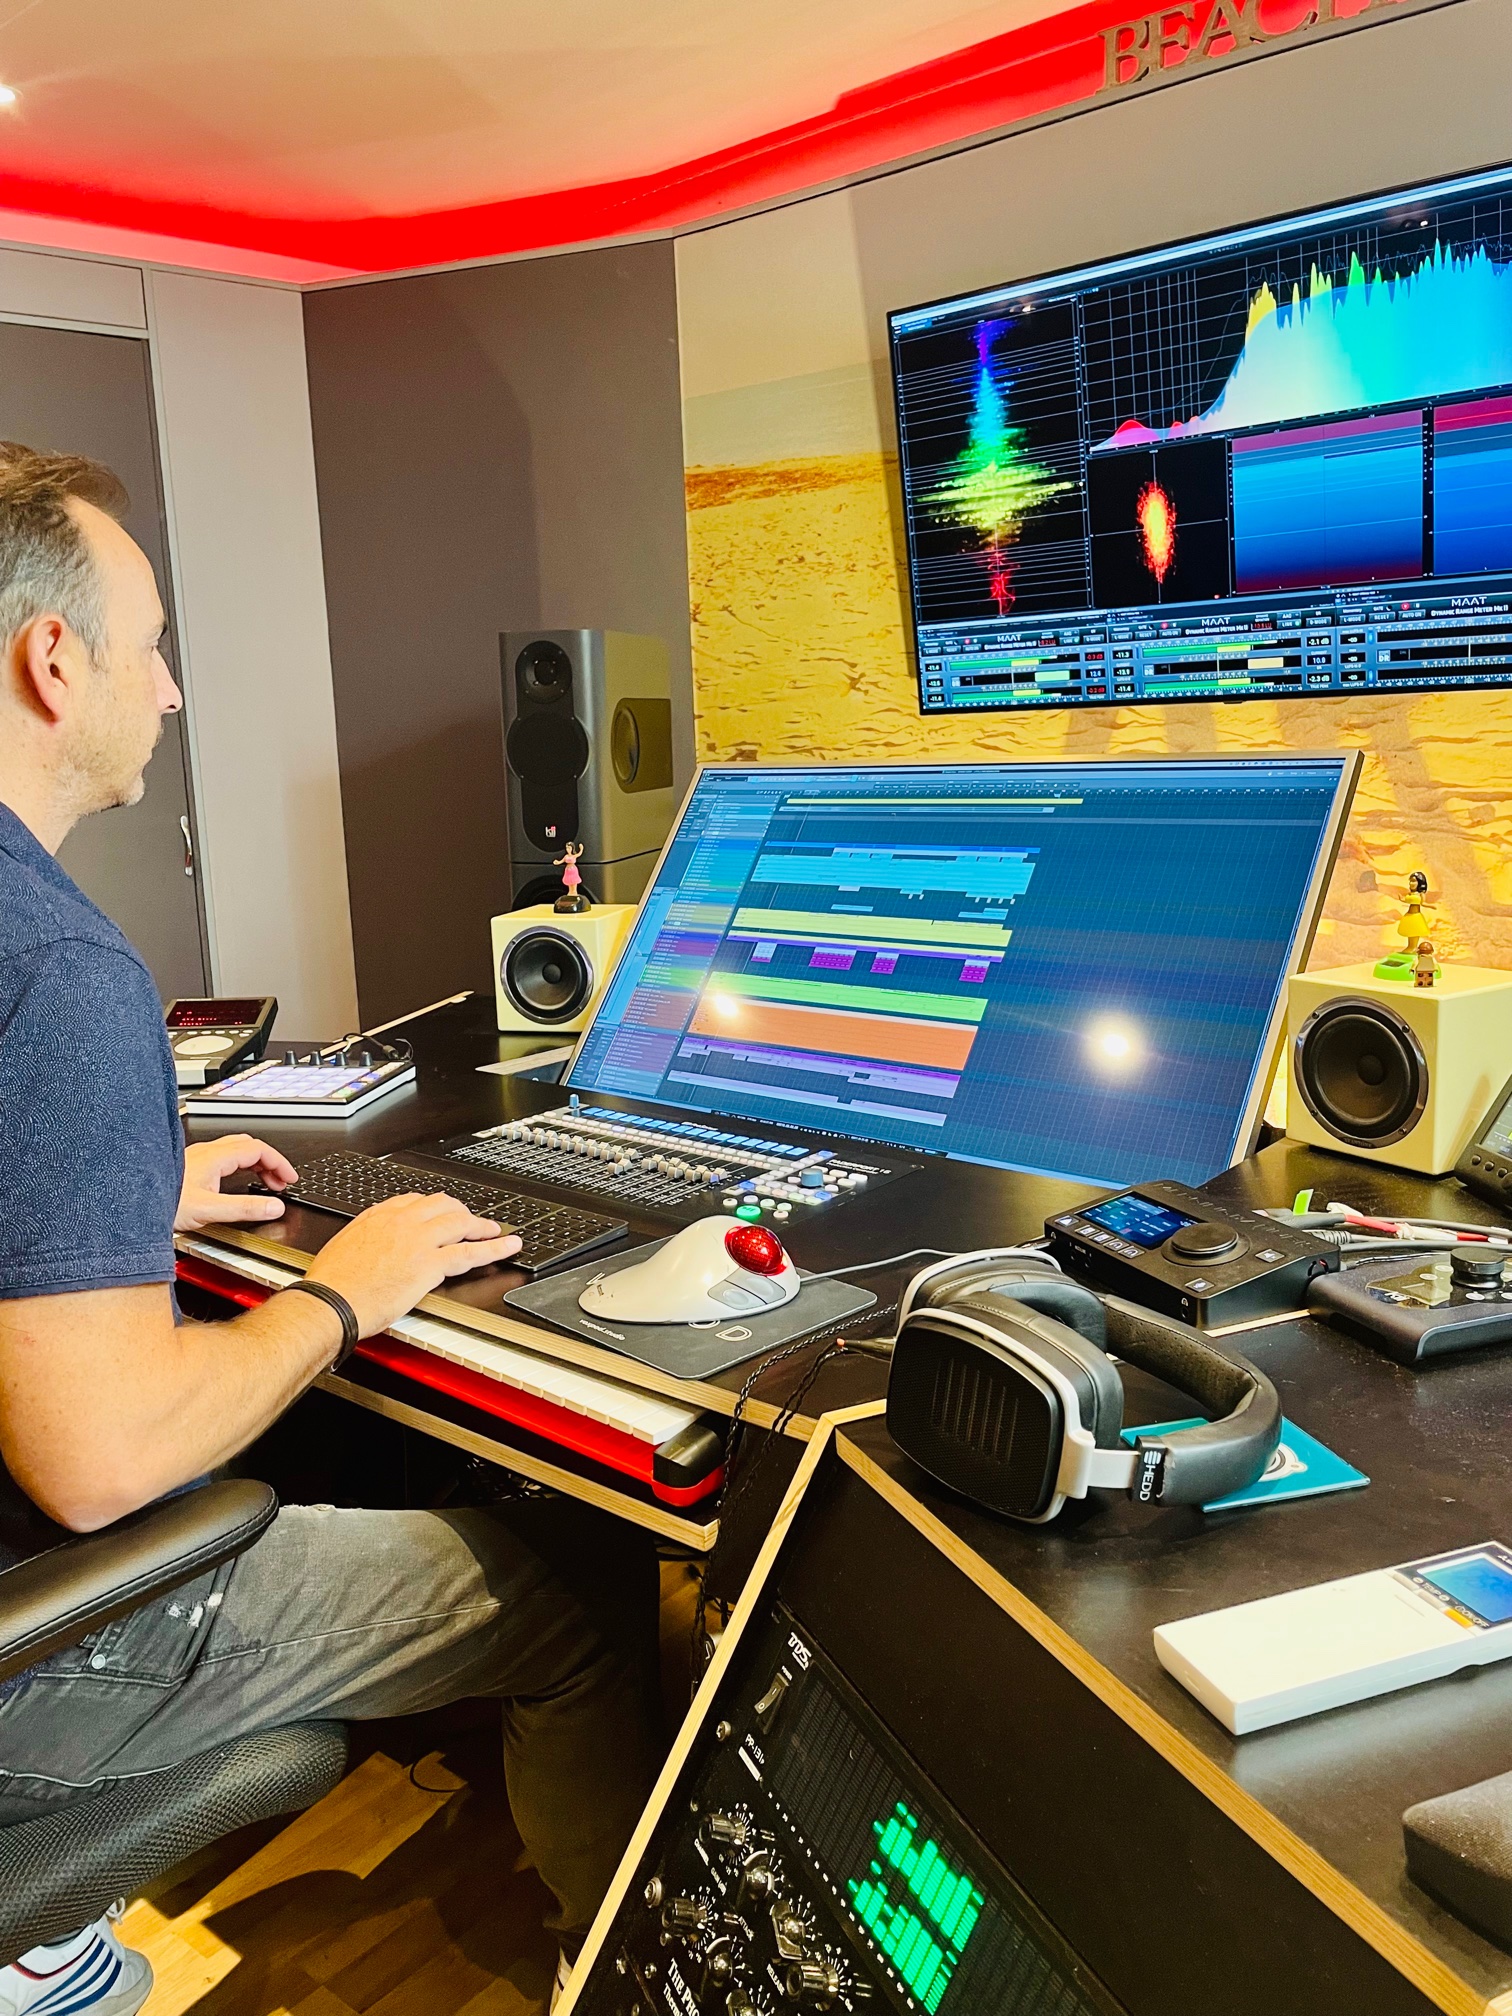
I have been mixing in Studio One for six years now and it keeps getting better and better. PreSonus really listens to user feedback and implements suggested improvements frequently; I haven’t experienced this with any other DAW.
Studio One allows for a very fast workflow and because of it’s intuitive build and design I can easily focus on the mixing.
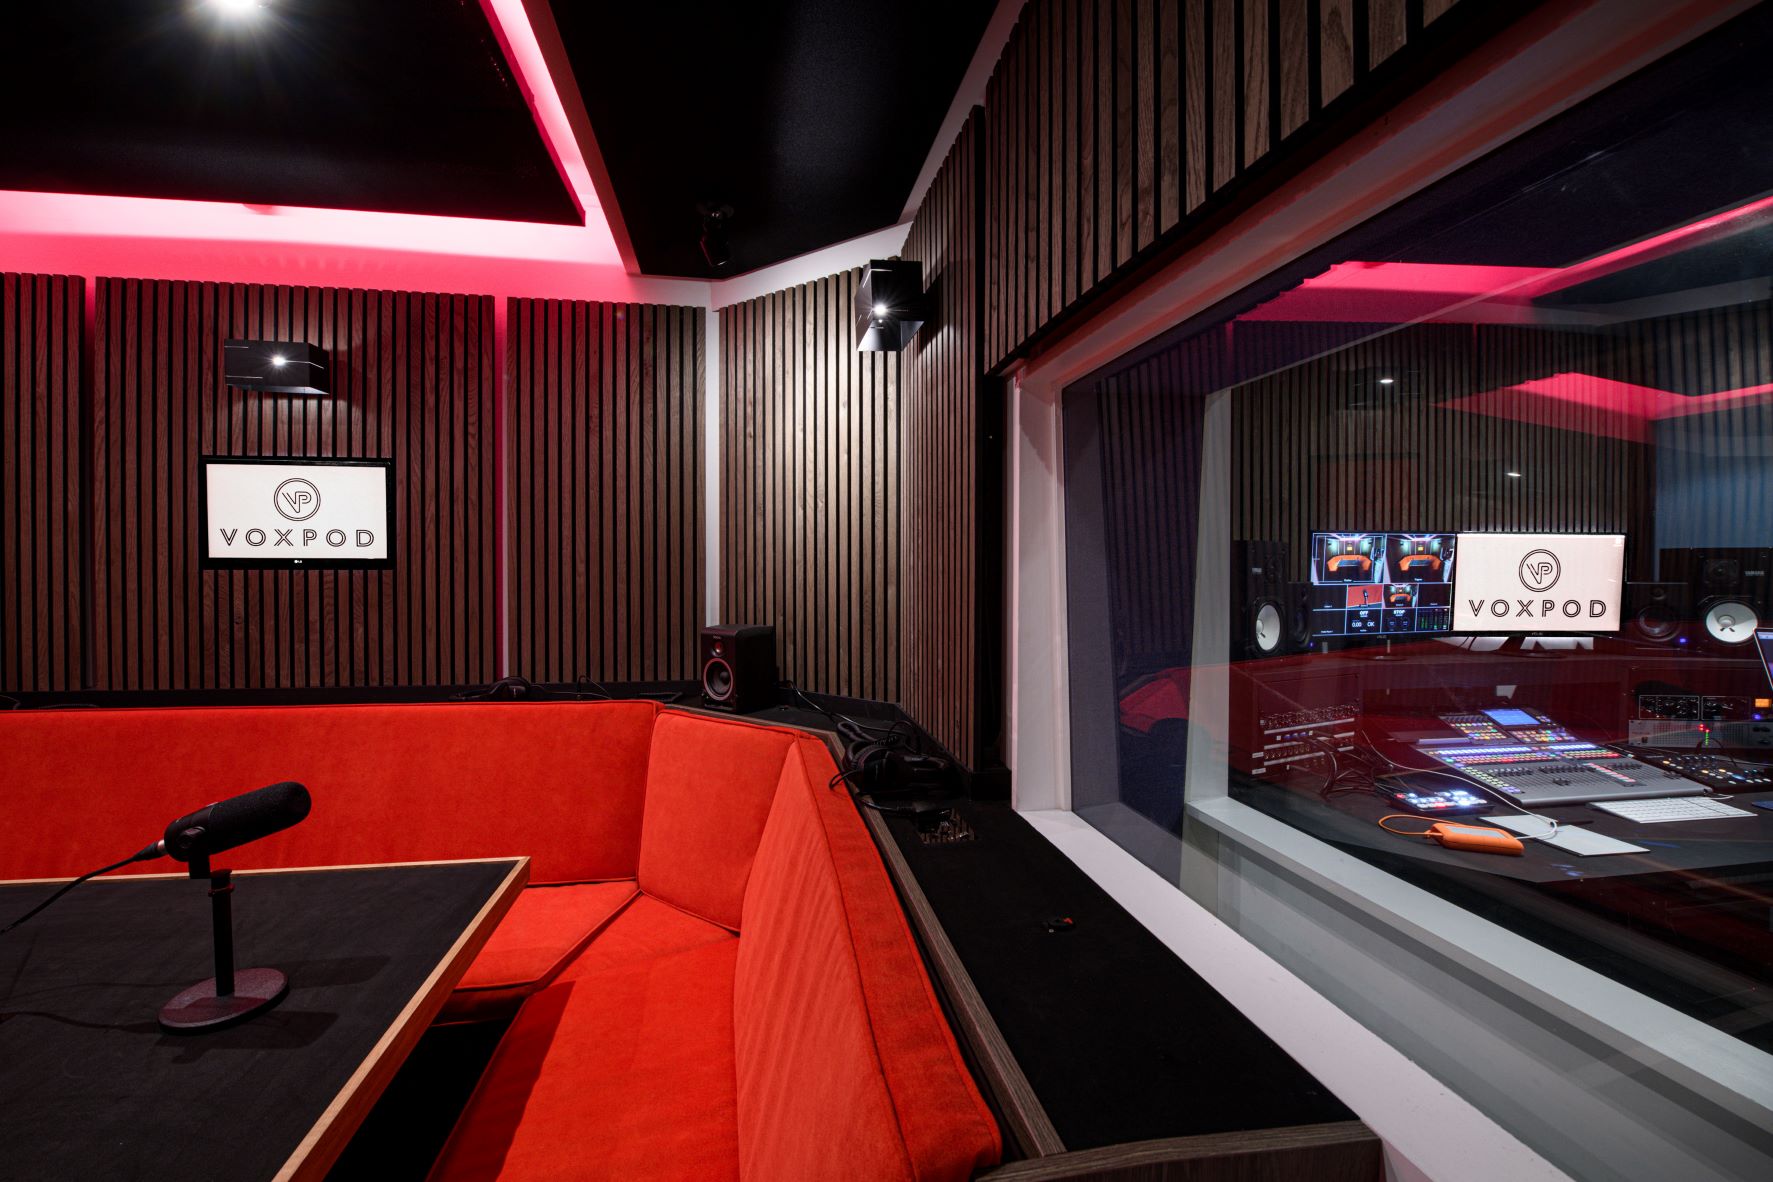
During lockdown in 2020, we decided that London was lacking in high-end state of the art podcast production facilities, so we built VOXPOD Studios. My podcast room can host up to eight people and also offers livestreaming and video recording of the shows on five video cameras placed around the room.
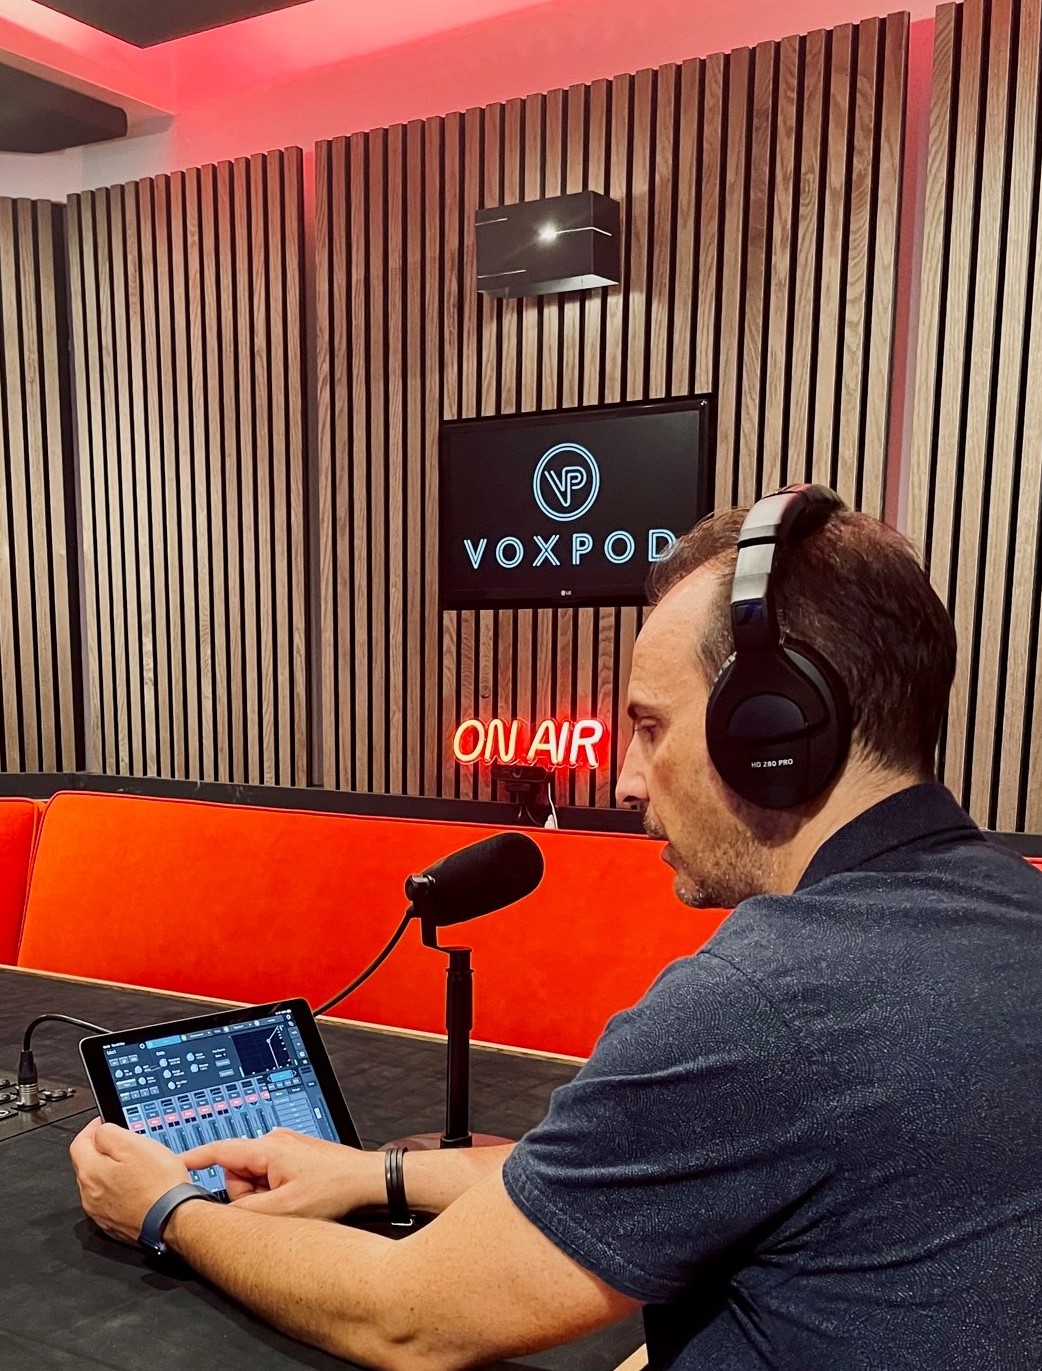 The PreSonus PD-70 dynamic mic has proven to be a game changer in VOXPOD studios. Its sound quality and tone set the bar above all the others on the market.
VOXPOD Studios has already started hosting shows for some big podcasts here in the UK, including the James Smith Podcast and Rugby’s leading podcast, “The Good The Bad and the Rugby.”
Lastly, another new positive feature of 2020 was the launch of PreSonus Sphere. It’s truly a brilliant way of connecting the rapidly growing number or Studio One users, world-wide. I love being able to try out suggested Presets and Studio One shared components from other engineers, writers and producers.
Join PreSonus Sphere today to check out James’ exclusive Presets and from those by other featured artists!
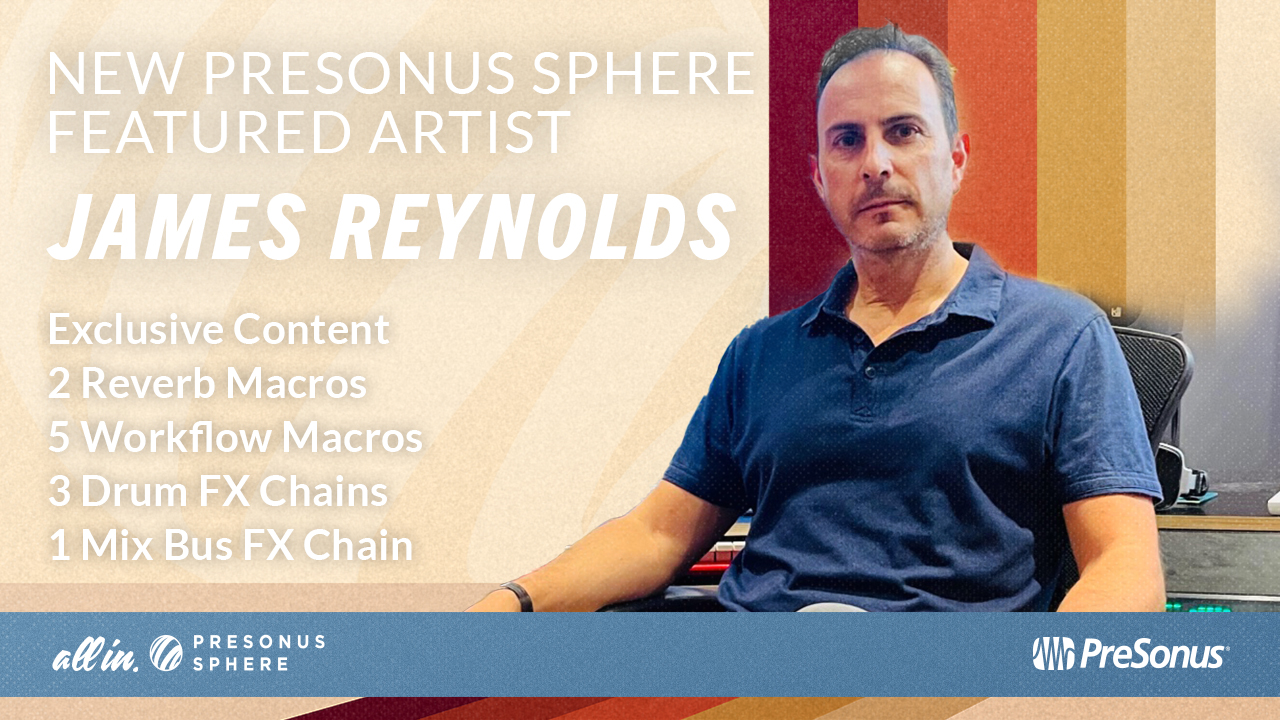
James F Reynolds: PreSonus Sphere Featured Artist
They include: two Reverb Macros, five Studio One Workflow Macros, three Drum FX Chains and a Mix Bus FX Chain for all PreSonus Sphere members to access and enjoy.
Only $14.95 per month for Studio One Professional, Notion, and so much more.
Amp Sims: Garbage In, Garbage Out

An astute Friday Tip reader commented that while the tip on how to level the outputs of amp sim presets was indeed useful, I should also write about the importance of input levels. Well, I do take requests—and yes, input levels are crucial with amp sims.
Physical amp sims are forgiving. They soak up transients, and chop off low and high frequencies. But amp sims tend to magnify the differences between guitars and playing styles. When going through the same preset, a player who uses a thin flat pick, 0.008 strings, and single coil pickups will sound totally different compared to a player who uses a thumbpick, 0.010 strings, and humbuckers. So, let’s look at four common mistakes people make when feeding amp sims.
- Dialing up presets created by someone else. You have no idea what kind of input level the amp sim expects, so you’ll almost certainly need to edit at least some parameters (particularly the input drive or level).
- Too much gain. Excessive gain generates nasty distortion, not the “good” distortion an amp creates. You’ll also have issues with decreased definition, potential aliasing, and a sound that splatters all over a mix. Check out the audio example, using Ampire’s Painapple amp.
The first half has the input set to 5 o’clock. Not only is the sound so distorted the playing is indistinct, listen to the very beginning, before the first note hits. All that gain is picking up noise, hum, and garbage that becomes part of your guitar signal. No wonder the amp sim sounds like garbage—it has plenty of garbage mixed in. The audio example’s second half has the input at 9 o’clock. The sound is not only more focused, but stronger.
- Inconsistent levels. Amp sim plug-ins are always re-amping—the guitar track is dry. Because amp sims are so dependent on levels, consistent sounds from presets require consistent track levels. I normalize my dry guitar tracks to -3 dB, and then my presets know what to expect. Also, note that Event level adjustments are before the amp sim. Sometimes all that’s needed to optimize the guitar sound is to lower the Event level in places where you want more definition, and raise it when you prefer heavier distortion.
- Too many low and high frequencies. Guitar amps were never about flat frequency response. Rolling off lows below the guitar’s range keeps out bass energy that has nothing to do with your playing, and rolling off the highs a bit simulates the high-frequency loss through long cables—something amp sims don’t emulate. In the next audio example, the first half is the same overly distorted sound as the previous audio example’s first half. The second half doesn’t change the input level, but rolls off the lows and highs with the Pro EQ, prior to the amp sim. Fig. 1 shows the Pro EQ settings.
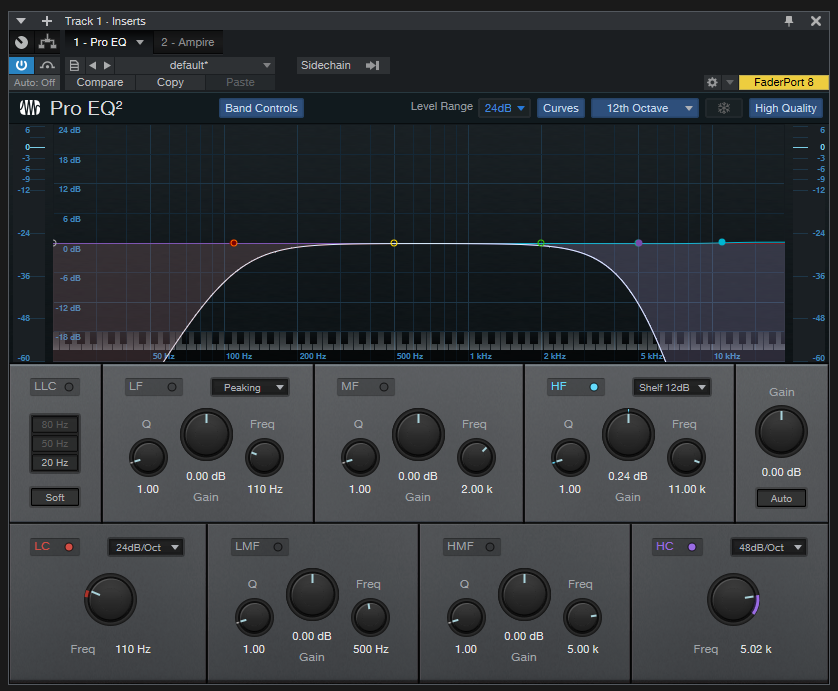
Figure 1: Rolling off the lows and highs before feeding an amp sim can clean up the sound.
In particular, listen to the spaces between notes. The version without EQ has a sort of bassy mud between notes that detracts from the part’s focus.
The bottom line is simple: If your amp sim doesn’t sound right, the quickest fix might be as simple as turning down the input level, and rolling off some lows and highs before the amp sim.
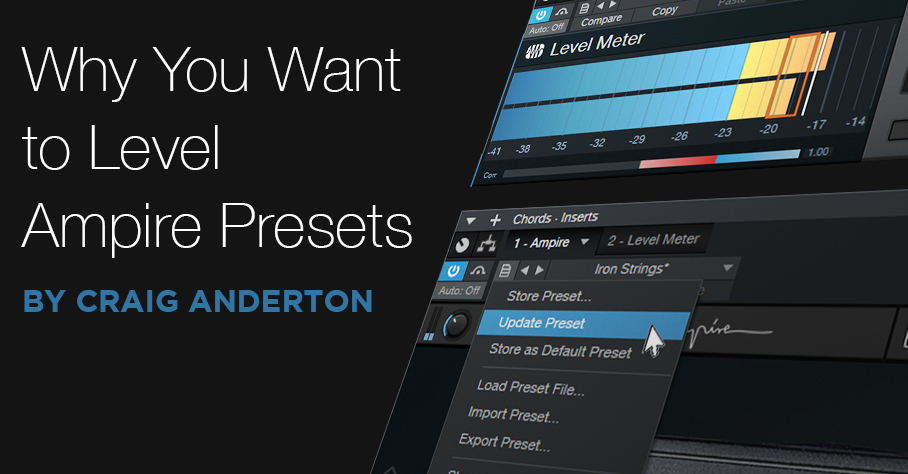
Why You Want to Level Ampire Presets
It’s great we can store presets, trade them with other users, and download free ones. But…when selecting different Ampire presets to decide how they fit with a track, you want their levels to match closely. Then, your evaluation of the sound will be based on the tone, not by whether the preset is softer or louder. However, consistent preset levels are not a given.
Having a baseline level for presets, so you don’t need to change the level every time you call up a new one, is convenient. You can’t really use VU meters for this, because you want sounds to have the same perceived level, which can be different from their measured level. For example, a brighter sound may measure as softer, but be perceived as louder because it has energy where our ears are most sensitive.
My standard of comparison is a dry guitar sound, because I want the same perceived level whether Ampire is enabled, or bypassed. You might prefer to have Ampire always be a few dB louder than your dry guitar—whatever makes you happy.
Enter LUFS
The LUFS (Loudness Unit Full Scale) measurement protocol measures perceived loudness. LUFS measurements allow streaming services like YouTube, Spotify, Apple Music, and others to adjust the volume of various songs to the same perceived level. This is why you don’t have to change the volume every time a different song shows up in a playlist. The system isn’t perfect, but it’s better than dealing with constant level variations. Fortunately, Studio One has a Level Meter plug-in that gives LUFS readings (fig. 1).
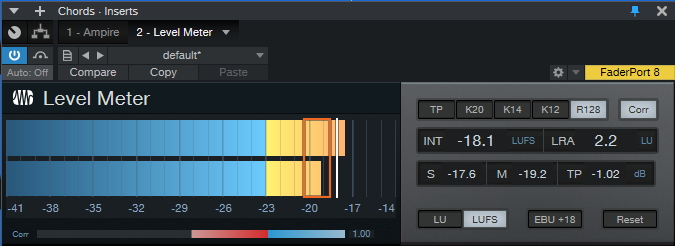
Figure 1: The Level meter can measure levels based on a variety of standards, including LUFS.
The Process
- Record at least two Events—one for chords, and one for single-note leads. If you use bass presets, you’ll also want an Event with a bass line. Record about a 15 second clip of continuous guitar chord progressions, and another clip with 15-30 seconds of single notes (and/or bass lines), also without pauses.
- Insert the Level meter after Ampire, and enable its LUFS and R128 buttons. Set the appropriate event to loop, and start playback.
- With Ampire bypassed, adjust the Event’s level for a nominal LUFS reading. I use -18 dB because that works well with Ampire, Helix, and other amp sims. After setting your standard level, it’s a good idea to lock the Events from editing (context menu > Toggle Edit Lock).
We interrupt these steps to bring you an important bulletin: The Level Meter reading that matters is the INT field. This averages out the audio, so you’ll see the reading change at first, and then settle down to a consistent LUFS reading. When you change levels, call up a different preset, or make any changes, click on the Reset button to re-start the averaging process. When doing any LUFS measurements, you can’t be sure the reading is correct until you’ve a) hit Reset, and b) played the event several times, which is why we want to loop it.
We now return to the step-by-step procedure.
- Enable Ampire, and call up a preset. Hit the Level Meter’s Reset button, and after the Event has played through a couple times, check the LUFS meter reading.
- In my case, an LUFS reading of -20 would mean the preset level is about 2 dB lower than my standard -18 dB level. So, I’d raise Ampire’s output control (fig. 2) by 2 dB. On the other hand, if the LUFS reading was -14 dB, it would be about 4 dB louder than my standard. I’d instead need to lower the output level control by 4 dB.

Figure 2: Use the output control to obtain similar levels from different presets.
- After adjusting the level, hit Reset on the Level Meter, and play the loop a few times. If the reading is the same as the nominal value…done! Otherwise, re-tweak.
- The final step is to click on Update Preset (fig. 3), so you don’t have to do this again.
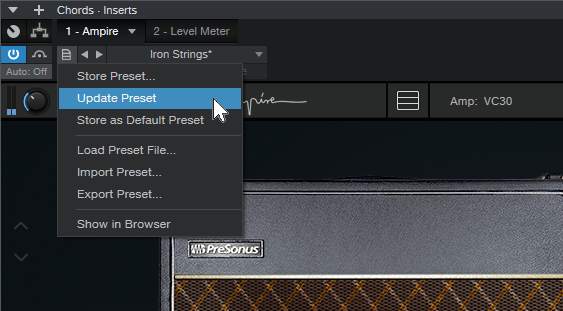
Figure 3: Save your work for future sessions.
And while you’re at it, save the Song you used to do this testing. Then you can call it up again in the future, when you want to match preset levels.
Okay, so it took a little time to balance all your presets. But when deciding what preset to use in the future, you’ll be glad you set them all to a baseline level.
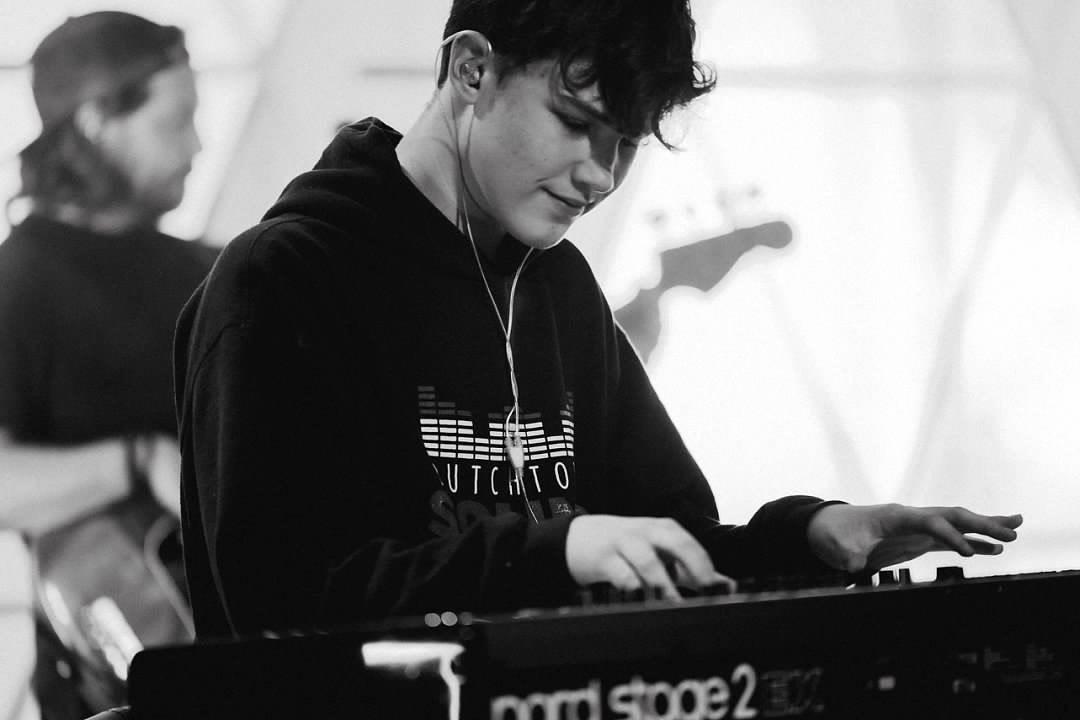
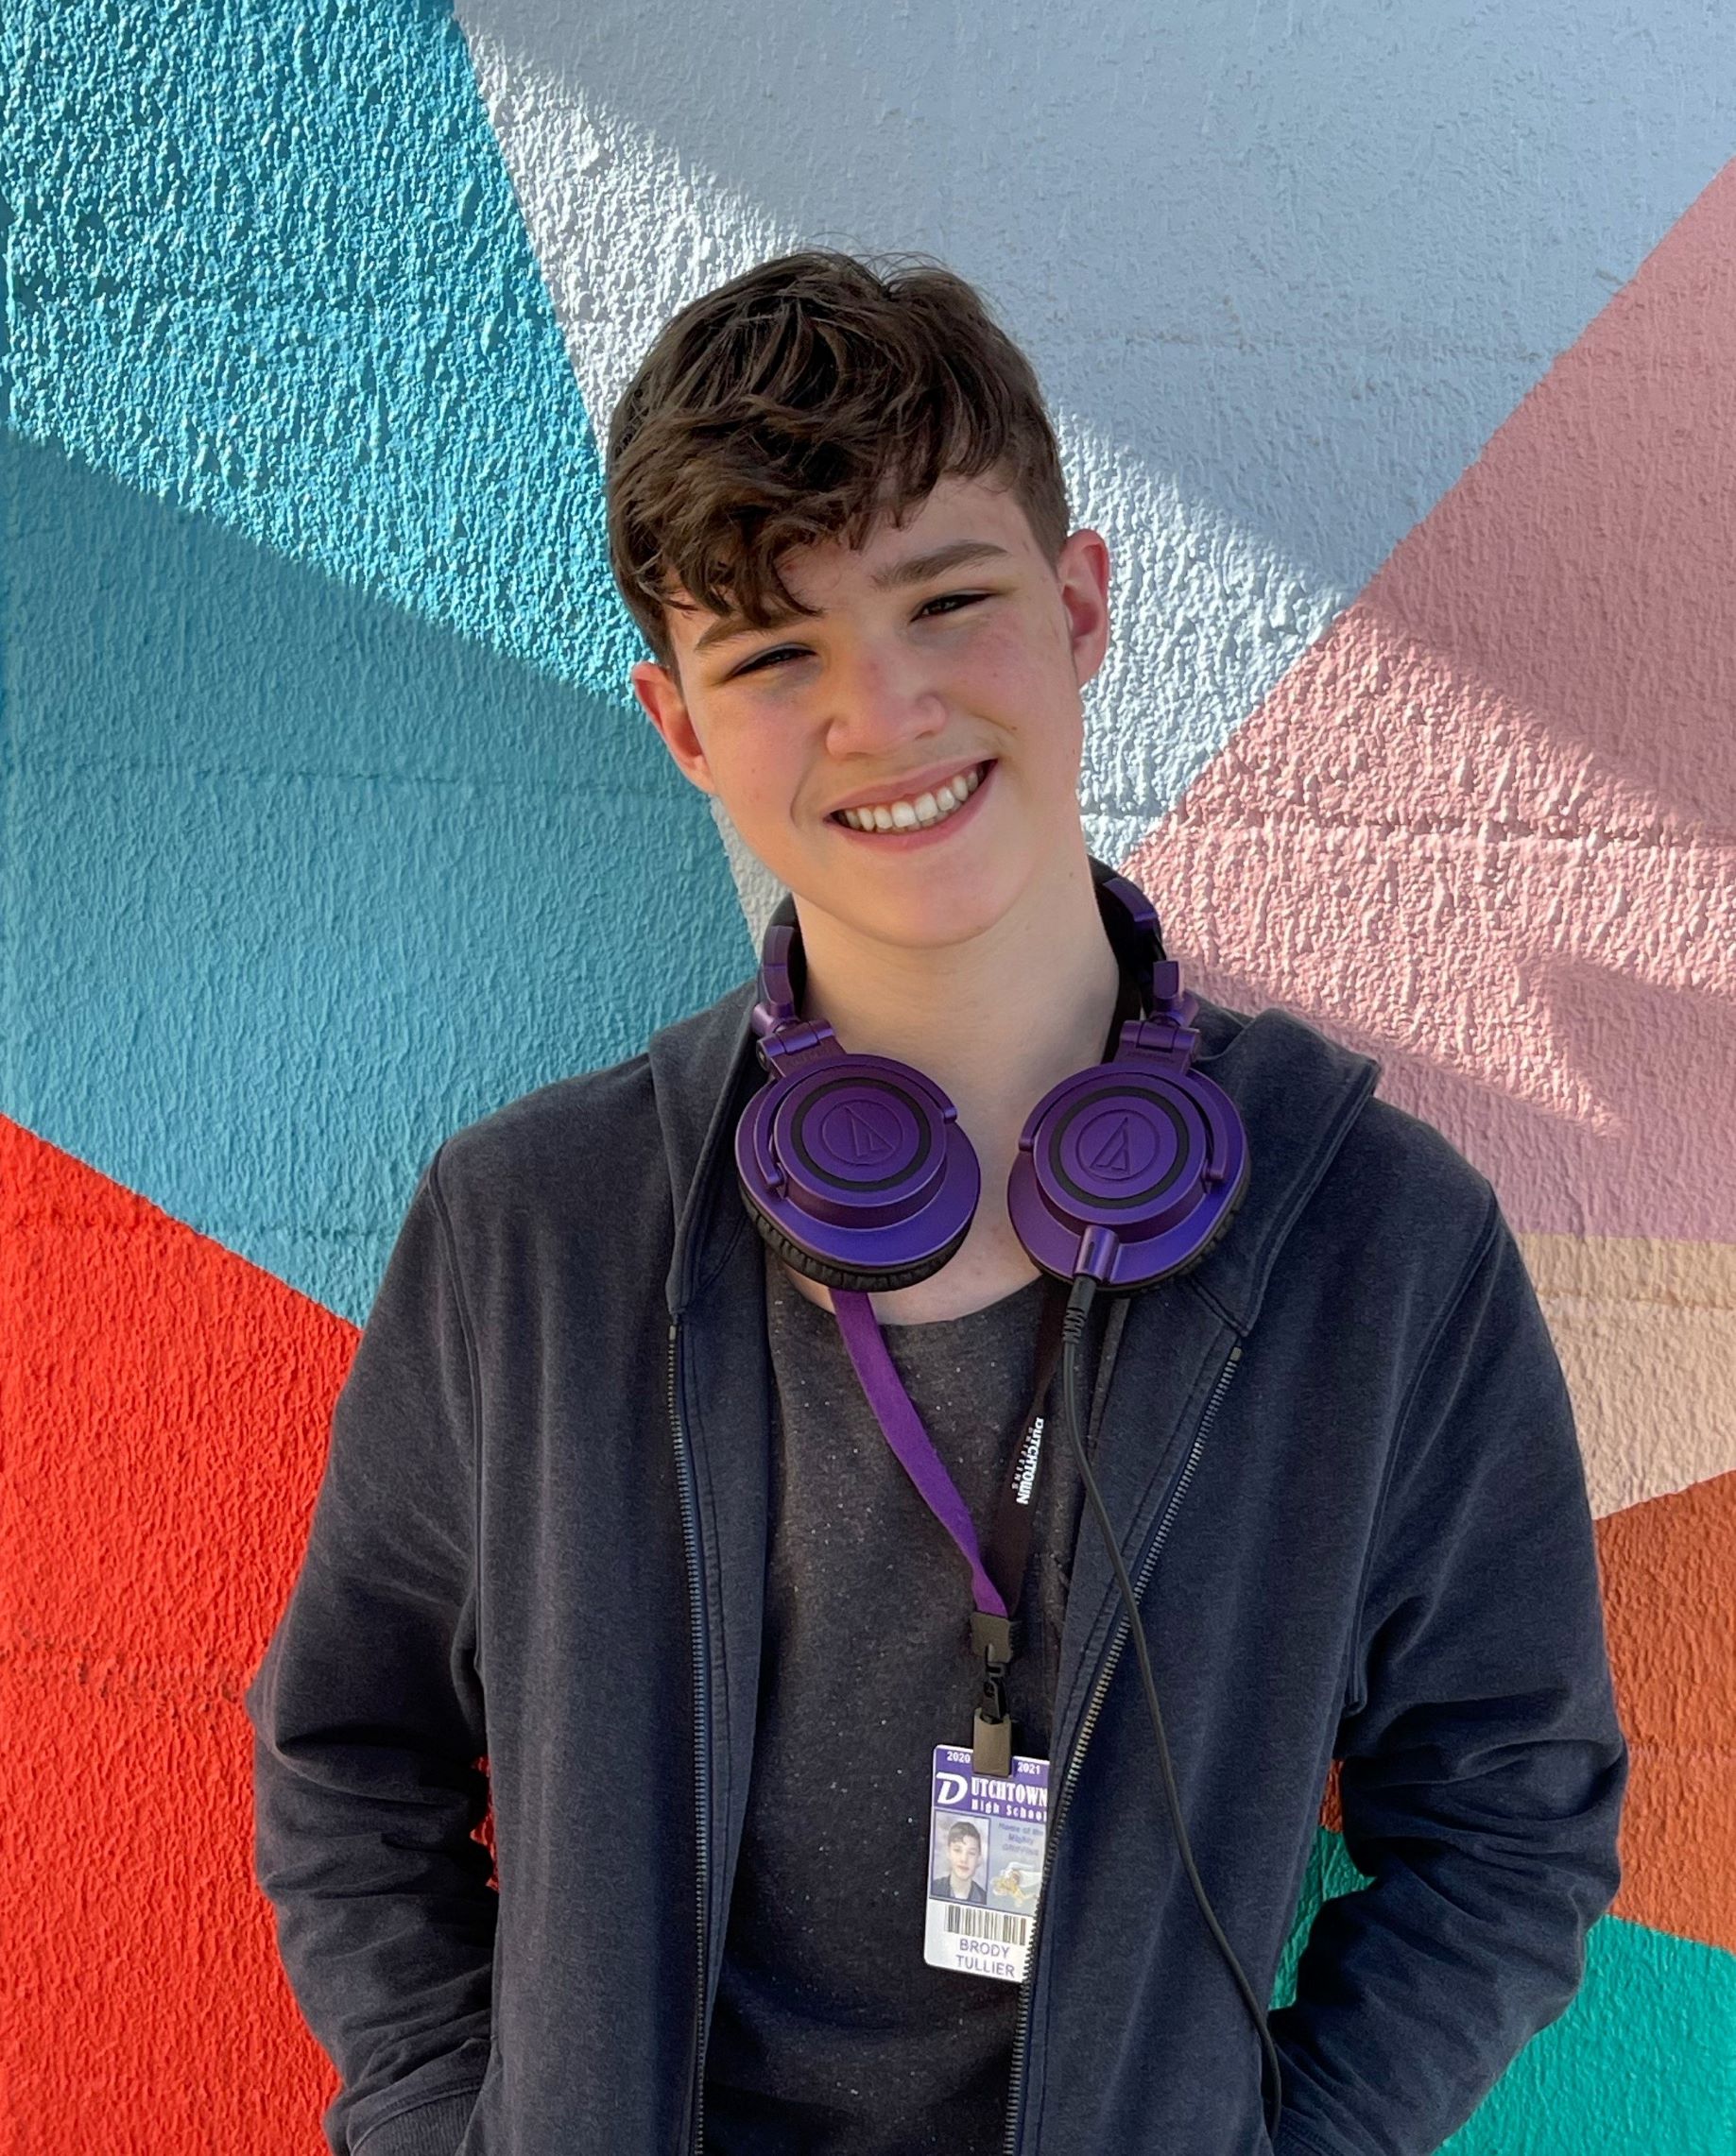
Brody Tullier on using Studio One for Video Game Soundtracks
Brody Tullier (aka Zeno) is a 17 year-old composer based in Baton Rouge, Louisiana who has been composing and arranging original music for the past four years.
 His main style of composition is often through complex midi-mapping and programming, although he is also a studying pianist and vocalist.
Delving into advanced audio production more and more in recent years, his music has become the lively, energetic, and polished arrangements that you can hear in his recent Bandcamp releases here.
Brody’s preferred style of compositions lean heavily towards video-game inspired tracks and he aspires to one day seek a career in the video game music industry.
We wish him great success in his ongoing growth as a musician, composer and producer!
Follow Brody’s path in discovering the creative power of Studio One, Notion and the PreSonus software add-ons available.
Join PreSonus Sphere today!
Only $14.95 per month for Studio One Professional, Notion, and so much more.
Studio One’s Session Bass Player
Studio One includes multiple algorithmic composition tools, but I’m not sure how many users are aware of them. So, let’s look at the way some of these tools can help expedite the songwriting process.
I’ve always prioritized speed when songwriting, because inspiration can disappear quickly. But, I’ve also found that good guide tracks (e.g., cool drum loops instead of metronome clicks) increase the inspiration factor. The trick is to create good guide tracks, without getting distracted into editing a guide tack into a “part.”
A solid bass line helps drive a song, but when songwriting, I don’t want to take the time to grab a bass and do the necessary setup. The blog post Studio One’s Amazing Robot Bassist describes a simple way to create a bass part by hitting notes on the right rhythm, and then conforming them to the Chord track. This week’s tip builds on that concept to let Studio One’s session bass player get way more creative, and generate parts even more quickly.
Fig. 1 shows a chorus being written. The process started with a rhythm guitar part (track 3), which I dragged up to the Chord track so it could parse the chord changes. I made a few changes to the Chord Track, then dragged it into a piano instrument track. This deposited MIDI notes for the chords, so now the piano played the chord progression. I then had the guitar follow the new Chord track, and the guitar and piano played together. Next up was adding a drum loop.
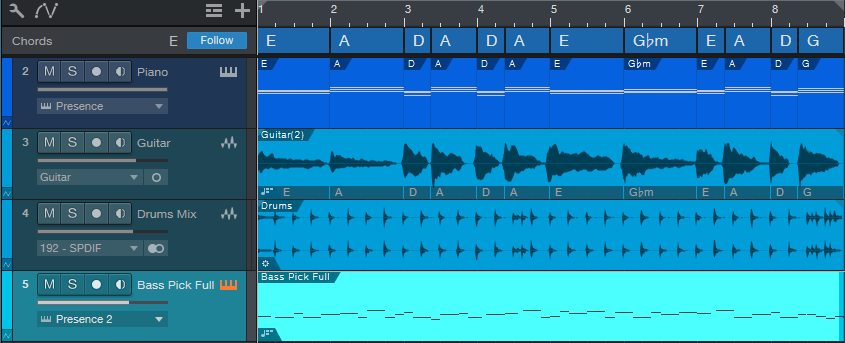
Figure 1: Studio One is set up for songwriting, and has just generated a bass part.
As to the bass part, there are three elements to having Studio One create a bass part.
1: Fill With Notes
After selecting the bass’s blank Note Event, open the Edit Menu and choose Action > Fill with Notes. You’ll want to customize the settings for best results (fig. 2).
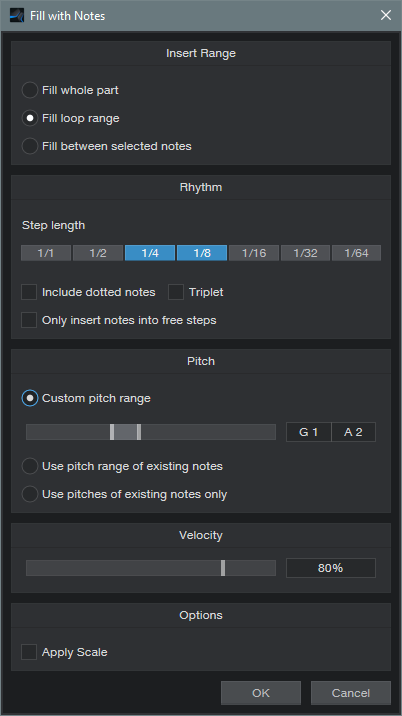
Figure 2: Studio One’s session bass player is thinking about what to play.
For example, choose a bass-friendly pitch range. For this song, I also wanted a fairly bouncy part, so the rhythm is made up of 1/4 and 1/8 notes. You might also want some half-notes in there. Click on OK, and you have a part.
Every time you invoke Fill with Notes, the notes will be different. If you don’t like the results, delete the notes, and try again. But don’t agonize over this—all you really want is notes with a rhythm you like, because the Chord Track and Scale will take care of the pitches.
Also note that if you don’t like the notes in, for example, the second half but like the first half, no problem. Delete the notes in the second half, set the loop to the second half, and try again.
2: Chord Track
Now have the part follow the Chord Track. Your follow options are Parallel, Narrow, and Bass. I usually prefer Narrow over Bass, but try them both. Now the notes follow the chord progression.
3: Choose and Apply Scale
This may not be necessary, but if the part is too busy pitch-wise, specify the scale note and choose Major or Minor Triad. Then, choose Action > Apply Scale. Now all the notes will be moved to the first, third, or fifth. Of course, you can also experiment with other scales—but remember, the object is to get an acceptable bass part down fast, so you can move on to songwriting.
Fig. 3 shows a bass part that Studio One’s session bass player “played.” This was on the second try.
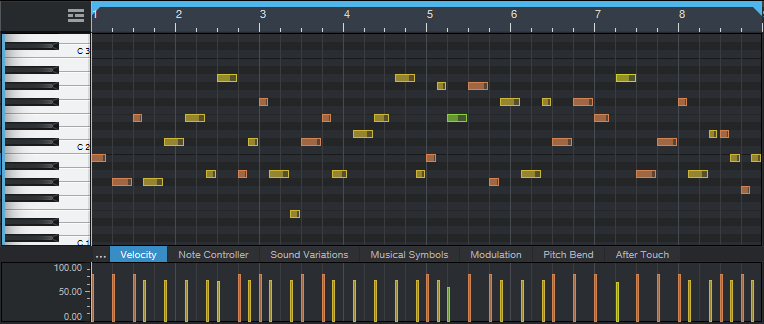
Figure 3: The session bass player came up with a pretty cool part. I applied Humanize to the velocities so it didn’t sound too repetitive.
Finally, let’s hear the results. The vitally important point to remember is that all this was created, start to finish, in under four minutes (which included tuning and plugging in the guitar). The end result was some decent guide tracks, so I could start work on the ever-crucial vocal lead line and lyrics. Thank you, session bass player!
Percussion in Motion

I’m a fan of hand percussion. Tambourines, cowbells, claves, guiros…you name it. But mixing it just right is always tricky. When mixed too high, the percussion becomes a distraction. Too low, and it might as well not be there. The object is to find the sweet spot between those extremes.
My solution is simple: use X-Trem’s Autopan function to give motion to percussion. The following audio example has cowbell (no jokes, please) and tambourine. The cowbell keeps a rock-solid hit on quarter notes, and is panned to an equally rock-solid center. But the tambourine is a different story. I’ve mixed both of them higher than normal, so you can clearly hear how they interact.
In the first half, both the tambourine and cowbell are panned to center. After a brief gap, the section repeats, with X-Trem moving the tambourine back and forth in the stereo field. In a real mix, both percussion parts would be mixed lower, so the tambourine’s motion would be something you sensed rather than heard. The end result is a feeling of more motion with the percussion, because the tambourine’s wanderings keep it from becoming repetitive.
X-Trem Setup
First things first: the track must be stereo. If you recorded it in mono, set the Channel Mode to stereo, select the clip, and type ctrl+B to bounce the clip to itself. This converts it to stereo.
I prefer not to have a regular, detectable panning change. A random LFO waveform would be ideal, but the X-Trem’s 16 Steps waveform is equally good. Slower pan rates are better, because you don’t want the pan position to change so fast that a percussion hit pans while it’s still sustaining or playing. I’d recommend 2 beats (changes every 1/8th note, as in the audio example) or every 4 beats for slower tempos or percussion that sustains.
Draw a pattern that’s as close as possible to seeming random (fig. 1). This prevents the panning from becoming repetitive.
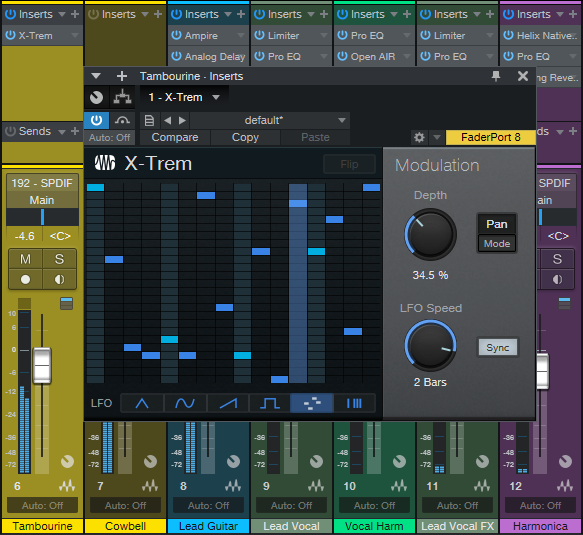
Figure 1: The 16 Steps option lets you create a custom LFO waveform.
Placement
If you want the panning to move around the center, fine—pan the track to center, and you’re done. But if you want the panning to move (for example) between hard left and center, remember that the pan control becomes a balance control in stereo. So if X-Trem pans the audio more toward the right, it will become quieter. To get around this, pan the channel to center, but follow the X-Trem with a Dual Pan that sets the actual panning range. Fig. 2 shows settings for panning between the left and center, while maintaining a constant level.
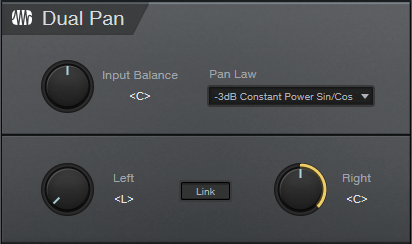
Figure 2: Dual Pan settings for varying the auto-panned position between the left and center.
As to the amount of X-Trem modulation depth…it depends. If you’ve been to my seminars where I talk about “the feel factor” with drum parts, you may recall that I like to keep the kick right on the beat, and change timings around it. A similar concept holds true with panning percussion. In the audio example, the cowbell is the anchor, and the tambourine dances around it. If both are moving, the parts can become a distraction rather than an enhancement.
Now you know how to make your percussion parts tickle the listener’s ears just a little bit more…and given the audio example, I’m proud of all of you for not stooping to a “more cowbell” joke!
Sneaky Mastering Page Tip
For this tip to make sense, I need to be upfront about two personal biases.
Personal bias #1: Drums should sound percussive. I can’t remember the last time I used compression on drums (although limiting or saturation is helpful to shave off extreme peaks).
Personal bias #2: I avoid using bus processors. The mix has to sound great without any bus processors, so the mastering process can take the mix to the next level.
Why I have these biases would take up a whole other tip. Besides, if your music sounds great with bus processors and compressed drums, then by all means—keep using bus processors, and compress your drums!
But There’s a Problem: “Super Peaks”
As a result of my biases, I send mixes with a wide dynamic range to the Mastering page, because that’s where I can control the precise amount of dynamic range processing in context with other related pieces of music. But, not restricting dynamics means that from time to time, there are “super peaks”—for example, if the kick, snare, cymbal, keyboard stabs, and a guitar power chord all hit at the same time (fig. 1).
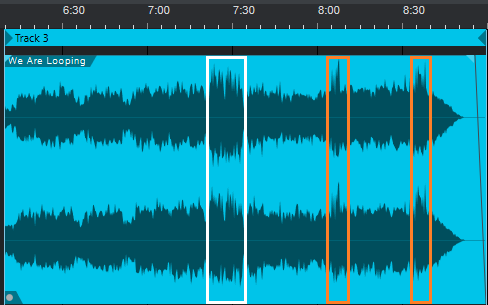
Figure 1: The super peaks are outlined in orange. Lower peaks are outlined in white.
These super peaks go way higher than most peaks, so if you normalize, the super peaks prevent any significant peak level increase. Using limiting or compression on the track works, but alters the percussive character. Of course, the beauty of the Song/Mastering page synergy is that you can tweak the mix in the Song page, and the Mastering page will reflect the results. However, with super peaks that combine multiple instrument sounds occurring simultaneously, tracking down which tracks to reduce, and by how much, gets complicated—especially if you have to deal with a dozen or so super peaks.
The Gain Envelope is the perfect tool for dealing with super peaks. You can bring down the peak and the area immediately adjacent to it, without neutering the percussive waveform (fig. 2). The Gain Envelope just lowers the peak’s level a bit—it doesn’t flatten the peak.
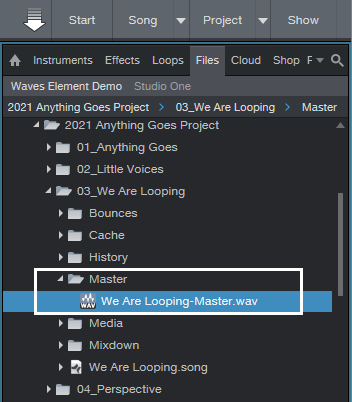
Figure 2: The super peak on the left has been lowered by -3 dB on the right.
Although the Mastering page doesn’t have Gain Envelopes, there’s still a way to apply that Song page advantage to the Mastering page. Usually, audio goes from the Song page to the Mastering page. In this case, we’ll do the reverse.
- Create a new Song.
- Open the Browser, and unfold the Project’s folder. Then, unfold the Song with the file that needs editing, and open the Song’s Master folder to expose the file used by the Mastering page (fig. 3).

Figure 3: Locate the Master file. Note the -Master.wav suffix.
- Drag the Master file into the new Song, and start editing.
- Use the Gain envelope to bring down the super peaks. While the file is open, you can make any other needed changes (e.g., increasing the level slightly at the beginning to pull listeners into the music).
- After making your changes, rename the existing Master file to something like “Song-Master Old.wav.” Then, drag the edited file from the Song into the Master folder, and rename it with the original name, like “Song-Master.wav.” Now your project will think the modified file is the Master file (fig. 4). Once it checks out as okay, you can delete the old Master file.
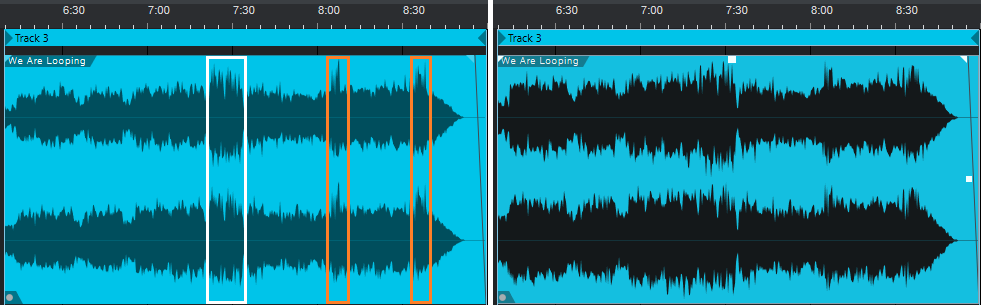
Figure 4: The original file is on the left. The version on the right had the super peaks reduced, and was then re-normalized.
Mission accomplished! Both files in fig. 4 were normalized, but compare the file on the right—it’s more consistent and louder, yet the dynamics remain intact. It was necessary to change only the levels of ten super-peaks by about -3 dB. I also brought up the level in the beginning section, to make a stronger entrance after the end of the previous song. The end result was about a +2.0 LUFS increase.
So there you have it: you can win the loudness wars—but with a bloodless coup that doesn’t squash your audio.
Shimmer Reverb
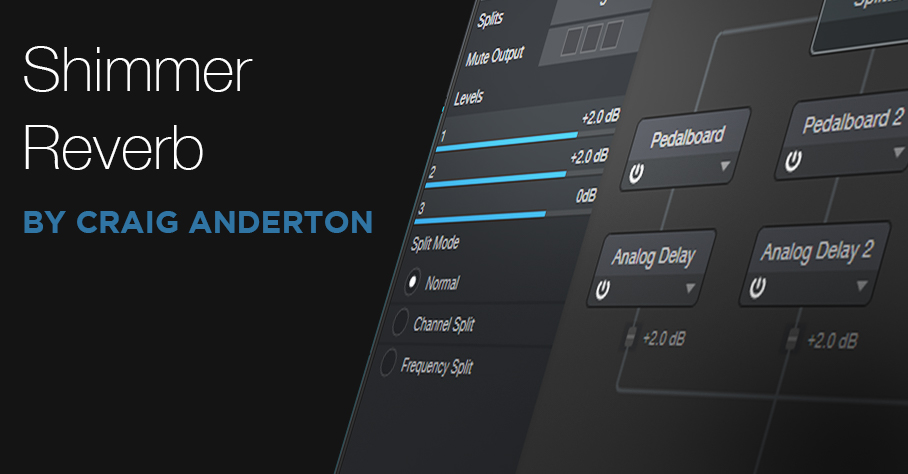
As reverb transitions from being simply a way to emulate an acoustic space to an effect in its own right, new reverb designs are becoming more popular. One of these is “shimmer” reverb, which uses pitch shifting before the reverb to add high-frequency content. Some of these recirculate the pitch-shifted output back to the input; although this implementation doesn’t do that, it still gives a solid shimmer effect—check out the audio examples.
After hearing the examples, you’ll probably want to download the multipreset included for Pro users. If you’re an Artist user and have the Ampire add-on, you can do this effect by using buses. Fig. 1 shows the Shimmer Reverb’s block diagram.
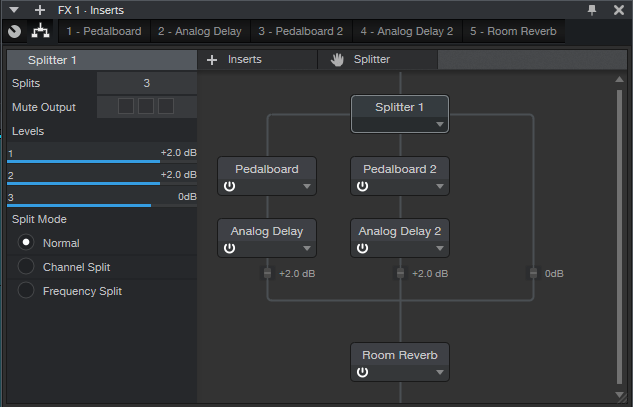
Figure 1: Shimmer Reverb FX Chain.
The Splitter has three splits. Two go to a Pedalboard with a Pitch Shifter module, set for an octave higher shift (fig. 2). The third provides a dry signal.
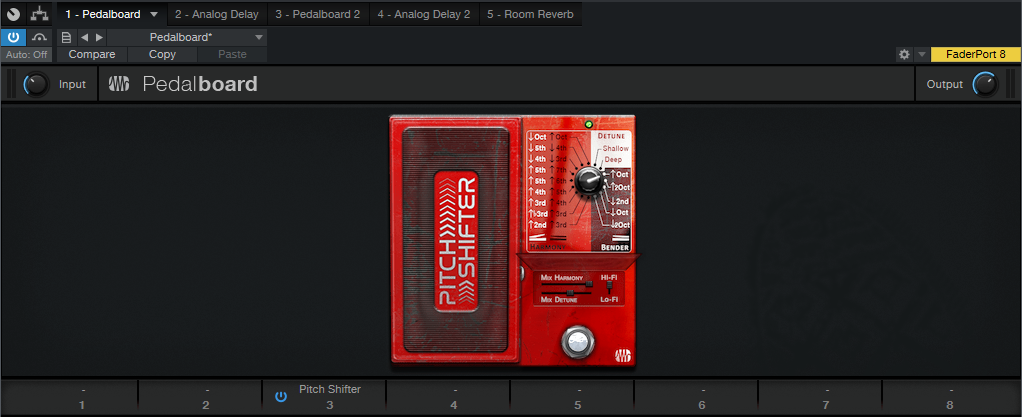
Figure 2: Pitch Shifter settings.
Because the fidelity drops off with extreme transposition, having two Pitch Shifters in parallel gives a smoother sound. Note that Mix Harmony is set full up, and Harmony Detune is up halfway. Feel free to experiment with the Detune parameter.
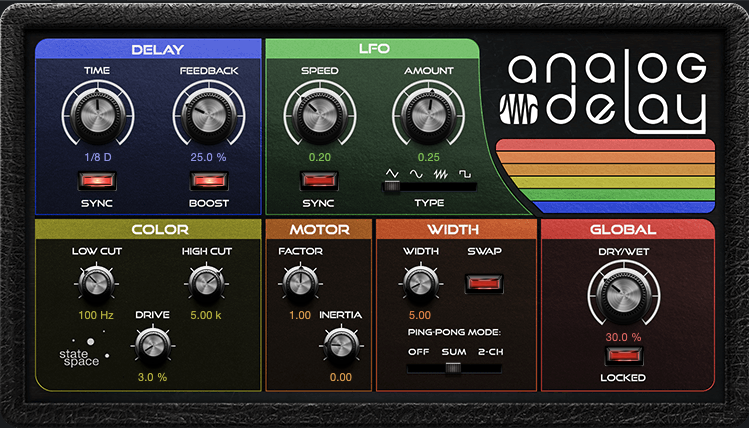
To smooth the sound further, an Analog Delay (fig. 3) follows each Pitch Shifter. They have identical settings, except that one is set for 31 ms of delay, and the other for 23 ms.
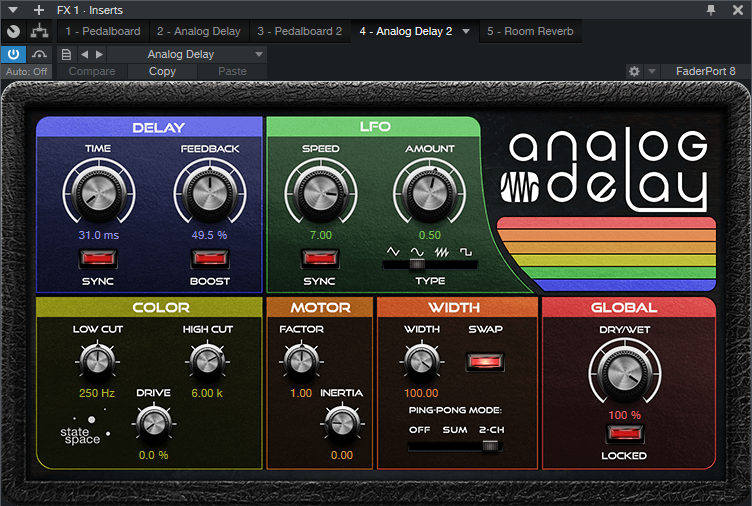
Figure 3: Analog Delay settings.
You’ll need to set the wet/dry balance in the FX Chain itself, using the level sliders for the three splits. Or, eliminate the dry split, and use this only as a bus or FX Channel effect.
And that’s all there is to shimmering your sound. Happy ambiance!
Download the Shimmer Reverb multipreset here.
Mixing Vocals: How To Make Vocal Production Presets in Studio One with Alina Smith

Join PreSonus Sphere today to check out Alina Smith’s exclusive Presets and more by other PreSonus artists!
Only $14.95 per month for Studio One Professional, Notion, and so much more.
Alina Smith: 2000’s Teen

Alina Smith is a songwriter, a producer, and one half of LYRE, who has written and produced records for traditional acts such as Fall Out Boy, ITZY, Red Velvet, Betty Who, Kirstin Maldonado (Pentatonix), as well as for today’s top digital creators like Kenzie Ziegler, Lexi Jayde, Niki and Gabi.
She has accumulated hundreds of millions of streams on songs she’s been a part of and earned several #1 singles. Alina’s work has been profiled in Forbes Magazine, Billboard Magazine, American Songwriter, 1883 Magazine, and more. She’s also well-known in the sound design space with LYRE’s Splice sample pack called “Perfect Pop.”
Here’s what you need to know, straight from Alina:
So I started recording myself singing pretty early on, I wanna say… 2005. I had a dynamic mic I plugged directly into the audio input of my prehistoric laptop and I had absolutely zero training in anything related to production. Then, a few years later I upgraded to an M-Box and a $100 MXL mic which is, funny enough, the setup that I got my first songwriting cut on. From then on, I kept progressing and learning, which I still do to this day, although I do have a pretty large bag of tricks at this point that I can dip into when I record different singers in different genres.
A few years ago I switched from Pro Tools to Ableton Live for instrumental production, but I was struggling with the vocal production side of things in there because at the time Ableton didn’t have playlisting, so recording and comping vocals was super time-consuming and clunky.
I decided to test-run Studio One and fell in love with it immediately! With the ease of setting my own key commands, I was able to choose the commands I was used to and not have to learn a whole new set. Sprinkle in the Melodyne and VocAlign via ARA integration, and I knew that I finally found my soulmate vocal production DAW!
 With a PreSonus Sphere membership, I’ve discovered a lot of new plug-in effects I really love, like the Analog Effects Collection. The Analog Delay is chef’s kiss!
I’ve really come to enjoy the PreSonus PX-1 mic, which I use for on-location recording quite a bit. With the right “in-the-box” vocal chain, I can make it sound bright and crispy and much pricier than it actually is!
It’s been a really hectic year for me! At the top of 2021, I set the intention of not holding back in any area of my life or career and for the rest of the year it translated into me pursuing several things all at once. I ended up organizing and hosting an online music convention, called the Modern Music Expo, which you can watch a replay of here:
I also released an EP called 2000’s Teen, which is my first body of work as an artist! And, seeing as my main job is writing and producing music for other artists with mg production team LYRE, I also did a ton of that, my favorite being “Mafia in the Morning” by ITZY, which came out this spring.
I’m already working on my next release: filming a music video and planning the drop. Writing and producing for various projects and making production tutorials for YouTube and TikTok. But mostly, I’m just trying to relax and enjoy fall, which is my favorite time of the year. It’s so important for artists to replenish their batteries, so that’s what I’m doing!
Let’s welcome Alina into the family as a Featured Artist on PreSonus Sphere!
She is sharing ten of her custom Vocal FX Presets for all PreSonus Sphere members to access and enjoy:
Join PreSonus Sphere today to check out Alina Smith’s exclusive Presets and more by other PreSonus artists!
Only $14.95 per month for Studio One Professional, Notion, and so much more.