Drum Replacement with Melodyne

The problem: I was using one of Chris McHugh’s acoustic drum loops from the (sadly, no longer available) Discrete Drums sample library. However, it had been recorded at a slower tempo, and when sped up, it was a bit too “busy” in places.
The solution: Drum Replacement with Studio One, Pro EQ, Gate, and Melodyne, so I could edit Note data into the part I wanted.
Getting Started: Step by Step
- Copy the drum loop to a new track, because we’ll want to re-visit the original one for each drum. We’ll start by replacing the kick.
- Use the Pro EQ as an Event effect to dial in the kick drum’s fundamental (fig. 1.) Combine a steep high cut with a low-frequency boost at the kick’s main frequency to isolate the kick from the rest of the track. Note that the sound doesn’t matter, you just want readily identifiable peaks. However, do avoid distortion, so Melodyne can represent velocity well.
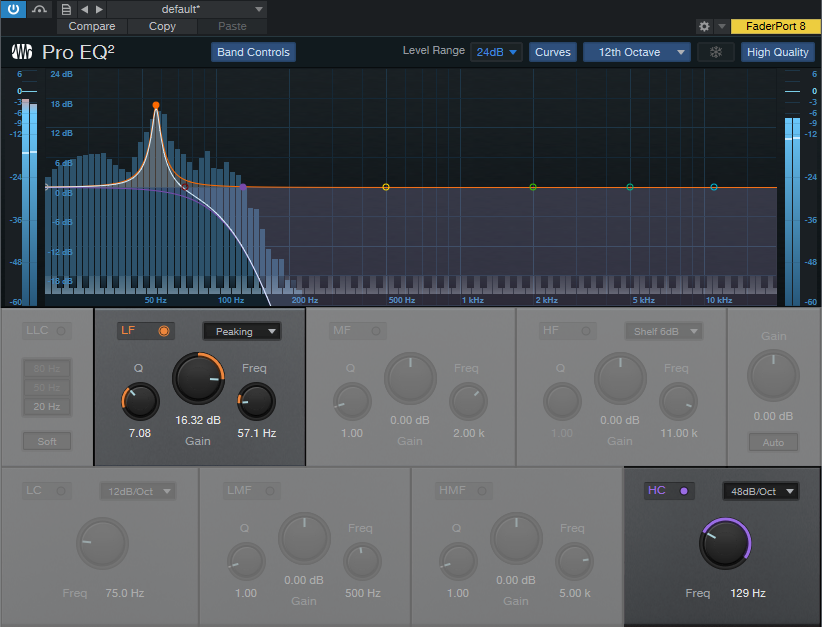
Figure 1: EQ settings to isolate the kick’s fundamental.
- Render the Event. This may leave some lower-level drum sounds or ambiance, so add a Gate, and set the Threshold to pick up only the kick drum’s peaks (fig. 2).
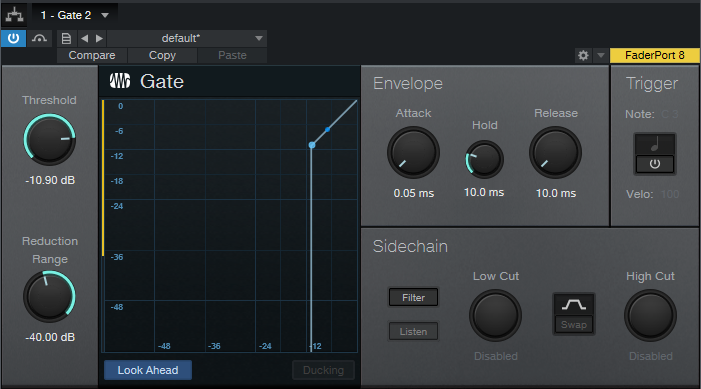
Figure 2: Gate settings to isolate the kick’s peaks.
- Render the Event again, select it, and choose Edit with Melodyne. Now the kick part looks like fig. 3.
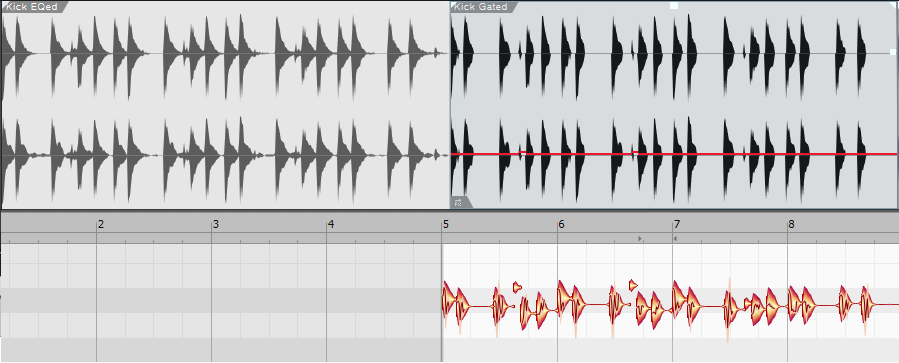
Figure 3: The Event on the left is the drum loop after EQing the kick. The Event on the right is the same one after gating. The lower blobs are the result of choosing Edit with Melodyne.
- Drag the Event track into an instrument track, and now you have note data for the kick.
Prepping the Note Data
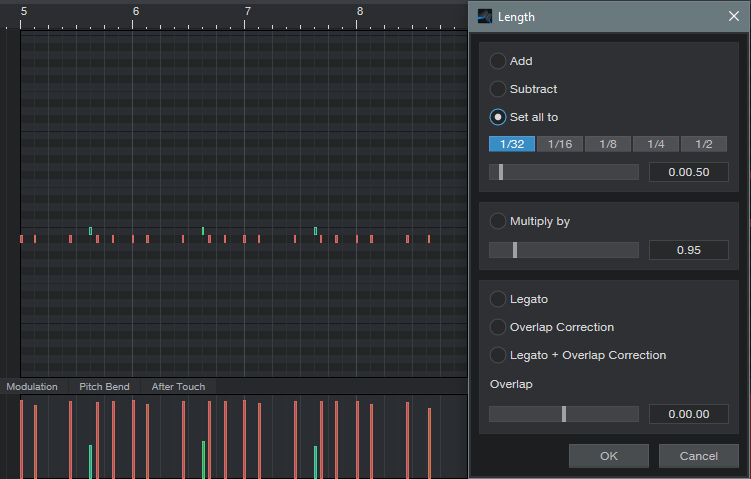
The note data length will vary. To tidy up the part, set all the drums to 16th or 32nd notes with Action > Length (fig. 4).
Note that Melodyne picked up on some low-velocity kick hits too (pretty cool). You could assign these to a different sample of a kick hit softly. Fortunately, the Discrete Drums library includes samples of the individual drums. So, I could load the samples into Impact XT, and this way the sound would work with other loops from the same collection. Since the drums are multi-sampled at different velocities, I selected all the notes, and used Studio One’s Transpose function to set them to the same pitch as the kick samples.
Hi-hat was the most difficult to convert to Note data, because snare hits can produce transients that extend into the hi-hat range. A 48 dB/octave low-cut combined with a major high-frequency peak did a decent job of isolating the hi-hat, but the frequency was extremely high and Melodyne wasn’t too happy about that. Transposing the Event down an octave or so before applying the gate made the hits more Melodyne-friendly.
Clean Up
I was taken aback at how well this technique was able to translate the acoustic drum loop into Note data. The best aspects were that it preserved the human timing of a real drummer, and Melodyne did a good job of preserving the dynamics. The only needed fix was removing a few notes caused by loud snare hits that came through on the hi-hat track, and of course, editing the data to create the part I wanted—done!