Monthly Archives: June 2024
Dynamics Processing for MIDI Velocity
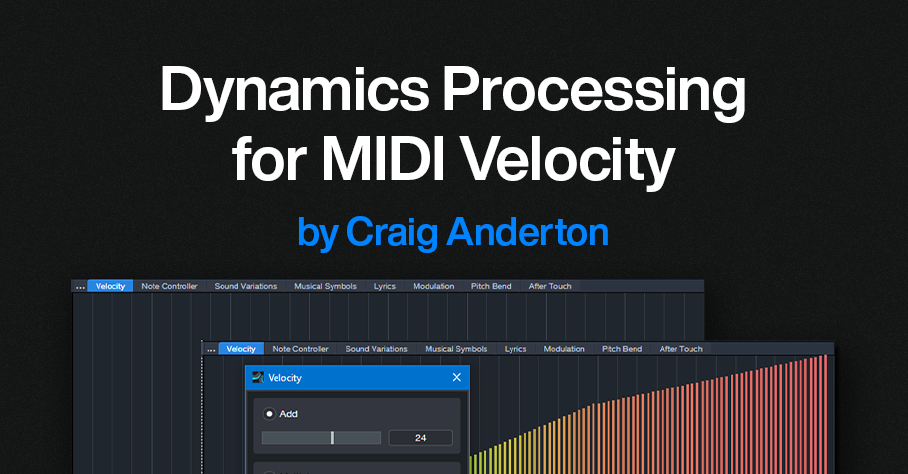
By Craig Anderton
Sure, you can follow your virtual instrument with an audio compressor. But there’s a problem: an instrument’s dynamics and expressiveness depend on the notes’ velocities—not just the audio output. Velocity triggers different samples, alters filter settings, affects envelopes, and much more. An audio compressor can’t compress velocity. So, audio compression can help tame audio levels, but it can’t enhance an instrument’s expressiveness.
Fortunately, there’s an easy way to apply dynamics processing to MIDI velocity. The principle is the same as audio compression: Set a threshold, choose a ratio, and finally, add makeup “gain.”
Fig. 1 shows MIDI velocities from 1 to 127. Of course, this wouldn’t be a real part, but it’s the easiest way to show how MIDI compression affects velocities. Let’s set a threshold at MIDI velocity 80, and compress above that with a 2:1 ratio. Note where velocity 80 is in fig. 1.
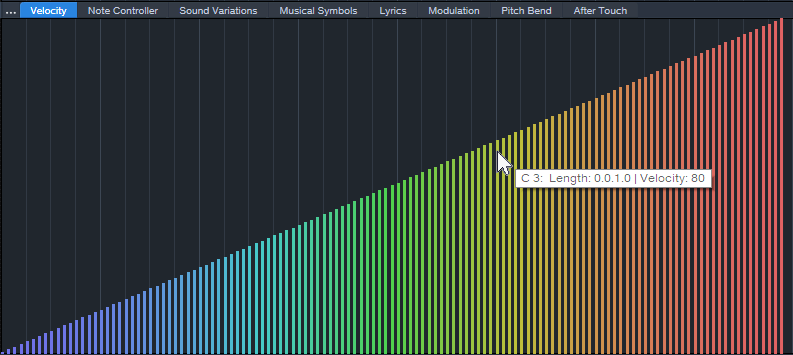
Figure 1: MIDI velocities from 1 to 127. We want to set the velocity compressor’s threshold to 80.
Select all the velocities above the threshold for processing (fig. 2).
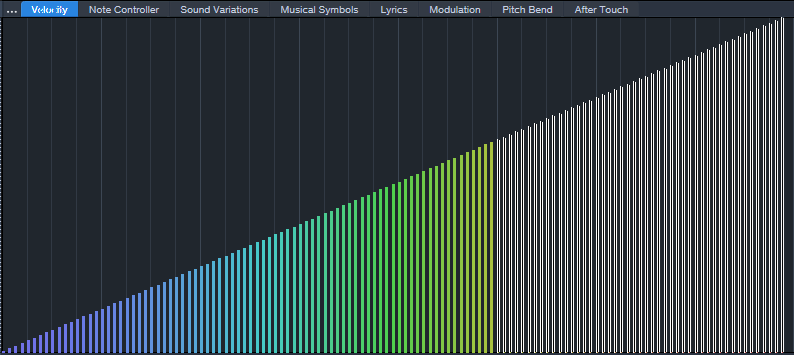
Figure 2: Velocities above the “threshold” are selected.
To compress the selected velocities by 2:1, choose Action > Velocity and multiply by 0.5. This is the same as a 2:1 ratio in an audio compressor (fig. 3).
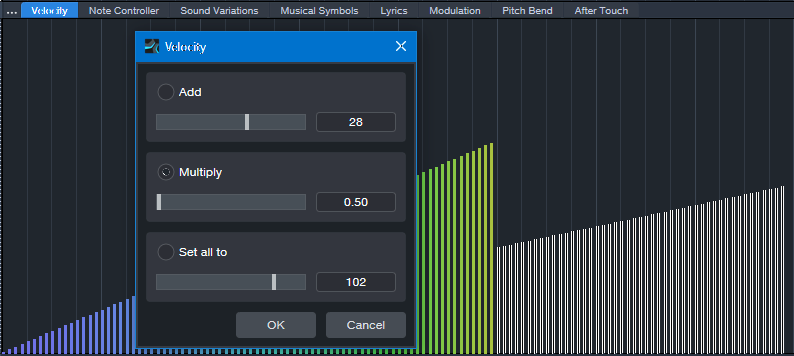
Figure 3: Velocities above the threshold are compressed by 2:1. Note how the slope is less steep.
Next, drag the selected velocity values up so that the compressed velocities line up with the velocities below the threshold. Because the velocities are still selected, you can just click on the left-most selected value, and then drag it up to its original velocity value of 80 (fig. 4). Now there’s a smooth transition at the threshold.
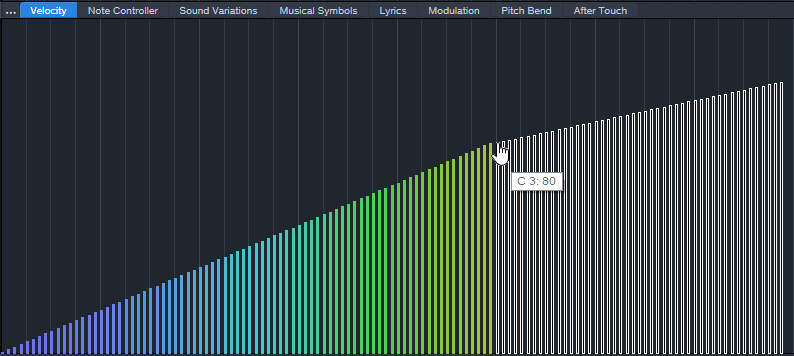
Figure 4: The compressed velocities pick up where the unprocessed velocities leave off.
Adding “makeup gain” is easy. The simplest option is to select all the velocities, and drag upward. Or, select all the velocities and choose Action > Add to add a constant. For example, after compression, the highest velocity is 103. So, adding 24 will raise all the velocities, with the highest one at 127 (fig. 5).
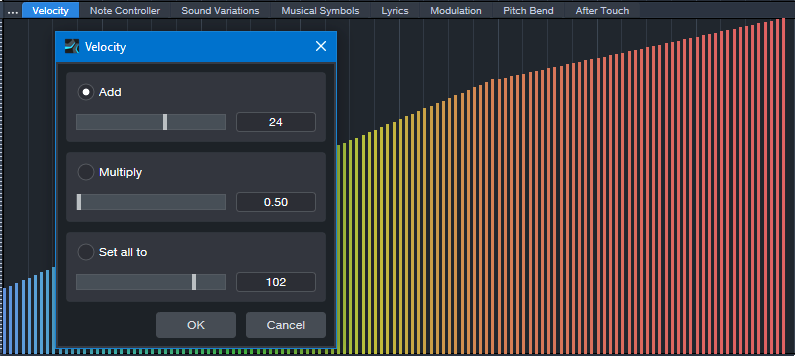
Figure 5: Like an audio compressor, the lower levels have been brought up, and the peaks have been reduced.
This is just one of the ways you can process MIDI velocity dynamics. You can also do expansion, limiting, and gating. If you’re interested in these types of processing as well, drop a note in the comments below.
Of course, you may want to compress the audio output as well. But in many cases, applying dynamics processing to an instrument’s MIDI data will give more expressive results than you can obtain with audio compression alone.
KOTA the Friend & RMB Justize | Studio One x TuneCore
Watch the independent artist and Wiz Khalifa producer cook up a song in a single day
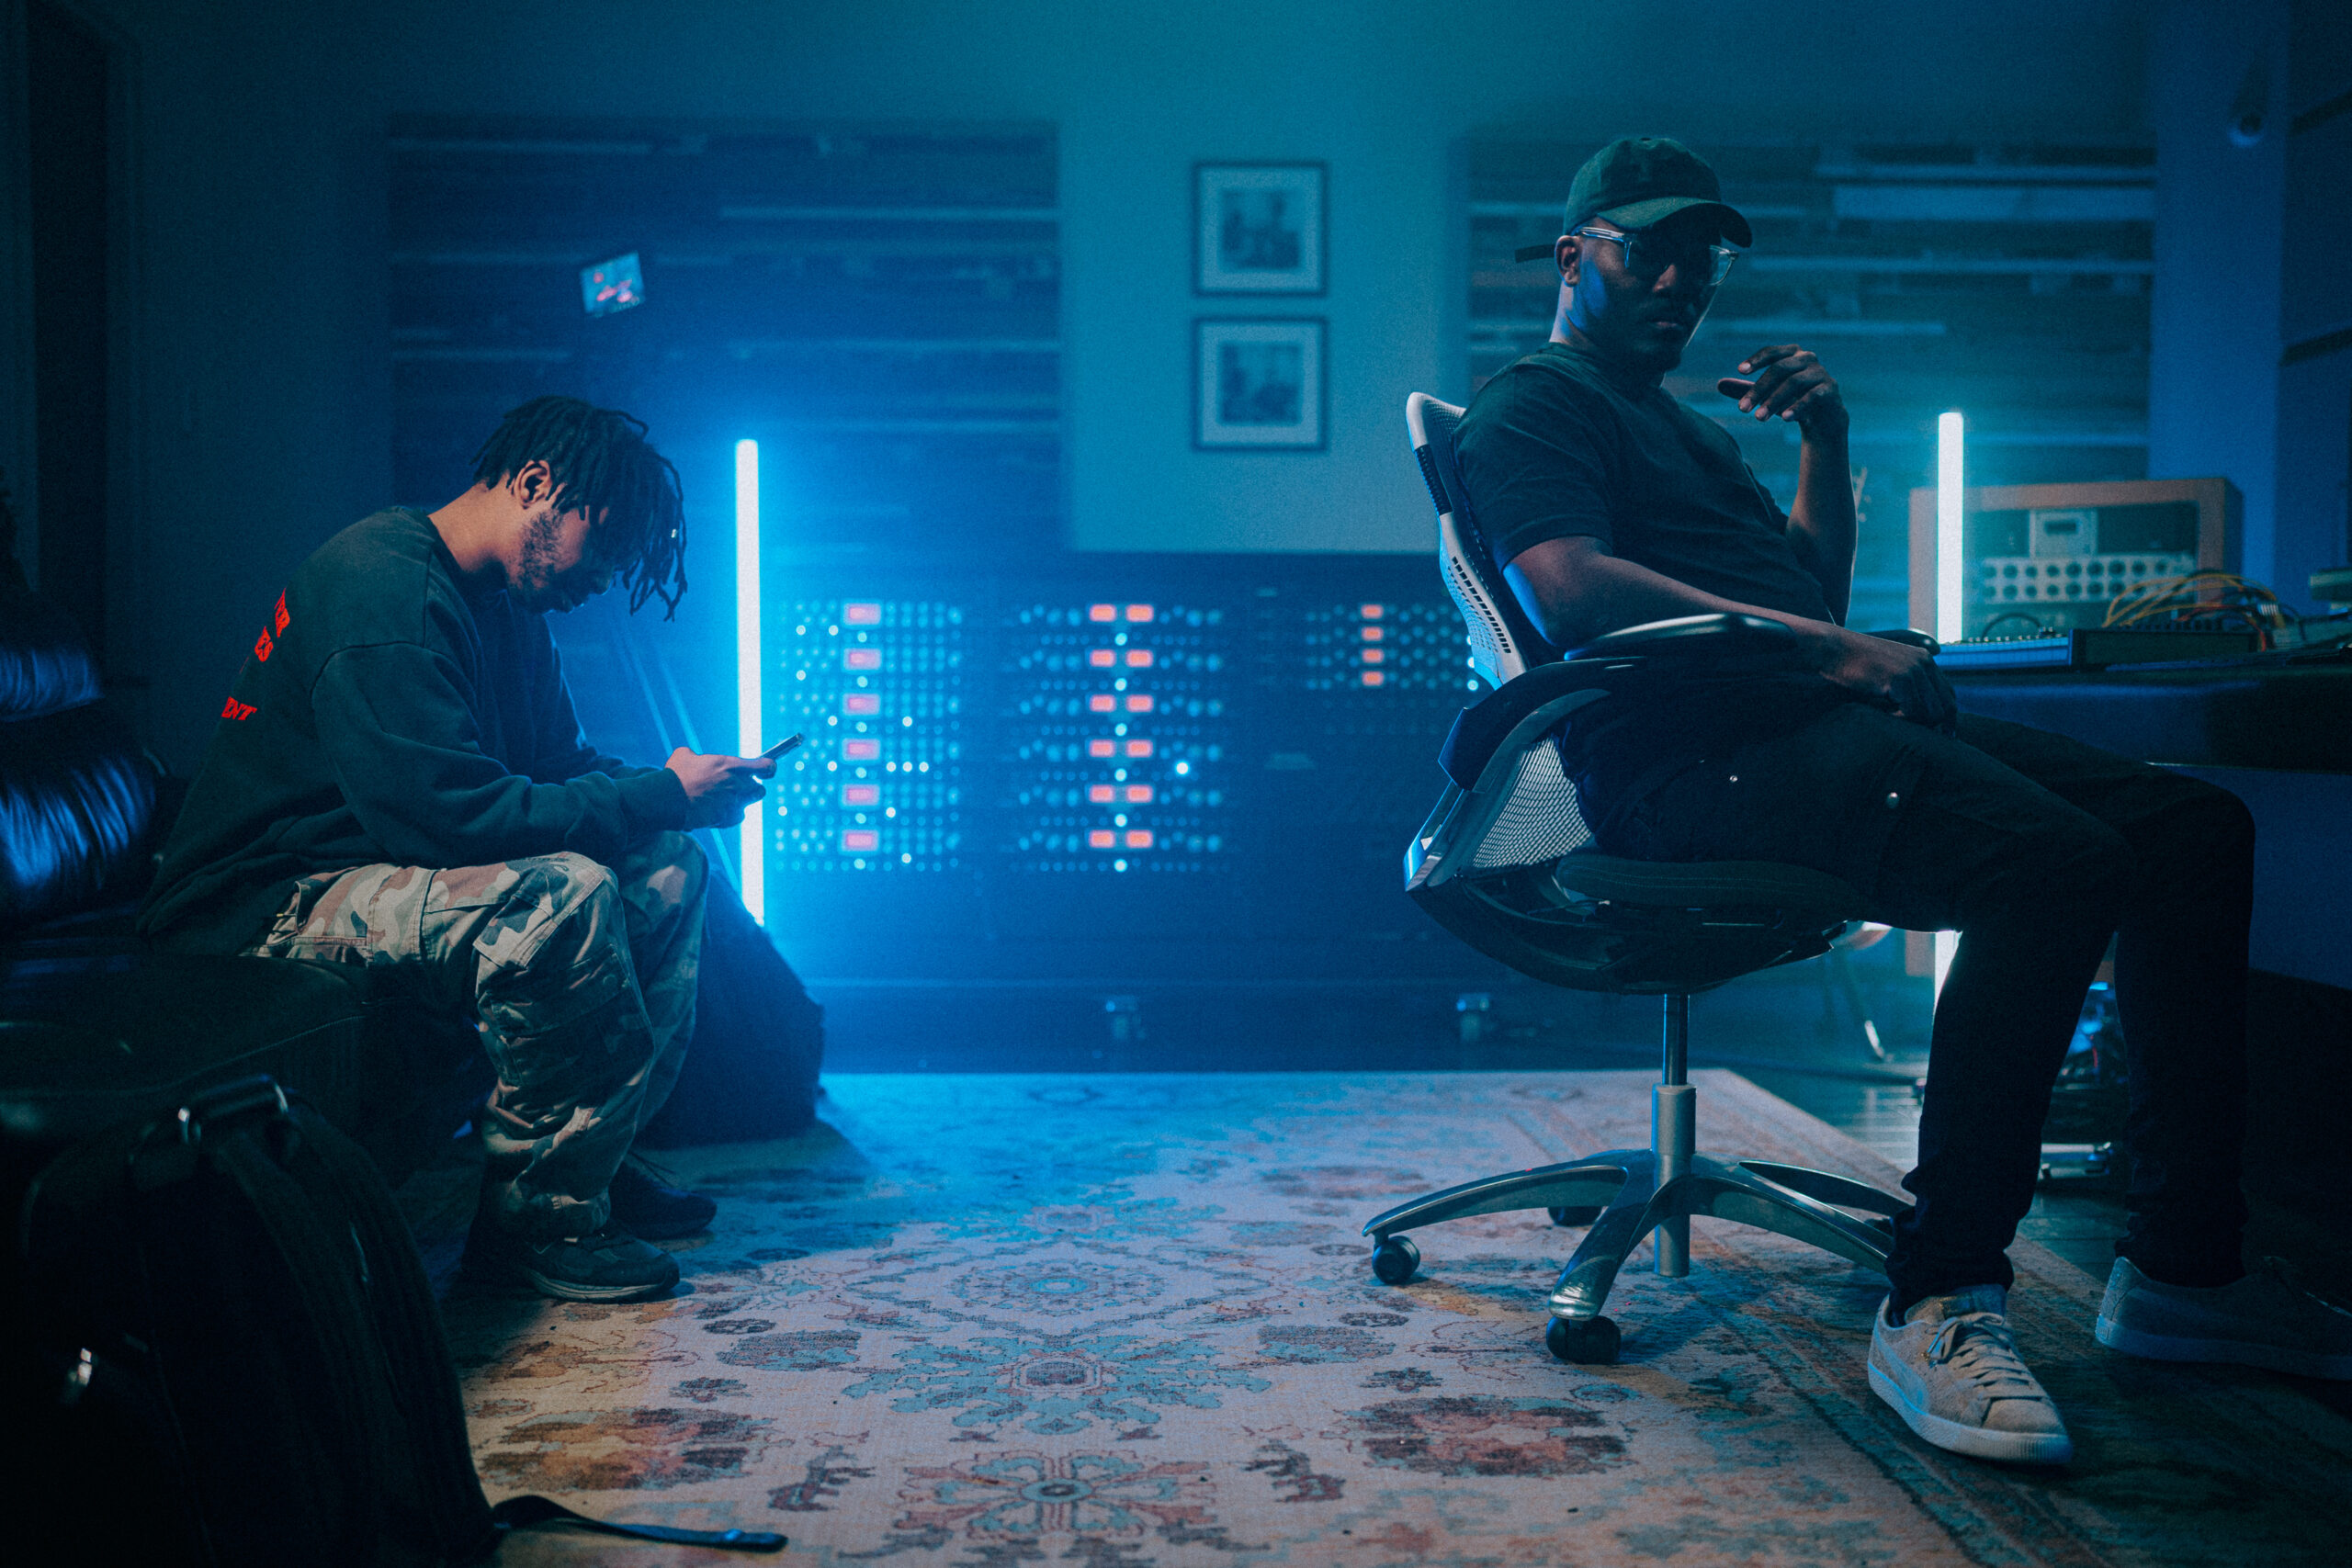
Imagine meeting someone for the first time and making a song together. That’s what independent artist KOTA the Friend and Wiz Khalifa producer RMB Justize did, producing a complete track at PreSonus HQ in just one day – with Studio One as their “one-stop shop [for] production, vocal recording, [and] mastering,” and TuneCore to “release the music, put a cool picture on it, put our name on it, and let the world hear it.”
Watch the making of their track “She’s Gone” below, and read on for more behind the scenes content.
Everyone loves a good collaboration – but working with others can be a challenge, especially when you’re a fiercely independent artist like Kota the Friend: “I record myself, make my own beats a lot of the times, I even mix myself sometimes.” It’s a boldly autonomous philosophy that informs his artistic approach and extends to the process of getting his music out into the world: “I’ve been able to sustain success as an independent artist just by constantly putting out music, putting out content, feeding the fans, and really going out on the road, going out on tour. We go to Europe every year. You know, people listen to the music and they’re vibin’ with it all year – in their houses, in their cribs, in their cars, on their way to work. And so we try to be there for them.”
“I even mix myself sometimes,” he says, but even a fiercely independent philosophy has its limits: “then I send it off to somebody who can really get the job done.” Enter GRAMMY-nominated producer and in-house Taylor Gang engineer RMB Justize. In addition to his star-studded production credits, RMB Justize was also an early adopter of TuneCore: “I’ve been using TuneCore since 2013. Once I realized how simple it became to just release the music, put a cool picture on it, put your name on it, and let the world hear it – it got real.”
In just a few short hours, these total strangers came together to produce a vibey, low-key masterpiece – recording, mixing, and mastering in Studio one, and releasing it on TuneCore without a label ever being involved. For independent artists, the simplicity, efficiency, and financial incentives are simply unbeatable: “Because TuneCore exists, I was able to release music on my own without a record label. And for us, especially years and years ago, that was monumental. For us to be able to just upload and put out music and get some kind of money from it…they gave me the opportunity to monetize off of my music when that opportunity wasn’t really around. And as artists, sometimes we forget that that’s what it’s about. And now we have an opportunity to reach our fans and get some money, so shout out to TuneCore. It’s always love to TuneCore.”
“She’s Gone” by KOTA the Friend & RMB Justize now streaming everywhere.
Listen Now: Spotify, Apple Music
With the integration of TuneCore within Studio One, users can now get their music across the finish line and into TuneCore’s hands for distribution without ever closing out of their DAW. To learn more about how to effectively distribute your music with TuneCore, check out our Distribution 101 article. And for a limited time, all existing and new Studio One+ subscribers get 50% off their first year of TuneCore Rising, Breakout, or Professional plans. Learn more.
PreSonus products used: Studio One, PreSonus HD9 Professional Monitoring Headphones.
Studio One’s Keyswitching Secrets
By Craig Anderton
Announcement: The 2nd Edition of The Huge Book of Studio One Tips and Tricks is now available as a free download for owners of previous versions. The new edition includes more tips, improves older ones, adds Artist versions for many Studio One Pro tips, and has been rewritten to help address newer users as well as veterans. For new buyers, the eBook is available only from Sweetwater. However, PreSonus will honor updates for those who purchased the book while it was being carried in the PreSonus online shop.
Keyswitching: Potential vs. Reality
Key Switch keys, usually located at the keyboard’s lowest octave, choose different virtual instrument articulations. For example, hitting C0 might add tremolo on a string preset, while hitting D0 adds glisses.
However, presets with Key Switching often require at least a 5-octave keyboard. With a 4-octave keyboard, you usually have two choices: transpose down to cover the notes (which sacrifices the Key Switches), or transpose up to keep the Key Switches but give up some notes. Fortunately, PresenceXT and Studio One deal with this issue in a clever, practical way.
Studio One’s Keyswitch Solution
With PresenceXT, regardless of how you transpose the notes, the Key Switches can always occupy the same position on the keyboard. You can also map Key Switches as desired, and to free up more keys for notes, use only a subset of Key Switches.
To map Key Switches:
1. Open a note event’s Note Editor.
2. Open the Sound Variations panel (click on the Wrench icon at the bottom of the Note Editor’s vertical keyboard).
3. The Action menu (fig. 1) provides multiple shortcuts for altering Key Switch assignments:
- Reload the instrument’s native Key Switch map.
- Assign default Key Switches.
- Assign Key Switches to successive chromatic keys.
- Assign Key Switches to successive white keys.
- Shift (transpose) Key Switches by +1 octave, – 1 octave, +1 note, or -1 note. This function shifts only the Key Switches, so notes remain on the keyboard as assigned.
- Clear all Key Switches.
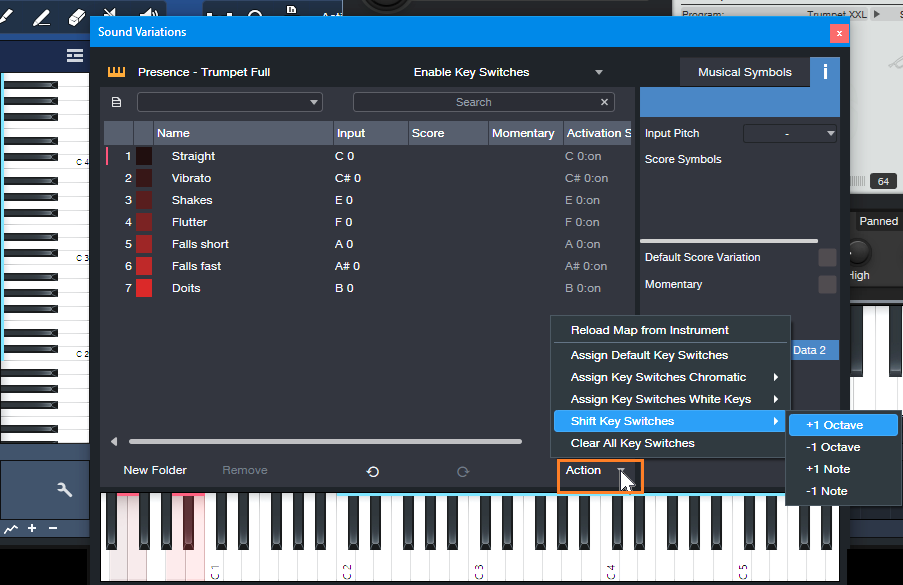
Figure 1: Click on Action (orange outline) to choose various ways to assign Key Switches.
A Practical Example
The PresenceXT Trumpet Full preset’s notes cover the range C2 through C6 (and even higher). The Key Switches cover the white keys from C0 to B0. You can’t fit 6 octaves of notes on a 4-octave keyboard, so here’s the solution:
1. There are no trumpet notes between C1 and B1. So, shifting the Key Switches to cover the range C1 to B1 avoids overlapping any notes.
2. From the Sound Variations panel, choose Action > Shift Key Switches > +1 octave. Now, the Key Switches cover the range from C1 to B1, with trumpet notes starting at C2 (fig. 2). This gives us three octaves of notes, and all the Key Switches. Compare this to fig. 1, which has different Input notes, and shows the Key Switches mapped from C0 to B0.
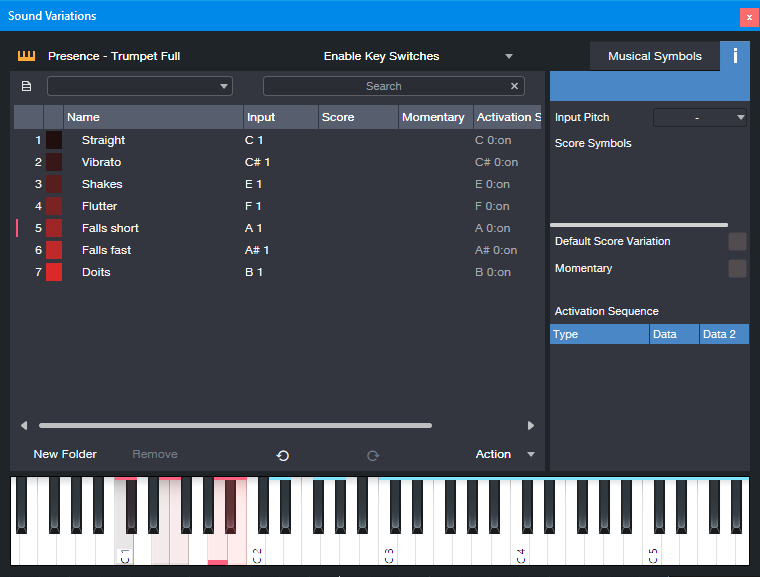
Figure 2: A four-octave keyboard can cover three octaves of notes and all the preset’s keyswitches.
3. If you instead want a higher range of trumpet notes that starts at C3, transpose the keyboard up an octave. Then, choose Action > Shift Key Switches > +1 octave again. Now the Key Switches cover the range from C2 to B2, with trumpet notes starting at C3.
Other Cool Key Switch Features
Some prefer having Key Switches on all white keys, because they’re easier targets to hit. Others prefer Key Switches on successive chromatic keys, so more keys are available for musical notes. The Action menu lets you choose either option. Furthermore, you can delete Key Switches simply by deleting the corresponding Input note in the list of Key Switch note assignments.
Note that both VSL and EastWest support Studio One Sound Variations natively, so they work the same way as PresenceXT. In addition to the features described above, when you load a preset, these instruments automatically transmit their Key Switch mapping (including names and symbols) to Studio One. This makes the process of using Studio One’s Key Switching talents even easier.
What About Other Instruments with Key Switches?
Some companies’ instruments (e.g., Kontakt, SampleTank) don’t support the Key Switching protocol that’s part of Studio One’s Sound Variations. But Studio One has a clever way to handle those instruments too—stay tuned for a future tip about this topic.
Finally, Sound Variations are about much more than just simplified Key Switching. To find out more, check out the clear, concise YouTube video by Lukas Ruschitzka.
Unlock New, Unique Vocoder Effects
By Craig Anderton
Usually, the Vocoder inserts into a track that provides the modulation, and the Vocoder’s sidechain receives the carrier. But why be normal? The same audio that provides the carrier can modulate itself. This technique unleashes a variety of processing options for drums, guitars, keyboards, percussion, and more. Even better, the Vocoder’s controls can tailor the results from subtle, to beautiful, to insane.
It’s difficult to explain the effect in words, so check out the audio examples. The first one has four measures of a loop without processing, then four measures of the loop vocoding itself.
The next audio example has one measure of a drum loop, then the drum loop vocoding itself.
The following example uses chorused guitar, with sawtooth Vocoder band automation to create a “rippling” effect. The vocoded sound goes through reverb as well.
The final example has two static Vocoder matrix settings with guitar. Static settings work well for instrument voicing, like changing the character of polysynth and pad sounds.
Channel Layout
Fig.1 shows the channel layout. This technique inserts the Vocoder in a bus, not a track. The audio track (in this case, Drums) has two pre-fader sends:
- One send goes to the Bus with the inserted Vocoder. This provides the Vocoder’s modulator.
- The other send goes to the Vocoder’s sidechain, to provide the carrier.
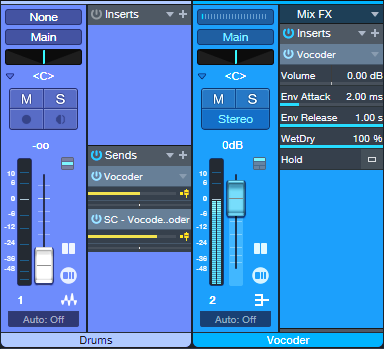
Figure 1: Channel layout. The Drums track provides the Vocoder’s modulator and carrier.
Vocoder Parameters
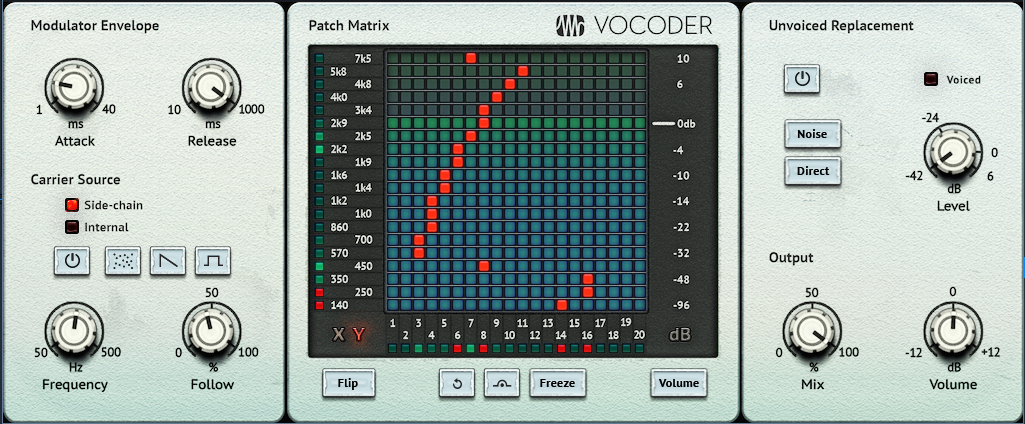
Figure 2: Typical Vocoder settings.
Start with the settings in fig. 2:
- The Carrier Source needs to be Side-chain.
- Shorter Release times add a percussive quality. Longer ones let the sound develop more.
- Mix sets the balance of the carrier and the modulated sound. Mix at 100 gives the most novel effects. Lower Mix values mix in more dry sound.
- Both Send levels from the Drums (or other audio track) affect the sound. Edit the sends to optimize the effect.
Automation, Too!
The vocoder matrix provides an almost unlimited tonal palette. The audio examples capture only a few of the options—just draw on the matrix, and listen to what happens. Also, note that automation can preserve your matrix doodling. Here are three examples of how to use automation:
- Automate the Flip button, and change it on the beat with drums and percussion loops. With the right settings, this can alternate between DJ-style “bottom” and “top” loops.
- Choose Write mode, and use the Vocoder matrix like an Etch-a-Sketch to create various tonal effects.
- Use the Paint tool to add periodic automation (square wave, sawtooth wave, etc.) to the matrix modulation tracks.
Whether used as a glorified tone control, a way to create rippling frequency changes, or to breathe new life into loops, vocoding a sound with itself is can give you new and surprising sounds.
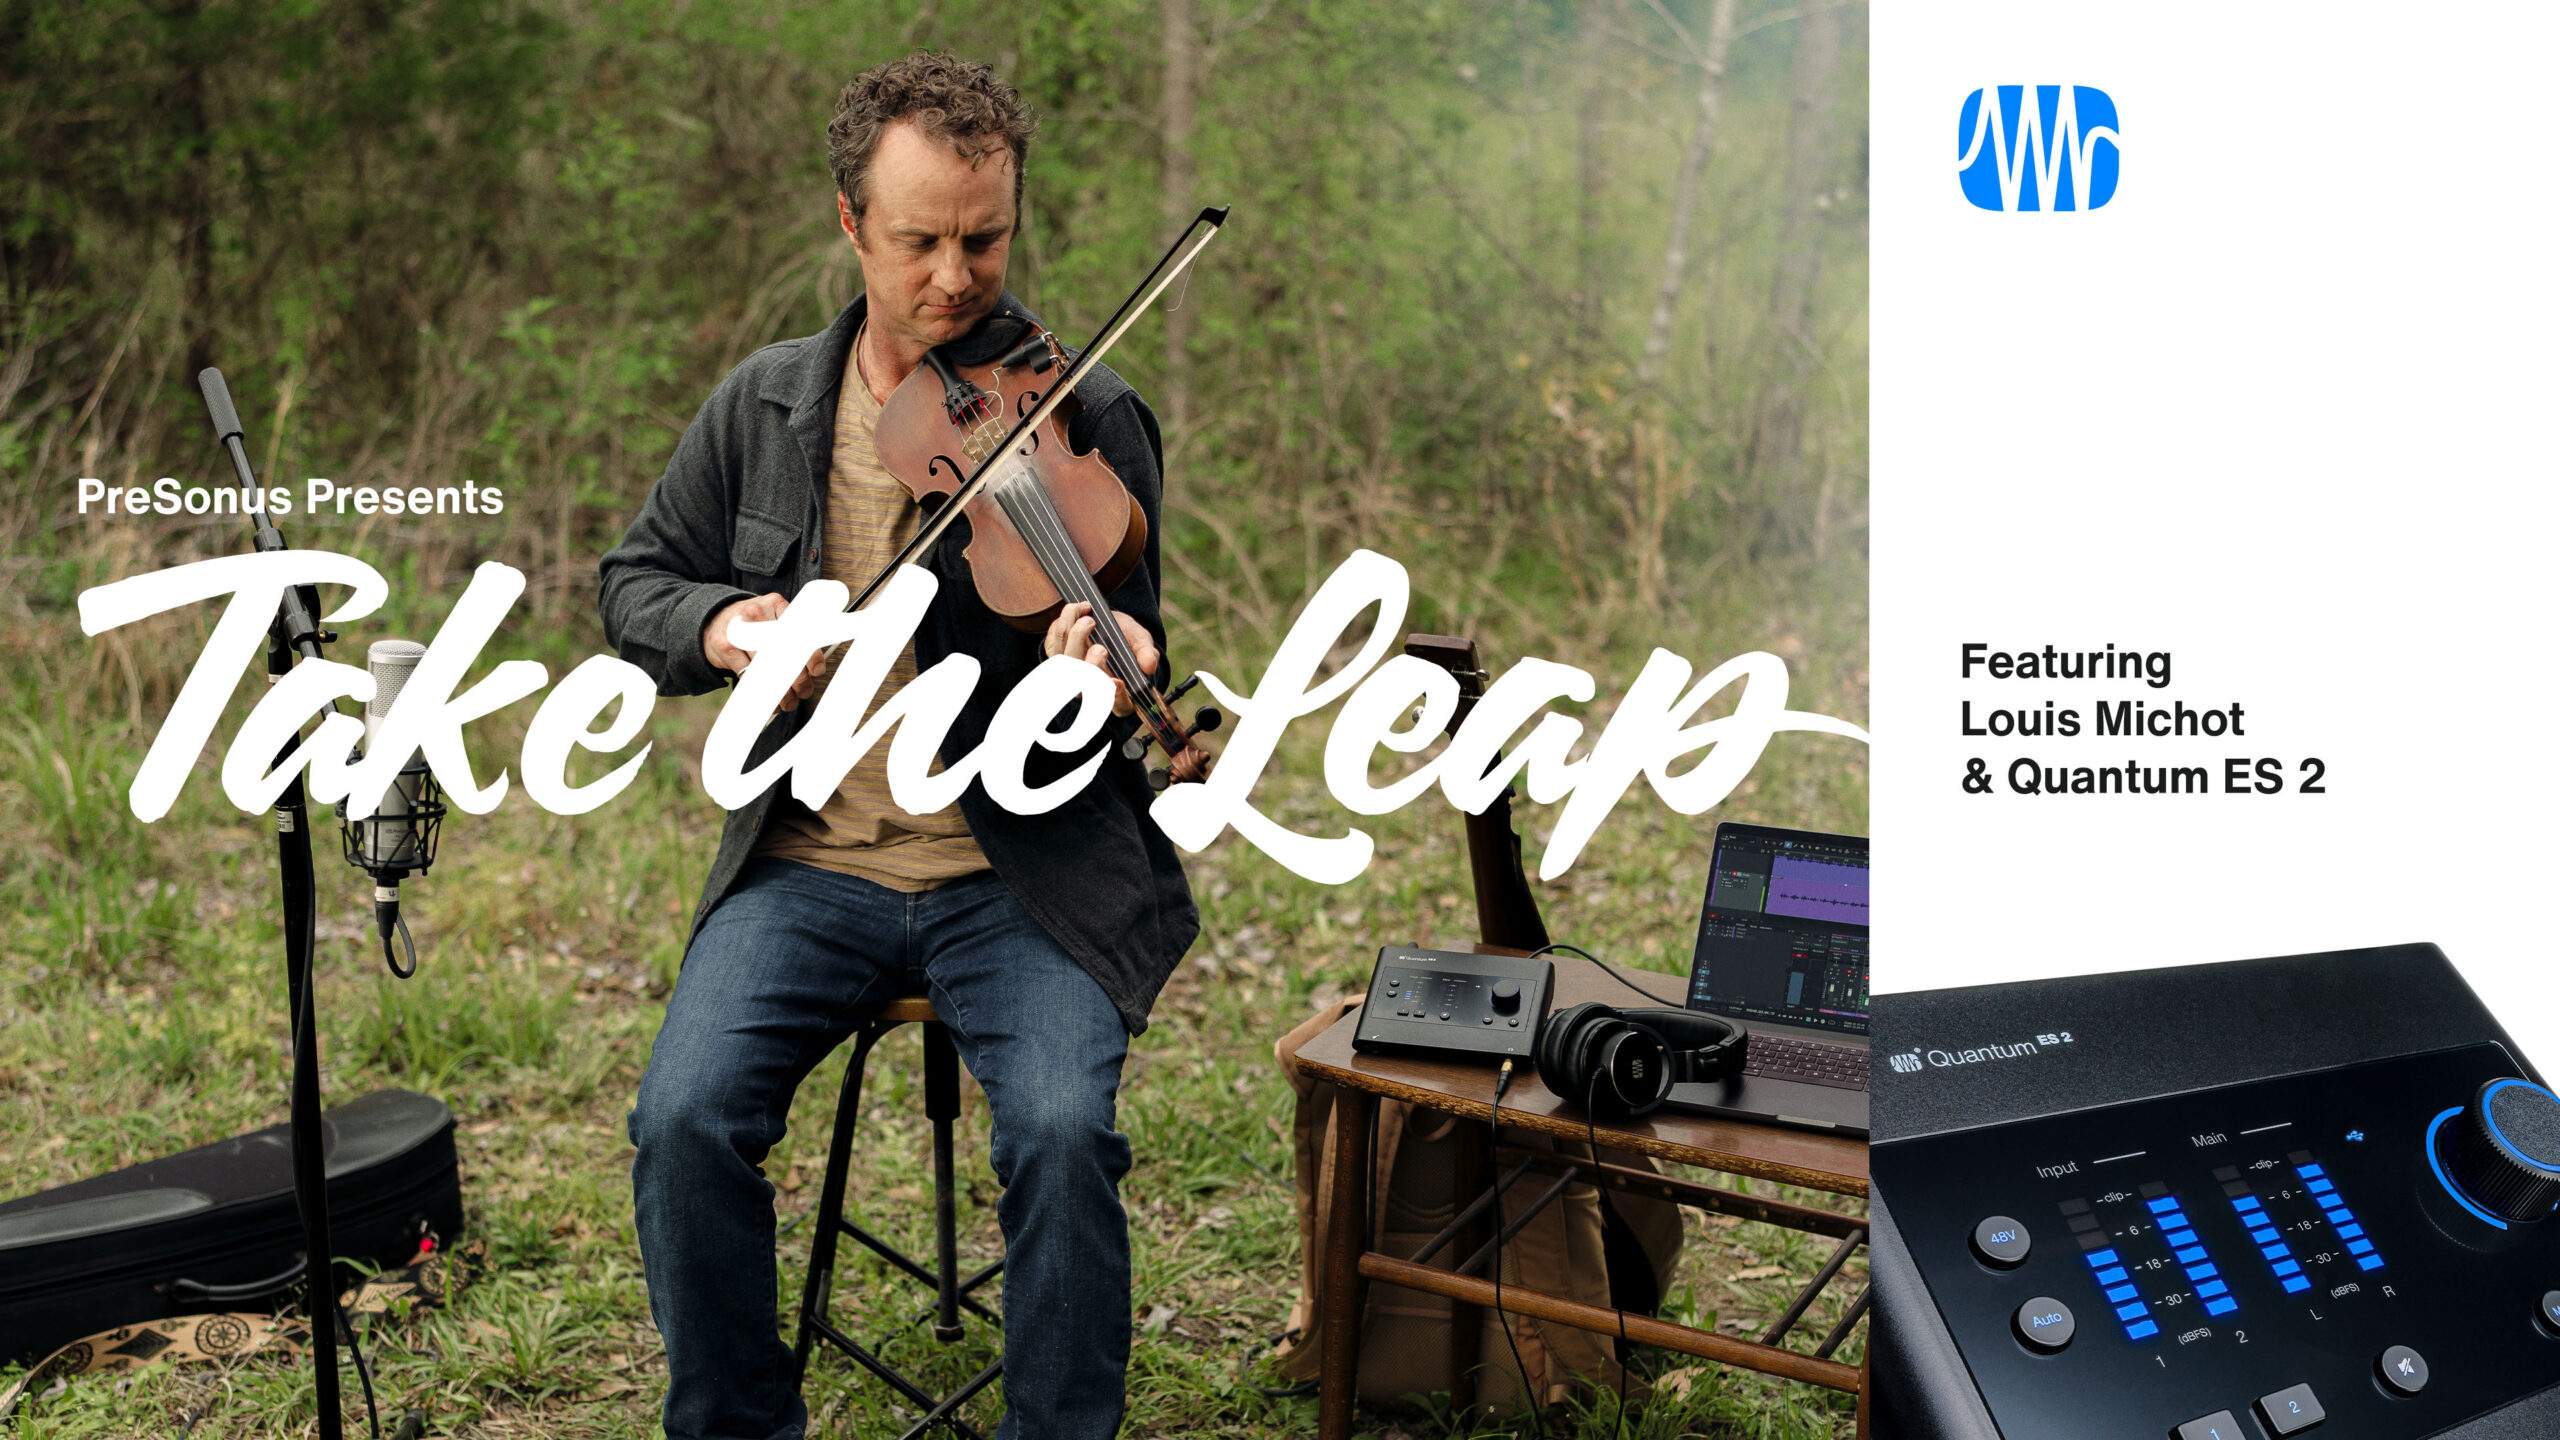
Louis Michot | Take the Leap | Quantum Audio Interfaces
The GRAMMY-winning fiddler, songwriter, and New Orleans native talks about taking his leap.
A life in music requires passion, creativity, dedication – and for many creators, their trajectory can be traced back to a defining moment that changed everything: the moment they took the leap.
Louisiana native Louis Michot is the fiddler, songwriter, and lead vocalist for the GRAMMY award winning Lost Bayou Ramblers. With more than 20 albums under his belt – and a passion for Louisiana French, local folklore, and environmental sustainability – Louis’ music career both honors and pushes the boundaries of the Louisiana French music traditions.
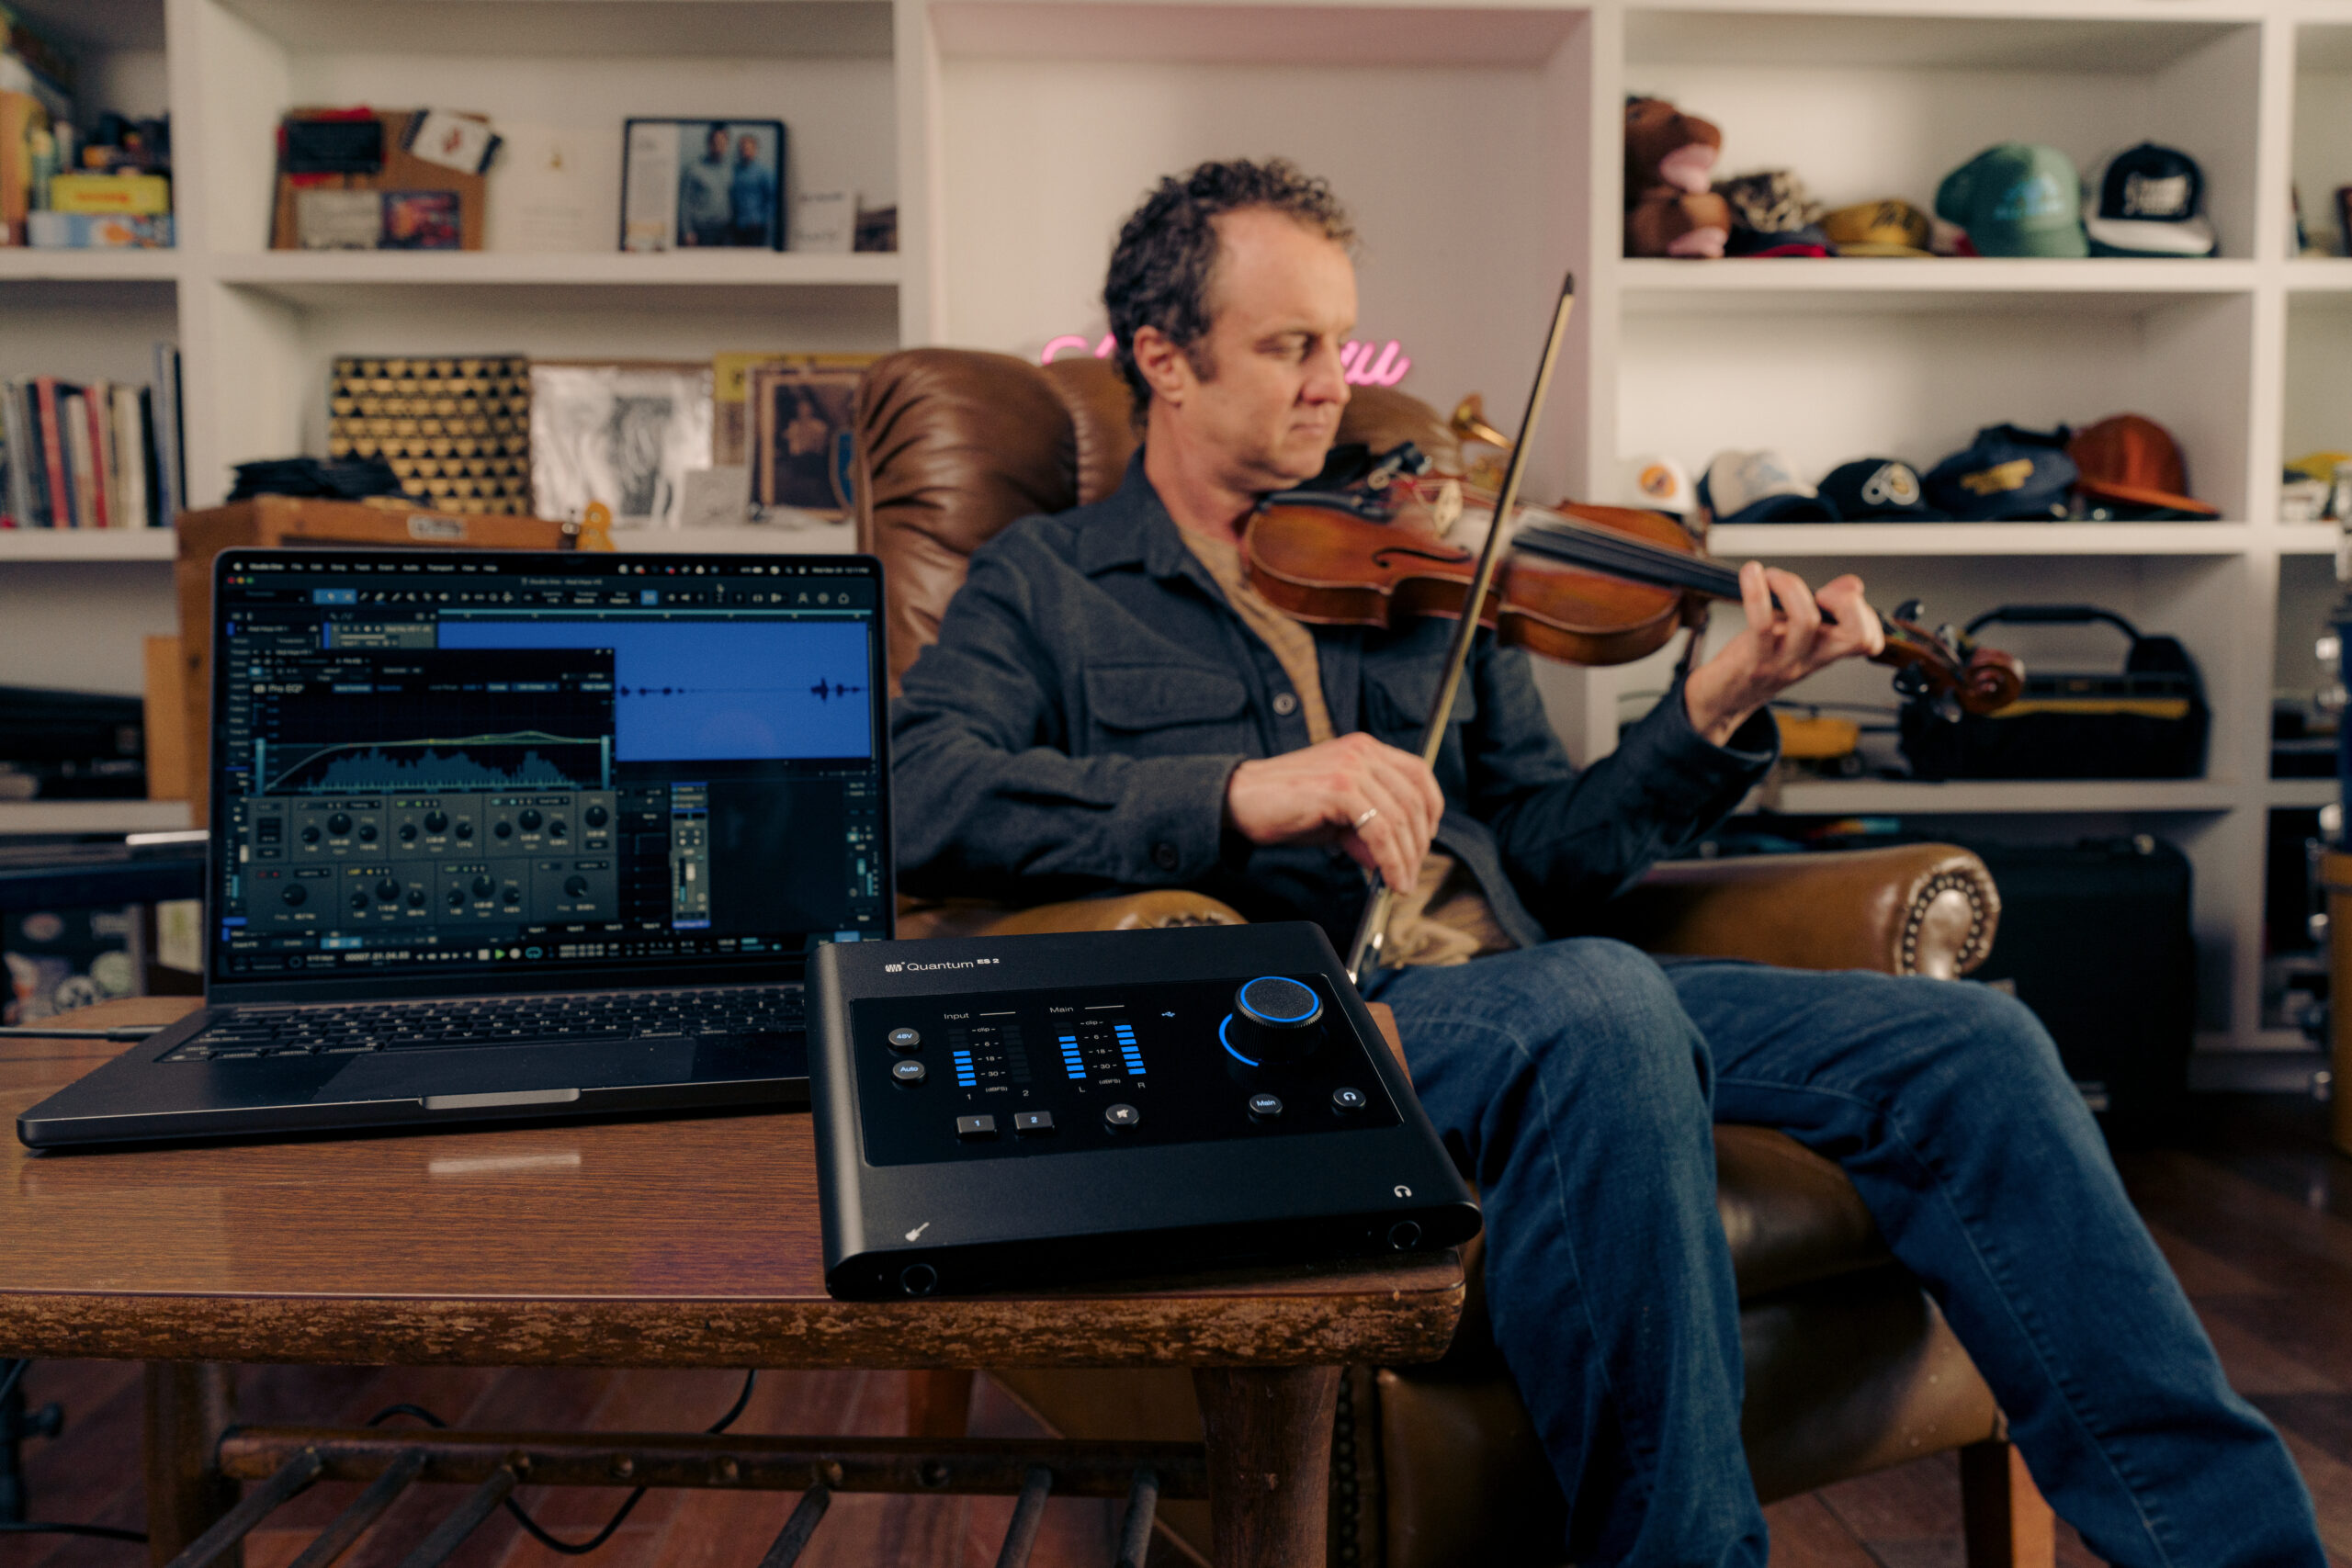
Watch as Louis performs his track “Les Beaux Jours” (“The Good Days”) through the all-new PreSonus Quantum ES 2 audio interface, and shares his story about growing up with Cajun music, his role as a cultural ambassador, and taking the leap with his first solo album.
Louis Michot might be best known as the fiddle player and lead-singer of the Lost Bayou Ramblers – but what truly fuels his career as a musician is Louisiana French, local folklore, and sustainability in the fastest disappearing landmass in the world: “Louisiana is beautiful and complex, both geographically and culturally,” Louis says. “The diversity of cultures that are intertwined here have given birth to some of the most popular music in the world, and the ever-changing landscape inspires people to keep creating new expressions: from Zydeco to Mardi Gras Indians, Cajun to country, and everything in between.”
Growing up surrounded by Cajun music seemed “normal” to Louis. “I thought every kid had an older generation around that played accordion and fiddle music and sang in French. But when I started playing guitar at 12 years old and learned all the Rock’nRoll and Blues standards, I realized that the Louisiana French music my family plays was very different from popular music.”
Recognizing his unique cultural inheritance, Louis decided to get out into the world and learn French and the fiddle for himself. “I traveled and hitchhiked throughout South Louisiana and Eastern Canada, learning the language with every French speaker I could meet, and honing my skills on the fiddle by playing on the streets.”
Inspired by his experiences at home and abroad, Louis started playing standup bass with the family band before taking the leap and founding the GRAMMY-winning Lost Bayou Ramblers with his brother, Andre. “After a decade of pushing the traditional music to the edge, we started melding the Cajun music we grew up with, and the Rock’n’Roll we learned to love, and playing Louisiana French music in a way that truly inspired us.”
23 years and two GRAMMYs later, Louis decided it was time for another leap of faith, and began work on his first solo album. “When I finally decided to dedicate myself to releasing a solo album, it was because I needed to get this music out of my head and my heart, and wanted to explore the scary freedom of starting with an empty canvas and making something brand new and completely unique to me.”
Hot on the heels of his hurricane relief work, Louis set up shop in a dry-docked houseboat affectionately named “Sister Ray,” and started tracking the songs that would go on to become his first solo album, Rêve du Troubadour (The Troubadour’s Dream). For Louis, the personal and artistic significance of this effort cannot be overstated: “I felt like I was fulfilling a part of myself that was in my blood, part of my heritage, and I want others who feel that same yearning to be able to follow that feeling and keep their culture alive, whatever that means to them.”
“I definitely never set out to represent anything other than myself, but I think my passion for the music and language have led me to be a representative for the importance of cultural depth in Louisiana. I’m continuing tradition within the music and the family, and doing my part to preserve and grow these cultural expressions of Cajun and Creole music.”
PreSonus products used: PreSonus Quantum ES 2 USB-C Audio Interface.
Meet the all-new family of Quantum USB-C Recording Audio Interfaces, and get in-depth information about the entire product line here.