Add Punch & Snap to Drum Hits
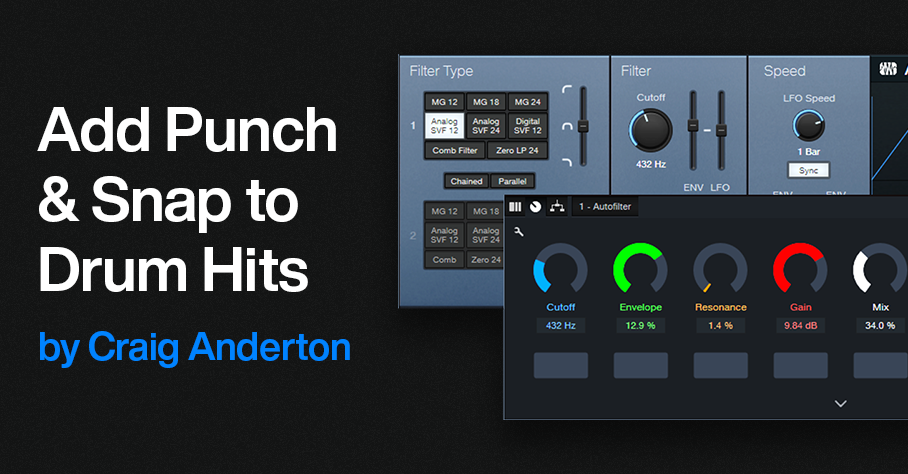
By Craig Anderton
A Pro EQ3 stage’s gain can respond dynamically to incoming signal level, so that louder inputs kick the gain higher (or lower). But Studio One also has an Autofilter EQ, whose frequency responds to the incoming signal level. With a bandpass filter, louder signals can push the peak higher in frequency. This is particularly useful for adding “snap” to acoustic drum parts (especially snare and tom hits), for a more lively, animated feel—as you’ll hear in the audio example. The first half is an unprocessed drum loop. The second half uses the technique described in this tip.
This works with Studio One Artist, because all you need is the Autofilter. But this tip also includes an Extended FX Chain for Studio One Professional/+ users. The Macro Controls make editing a little more convenient.
Download the Extended FX Chain here
Initial Setup
1. The top Filter Type is Analog SVF 12. Set its slider to Bandpass. Bypass the lower filter.
2. To zero the Filter LFO sliders and the Resonance Env slider, ctrl+click on them. Set Env Attack to 5.00 ms and Env Release to 1.50 s. Make sure Auto is off.
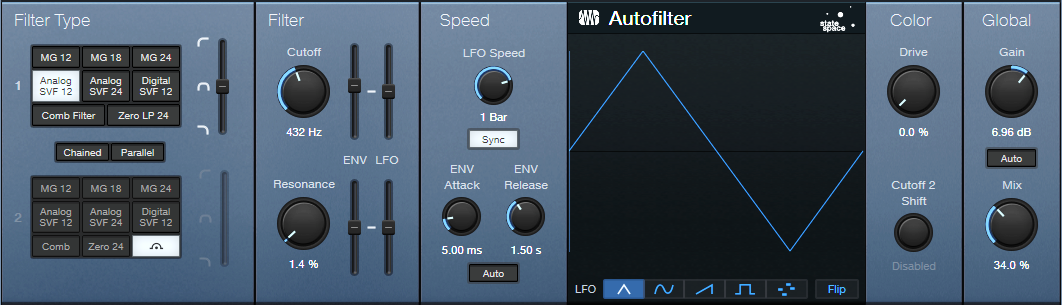
Figure 1: Typical Autofilter settings.
Tweak the Sound
It’s easiest to hear the results of your edits by temporarily turning the Resonance parameter to around 20% and the Mix control to 100%. This provides an exaggerated version of the filtered sound. However, note that the magic doesn’t happen until you mix this behind the dry audio. The effect’s goal is to reinforce the sound, not overwhelm it.
The Filter Cutoff and Cutoff Env slider interact. So, the best sound depends on getting a good relationship between the two. The optimum setting varies for different drums. Set the Filter Cutoff in the lower midrange, and use the Cutoff’s Env slider to add a little modulation. The Env slider is very sensitive, so you won’t need much modulation to vary the filter cutoff over a wide range. Be careful to avoid too much modulation. One advantage of using the FX Chain is that the Env control covers a small range of the envelope amount, which simplifies dialing in a setting.
Now you’ll hear a wah-like sound along with the drums. Next, mix the processed sound with the dry sound. Reduce the Resonance to around 5% or less. Turn Mix to 0.0% to hear the unprocessed drums. Bring up the Mix control to add the processed sound. The Mix control’s sweet spot is typically between 20% and 50%, but again, it varies for different drum sounds. Adjust Gain as needed.
Bear in mind that slight changes in the Filter Cutoff and/or Cutoff Env can make a major difference in the sound.
The Extended FX Chain
Fig. 2 shows the Macro Controls panel. This brings out the parameters mentioned above to cover a convenient range of values. In particular, the Envelope range isn’t as critical.
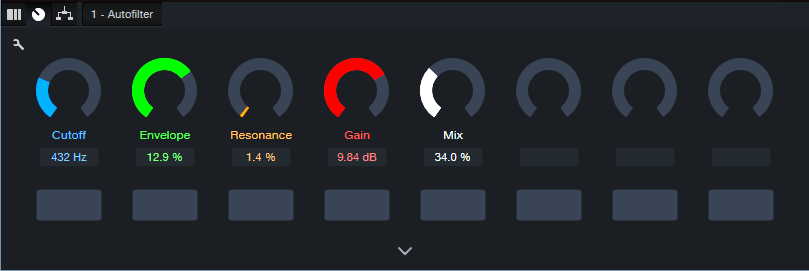
Figure 2: Macro Controls for the Add Snap to Your Snare.multipreset Extended FX Chain.
Pssst…Can You Keep a Secret?
Although this application is disguised as a way to enhance acoustic drums, it can also produce some really wild effects. With lots of processed sound, there’s a compression-like effect, and turning up the Resonance can get downright weird. It also works well on individual drums as well as drum buses and loops. So, don’t be afraid to experiment! You never know when dialing in the “wrong” settings will sound right.