Faster, Simpler, and Better Comping
At first, this might not seem too exciting. But follow the directions below, and try comping using this method—I don’t think you’ll be disappointed. This tip shows how to:
- Audition, select sections of, and promote Takes while listening to the rest of the mix, at any level you want.
- Listen to the edited Parent track made up of the Takes you’ve promoted, at any time during the comping process. Again, this is in context with the mix.
- Do all of the above while looping, so there’s never a break in the editing process.
- Do comping with only the Arrow tool—you don’t need the Listen tool.
Preparation: Set Up Dim Solo
First, implement the Dim Solo function described in the blog post Super-Simple Dim Solo Functionality. Dim Solo allows soloing a track or tracks, while all the other tracks are at an adjustable lower level. The process works by assigning all tracks except for the one you want to solo (e.g., a vocal track with its Take layers) to a VCA channel. You can then “dim” all the non-soloed tracks with the VCA level fader to whatever level you want while you comp, and hear the Takes in context with the song. After auditioning and selecting the desired sections of your Takes, set the VCA fader back to 0.0 to return to the original mix levels. The minute or two it takes to set up Dim Solo is more than offset by the benefits it offers to comping. For more details, refer to this blog post for how to create the Dim Solo function.
Faster Take Auditioning, Selecting, and Promoting
After setting up Dim Solo and using the VCA Channel fader to adjust the level of the mix (which excludes the track being comped, because it isn’t part of the VCA group), here’s how to audition and select Takes:
1. Safe Solo (Shift+Click) the parent track with the Takes. This is important! It allows soloing the Parent track without muting the tracks that are playing back at the dimmed level.
2. Loop the section with the Takes you want to audition.
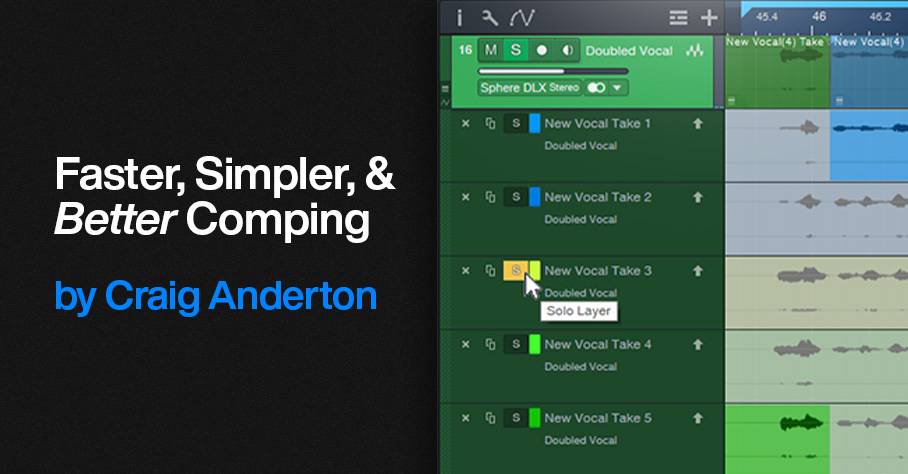
3. Click a Take’s Solo button to audition it while the song loops (fig. 1).
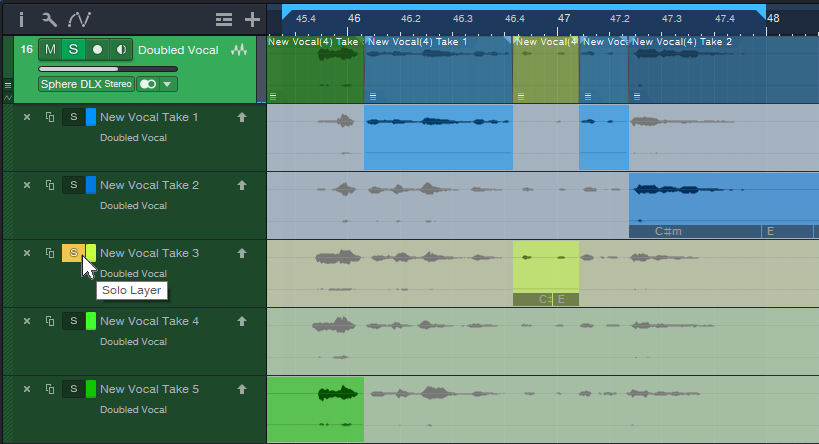
Figure 1: Take 3 is being soloed for auditioning, and for selecting sections to be promoted to the Parent track. Turning off the Take’s Solo would solo the Parent track, so you could audition the edited parent track and hear any Take sections that had been promoted.
4. If you hear a section in a Take you want to promote to the Parent track, use the Arrow tool (which turns into an I-beam cursor when hovering over a selected Take) to click+drag over the section.
5. Continue soloing Takes while the music loops, and select the sections you want to promote to the Parent track. If needed, alter the loop start and end points.
6. If at any time you want to hear the edited Parent Track with the Takes you’ve promoted up to that point, make sure no Take layers are in solo mode.
Better Music Through Better Comping
One reason I wrote up this tip is because of an interesting side effect. The Takes I selected as “best” when auditioned in the usual way were often not the same Takes chosen as “best” when listening to them in context with the music. A technically perfect Take is not necessarily the same thing as a Take with the best feel. Listening to, selecting, and promoting the Takes in context with the mix makes a big difference in helping to select Takes that fit the music like a glove.