Quick, Perfect S-Shaped Fades
First, some news: the free update to version 1.4 of The Huge Book of Studio One Tips and Tricks is finally available in the PreSonus Shop. If you purchased a previous version from PreSonus, simply download the eBook again, using the same credentials—you’ll automatically receive the latest version. Now for the tip…
What’s Cool About S-Shaped Fades, Anyway?
An S-shaped fade starts by fading slowly, accelerates to halfway through the fade, then slows down to do the final part of the fade. This provides a natural, smooth kind of fade that I prefer for most song fadeouts. Also, video tracks commonly use S-shaped fades. So, an S-shaped fade for the audio can match an S-shaped fade applied to the video.
Before version 5.5, the Project Page didn’t have automation or a gain envelope, so I wrote a tip on how to incorporate an S-shaped fade in a Song’s master level automation. Once the song had the fade, you could update the Mastering file to include the fade. But now that the Project Page can do automation and gain envelopes, you can apply that tip directly to Events in the Project Page as well as in the Song page.
However, compared to the technique this post covers, the previous method has one advantage and one disadvantage. The advantage is that it’s easy to customize the S-fade shape. The disadvantage is that it’s more time-consuming to get a perfect S-shape. So, here’s how to add a perfect S-shaped fade—quickly—with the Paint tool and its Parabolic option:
1. Add a Gain Envelope (right-click on an Event and check Gain Envelope). You can also apply this kind of fade to master level automation.
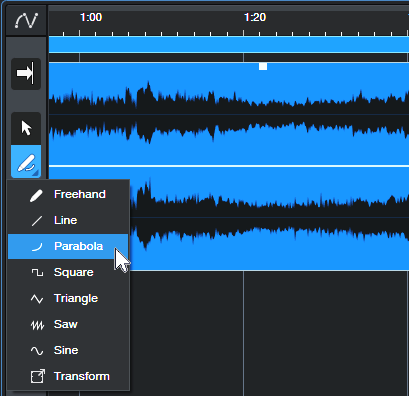
2. Choose the Parabola shape for the Pencil tool (fig. 1).
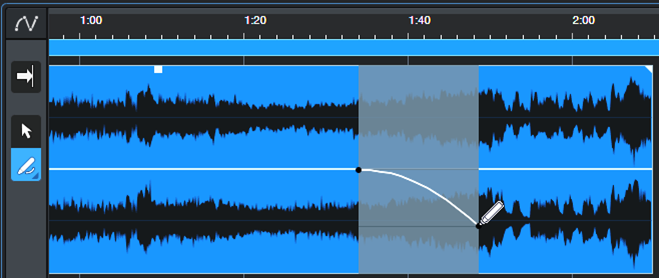
3. Click where you want the fade to begin. Drag right, and then down to where the fade’s midpoint should be (fig. 2).
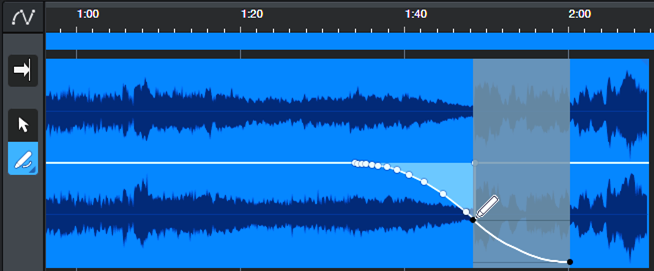
4. Finally, click where you want the fade to end. Drag left, and then up to the fade’s midpoint (fig. 3).
And now, you have your perfect S-shaped fadeout. Delete any nodes (if present) to the right of where the fade ends—and your work is done.