A Dive Into Inside-Out Mixing
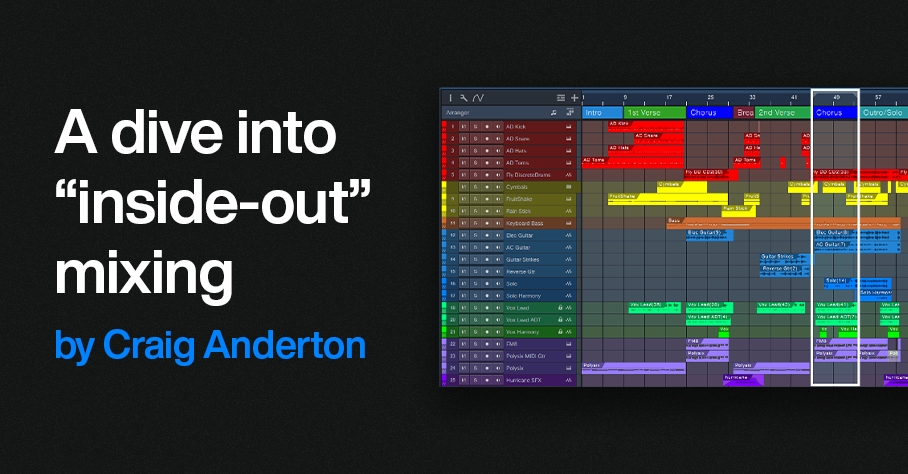
By Craig Anderton
There’s no “right” or “wrong” way to mix. For example, many successful engineers adjust individual tracks, and then mix groups of tracks. That’s fine, but as much as possible, I prefer to mix with sounds in context. I also no longer mix linearly, from start to finish, as was done with tape.
There’s a mixing technique that works well for me with typical songs that don’t have huge amounts of tracks. “Inside-out” mixing starts more in the middle of a song, and works its way out toward the beginning and end. This maintains a consistent sound quality through a song, and speeds up the mixing process. Maybe this method will work for you, too.
Part 1: Mix the “Big Chorus”
Start by placing a loop around the busiest, densest part of the song where the greatest number of tracks are playing at once (fig. 1). With a traditional mix, this will often be “the big chorus.” This is the “inside” part of inside-out mixing. In fig. 1, note that this loop (outlined in white) captures the drums, percussion, cymbals, bass, dual guitars, doubled lead vocals, harmony vocal, the first part of a solo that goes to the end, and dual keyboards.
Balancing all these crucial elements at once guarantees mixing in context. Also, if they work well together, they’ll almost certainly work well together with parts of the mix that are less dense. The objective is to tame the most difficult part of the mix early in the mixing process, which makes the rest of the mix flow more easily.
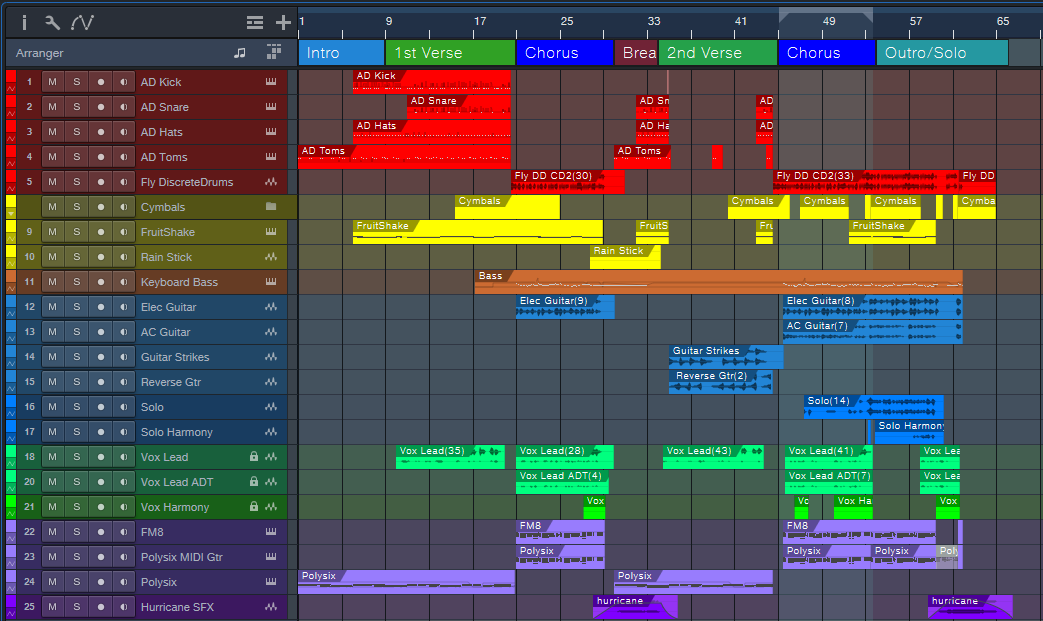
Figure 1: Tracks for my latest YouTube release, Inside the Eye of the Hurricane. The looped section that starts the mixing process is outlined in white.
Furthermore, I begin with minimal effects except for EQ. There are no sends or automation. The goal is to have a reference mix of as many tracks as possible that play simultaneously, yet be able to hear them all distinctly. (As usual, I start with everything panned to center. The reason why was described in a blog post from 2019, but the PreSonus archives no longer go back that far. You can find a revised version of the post on page 18 in The Huge Book of Studio One Tips & Tricks, 2nd Edition.)
After setting the reference levels, I add EQ and then re-adjust the levels. The looped section should now sound closer to what you want.
Part 2: Mix the Other Chorus(es)
Now loop an earlier chorus. It’s likely this will have a sparser arrangement, so that the later chorus can have more impact. The odds are excellent that the reference mix will still work for this chorus. If not, I usually use an Event envelope if any levels need to go up or down a bit. Automation doesn’t get added until the very end.
Part 3: Mix the Verse Between the Choruses
Next, loop the last measure or two of the previous chorus, the first two measures of the big chorus, and the verse between the choruses. Now you can mix the verse in context with coming out of the first chorus and going into the second one. This makes it easier to have a good flow from section to section.
Part 4: Loop Other Sections
Maybe there’s a bridge, a solo, another verse, whatever. By now, you get the idea: Loop sections of the song for mixing, and incorporate a little bit of what leads into the loop, as well as what follows it. I mix the beginning and end last, because with the rest of the song in place, it’s easy to figure out how to have them introduce and exit the song.
Part 5: Decorate the Mix with Ear Candy
At this point, you should have a solid, if not necessarily spectacular, mix. Insert some buses for reverb, delay, and various other effects, then route sends to them. Insert other processors, like dynamics, chorusing, more radical types of EQ, etc. Add the elements that make a mix interesting, and introduce elements of surprise.
Part 6: Automation
You’re in the home stretch. Now it’s time to think of the entire mix, not just the individual sections. For now, avoid the temptation to use master bus processing. Make the entire mix as wonderful as possible, and use master bus processing only for occasional reality checks.
Part 7: Finalize Your Mix
Finalize the mix with master bus processors if that’s your workflow, or transfer over to the Project Page to do your mastering.
About Some of the Ear Candy
The song “Inside the Eye of the Hurricane” also uses many of the techniques covered in previous blog posts. I thought you might enjoy hearing them in context.
Authentic ADT (Automatic Double-Tracking) is the only technique I use for double-tracking vocals because it sounds more like physical double-tracking than anything else I’ve found. It’s used on the choruses, but not the verses, so it’s easy to hear the difference.
Authentic 60s Flanger for Artist processes the crazy drum break, which also uses reversed audio. This happens just before the song’s second chorus.
A Guitar Solo Trick You’ve Never Heard Before was about solos, but this part of the song uses the reversed technique with chords to create pseudo-feedback effects.
Why I Don’t Use Compressors Anymore is certainly true here. The only compressor provides a special effect on the reversed guitar chords. There’s about 4 dB of limiting on vocals and 3 dB of drums. The vocal dynamics processing relies almost exclusively on phrase-by-phrase normalization and gain envelope dynamics. These techniques were also covered in blog posts that are no longer available. However, they’re described starting on page 484 in the eBook referenced above.
The techniques described in Fix Boring Acoustic Drum Loops is one reason why the acoustic drum loops in the choruses sound played instead of programmed. (The electronic drums in the verses are played in real time.)
Finally, there are two versions of the song posted online. One is conventional stereo. The other is binaural stereo that gives a more immersive sound when heard over headphones. Many people still don’t realize that you don’t need a surround system to take advantage of Atmos. As described in the blog post Easy Atmos: Grab Headphones, Mix, Have Fun, you can use Atmos to render your music in a binaural two-channel format designed for headphones. The sound is fuller and more satisfying than conventional stereo.
As just one example of what Atmos can do, there are synth filter sweeps in both versions of the song. However, the binaural version allows processing the filter spatially by making the sound more distant, and wider, as the filter cutoff increases. It’s a subtle effect, but far more expressive than simply turning up the filter’s cutoff frequency. For me, inside-out mixing also works well with Atmos. Because you’re mixing the densest part of the song first, you’re also creating a space that translates to the rest of the mix.