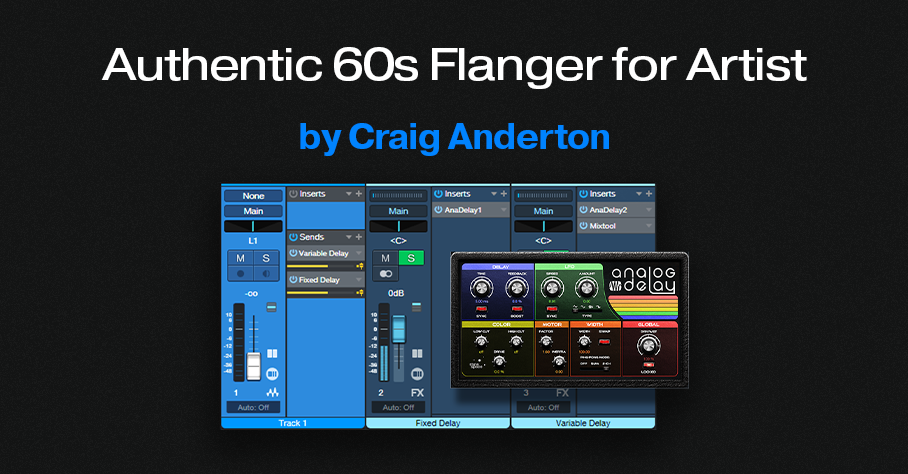
Authentic 60s Flanger for Artist
In the 60s, flanging was an electro-mechanical process that involved two turntables or two tape recorders. Since then, flanging has evolved into a digitally driven effect, with a variety of cool bells and whistles. Paradoxically, though, many of today’s digital flangers can’t reproduce the period-correct sound of 60s flanging.
Five years ago, I wrote a blog post about a vintage flanger FX Chain that took advantage of Studio One Pro’s Splitter and Extended FX Chains features. Although this week’s tip takes a little more effort to set up than just loading an FX Chain, and doesn’t have Macro Controls, it gives the same authentic flanging sound for Studio One Artist—check out the audio example.
The 60s flanging sound has three important qualities:
- The flanging effect is controlled manually, not with an LFO. Flanging resulted by manipulating a variable speed option on one of the turntables or tape recorders, or manually pressing on the tape flange or turntable platter to cause a temporary speed change.
- Through-zero flanging. 60s flanging was not a real-time process. One of the turntables or tape recorders could go forward in time, compared to the other one. Typically, one of the audio paths was also switched out of phase. When one path transitioned across the point where it went from being behind the other path to being ahead of it, there was a brief moment when the two signals would cancel. This was called the through-zero point, and contributed to flanging’s dramatic sound.
- Motor inertia. Mechanical motors couldn’t respond instantly to speed changes, so manual flanging was somewhat unpredictable. After changing a tape recorder’s variable speed setting, it would take a while for the motor to catch up. This created a smooth, “liquid” feel as you controlled the flanging effect. The Inertia control in Studio One’s Analog Delay emulates the feel of controlling a mechanical device.
The Setup
Fig. 1 shows the track setup for the flanging effect.
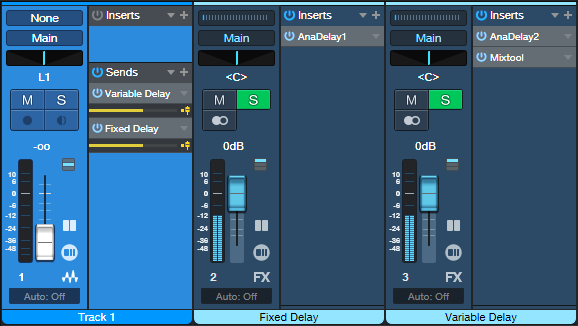
1. The track you want to flange feeds two FX buses via pre-fader Sends. Turn the track’s channel fader down all the way. The Sends must have the same level (e.g., -6.0 dB).
2. Insert an Analog Delay in each FX Channel. Use the settings in fig. 2 for both of them.

3. Insert a Mixtool after the Analog Delay in the Variable Delay FX Channel. Turn on the Mixtool’s Invert Left and Invert Right buttons.
4. The channel faders settings for the Fixed Delay and Variable Delay channels need to be identical, and track each other. It’s a good idea to Group them.
How It Works
The Fixed Delay channel has a 5 ms delay. This is the “dry” channel. The Variable Delay channel’s Mixtool flips the FX Channel’s phase. The Analog Delay in the Variable Delay FX Channel can be longer or shorter than 5 ms. So, when the audio passes through 5 ms of delay, there’s the cancellation effect of through-zero flanging. By delaying the “dry” path, we’ve effectively allowed the Variable Delay to go into the future…at least as far as the dry audio path is concerned.
Create the flanging effect with the Analog Delay controls in the Variable Delay channel:
- The Factor parameter in the Motor section controls the flanging effect itself. Move the control in real time, while writing Automation, for authentic-sounding flanger variations.
- The Inertia control in the Motor section adds the “glide” that occurs when changing the Factor control from one setting to another. An Inertia setting of around 0.35 is a good starting point. This tends to be a set-and-forget control.
- For positive flanging (a more subtle sound), turn off the Mixtool’s Invert Left and Invert Right buttons.
Customization
- To avoid the “double cancel” effect when the flanger goes past the through-zero point then returns back through it, set the Factor control for the Analog Delay in the Fixed Delay channel to 2.00. The flanger will still hit the through-zero point. But when the flanger reverses direction, it won’t go through the through-zero point again.
- To extend the low part of the flanger range (longer delay), change both time controls to 10 ms. However, remember that the Time setting creates an initial delay that will delay the track slightly.
- To have the through-zero point occur in the middle of the Factor control’s range, set the Analog Delay time in the Fixed Channel delay to 10 ms, and its Factor to 2.00.
- If the sound seems bass-heavy, turn up the Low Cut control on both Analog Delays to between 50 and 100 Hz.
- If you don’t want full cancellation at the through-zero point, change one of the Dry/Wet controls to less than 100%. 85% generally is enough.