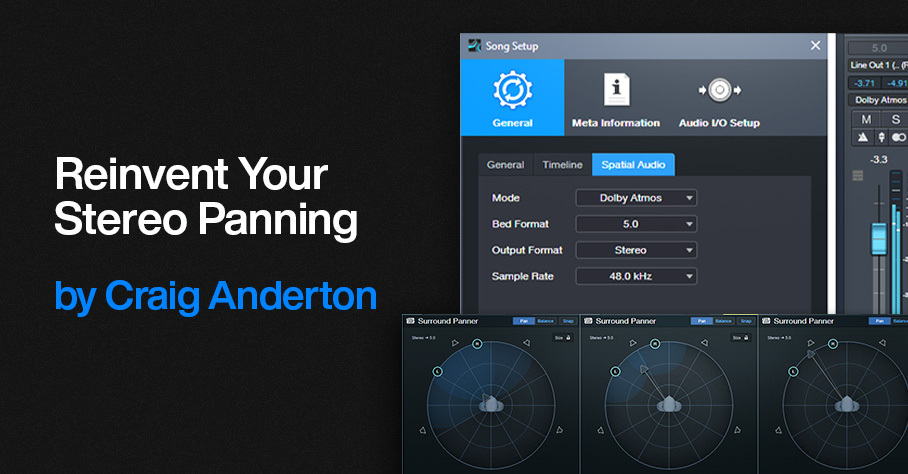
Reinvent Your Stereo Panning
This tip is about working with stereo, NOT about Dolby Atmos® or surround—but we’re going to steal some of what Atmos does to reinvent stereo panning. Studio One’s Surround panners are compatible with stereo projects, offer capabilities that are difficult to implement with standard panpots, and are easy to use. Just follow the setup instructions below, and start experimenting to find out how surround panning affects stereo tracks. (Surround panners work with mono tracks too, although of course the stereo spread parameter described later is irrelevant.)
Setup
When you’re ready to mix, choose Song > Spatial Audio. Select the parameter values to the left in fig. 1. In the output section (fig. 1 right), select 5.0 for the Bed format, and Stereo for both Speakers and Headphones so you can use either option to monitor in stereo.
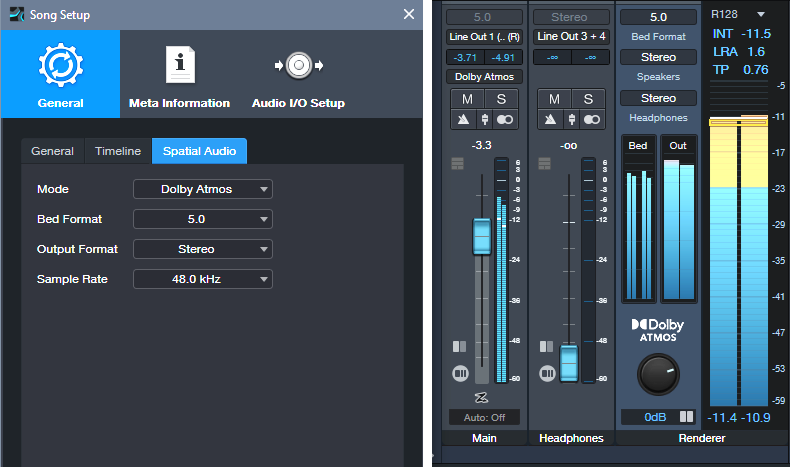
Figure 1: Parameter setup for Surround panning with stereo projects.
After choosing Dolby Atmos for spatial audio, channel panpots turn into surround panpots. Double-click on them to see the “head-in-middle-of-soundfield” image shown below. Choose Disable Center, which isn’t used. LFE Level doesn’t matter, unless you’re using a subwoofer.
Using surround panners for stereo offers several adjustable parameters:
Spread. Move the L and R circles to set the left and right pan position spread, or click and drag in the numeric Spread field. The spread (fig. 2) can go from 0 (mono), to 100% (standard panning), to 200% (extra wide, like binaural panning).
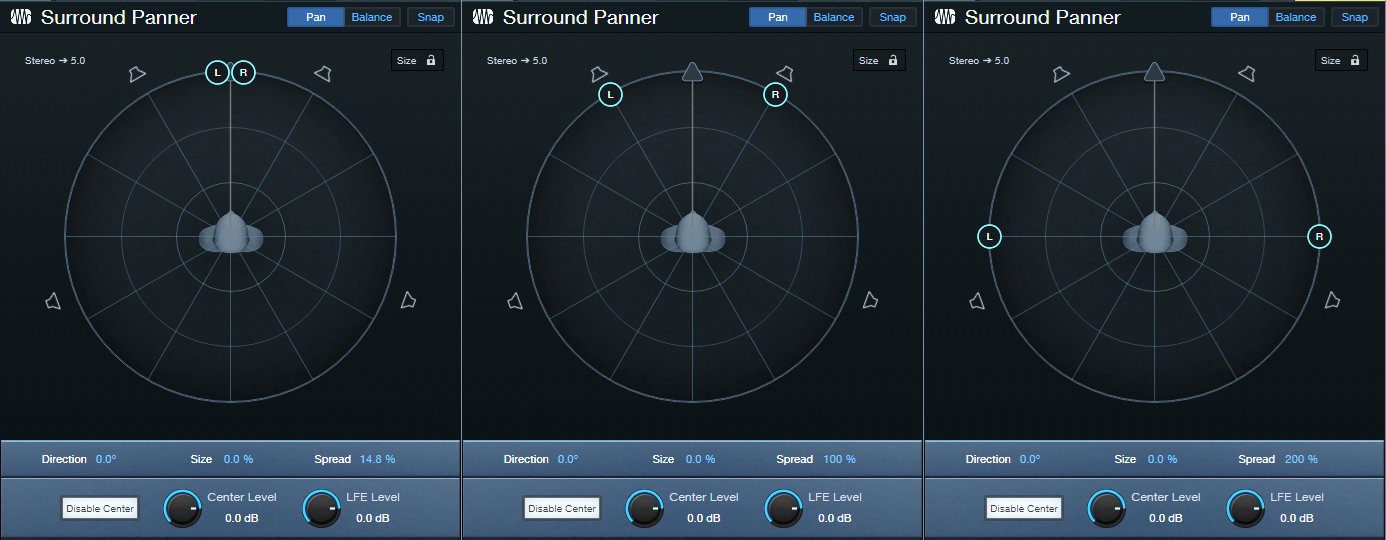
Figure 2: (Left to right) 14.8% spread, 100% spread, 200% spread.
Direction. After establishing the spread, click on the arrow and rotate the spread so it covers the desired part of the stereo field (fig. 3). You can also click and drag on the numeric Direction field. Between spread and direction, you can “weight” the stereo spread so that it covers only a sliver of the stereo field, covers center to right or left, mostly left, mostly right, etc.
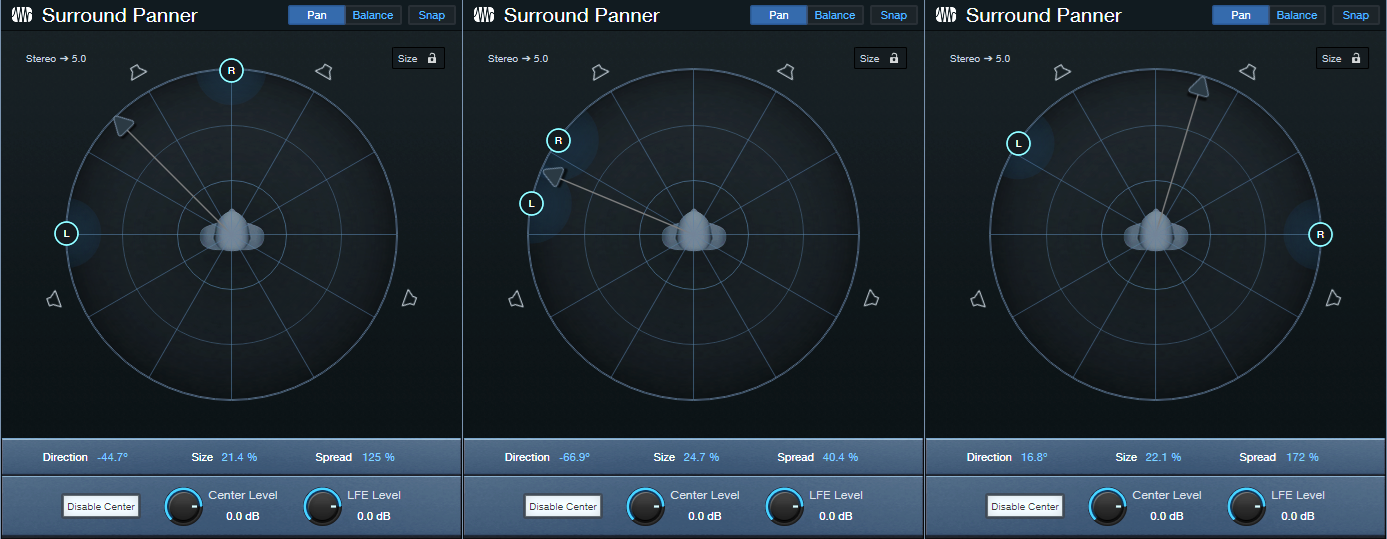
Figure 3: (Left to right) Panned from left to center, panned to a narrow slice of the stereo field, and panned almost full but tilted toward the right.
Size. This has no equivalent with stereo panpots. Click on the arrow, and move it closer to the head for a “bigger” size, or further from the head for a “smaller” size (fig. 4). You can also click and drag on the numeric Size field. The result isn’t as striking as with true surround, but it’s much more dramatic than standard panning. Note the “cloud” that shows how much the sound waves envelope the head. All the previous images showed a small size.
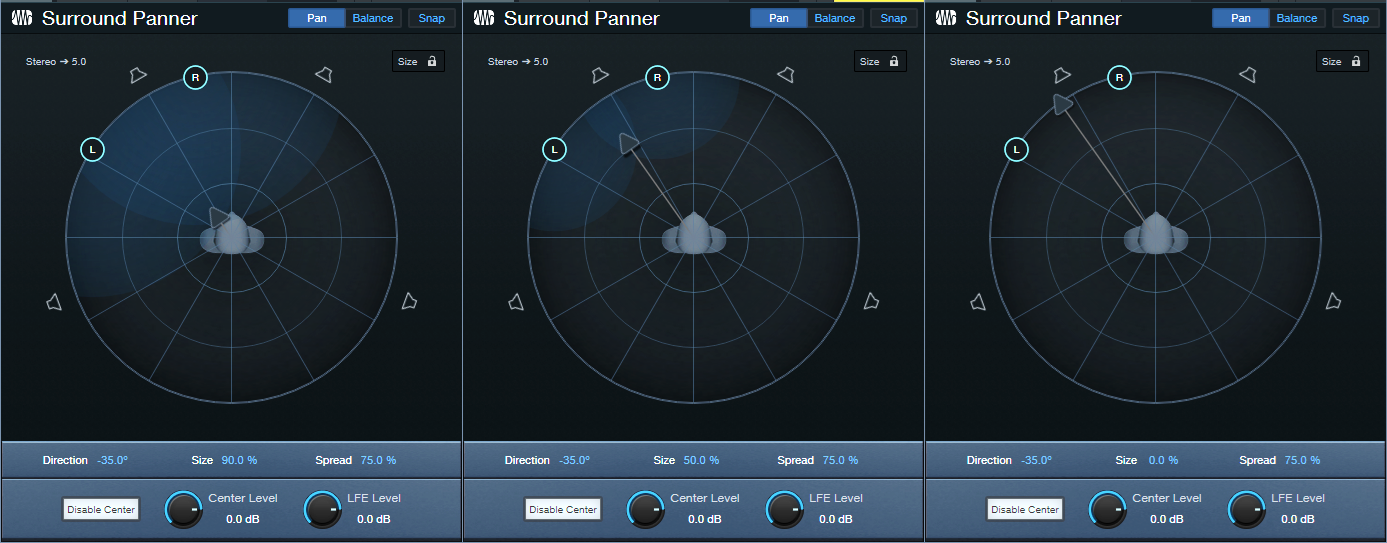
Figure 4: (Left to right) Biggest size/least distance, moderate size/moderate distance, smallest size/furthest distance.
Flexible automation. A joystick or controller pad can automate two of the parameters simultaneously. Or, modulate all three parameters using three controls from a control surface. This is a huge deal compared to standard panning. For example, suppose an instrument is ending a solo, while another solo starts. The one that’s ending can pan to a narrower spread, move off to the side, and become smaller just by moving three controls.
Other Features
- Balance Tab. The surround panners can also serve as conventional balance controls. This setting interacts with the panners. For example, if the L and R buttons are close to each other, there won’t be much balance to adjust. I rarely use the balance option. To make sure that surround panning isn’t altered by a Balance parameter setting, check that the balance “dot” is in the center of the virtual head.
- Size lock. This maintains the same Size setting, regardless of what you do with the Direction and Spread parameters. Hold Shift to bypass Lock temporarily, and fine-tune Size.
- Object Panner. Right-click on the Surround panner, and you can choose an Object Panner instead. This is less relevant with stereo, because front/back and lower/higher directionality doesn’t exist like it does in a true Atmos system. However, the Object Panner does have Size, Spread, and Pan X (left/right) parameters, so feel free to play around with it—you may like the interface better than the surround panner. It’s also possible to do crazy automation moves. In any case, you can’t break anything.
- Other. This is another function you reach via a right-click on the Surround Panner. You’ll see a list of other plugins on your system that may have spatial placement abilities, like Waves’ Nx series of control room emulators, Brauer Motion, Ozone Imager, Ambisonics plugins, and the like. If you insert one of these, you can revert to the stock Studio One panners or choose other options by clicking on the downward arrow just under the “other” plugins name.
It may sound crazy to use Surround panners in stereo projects—but try it. You can truly do stereo panning like never before.