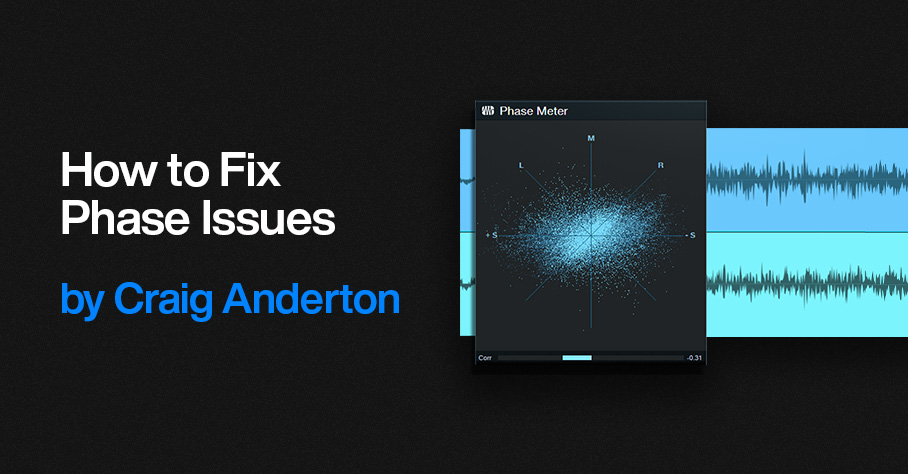
How to Fix Phase Issues
Recording audio using more than one feed from the same source may create phase issues. For example, when miking a bass amp and taking a DI (dry) input, the DI’s audio arrives at your interface instantly. But because sound travels 12″ (30 cm) in 1 millisecond, the mic’s audio will arrive later due to the distance between the mic and speaker. This means it won’t be time-aligned with the direct sound, so there will be a phase difference.
Miking an acoustic guitar with two mics, or drum overheads that are a distance from the drum kit, may also lead to potential phase problems. Even partial phase cancellations can thin or weaken the sound.
It’s best to check for phase issues and fix them prior to mixing. One way to resolve phase issues is to look at the two waveforms on the timeline, and line them up visually. However, the waveforms may not look that similar (fig. 1), especially when comparing audio like a room mic with a close-miked sound.
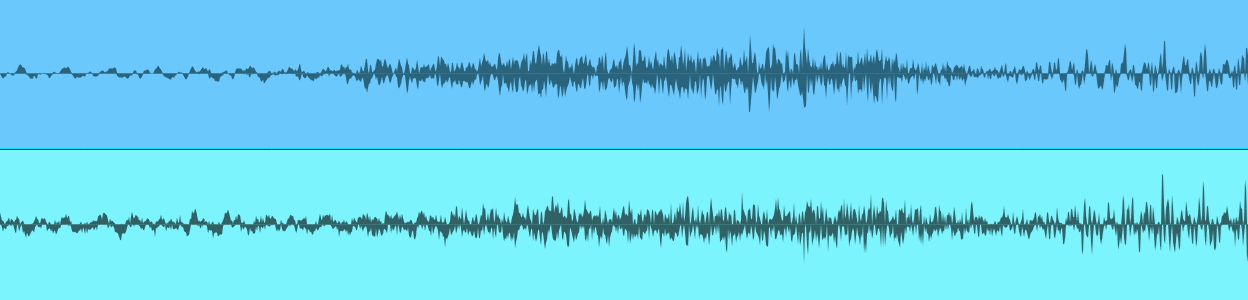
Figure 1: Despite being zoomed in, you wouldn’t necessarily know from the waveforms that they are at their point of maximum cancellation.
Another option is to sum the sources in mono, delay or advance one relative to the other, and listen for what sounds the strongest. That can work, but it’s not always easy to hear exactly when the waveforms are in phase. Let’s make the process more foolproof.
The Phase Correction Process
The goal is to find the alignment of the two waveforms where the audio sounds the strongest. However, it’s easier to hear phase cancellation than addition. So, by inverting the phase of one channel, we can align the tracks for maximum cancellation. Returning the phase to normal then gives the strongest sound. Here’s the process:
1. Solo the channels that may have a potential phase issue. Determine whether they do by listening for a thinner sound when they’re summed to mono, or both panned to center.
2. Match the channel levels as closely as possible.
3. Pan the two channels hard left and hard right.
4. Insert the Phase Meter plugin in the master bus.
5. Insert a Mixtool in one of the instrument channels. Invert the Mixtool’s phase. If a track uses stereo audio, invert the left and right channels.
6. Turn off Snap. This allows nudging an Event in 1 millisecond increments. Select the Event and type Alt+Right Arrow to move the track earlier by 1 ms, or Alt+Left Arrow to move the track later by 1 ms.
7. Nudge one of the tracks with respect to the other track until the Phase Meter shows the most negative correlation (i.e., the lower bar graph swings to the left as much as possible, as in fig. 2). This indicates maximum cancellation. Note: The time range for maximum cancellation is extremely narrow. One millisecond can make the difference between substantial cancellation and no cancellation. Be patient. Adjust 1 ms at a time.
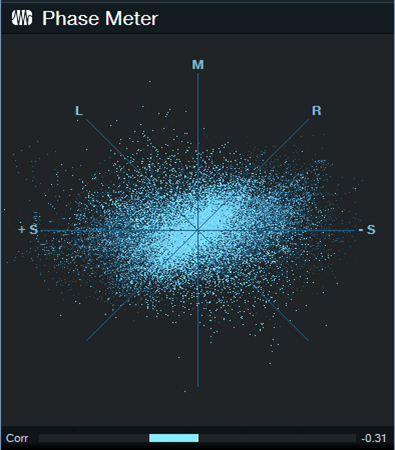
Figure 2: A negative correlation reading indicates that the two sources have phase differences.
8. You’ve now aligned the two tracks. Remove the Mixtool plugin so that the two signals are in phase.
Tip: For audible confirmation, in Step 7 listen as you make these tiny changes. If you enable the Mono button in the Main bus, aim for the thinnest possible sound. If you monitor in stereo, listen for the narrowest stereo image.
Super-Fine Tuning
1 ms is a significant time shift when trying to match two signals’ phase. Step 7 will isolate a 1 ms window where the two tracks are in phase (or at least close to it), but you may be able to do better.
Select Samples for the Timebase and turn off Snap. Zoom in far enough, and you’ll be able to click on the Event and drag it earlier or later in 1 sample increments (fig. 3). That can tighten the phase further, if needed.
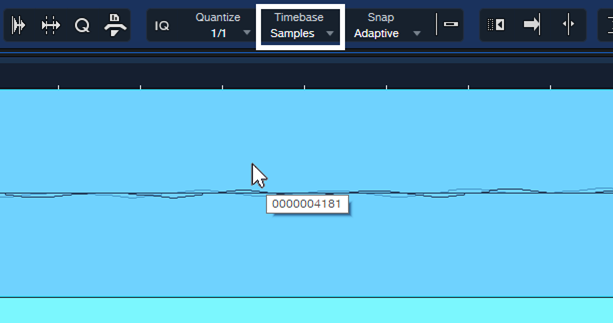
Figure 3: With Timebase set to Samples and Snap turned off, the resolution for moving an Event is 1 sample.
This may be overkill, but I know some of you are perfectionists 😊. Happy phase phixing!