The Surprising Channel Strip EQ

Announcement: Version 1.4.1 of The Huge Book of Studio One Tips and Tricks is a free update to owners of previous versions. Simply download the book again from your PreSonus account, and it will be the most recent version. This is a “hotfix” update for improved compatibility with Adobe Acrobat’s navigation functions. The content is the same as version 1.4.
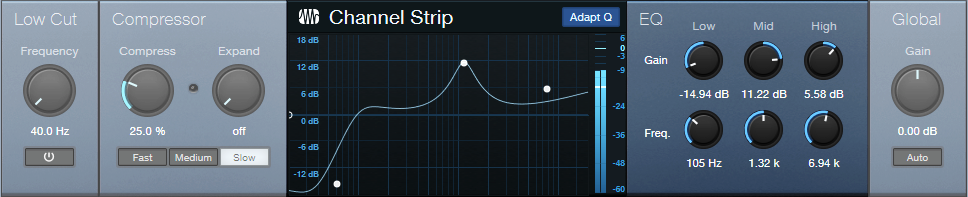
Studio One has a solid repertoire of EQs: the Fat Channel EQs, Pro EQ3, Ampire’s Graphic Equalizer, and the Autofilter. Even the Multiband Dynamics can serve as a hip graphic EQ. With this wealth of EQs, it’s potentially easy to overlook the Channel Strip’s EQ section (fig. 1). Yet it’s significantly different from the other EQs.
Back to the 60s
In the late 60s, Saul Walker (API’s founder) introduced the concept of “proportional Q” in API equalizers. To this day, engineers praise API equalizers for their “musical” sound, and much of this relates to proportional Q.
The theory is simple. At lower gains, the bandwidth is wider. At higher gains, it becomes narrower. This is consistent with how we often use EQ. Lower gain settings are common for tone-shaping. Increasing the gain likely means you want a more focused effect.
The concept works similarly for cutting. If you’re applying a deep cut, you probably want to solve a problem. A broad cut is more about shaping tone. Also, because cutting mirrors the response of boosting, proportional Q equalizers make it easy to “undo” equalization settings. For example, if you boosted drums around 2 kHz by 6 dB, cutting by 3 dB produces the same curve as if the drums had originally been boosted by 3 dB.
Proportional Q also works well with vocals and automation. For less intense parts, add a little gain in the 2-4 kHz range. When the vocal needs to cut through, raise the gain to increase the resonance and articulation.
The Channel Strip’s Adapt Q button converts the response to proportional Q. Let’s look at how proportional Q affects the various responses.
High and Low Stages
The High band is a 12 dB/octave high shelf. In fig. 2, the Boost is +15 dB, at a frequency of 2.5 kHz. The top image shows the EQ without Adapt Q. The lower image engages Adapt Q, which increases the shelf’s resonance.
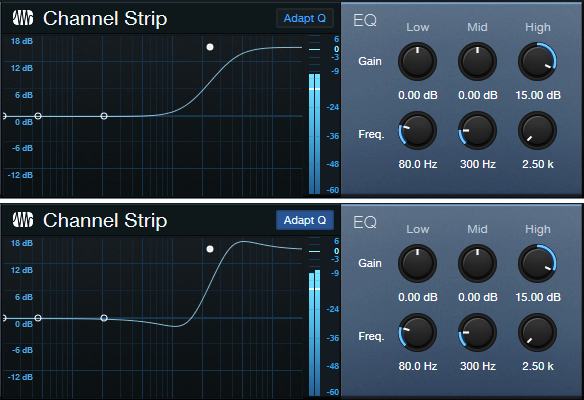
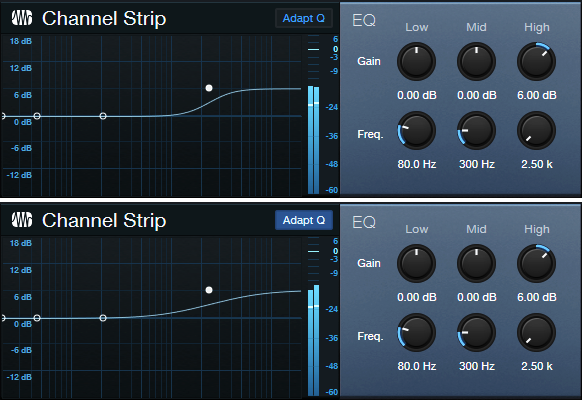
Fig. 3 shows what happens with 6 dB of gain. With Adapt Q enabled, the Q is actually less than the corresponding amount of Q without Adapt Q.
Cutting flips the curve vertically, but the shape is the same. With the Low shelf filter, the response is the mirror image of the High shelf.
Midrange Stage
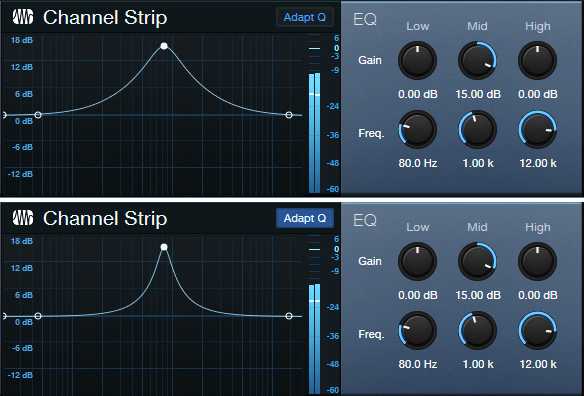
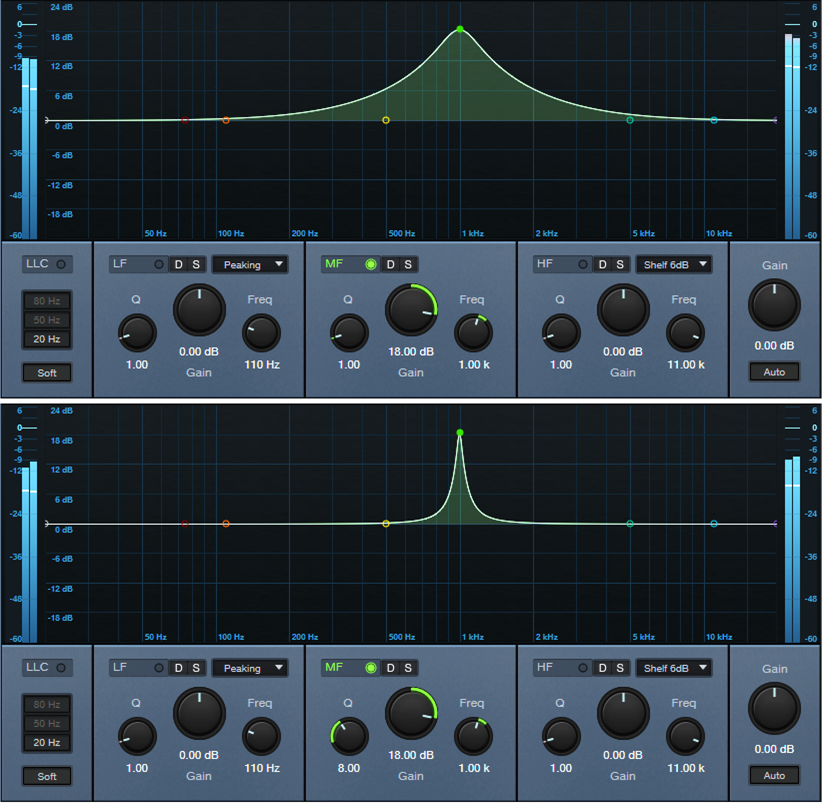
The Midrange EQ stage has variable Gain and Frequency. There’s no Q control, but the filter works with Adapt Q to increase Q with more gain or cut (fig. 4).
With 6 dB Gain, the Q is essentially the same, regardless of the Adapt Q setting (fig. 5).

Finally, another Adapt Q characteristic is that the midrange section’s slope down from either side of the peak (called the “skirt”) hits the minimum amount of gain at the same upper and lower frequencies, regardless of the gain. This is different from a traditional EQ like the Pro EQ3, where the skirt narrows with more Q (fig. 6).
Perhaps best of all, the Channel Strip draws very little CPU power. So, if you need more stages of EQ, go ahead and insert several Channel Strips in series, or in parallel using a Splitter or buses. And don’t forget—the Channel Strip also has dynamics 😊!