How to “Focus” Effects
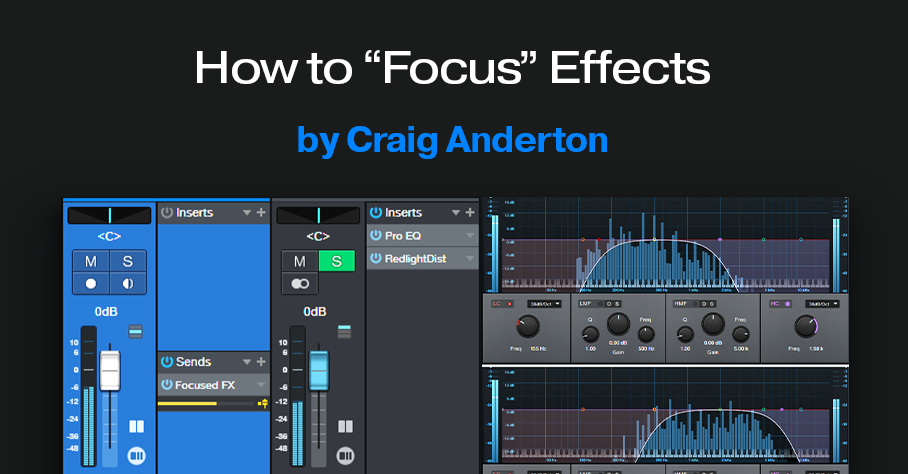
There’s nothing new about using an FX Channel to add an effect in parallel to a main track. But we can make effects even more effective by “tuning” them, to provide more focus.
This process works by inserting a Pro EQ3 before an FX Channel effect or effects (fig. 1). Then, use the EQ’s Low Cut and High Cut filters to tune a specific frequency range that feeds the effect. For example, I’ve mentioned restricting high and low frequencies prior to feeding amp sims, but we can use this focusing technique with any processor.
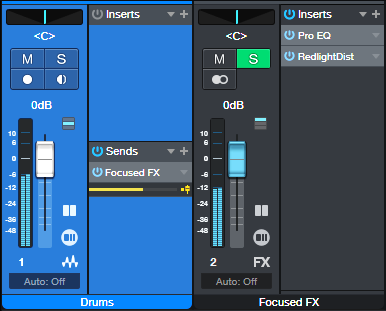
There are several reasons for placing the Pro EQ3 before the effect. With saturation effects, this reduces the possibility of intermodulation distortion. With other effects, reducing the level of unneeded frequencies opens up more headroom in the effect itself. Finally, with effects that respond to dynamics (autofilter, compressor, etc.), you won’t have frequencies you don’t want pushing the frequencies you do want over the processor’s threshold.
Here are some specific examples to help get your creative juices flowing.
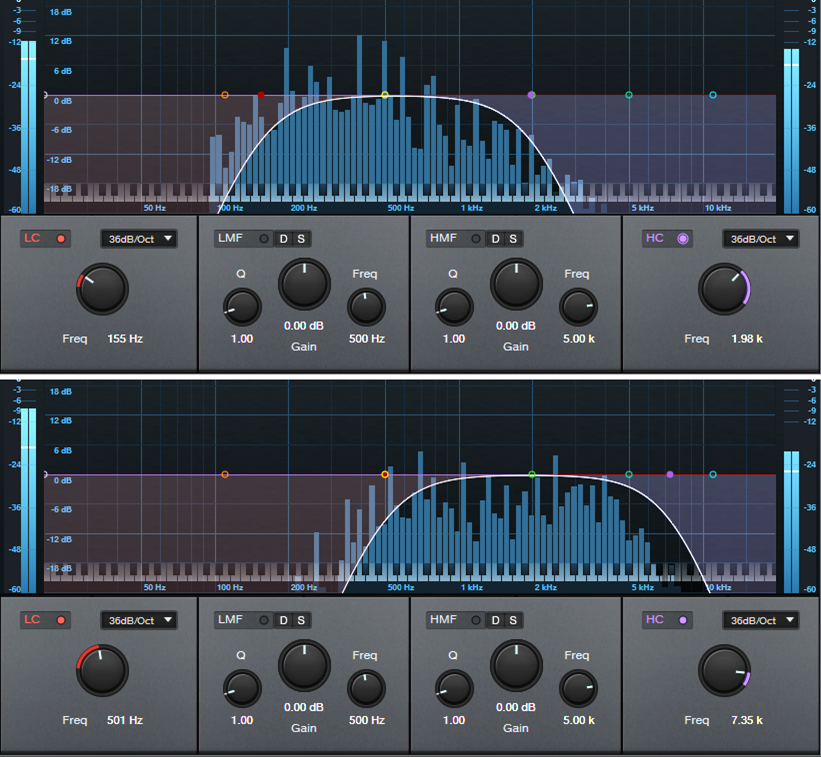
Distortion or Saturation with Drums
The audio example plays four measures of drums going into the RedlightDist, with no focus. The next four measures focus on the high frequencies. This gives an aggressive “snap” to the snare. The next four measures focus on the low frequencies, to push the kick forward.
Fig. 2 shows the tunings for the high- and low-frequency focus.

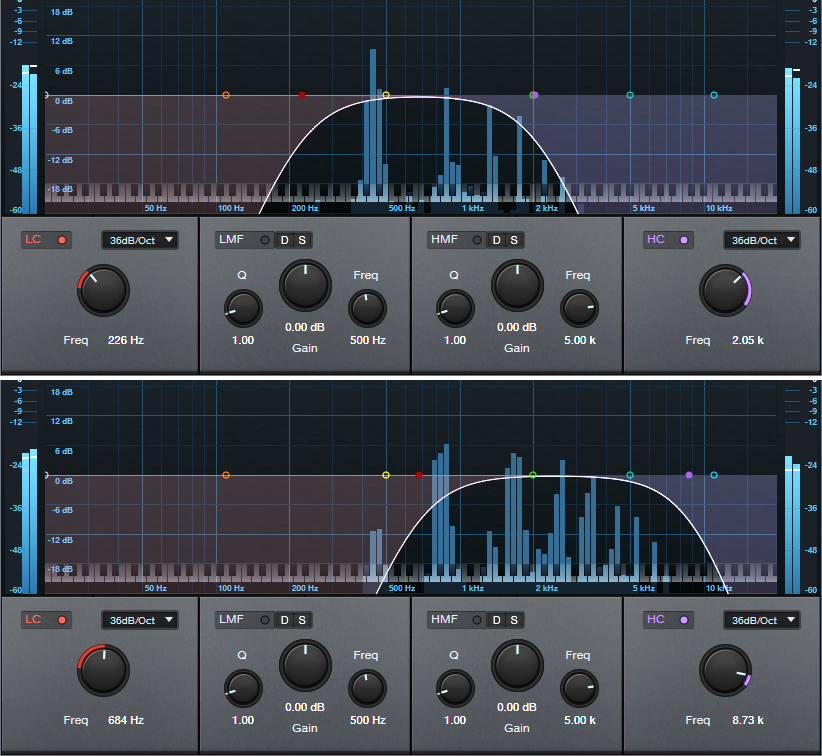
Reverb with Guitar
The audio example plays four measures of midrange-frequency focus feeding reverb, then four measures using a high-frequency focus. Focusing is helpful with longer reverb times, because there are fewer frequencies to interfere with the main sound.
Fig. 3 shows the tunings for the midrange- and high-frequency focus filters.
Delay with Synth Solo
For our last example, the first five measures are synth with no focus. The next five measures focus on the lower frequencies. The difference is subtle, but it “tucks away” the reverb behind the solo line. The final five measures focus on the high frequencies, for a more distant echo vibe.
Fig. 4 shows the tunings for the midrange- and high-frequency focus filters.
These are just a few possibilities—another favorite of mine is sending focused frequencies to a chorus, so that the chorus effect doesn’t overwhelm an instrument. Expanders also lend themselves to this approach, as does saturation with bass and electric pianos.
Perhaps most importantly, focusing the effects can give a less cluttered mix. Even tracks with heavy processing can stand out, and sound well-defined.