EZ Voiceovers with the Lyrics Track
I narrate an average of a video a week, so I’m always looking for better workflow options—and version 6 came through with the Lyrics Track. This tip is about one workflow, but the concept is flexible enough that you may find something that works better for you.
The Recording Process
Recording narration is different from laying down a guitar part. First, I record a reference narration track that breaks the narration down into smaller pieces. Typically, they’re around 20 seconds. Then, the narration for each section becomes a separate phrase in the Lyric Track.
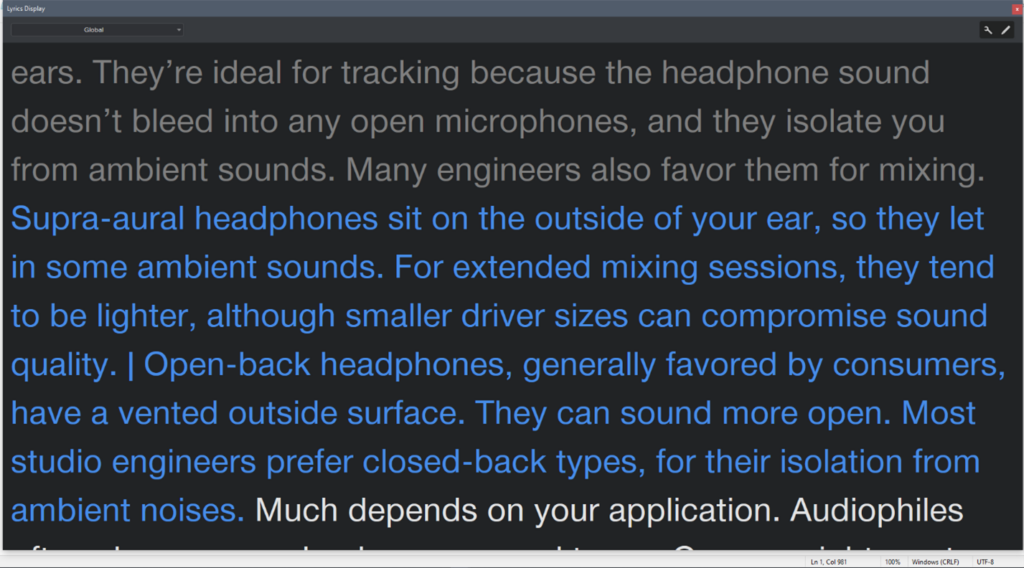
Because I never get narration right the first time (hey, at least I admit it!), I loop-record the narration five or six times. This is where the Lyrics Display is invaluable. Normally, Studio One is on the main monitor, and the second, smaller monitor is dedicated to working with plug-ins and such. But for narration, the Lyrics Display goes on the main monitor. I’m only recording, not editing or arranging, so placing Studio One on the smaller monitor isn’t an issue (figs. 1 and 2). The Lyrics Display’s maximum font size (60.00) allows seeing the text while being at least a couple meters away from the computer. By using a ribbon mic and pointing the mic’s null response at the computer, there’s virtually zero background noise.

Before V6, I opened a text file with narration in the main monitor. However, this required scrolling for longer narrations. Paging up and down with a wireless keyboard worked, but was distracting (and I had to edit out the noise it made). With V6, while recording, the Lyrics Display jumps automatically to the next section of text, and highlights it in blue. This is way more convenient.
Editing
The standard comping tools are less useful because narration isn’t cut to a beat. Due to the slight variations, I unpack the layers to Tracks, and use the Listen Tool to decide which version has the best narration for any given section. The preferred sections are cut, and moved to a composite track. Keyboard shortcuts are essential here to choose among select, cut, and listen.
Some Events may have issues where the narration is good, but there’s a potential deal-breaker problem (e.g., a prominent mouth click). The Inspector comes into play here. V6’s Customize option pares the interface down to what’s needed needed to work with narration. Sometimes an Event processing plug-in will solve the problem, but if not, I add a marker to indicate where more editing is needed. That may mean substituting a section from a different take, or coming back to it later and recording replacement narration.
After selecting individual Events and bouncing them to single file, next is overall processing. The Pro EQ’s linear-phase low-cut filter reduces some of the ribbon mic’s boomy qualities, and a bit of high-end boost adds intelligibility. iZotope RX takes care of mouth de-clicking. Then, the Limiter and Gain Envelope even out any unwanted level variations, while V6’s new De-Esser reduces any overbearing sibilance. This group of processors cleans up the narration well.
Once the narration is exactly as desired, then it’s time to render, lay it on the timeline with the visuals…and send the invoice 😊
