Five One-Stage EQ Fixes
These simple EQ settings can fix a variety of issues. Just remember that often, a little goes a long way. When boosting or cutting with EQ, try the “rule of half”—boost or cut by what you think is the correct amount, then cut it in half and live with the sound for a while before deciding you need more.
1. Magic Fairy Dust
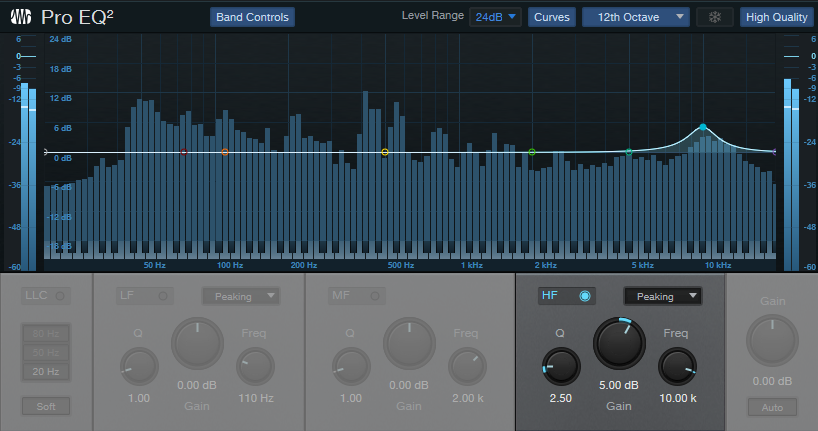
This trick dates back to the days of tape, when multitrack projects would start to lose high frequencies due to constant playback and self-erasure. Adding some high-frequency spice on the stereo mixes or masters helped compensate for any dullness. Although we don’t need to add as much compensation with DAWs, a somewhat narrow, moderate boost at 10 kHz (fig. 1) adds sparkle and brightness that gives a sheen to cymbals, percussion, and even vocals.
2. Clean Out Mud from Your Reverb
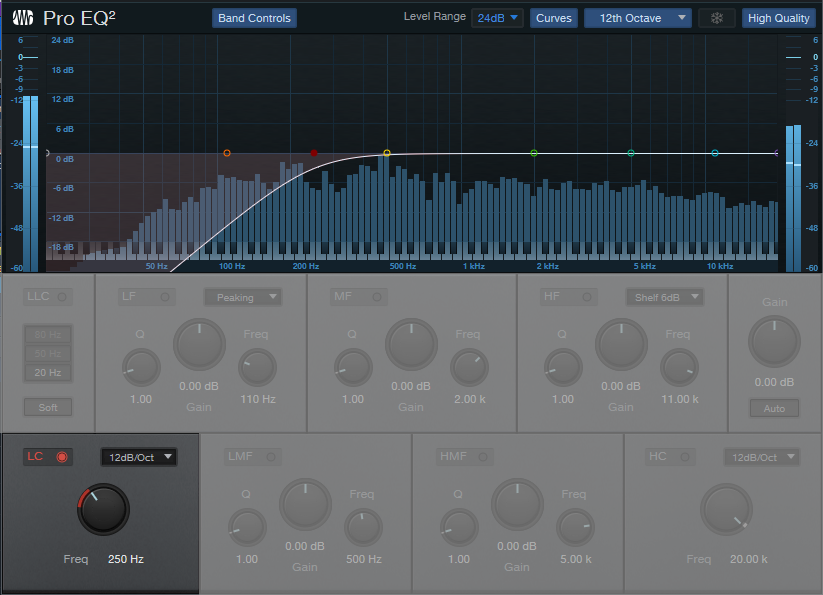
This is especially useful for drum reverb. Reverberated kick can produce a muddy, indistinct sound that interferes with clarity in the bass range. Rolling off some low frequencies (fig. 2) prior to going into reverb eliminates the mud, and tightens the reverb. Note that you don’t need to use the linear-phase EQ for this application, because it doesn’t matter if there are some phase shifts about the cutoff frequency—it’s just going through reverb anyway. Also, if your CPU is straining, you don’t need to use the Pro EQ2’s High Quality mode.
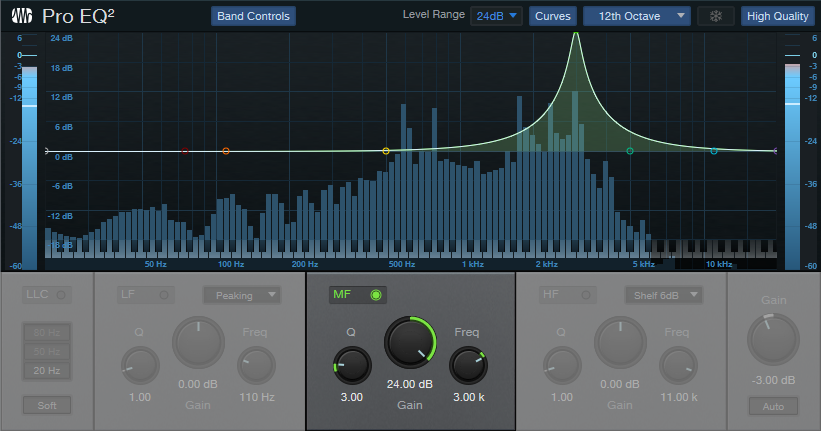
3. Make Vocals More Intelligible
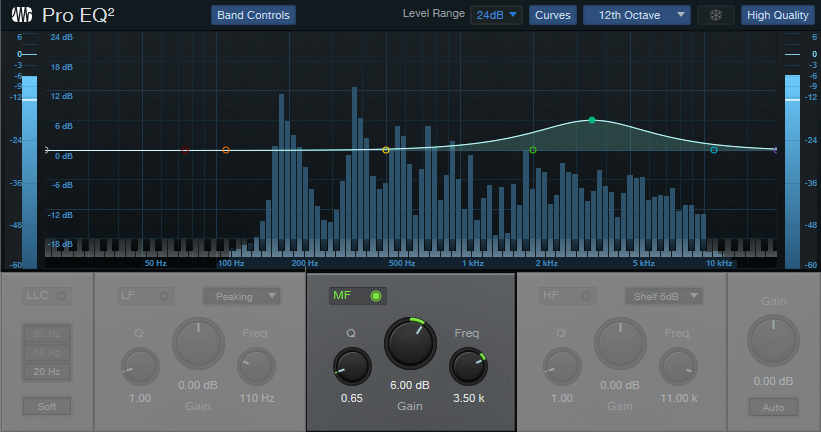
This tip applies not just to singing, but to narration, voiceovers, and podcasts. A fairly broad boost in the 3 to 5 kHz range (fig. 3) increases intelligibility and adds brightness that helps lift a vocal in the mix. The optimum frequency depends on the voice and mic, but don’t overdo the boost. The human ear is most sensitive in this region, so too much boosting leads to listener fatigue—and you don’t want listeners to get tired of your vocals.
4. Tighten Your Master

For a brighter, tighter pop sound when mastering, a slight dip in the 250-300 Hz region (fig. 4) reduces any potential muddiness. This can occur because many instruments have energy in this region, which unbalances the sound. Again, though, you be sparing. This region also contributes “warmth” to the sound, and you don’t want to reduce that too much.
5. Selectively Push Frequencies into Processing
This tip is most relevant with dynamics processing and amp sims. The sound of dynamics processors depends on whether audio goes above a threshold or not, while amp sims depend on a signal level being high enough to go into distortion.
Fig. 5 shows settings that precede an amp sim set for lead sounds. With these settings, the guitar’s high notes go into distortion more readily than low notes. The lead notes sustain longer, and you don’t have to hit the strings as hard to get the same amount of level as the lower strings. Although this goes against the conventional wisdom of placing EQ after compression, we’re using the EQ to modify the subsequent effect, not specifically to change the tone. Besides, conventional wisdom is overrated 😊
Heads-up: Version 1.3 of The Huge Book of Studio One Tips and Tricks is now available! This 637-page book with 230 innovative tips is a free update to owners of previous versions ($19.95 to new buyers). Download the update from your PreSonus or Sweetwater account the same way you downloaded your previous version. For more information, check out the series of Studio One eBooks. Also, there’s a dedicated support forum if you have questions about the tips, or suggestions for future revisions.