5 Session-Saving Tips for Studio One
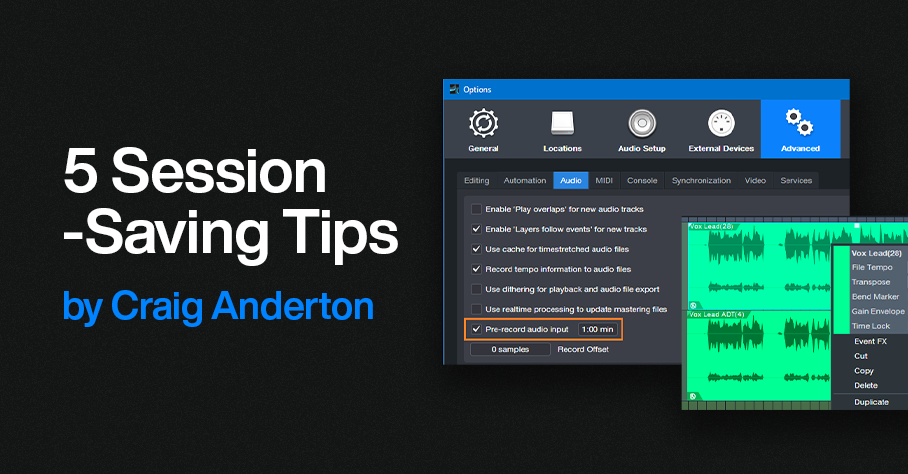
By Craig Anderton
I admit it: the following tips are based on personally embarrassing experiences. I like to work fast to keep the creative juices flowing, but that can lead to occasional mistakes. Fortunately, these tips can help prevent a session from accidentally going south.
Track Lock
To lock track Events to their timeline positions, right-click on the track’s header and choose Time Lock (fig. 1). One application is locking tracks before mixing. Although the mixing console has full functionality, if you switch over to the Arrange window to set up loop points, confirm which tracks are in folders, and the like, a slip of the mouse won’t cause accidental edits.
I also use this with my “authentic ADT” technique, which requires placing two tracks at precise timeline positions. Locking both tracks maintains those positions. (Note: Even when locked, some non-critical editing functionality, like renaming, remains available.)

Figure 1: Right-click on a track and then choose to lock or unlock it. When locked, a lock symbol appears in the track header’s upper right.
Time Lock and Edit Lock
These are more granular locking options (fig. 2). Right-click on an Event or Events, and choose one or both:
- Time Lock prevents the Event from moving on the timeline. You can still do edits like alter fades.
- Edit Lock prevents making accidental edits.
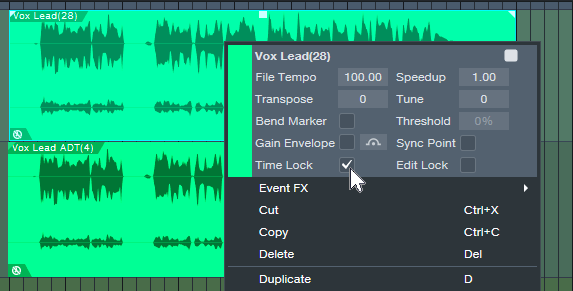
Figure 2: Protect an individual Event or Events from being edited, having timeline positions changed, or both.
Pseudo-Retrospective Recording for Audio
Although not as sophisticated as Retrospective Recording for MIDI Events, Studio One 3 introduced a similar function for audio. When enabled, Studio One is always listening to your audio inputs, and capturing the audio in buffers. When you start recording, the file includes audio that occurred before you clicked on record. After recording, you don’t see the captured audio. However, slip-editing the beginning of the audio to the left reveals the “pre-record” audio.
To set up Pre-Record audio, choose the Advanced Options, and select the Audio tab. Check Pre-Record Audio Input, and specify the number of seconds you want to capture (fig. 3). The maximum is one minute, but with lots of inputs this uses quite a bit of buffer memory. 10 or 15 seconds usually suffices.
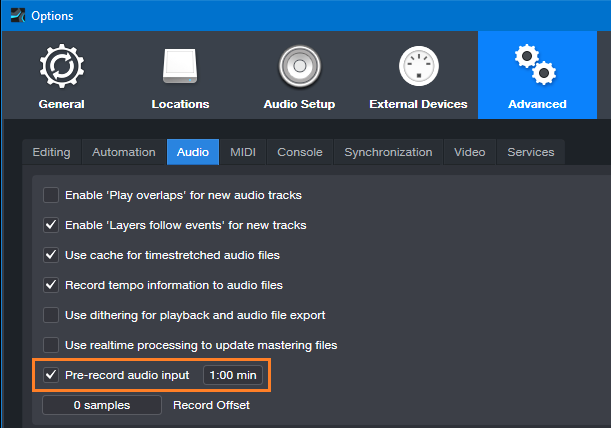
Figure 3: Missed the first few seconds of a take? Relax—you had Pre-Record Audio Input checked.
Two other cool features include:
- Pre-Record saves the audio for any track that’s record-enabled. So, suppose a drum set has five miked tracks, and the drummer plays some amazing intro but you were late clicking on record. You can slip-edit all five recorded tracks to recover the audio.
- Pre-Record can handle interruptions. Let’s assume a guitarist plays some great riff and then stops, but you missed it. So, you click on record, and pre-record captures the sound you missed. But then the guitarist says “hey, don’t record me yet, I’m not ready.” So, you click out of record, with the transport still going while you wait. Unexpectedly, the guitarist plays an even better version of the riff. So, you hit record again. Now the guitarist is settled in and plays for real. When you stop recording, the file will include both of the pre-record riffs, as long as the combined length didn’t exceed the buffer time.
Prevent Ripple Edit Mishaps
Ripple Editing allows edits like removing a section of a track, and having the track close up to fill the hole created by deletion. Or, insert an Event, and have it push the track later to make space for the addition. That’s cool, but if you leave Ripple Edit on accidentally, doing any subsequent cuts or pastes could mess up multiple Event positions in a song. Always disable Ripple Edit immediately after making your edit (fig. 4). Some people delete the keyboard shortcut, so that fat fingers can’t enable ripple editing accidentally.
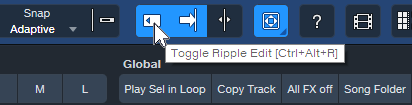
Figure 4: Be sure to toggle Ripple Editing off after you’ve made a ripple edit.
Lock Events to Video “Hit Points”
Time Lock locks Events to bars and beats. However, when working with video, you often want to lock a sound effect to an absolute time in hours and seconds. That way, even if the background music’s tempo needs to change, the intergalactic cosmic explosion will still happen at the exact frame in the video where the planet blows up.
Studio One can ‘t lock Events to the Seconds Timebase, but there’s a workaround. You can lock Markers to specific times by toggling from bars/beats to seconds in the Marker track (fig. 5), and then relate Events to Markers.
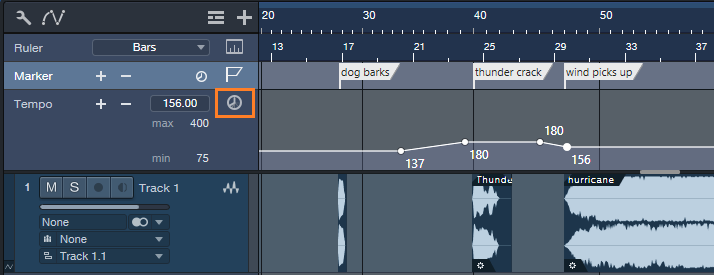
Figure 5: Toggling the Timebase button (outlined in orange) to Seconds locks the markers to minutes and seconds.
Name the Markers after the Events that need to conform to a hit point. If the tempo changes, move the Events to line up with their associated Markers.
I hope that at least one of these tips can help you save a session!