Tag Archives: Bassroom
Mastering the low end with BASSROOM

Tom Frampton
This blog post will tell you how to get the perfect amount of bass when mastering audio using BASSROOM.
This is where so many potentially awesome tracks fail. Too much bass and your track will sound bloated and lack clarity. Not enough bass and your track will sound weak.
I have a process that helps me set the perfect amount of bass for my clients every time. Since I implemented this technique I can honestly say that my mastering business has dramatically improved (more than doubled!)
I hope that this technique helps you too, whether it’s growing your studio business or simply nailing the master of a track that will further your career as an artist.
Let’s start with why nailing the low-end is so difficult:
- Monitors with great low-end response are super expensive.
- Acoustic treatment is expensive BUT essential for any monitors (expensive or not) to be effective.
- Even when we have great monitors and acoustic treatment how can we be sure of what the perfect low-end level is?
So we’re up against a few hurdles here, but the technique I’ll explain will improve the low- end of your masters, even in the most basic studio set-ups.
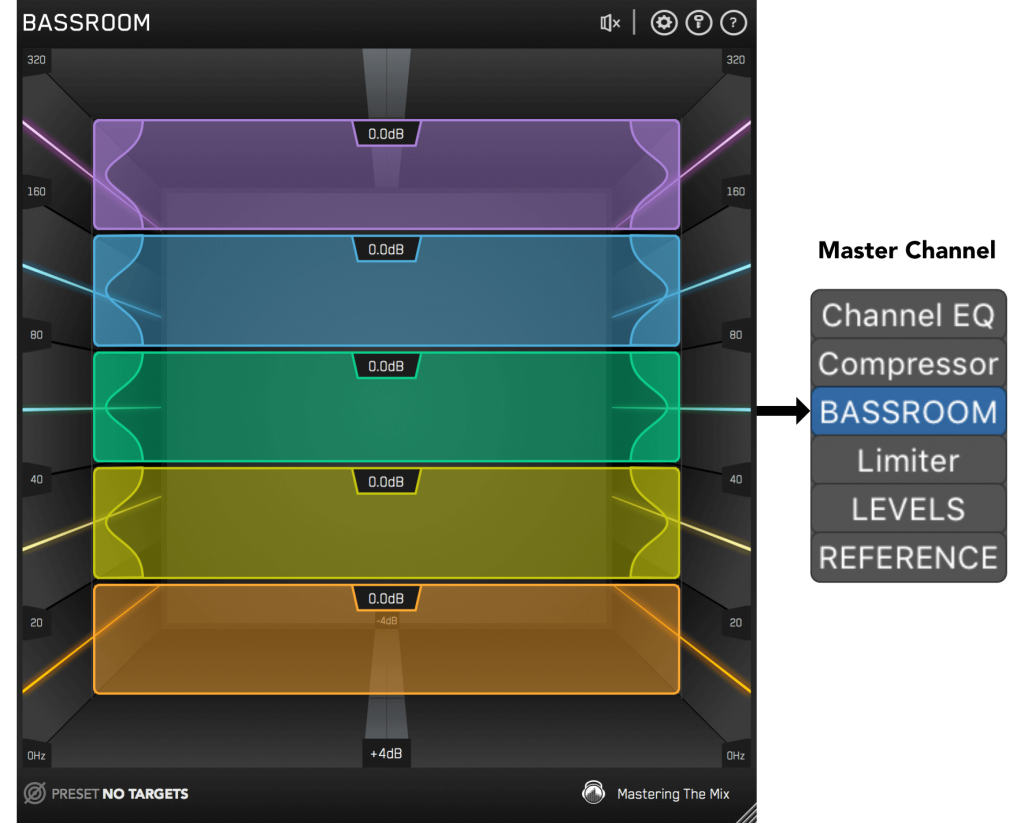
Step 1: Load Up Our Mixing and Mastering EQ BASSROOM on The Master Channel
BASSROOM uses complex algorithms that accurately identifies how the human ear perceives low-frequencies relative to the balance of the whole mix. For that reason it should be loaded on your master channel so it can analyse and be applied to your whole mix.
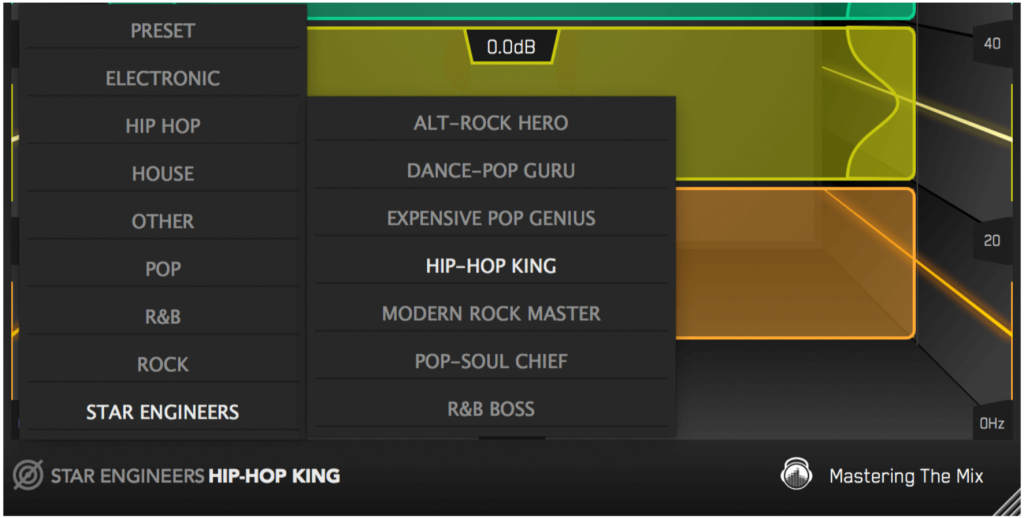
Step 2: Choose A Preset
To get the most value from BASSROOM, start by selecting a preset that best suits the material you’re working on.
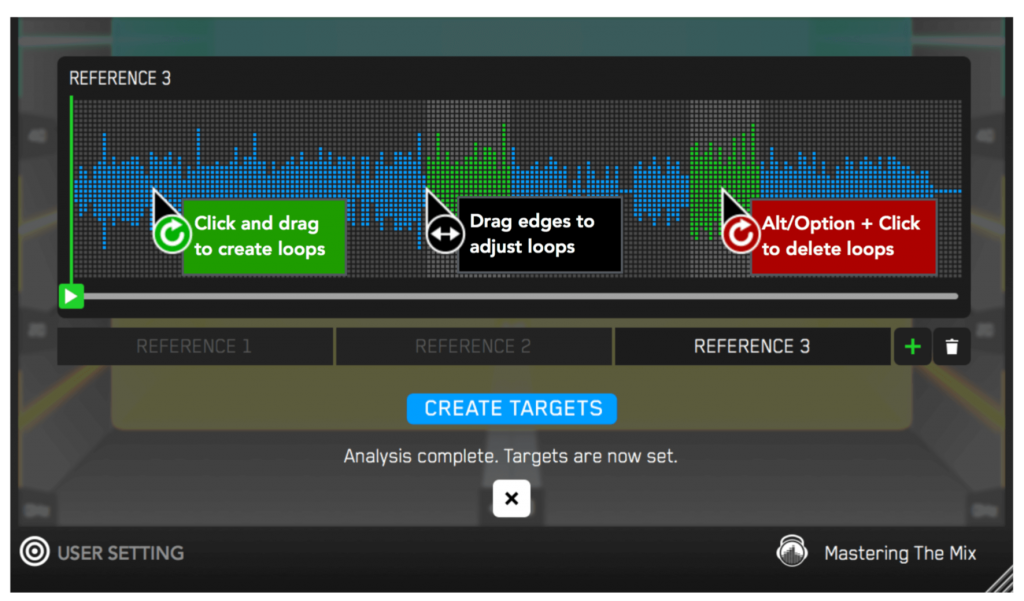
Step 3: Create A Target
Rather than choosing a preset, you can create your own target values by clicking the target icon in the bottom left corner and importing reference tracks. If you’re creating targets, we recommend clicking and dragging on the waveform to select the drop or chorus for the analysis, as this is usually the material with the best representation of the bass in the track. BASSROOM will create targets based on all the tracks loaded into the analysis window.
Step 4: Shape Your Low End
Now monitor a bass heavy section of your production (i.e. the drop or chorus), and you’ll see the targets move to the suggested EQ positions based on the tonal balance of your mix compared to the tonal balance of your preset. Use the targets to get a great starting point, then adjust by ear to tweak your low-end to perfection. The algorithm accounts for differences in loudness, so the targets will be accurate and relevant whether you’re mixing or mastering.
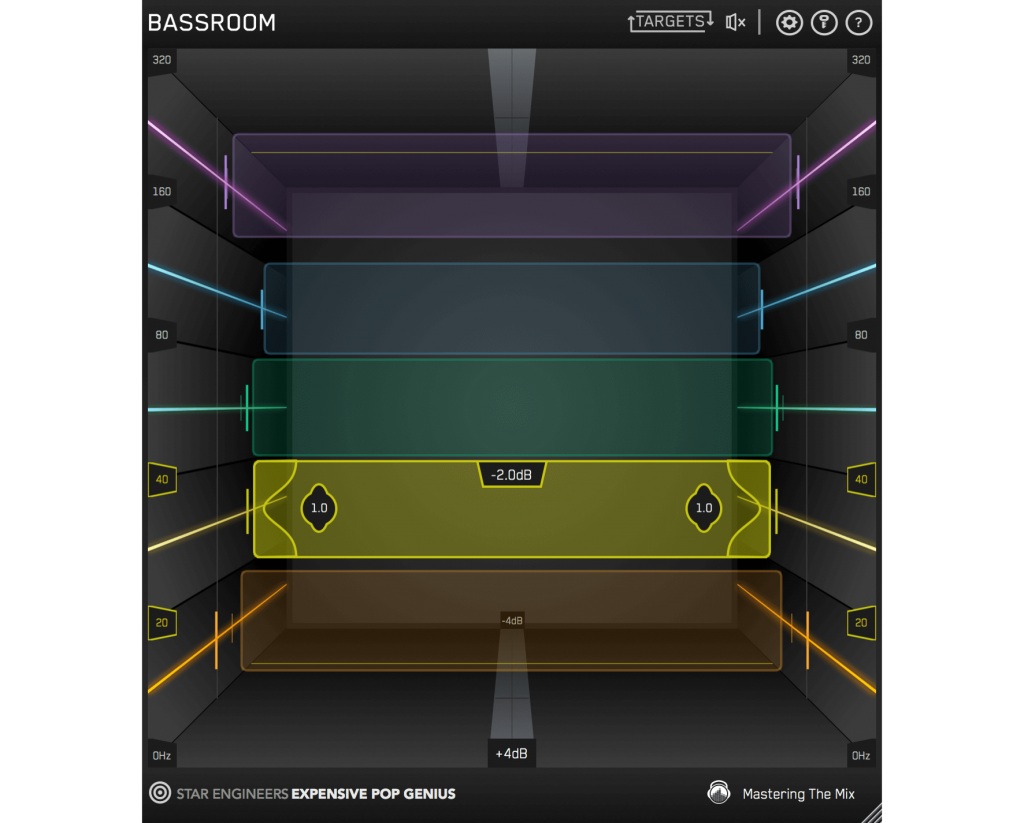
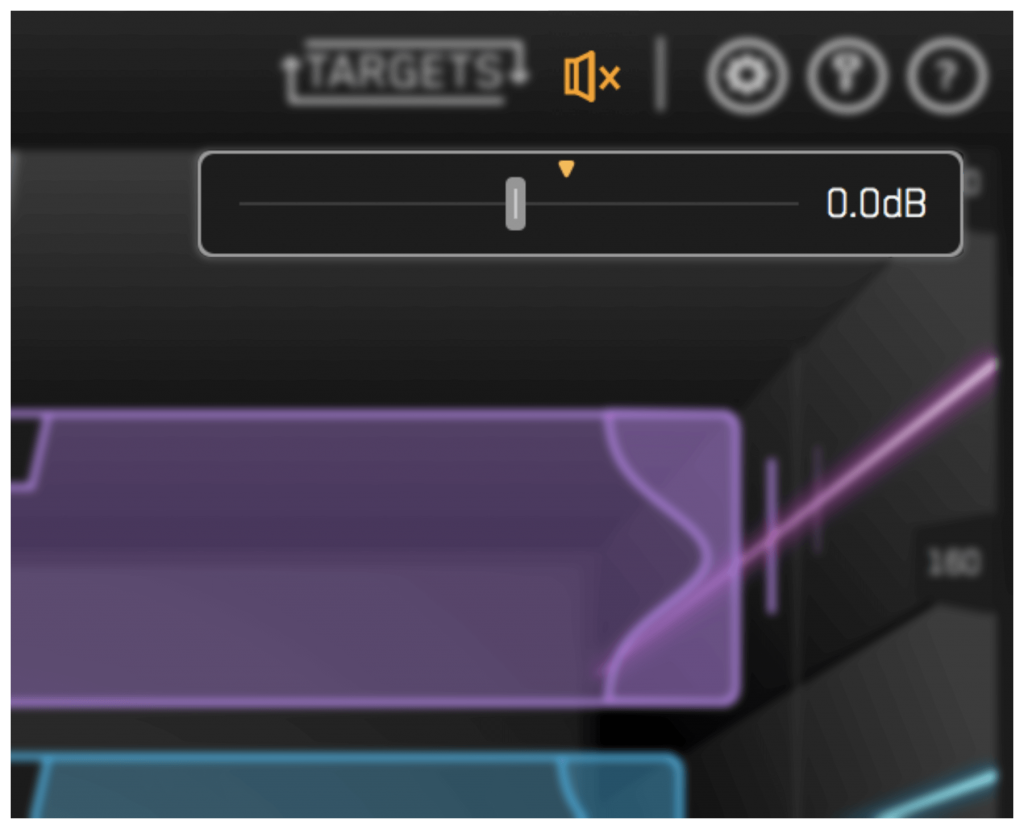
Step 5: The Level Match
The EQ adjustments may have changed the overall gain of your audio. If the gain has changed by more than 2dB the speaker icon will turn orange. Hover your mouse over the bypass icon to open the output gain and level match pointer. Match the gain slider to the level match pointer to match the perceived loudness of your audio before it passed through BASSROOM.
HEAR THE DIFFERENCE!!
Not only will your low-end fall into place, but the level matching will give you a well-balanced sound across the whole frequency spectrum. Toggle bypass on and off to hear the difference.
Click here to get BASSROOM!