Category Archives: Studio One
Friday Tip: MIDI Guitar Setup with Studio One
I was never a big fan of MIDI guitar, but that changed when I discovered two guitar-like controllers—the YRG1000 You Rock Guitar and Zivix Jamstik. Admittedly, the YRG1000 looks like it escaped from Guitar Hero to seek a better life, but even my guitar-playing “tubes and Telecasters forever!” compatriots are shocked by how well it works. And Jamstik, although it started as a learn-to-play guitar product for the Mac, can also serve as a MIDI guitar controller. Either one has more consistent tracking than MIDI guitar retrofits, and no detectable latency.
The tradeoff is that they’re not actual guitars, which is why they track well. So, think of them as alternate controllers that take advantage of your guitar-playing muscle memory. If you want a true guitar feel, with attributes like actual string-bending, there are MIDI retrofits like Fishman’s clever TriplePlay, and Roland’s GR-55 guitar synthesizer.
In any case, you’ll want to set up your MIDI guitar for best results in Studio One—here’s how.
Poly vs. Mono Mode
MIDI guitars usually offer Poly or Mono mode operation. With Poly mode, all data played on all strings appears over one MIDI channel. With Mono mode, each string generates data over its own channel—typically channel 1 for the high E, channel 2 for B, channel 3 for G, and so on. Mono mode’s main advantage is you can bend notes on individual strings and not bend other strings. The main advantage of Poly mode is you need only one sound generator instead of a multi-timbral instrument, or a stack of six synths.
In terms of playing, Poly mode works fine for pads and rhythm guitar, while Mono mode is best for solos, or when you want different strings to trigger different sounds (e.g., the bottom two strings trigger bass synths, and the upper four a synth pad). Here’s how to set up for both options in Studio One.
- To add your MIDI guitar controller, choose Studio One > Options > External Devices tab, and then click Add…

Figure 1: Check “Split Channels” if you plan to use a MIDI guitar in mono mode.
- To use your guitar in Mono mode, check Split Channels and make sure All MIDI channels are selected (Fig. 1). This lets you choose individual MIDI channels as Instrument track inputs.
- For Poly mode, you can follow the same procedure as Mono mode but then you may need to select the desired MIDI channel for an Instrument track (although usually the default works anyway). If you’re sure you’re going to be using only Poly mode, don’t check Split Channels, and choose the MIDI channel over which the instrument transmits.
Note that you can change these settings any time in the Options > External Devices dialog box by selecting your controller and choosing Edit.
Choose Your Channels
For Poly mode, you probably won’t have to do anything—just start playing. With Mono mode, you’ll need to use a multitimbral synth like SampleTank or Kontakt, or six individual synths. For example, suppose you want to use Mai Tai. Create a Mai Tai Instrument track, choose your MIDI controller, and then choose one of the six MIDI channels (Fig. 2). If Split Channels wasn’t selected, you won’t see an option to choose the MIDI channel.
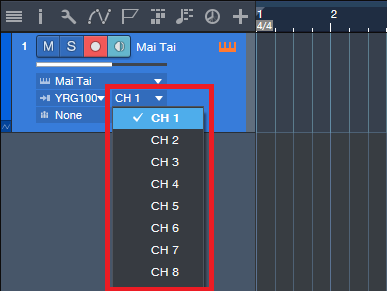
Figure 2: If you chose Split Channels when you added your controller, you’ll be able to assign your instrument’s MIDI input to a particular MIDI channel.
Next, after choosing the desired Mai Tai sound, duplicate the Instrument track five more times, and choose the correct MIDI channel for each string. I like to Group the tracks because this simplifies removing layers, turning off record enable, and quantizing. Now record-enable all tracks, and start recording. Fig. 3 shows a recorded Mono guitar part—note how each string’s notes are in their own channel.
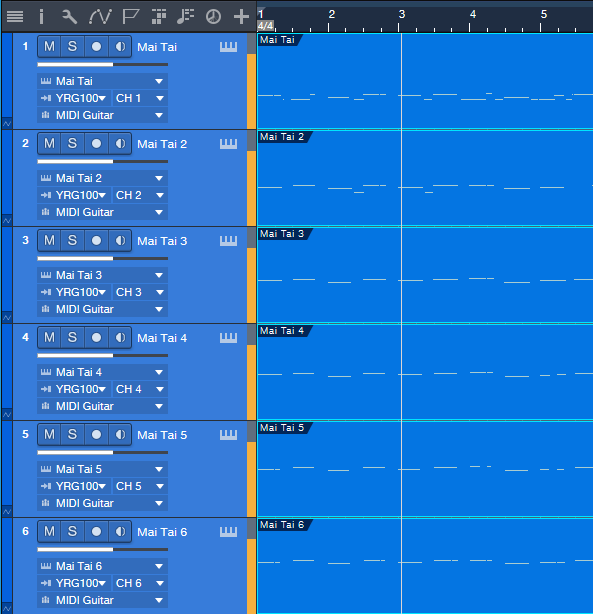
Figure 3: A MIDI guitar part that was recorded in Mono mode is playing back each string’s notes through its own Mai Tai synthesizer.
To close out, here are three more MIDI guitar tips.
- In Mono mode with Mai Tai (or whatever synth you use), set the number of Voices to 1 for two reasons. First, this is how a real guitar works—you can play only one note at a time on a string. Second, this will often improve tracking in MIDI guitars that are picky about your picking.
- Use a synth’s Legato mode, if available. This will prevent re-triggering on each note when sliding up and down the neck, or doing hammer-ons.
- The Edit view is wonderful for Mono mode because you can see what all six strings are playing, while editing only one.
MIDI guitar got a bad rap when it first came out, and not without reason. But the technology continues to improve, dedicated controllers overcome some of the limitations of retrofitting a standard guitar, and if you set up Studio One properly, MIDI guitar can open up voicings that are difficult to obtain with keyboards.
In Mono mode with Mai Tai (or whatever synth you use), set the number of Voices to 1 for two reasons. First, this is how a real guitar works—you can play only one note at a time on a string. Second, this will often improve tracking in MIDI guitars that are picky about your picking.
Studio One 4.1.3 is here!
Studio One 4.1.3 is a free maintenance update for all Studio One 4 users and includes a variety of improvements. Click “Check for Updates” in Studio One’s Start Page to get it!
- Support for new Studio Series USB-C™-compatible Interfaces
- FX Sends are now visible by default on the console
Please click here to check out the latest release notes for a full list of fixes and improvements. in 4.1.3
In case you missed it, this release is hot on the heels of 4.1.2, which included the following:
- AAF Import/Export now supports volume automation
- AAF Export is now compatible with MOTU Digital Performer 9 (using legacy mode)
- A safety query has been added to the “Reset recent songs list” function
- Saving versions of a song is now more flexible with added control over how they affect the original song
- The song key signature is now included in the song meta data
- Quantize macros have been updated
- Multi-touch support now prevents “Mouse-as-Pointer” emulation for Plug-ins
- Time-stretching events in Arrangement is now reflected in the Audio Editor
Please click here to check out the latest release notes for a full list of fixes and improvements in 4.1.2.
The Bentley Boys on StudioLive
The Bentley Boys
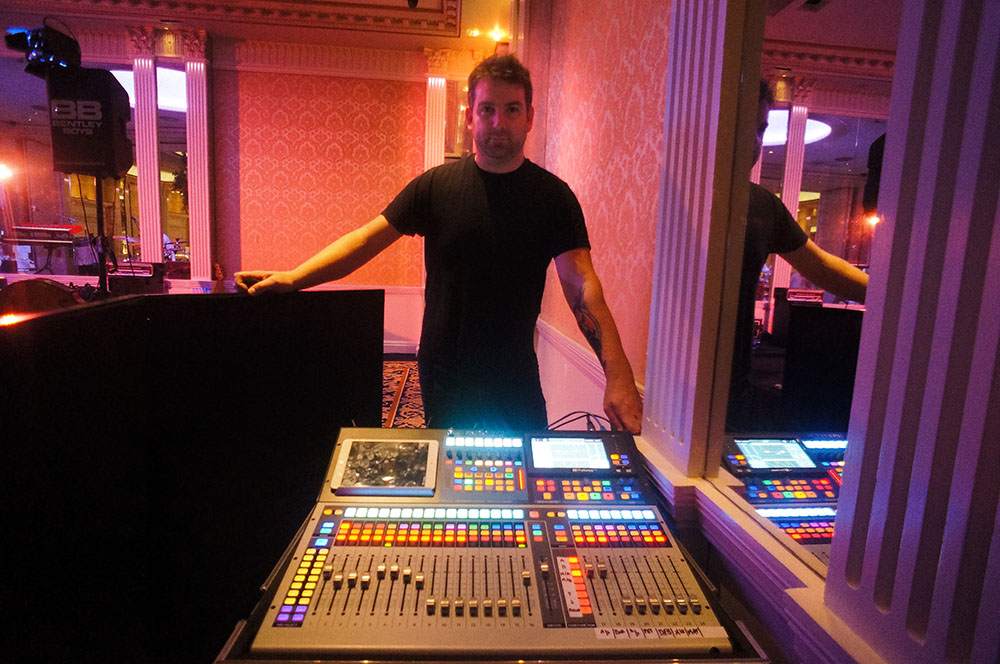
The Bentley Boys are Ireland’s premier corporate entertainment and wedding band. They were voted RSVP Wedding Band of the Year in 2013 and 2014 and Nominated Weddings Online Band of the Year for 2013, 2014 & 2015, 2016 and 2017. The Bentley Boys play all around Ireland and they tailor the band to every event to make sure the event is nothing short of sensational. Having been long-standing PreSonus users, we spoke to Dez Carpenter, Production Manager, about how PreSonus’ quality, price, and support ticks all the boxes for the Bentley Boys.
Dez is also a professional musician and has over 15 years experience playing professionally in Ireland. He came on board with Bentley Productions and Bentley Boys nearly ten years ago and has spent seven of these as their Production Manager. His roles within the company include event planning and execution, personnel management and training, and lead engineer. For Dez, having multiple systems out at any one time means he needs to have confidence in the product—which he’s found with PreSonus.
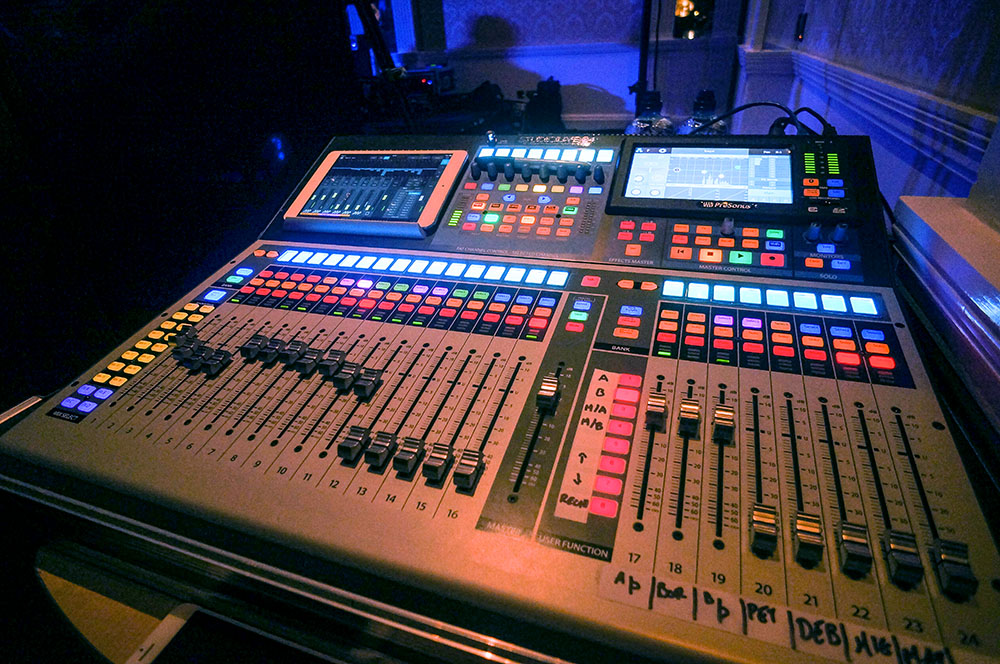
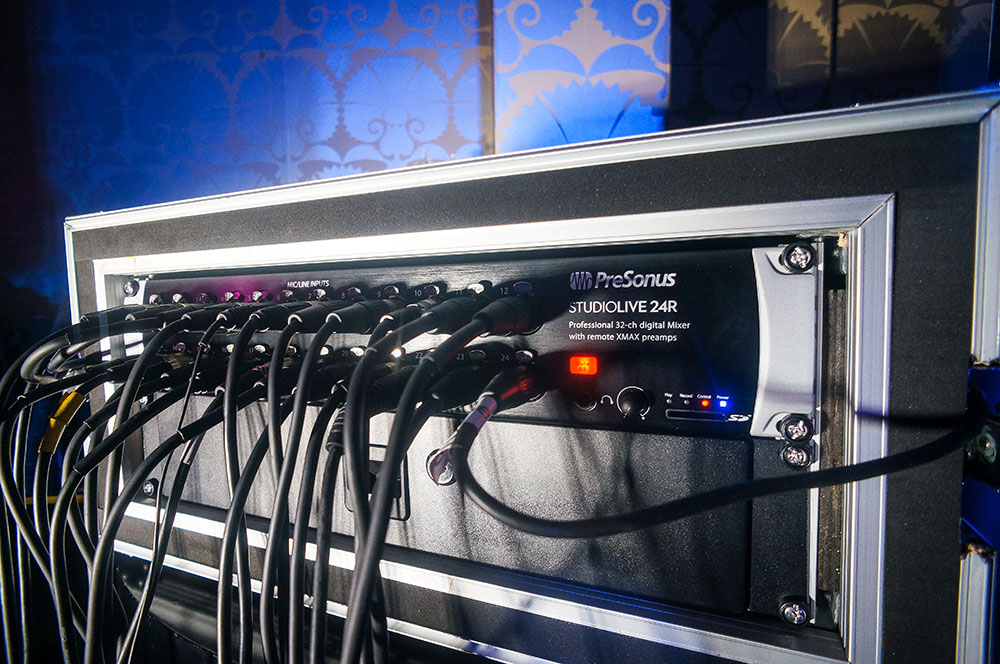
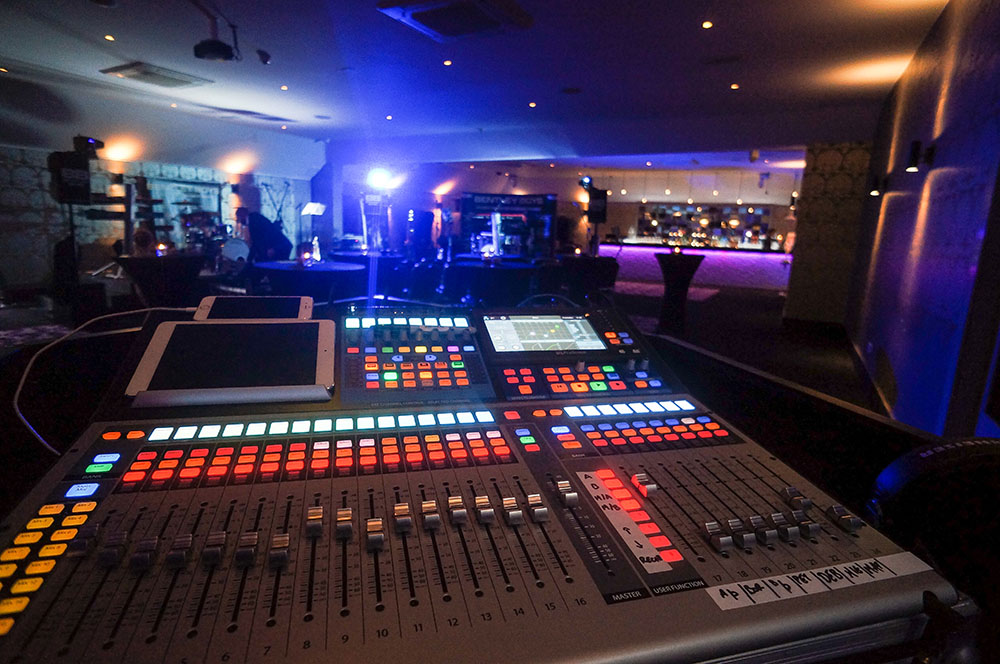
The Bentley Boys main digital mixer for stock is the StudioLive 16.0.2—and they have a lot of them! They have also now expanded to include the new StudioLive 24 (Series III) and StudioLive 24R rack mixer and are exploring the PA range to add to their inventory. In particular, the PreSonus AIR Series P.A. speakers have been selected to further enhance the quality of The Bentley Boys’ touring system. All of the PreSonus products are used for live FOH applications. High profile events, blue chip corporate clients, etc.
When asked what led the Bentley Boys to choose these particular PreSonus products, Dez Carpenter, Production Manager for the Bentley Boys states, “Our AV model is focused on small format, expandable, and minimal footprint equipment. The 16.0.2 was simply a no-brainer in terms of price, size, and functionality. It sounds better than anything else in its range, hands down. We’ve tried them all. The StudioLive 24 has transformed our larger events in terms of features and flexibility with the 24R.”
“PreSonus is a user-focused company,” he continues. “The community and support is so inclusive… you simply don’t get this from other companies. The equipment does exactly what it says on the tin, and it’s so intuitive. Training schedules are minimal, which is so important when taking on new personnel. The boards sound great, all our guys love using them and comment consistently how happy they are with their mixes.”
A big thing for the Bentley Boys that has proved to be particularly useful is that the presets work! “Before an event, I have total confidence to sit down in the lobby with the mixer and load my channels. I know that when the band is plugged in that my mix will be 95% of the way there. We get zero time on the majority of our events for soundcheck—the band is an afterthought most of the time, my mix position could be side stage, etc. To have total confidence in the product… I can’t put a value on that.”
When asked if there were any features on their wish list for PreSonus to add in future products, Dez explained that they are still working through the features on the StudioLive 24, and right now he can’t think of any. “I have been fortunate to A/B the StudioLive Series III alongside its competitors and without a doubt, it sounds better, is more flexible, and has a far better workflow. One of our events features two acts, split across two stages. The flexibility and layout of the DCAs are a big plus. The A/B option on each input is an awesome feature, along with the EQ variants. We are extremely happy to be working with the new additions to our PreSonus inventory and are greatly benefiting from even further flexibility the Series III mixers offer to our FOH requirements.”
Keep up with The Bentley Boys on Facebook!
Friday Tip: Colorization: It’s Not Just About Eye Candy
Some people think colorization is frivolous—but I don’t. I started using colorization when writing articles, because it was easy to identify elements in the illustrations (e.g., “the white audio is the unprocessed sound, the blue audio is compressed”). But the more I used colorization, the more I realized how useful it could be.
Customizing the “Dark” and “Light” Looks
Although a program’s look is usually personal preference, sometimes it’s utilitarian. When working in a video suite, the ambient lighting is often low, so that the eye’s persistence of vision doesn’t influence how you perceive the video. For this situation, a dark view is preferable. Conversely, those with weak or failing vision need a bright look. If you’re new to Studio One, you might want the labels to really “pop” but later on, as you become more familiar with the program, darken them somewhat. You may want a brighter look when working during daytime, and a more muted look at night. Fortunately, you can save presets for various looks, and call up the right look for the right conditions (although note that there are no keyboard shortcuts for choosing color presets).
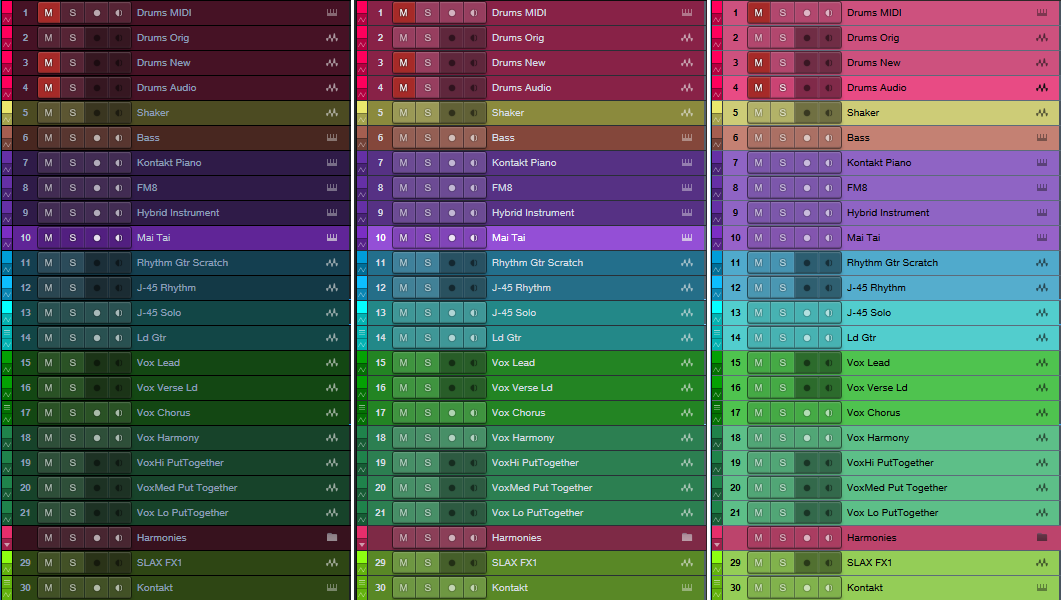
Figure 1: From left to right: dark, moderate, and bright luminance settings.
You’ll find these edits under Options > General > Appearance. For a dark look, move the Background Luminance slider to the left and for a light look, to the right (Fig. 1). I like -50% for dark, and +1 for light. For the dark look, setting the Background Contrast at -100% means that the lettering won’t jump out at you. For the brightest possible look, bump the Background Contrast to 100% so that the lettering is clearly visible against the other light colors, and set Saturation to 100% to brighten the colors. Conversely, to tone down the light look, set Background Contrast and Saturation to 0%.
Hue Shift customizes the background of menu bars, empty fields that are normally gray, and the like. The higher the Saturation slider, the more pronounced the colorization.
The Arrangement sliders control the Arrangement and Edit view backgrounds (i.e., what’s behind the Events). I like to see the vertical lines in the Arrangement view, but also keep the background dark. So Arrangement Contrast is at 100%, and Luminance is the darkest possible value (around 10%) that still makes it easy to see horizontal lines in the Edit view (Fig. 2).

Figure 2: The view on the left uses 13% luminance and 100% contrast to make the horizontal background lines more pronounced.
Streamlining Workflow with Color
With a song containing dozens of tracks, it can be difficult to identify which Console channel strip controls which instrument, particularly with the Narrow console view. The text at the bottom of each channel strip helps, but you often need to rename tracks to fit in the allotted space. Even then, the way the brain works, it’s easier to identify based on color (as deciphered by your right brain) than text (as deciphered by your left brain). Without getting too much into how the brain’s hemispheres work, the right brain is associated more with creative tasks like making music, so you want to stay in that mode as much as possible; switching between the two hemispheres can interrupt the creative flow.
I’ve developed standard color schemes for various types of projects. Of course, choose whatever colors work for you; for example, if you’re doing orchestral work, you’d have a different roster of instruments and colors. With my scheme for rock/pop, lead instruments use a brighter version of a color (e.g., lead guitar bright blue, rhythm guitar dark blue).
- Main drums – red
- Percussion – yellow
- Bass – brown
- Guitar – blue
- Voice – green
- Keyboards and orchestral – purple
- FX – lime green
Furthermore, similar instruments are grouped together in the mixer. So for vocals, you’ll see a block of green strips, for guitar a block of blue strips, etc. (Fig. 3)
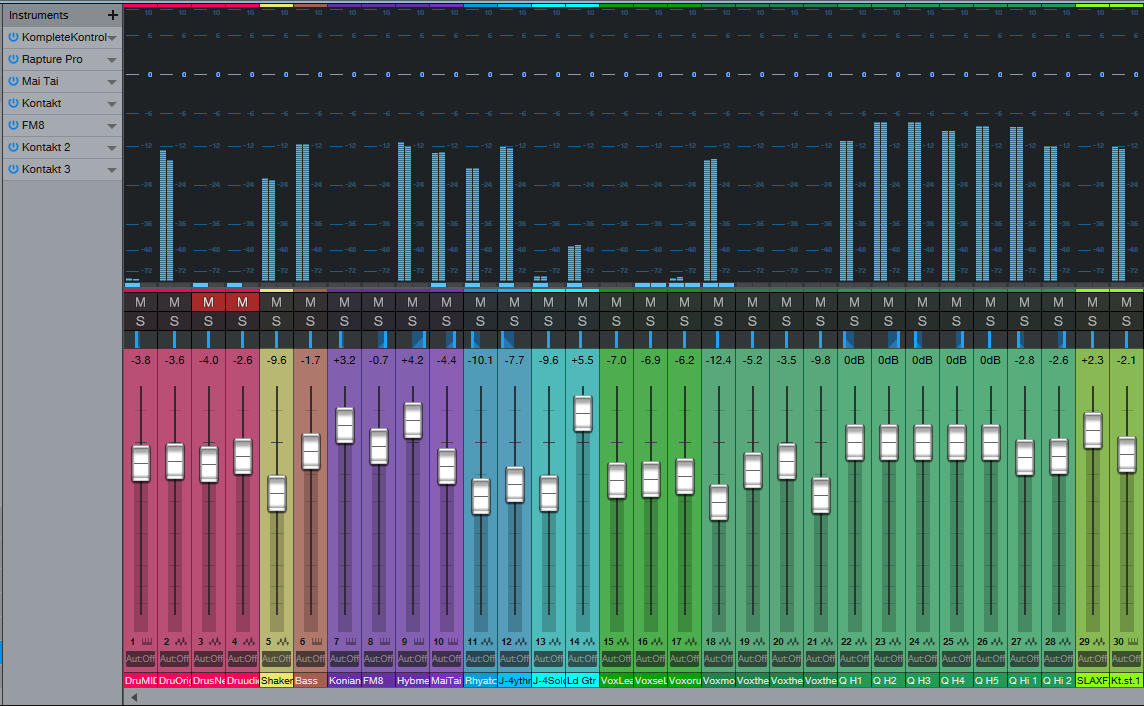
Figure 3: A colorized console, with a bright look. The colorization makes it easy to see which faders control which instruments.
To colorize channel strips, choose Options > Advanced tab > Console tab (or click the Console’s wrench icon) and check “Colorize Channel Strips.” This colorizes the entire strip. However, if you find colorized strips too distracting, the name labels at the bottom (and the waveforms in the arrange view) are always colored according to your choices. Still, when the Console faders are extended to a higher-than-usual height, I find it easier to grab the correct fader with colored console strips.
In the Arrange view, you can colorize the track controls as well—click on the wrench icon, and click on “Colorize Track Controls.” Although sometimes this feels like too much color, nonetheless, it makes identifying tracks easier (especially with the track height set to a narrow height, like Overview).
Color isn’t really a trivial subject, once you get into it. It has helped my workflow, so I hope these tips serve you as well.
Extra TIP: Buy Craig Anderton’s Studio One eBook here for only $10 USD!
Studio One 4.1.2 is available now!
Studio One 4.1.2 is a free maintenance update for all Studio One 4 users and includes a variety of improvements. Click “Check for Updates” in Studio One’s Start Page to get it!
- AAF Import/Export now supports volume automation
- AAF Export is now compatible with MOTU Digital Performer 9 (using legacy mode)
- A safety query has been added to the “Reset recent songs list” function
- Saving versions of a song is now more flexible with added control over how they affect the original song
- The song key signature is now included in the song meta data
- Quantize macros have been updated
- Multi-touch support now prevents “Mouse-as-Pointer” emulation for Plug-ins
- Time-stretching events in Arrangement is now reflected in the Audio Editor
Please click here to check out the latest release notes for a full list of fixes and improvements.
Friday Tips: The Virtual Pop Filter
Hate those p-pops and breath noises? So do I, especially when I’m being paid the big bucks for voiceovers and have to edit the pops out by hand. Granted, the Pauly pop filter is a fantastic solution—it’s the best pop filter I’ve ever tried—but its $300 price tag is pretty daunting. And no matter how hard you try to control pops at the source, sometimes those pesky, problematic pops work their way into a track anyway. So, it’s time for a do-it-yourself pop filter project. And because it’s virtual, this one doesn’t involve taking panty hose and stretching it over a hanger. Instead, we’ll stretch the Pro EQ into being a virtual pop filter.
The key is creating an ultra-steep cutoff frequency that kills the low frequencies, but lives below the range of the voice so it doesn’t thin out the vocal. The easiest way to create a steep cutoff is with multiple sharp notches (Fig. 1). There are four notches, all with a Q of 12 and a gain of -24 dB. Frequencies are 130, 140, 150, and 160 Hz.

Figure 1: Use notch filters to create a super-steep low frequency slope.
Now we need to get rid of the low frequencies. Enabling the Low Cut filter helps, but if we turn it up too far, it starts rounding off the slope, which makes it not as steep. A slope of 48 dB/octave, with a frequency around 90 Hz seems about right (Fig. 2).

Figure 2: Adding a Low Cut filter starts carving away at the low frequencies.
That’s better, so it’s time for the coup de grâce—the Low Frequency Shelf stage. This gets rid of the remaining low frequencies, while still keeping the insanely steep slope (Fig. 3).

Figure 3: The Low Frequency Shelf completes the virtual pop filter.
However, note that the Low Frequency Shelf is also the key to versatility. By increasing the Q, you can add a low-frequency “bump” that’s just above the cutoff frequency. This adds extra depth, and a deep kind of vocal resonance that still keeps the p-pops under control.
Of course, every voice and mic is different, so you may want to edit the parameters somewhat. To preserve more bass, drop the frequency of all filter stages by 10 Hz and see if that helps. Conversely, if the p-pops are still too prominent, raise the frequency of all filter stages by 10 Hz until you hit the desired response…or if you’re impatient, use 20 to 30 Hz jumps.
In any event, you now have a super-steep low cut filter that can remove plosives, wind noises, most breath noises, earthquake sounds, and even the rumble from those pesky UFO flyovers—you might be surprised at just how effective this little project can be in banishing pops from your life.
Friday Tips: The Melodyne Envelope Flanger
This isn’t a joke—there really is an envelope-controlled flanger hidden inside Melodyne Essential that sounds particularly good with drums, but also works well with program material. The flanging is not your basic, boring “whoosh-whoosh-whoosh” LFO-driven flanging, but follows the amplitude envelope of the track being flanged. It’s all done with Melodyne Essential, although of course you can also do this with more advanced Melodyne versions. Here’s how simple it is to do envelope-followed flanging in Studio One.
- Duplicate the track or Event you want to flange.

- Select the copied Event, then type Ctrl+M (or right-click on the Event and choose Edit with Melodyne)
- In Melodyne, under Algorithm, choose Percussive and let Melodyne re-detect the pitches.

- “Select all” in Melodyne so that all the blobs are red, then start playback.
- Click in the “Pitch deviation (in cents) of selected note” field.
- Drag up or down a few cents to introduce flanging. I tend to like dragging down about -14 cents.
As with any flanging effect, you can regulate the mix of the flanged and dry sounds by altering the balance of the two tracks.
Note that altering the Pitch Deviation parameter indicates an offset from the current Pitch Deviation, not an absolute value. For example if you drag down to -10 cents, release the mouse button, and click on the parameter again, the display will show 0 instead of -10. So if you drag up by +4 cents, the pitch deviation will now be at -6 cents, not +4. If you get too lost, just select all the blobs, choose the Percussion algorithm again, and Melodyne will set everything back to 0 cents after re-detecting the blobs.
And of course, I don’t expect you to believe that something this seemingly odd actually works, so check out the audio example. The first part is envelope-flanged drums, and the second part applies envelope flanging to program material from my [shameless plug] Joie de Vivre album. So next time you need envelope-controlled flanging, don’t reach for a stompbox—edit with Melodyne.
Friday Tips: Studio One’s Hybrid Reverb
The previous tip on creating a dual-band reverb generated a fair amount of interest, so let’s do one more reverb-oriented tip before moving on to another topic.
Studio One has three different reverbs—Mixverb, Room Reverb, and OpenAIR—all of which have different attributes and personalities. I particularly like the Room Reverb for its sophisticated early reflections engine, and the OpenAIR’s wide selection of decay impulses (as well as the ability to load custom impulses I’ve made).
Until now, it never occurred to me how easy it is to create a “hybrid” reverb with the best of both worlds: using the Room Reverb solely as an early reflections engine, and the OpenAIR solely for the reverb decay. To review, reverb is a continuum—it starts with silence during the pre-delay phase when the sound first travels to hit a room’s surfaces, then morphs into early reflections as these sounds bounce around and create echoes, and finally, transforms into the reverb decay—the most complex component. Each one of these components affects the sound differently. In Studio One, these components don’t all have to be from the same reverb.
THE EARLY REFLECTIONS ENGINE
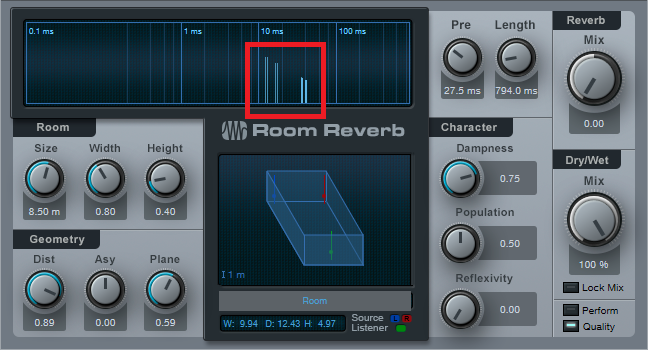
Start by inserting the Room Reverb into an FX Channel, and calling up the Default preset. Then set the Reverb Mix to 0.00 and the Dry/Wet Mix to 100%. The early reflections appear as discrete vertical lines. They’re outlined in red in the screen shot below.
If you haven’t experimented with using the Room Reverb as a reflections engine, before proceeding now would be a good time to use the following evaluation procedure and familiarize yourself with its talents.
- From the Browser, load the loop Crowish Acoustic Chorus 1.wav (Loops > Rock > Drums > Acoustic) into a stereo track. This loop is excellent for showcasing the effects of early reflections.
- Create a pre-fader send from this track to the FX Channel with the Room Reverb, and bring the drum channel fader all the way down for now so you hear only the effects of the Room Reverb.
- Let’s look at the Room parameters. Vary the Size parameter. The bigger the room, the further away the reflections, and the quieter they are.
- Set the Size to around 3.00. Vary Height. Note how at maximum height, the sound is more open; at minimum height, the sound is more constricted. Leave Height around 1.00.
- Now vary Width. With narrower widths, you can really hear that the early reflections are discrete echoes. As you increase width, the reflections blend together more. Leave Width around 2.00.
- The Geometry controls might as well be called the “stand here” controls. Turning up Distance moves you further away from the sound source. Asy varies your position in the left-right direction within the room.
- Plane is a fairly subtle effect. To hear what it does, repeat steps 3 and 4, and then set Size to around 3.00, Dist to 0.10, and Asy to 1.00. Plane spreads the sounds a bit more apart at the maximum setting.
Now that you know how to set up different early reflections sounds, let’s create the other half of our hybrid reverb.
THE REVERB DECAY
To provide the reverb decay, insert the OpenAIR reverb after the Room Reverb. Whenever you call up a new OpenAIR preset, do the following.
- Set ER/LR to 1.00.
- Set Predelay to minimum (-150.00 ms).
- Initially set Envelope Fade-in and Envelope ER/LR-Xover to 0.00 ms.
There are two ways to make a space for the early reflections so that they occur before the reverb tail: set an Envelope Fade-in time, an Envelope ER/LR-Xover time, or both. Because the ER/LR control is set to 1.00 there are no early reflections in the Open AIR preset, so if you set the ER/LR-Xover time to (for example) 25 ms, that basically acts like a 25 ms pre-delay for the reverb decay. This opens up a space for you to hear the early reflections before the reverb decay kicks in. If you prefer a smoother transition into the decay, increase the Envelope Fade-in time, or combine it with some ER/LR-Xover time to create a pre-delay along with a fade-in.
The OpenAIR Mix control sets the balance of the early reflections contributed by the Room Reverb and the longer decay tail contributed by the OpenAIR reverb. Choose 0% for reflections only, 100% for decay only.
…AND BEYOND
There are other advantages of the hybrid reverb approach. In the OpenAIR, you can include its early reflections to supplement the ones contributed by the Room Reverb. When you call up a new preset, instead of setting the ER/LR, Predelay, Envelope Fade-In, and Envelope ER/LR-Xover to the defaults mentioned above, bypass the Room Reverb and set the Open AIR’s early reflections as desired. Then, enable the Room Reverb to add its early reflections, and tweak as necessary.
It does take a little effort to edit your sound to perfection, so save it as an FX Chain and you’ll have it any time you want it.
New from iZotope

We’ve got amazing new stuff from iZotope over at shop.presonus.com! Check out the incredible mastering tools in Ozone, advanced audio restoration in RX 7, and the powerful mixing and analysis tools of Neutron… and more! These advanced audio tools are available both in full versions and lower-priced “Elements” editions. You can even get all of the Elements series in a single, affordable bundle!
Click here to shop and learn more about iZotope Add-ons for Studio One!
New: Overdose Drums from Craft Audio

Click here to hear Overdose Drums and shop!