The Limiter2 Deep Dive
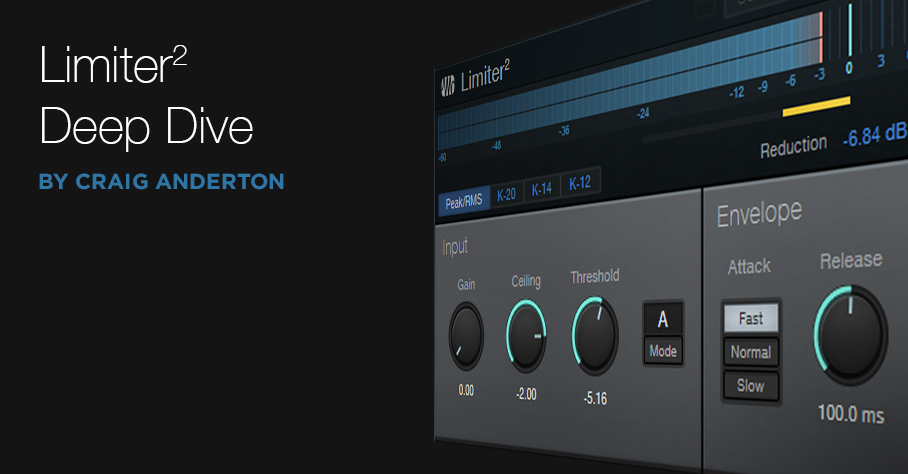
At first, the changes to the effects in Version 5 seem mostly cosmetic. But dig deeper, and you’ll find there’s more to the story—so let’s find out what’s new with Limiter2 (Fig. 1).
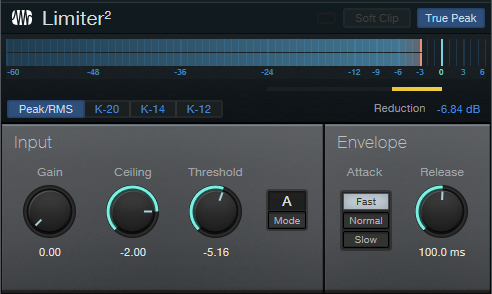
Figure 1: Limiter2 has had several design changes for Version 5.
The control parameters are more logical, and easier to adjust. Prior to V5, there was an unusual, by-design interaction with the Ceiling and Threshold controls; setting Ceiling below Threshold gave the limiter a softer knee. However, the tradeoff was difficulty in obtaining predictable results. Besides, if the soft knee aspect is important to you for dynamics control, just use the Compressor with a really high ratio.
In Limiter2, the Threshold is relative to the Ceiling—the Ceiling sets Limiter2’s absolute maximum level, while Threshold sets where limiting begins below the Ceiling, based on the Threshold parameter value. For example, if Ceiling is 0.00 and Threshold is -6.00, then the limiter’s threshold is ‑6.00 dB. But if the Ceiling is ‑3.00 dB and the Threshold is -6.00, then the limiter’s Threshold is -9.00 dB. Makeup gain occurs automatically so that as you lower the Threshold parameter, the output level increases as needed to meet the Ceiling’s target output level.
Modes and Attacks
There are now two Modes, A and B, and three Attack time settings. The pre-V5 Limiter had less flexible attack options, which mostly impacted how it responded to low-frequency audio; the waveform could have some visible distortion when first clamped, but the distortion would disappear after the attack time completed.
I’ll spare you the hours I spent listening and nerding around with the (highly underrated) Tone Generator and Scope plug-ins to analyze how the new options affect the sound, so here’s the bottom line.
In applications where you want to apply something like 6 dB of peak reduction to make a track or mix “pop,” the Limiter2 performance in Mode A is essentially perfect. Unless you’re into extreme amounts of limiting or material with lots of low frequencies, Mode A should cover what you need 95% of the time (and it also outperforms the pre-V5 limiter).
If you’re using Limiter2 as a brickwall limiter to keep transients from spilling over into subsequent stages, then use Mode A/Fast attack for the highest fidelity and give up a tiny bit of headroom, or Mode B/Fast Attack for absolute clamping.
Fig. 2 shows how the fast and slow times compare. The following were all set for 50 ms release times, 1 kHz sine wave input, and -20 dB Threshold—so Limiter2 was being hit pretty hard.
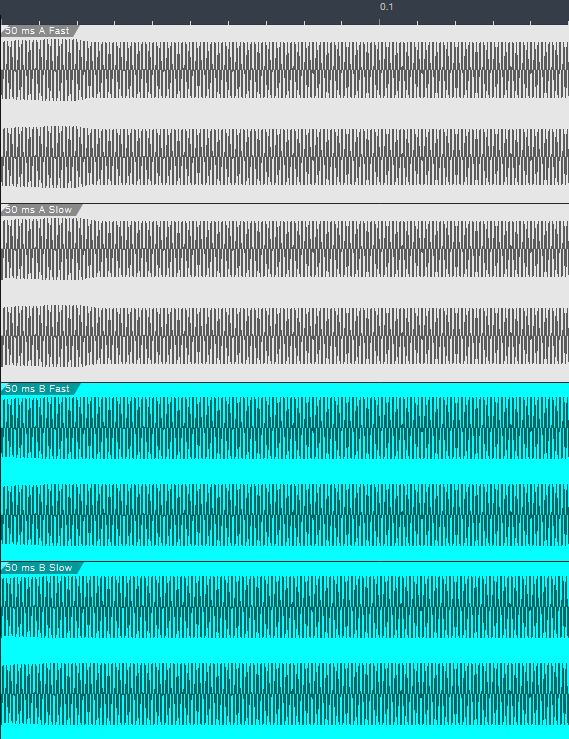
Figure 2: Fast and Slow attacks compared for Modes A and B, cropped to 150 ms duration. Top to bottom: Mode A/Fast, Mode A/Slow, Mode B/Fast, Mode B/Slow.
The visuals are helpful, but on signals with fast transients, you may hear more of a difference with the different attack times than these images might indicate. Nonetheless, it’s clear that Mode B/Fast is super-fast. If you look carefully at Mode A/Slow, you’ll see a very tiny downward blip on the first cycle of the attack (it’s less visible on Mode B/Slow). Mode A takes about 20 ms to settle down to its final level.
Low-Frequency Performance
For more background on the nuts and bolts of how this works, the tradeoff for Mode B’s higher speed mostly involves very low frequencies (under 80 Hz or so, and especially under 50 Hz). With a 50 Hz sawtooth wave, 100 ms Release, and a significant amount of limiting, Mode B/Slow gives some visible overshoot and distortion. Mode B/Fast reduces the overshoot but increases distortion. Mode A does less of both—with Slow, there’s less overshoot, and with Fast, there’s less distortion. Note that any distortion or overshoot occurs only when pushing Limiter2 to extremes: very low-frequency waveforms, with steep rise/fall times, short release times, and lots of limiting. However, this is mostly of academic interest with waveforms that have lots of harmonics, like sawtooth and square. The level of the harmonics is high enough to mask any low-level harmonics generated by distortion.
I also tested with a sine wave, which gives an indication of what to expect with audio like a kick drum (e.g., 40-60 Hz fundamental) or low bass notes. Mode B/Fast has less distortion than Mode B/Slow, while Mode A, fast or slow, flattens peaks almost indiscernibly (Fig. 3).
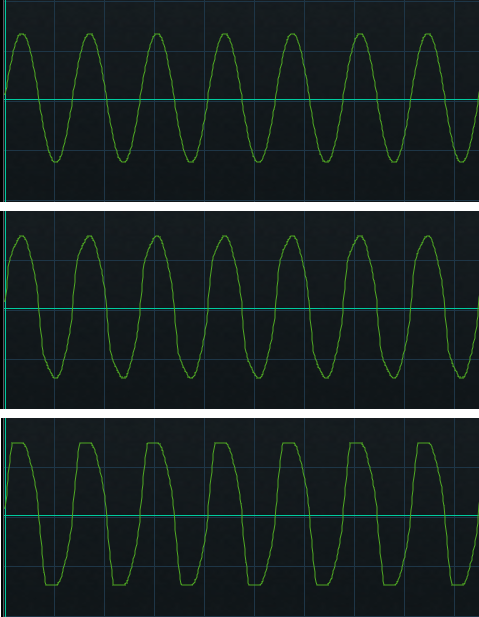
Figure 3: A 30 Hz sine wave with about 15 dB of limiting. Top: A Mode. Middle: B Mode/Fast. Bottom: B Mode/Slow.
In this situation, Mode A would likely be my choice, but as always, use your ears—the light distortion from Mode B can actually enhance kick drum and bass tracks. Also note that which mode to use depends on the release time. For example, with a short (35 ms) release, B/Slow had the most audible distortion, B/Fast was next, and B/Normal had no audible distortion.
While I was in testing mode, I decided to check out some third-party limiters (Fig. 4) with a different program. These are all marketed as “vintage” emulations, and set to the fastest possible attack time.
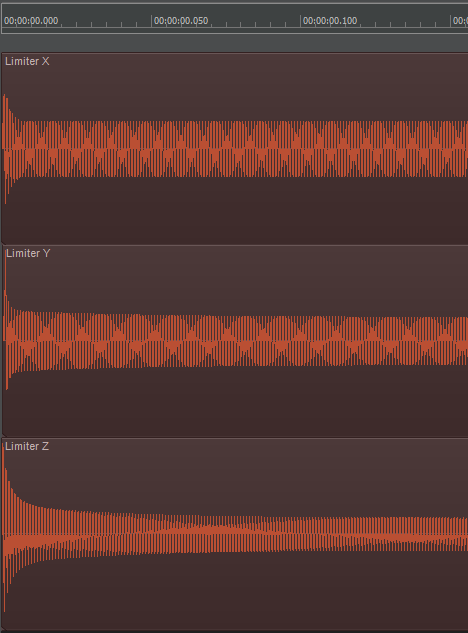
Figure 4: The results of testing some other limiters.
In case you wondered why some people say these vintage limiters have “punch”…now you know why! The time required to settle down to the final level is pretty short (except for the bottom one), but the limiter doesn’t catch the initial peaks. This is why you can insert one of these kinds of limiters, think you’re limiting the signal, but the downstream overload indicators still light on transients. Incidentally, the Fat Channel’s Tube limiter has this kind of “vintage punch” response in the Limit mode, while the Fat Channel’s one-knob, final limiter stage—although basic—is highly effective at trapping transients.