Friday Tips: Multiband Processing Development System
I’m a big fan of multiband processing. This technique divides a signal into bands (I generally choose lows, low mids, mids, and high mids), processes each band independently, then sums the bands’ outputs back together again.
I first used multiband processing in the early 80s, with the Quadrafuzz distortion unit (later virtualized by both Steinberg and MOTU). This produces a “cleaner” distortion sound because you didn’t have the intermodulation distortion caused by low strings and high strings interacting with each other. However, multiband processing is also useful with delay, like using shorter delays on lower frequencies, and longer delays on higher frequencies…or chorus, if you want a super-lush sound. But there are other cool surprises, like using different effects in the different bands, or using envelope filters.
So for Studio One, I’ve created a multiband processing “development system” for creating new multiband effects—and that’s the subject of this tip.When I find an effect I like, it gets turned into a fixed FX chain that uses the Splitter module’s multi-band capabilities instead of buses to create four parallel signal paths.
Band Splitting
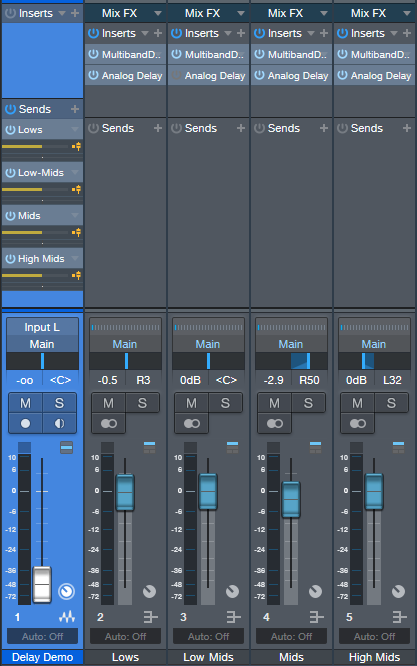
Figure 1: The Multiband Processing Development System, set to evaluate multiband processing with analog delay.
Start by creating four pre-fader sends to feed four buses (fig. 1). Each bus handles a specific frequency range. The simplest way to create splits is with the Multiband Dynamics set to no compression, so it can serve as a crossover.
To create the bands, insert a Multiband Dynamics processor in one of the buses, open it, and set the compression Ratio for all Multiband Dynamics bands to 1:1. This prevents any compression from occurring.
Referring to fig. 2, as you play your instrument (or other signal source you want to process), solo the Low band. Then adjust the Low / Low-Mid X-Over Frequency control to set the dividing frequency between the low- and low-mid band.
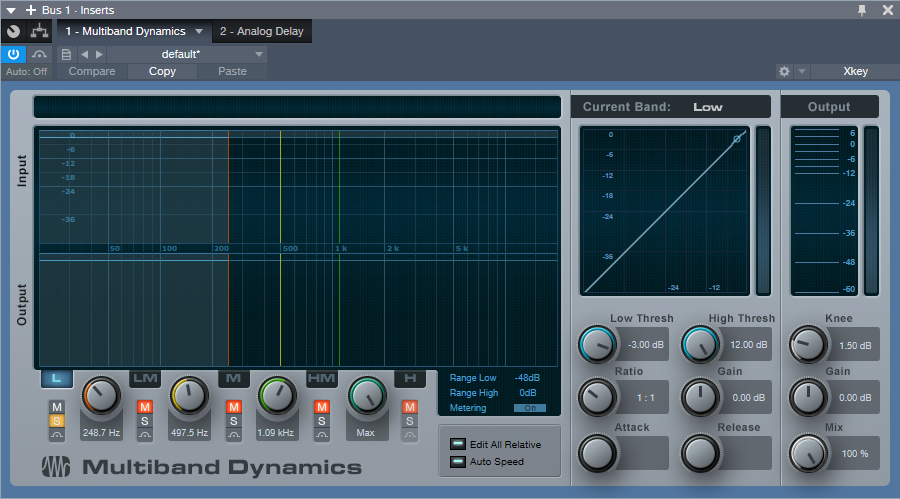
Figure 2: Use the Multiband Dynamics processor to create the individual band in each bus.
Next, solo the Low Mid band and adjust its frequency control. Use a similar procedure on each band until you’ve chosen the frequencies you want each band to cover. For guitar, having more than four bands isn’t all that necessary, so I normally set the frequency splits to around 250 Hz, 500 Hz, and 1 kHz. The resulting bands are:
- Below 250 Hz
- 250 – 500 Hz
- 500 – 1,000 Hz
- Above 1,000 Hz
Setting the Mid-High / High X-Over Frequency to Max essentially removes the Multiband Dynamics’ top band.
After choosing the frequency bands, copy the Multiband Dynamics processor to the other three buses. Solo the Low band for one bus, the Low Mid in the next bus, the Mid in the next bus, and finally, the High Mids in the fourth bus. Now each bus covers its assigned frequency range.
At this point, all that’s left is to insert your processor(s) of choice into each band. Don’t forget that you can experiment with panning the different bands, changing levels, altering sends to the buses to affect distortion drive, and more. This type of setup allows for a ton of options…so get creative!