Better Reverb with Frequency Splitting
It’s convenient that Studio One has three significantly different reverbs, but none of them has separate decay times for high and low frequencies. This is one of my favorite reverb features, because (for example) you can have a tight kick ambiance, but let the hats and cymbals fade out in a diaphanous haze…or have a huge kick that sounds like it was recorded in a gothic castle, with tight snare and cymbals on top. Also with highly percussive drums, sometimes I’d like a little more diffusion than what’s available so that reflections aren’t perceived as discrete echoes, but rather, as a smooth wash of sound.
So let’s build the ideal Room Reverb for drums (other instruments, too). There’s a downloadable FX Chain that provides a big drum sound template, but note that the preset control settings cover only one sound out of a cornucopia of possible effects. Once you start modifying the reverb sounds themselves, as well as some of the parameters in the Routing window itself, anything’s possible.
ROUTING AND MACRO CONTROLS
Here’s the FX Chain routing.
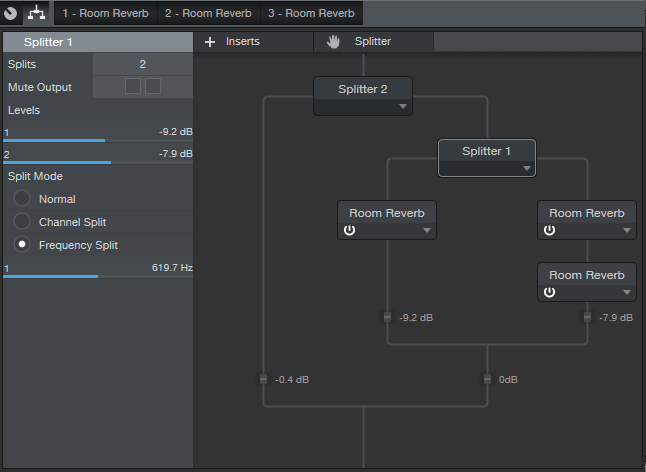
Splitter 2 provides a Normal split. One split handles the dry signal, while the other goes to the reverbs. Splitter 1 does a Frequency split, with one split going to a single Room Reverb dedicated to the low frequencies, and the other split going to two Room Reverbs in series for the high frequencies. The Split point (crossover frequency) is set around 620 Hz, but varying this parameter provides a wide variety of sounds.
You might wonder “why not just feed two reverbs, and EQ their output?” EQing before going into the reverb gives each reverb more clarity, because the low and high frequencies don’t interact with each other in the process of being reverberated.
The three Mixtool modules provide mixing for the dry, low reverb, and high reverb sounds, as represented by the first three Macro controls. The other controls modify reverb parameters, but of course, these are only some of the editable parameters available for adjustment within the Room Reverb.
HOW TO USE IT
Here’s one option, although I don’t claim that it’s necessarily “best practices” (suggestions are welcome in the Comments section!).
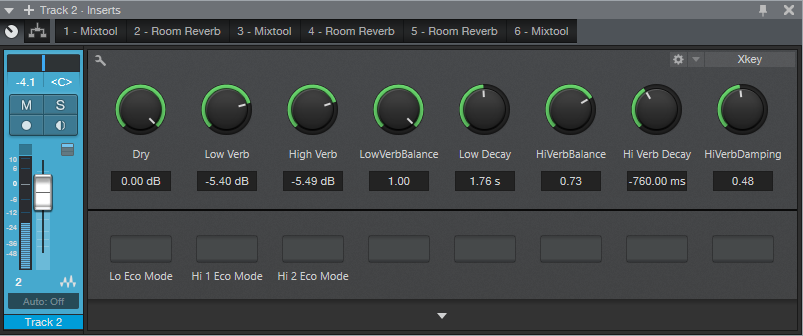
Start with the Dry, Low Verb, and High Verb controls at minimum. Bring up the Low Verb, and adjust Low Verb Balance and Low Decay for desired low end. Then turn down Low Verb, bring up High Verb, and adjust its associated controls (Hi Verb Balance, Hi Verb Decay, and Hi Verb Damping). With both Low Verb and High Verb set more or less the same, go into the Routing section and vary Splitter 1’s crossover frequency (the slider below Frequency Split). After finding the optimum crossover point, re-tweak the mix if necessary.
Finally, choose a balance of all three levels, and you’re good to go.
WHAT ABOUT THE REVERBS THEMSELVES?
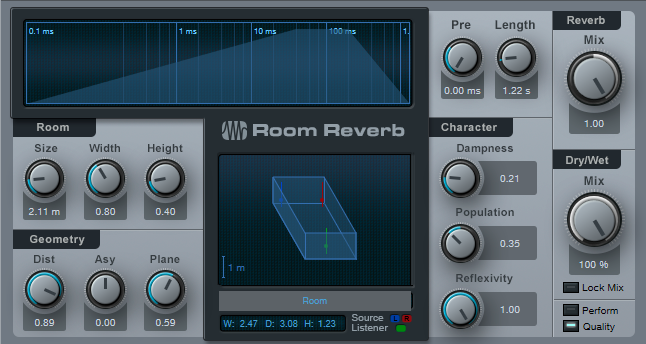
For the default FX Chain preset, the Low Verb has a shorter delay than the High Verbs, but still gives a big kick sound.
The reason for using two Room Reverbs in series for the high reverb component is to increase the amount of diffusion, and provide a smoother sound.
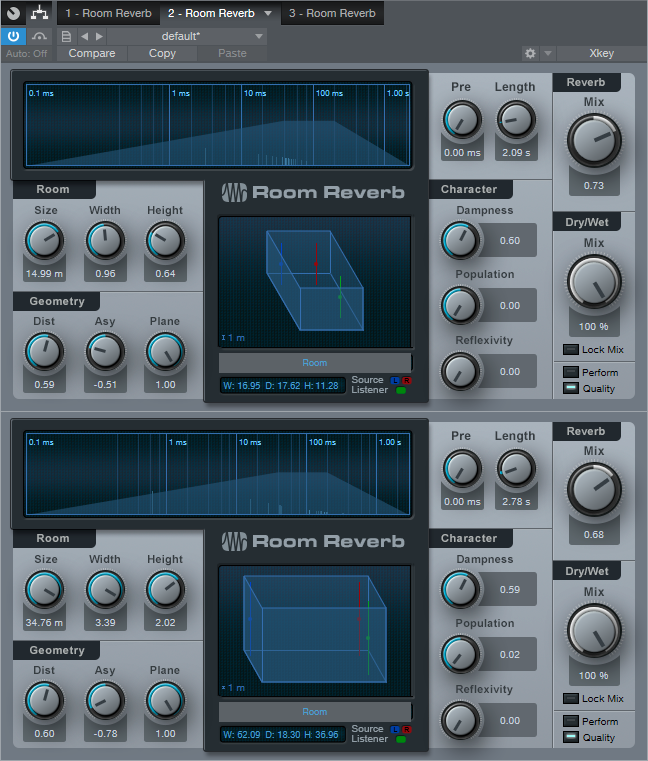
You want fairly different settings for the two reverbs so that they blend, thus giving the feel of more diffusion. There’s not really a lot of thought behind the above settings; I just copied one of the reverbs and changed a few parameters until the sound was smooth.
Incidentally, three Room Reverbs requires a decent amount of CPU, so there are switches at the bottom of the Macro Controls to enable the “eco” mode for each reverb. Choosing eco for the low frequency reverb impacts the sound less than choosing eco for the two high frequency reverbs.
IT’S A WRAP
Download the FX Chain and check out what this FX Chain can do—I think you’ll find that when it comes to reverbs, third time’s a charm.
Click here to get the FX Chain preset!