Import JPG/PNG Files into the Video Track
This builds on last week’s tip about splitting and navigating within the Video Track, because one of the main reasons for creating splits is to import additional material. Although the Video Track can accept common video file formats, sometimes you’ll need to import static JPG or PNG images. These could be a band logo, screen shots for a tutorial video, a slide with your web site and contact information, photos from a smartphone, public domain images, etc. To bring them into the video track, you need to convert them into a compatible format, like MP4.
Many online sites offer to “convert JPEG to MP4 for free!” However, I’m skeptical of those kinds of sites. Fortunately, modern Mac and Windows operating systems include tools that can do any needed conversion.
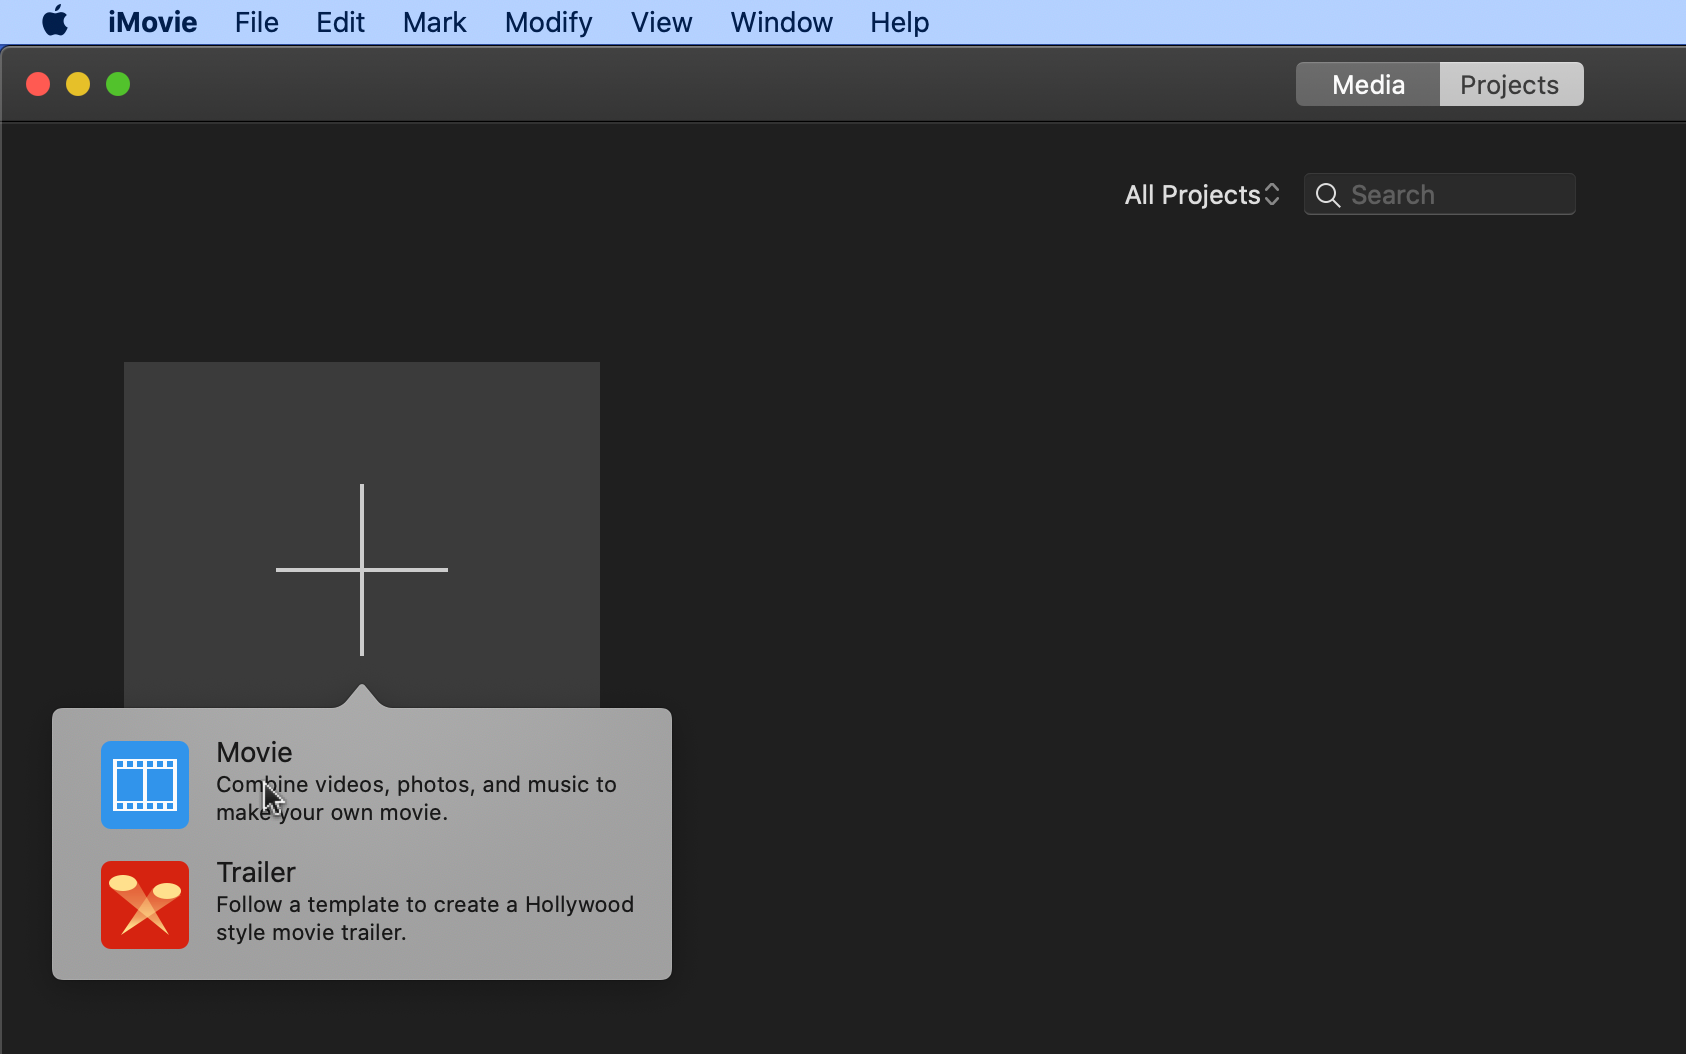
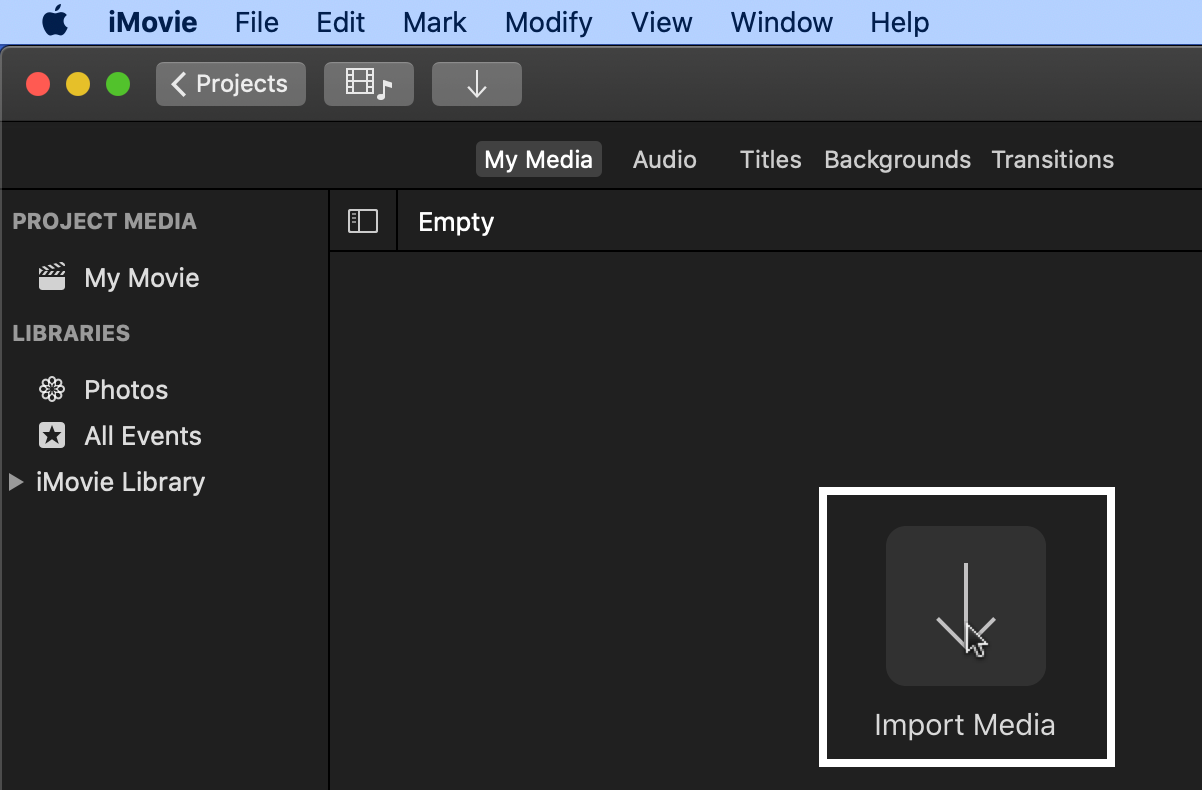
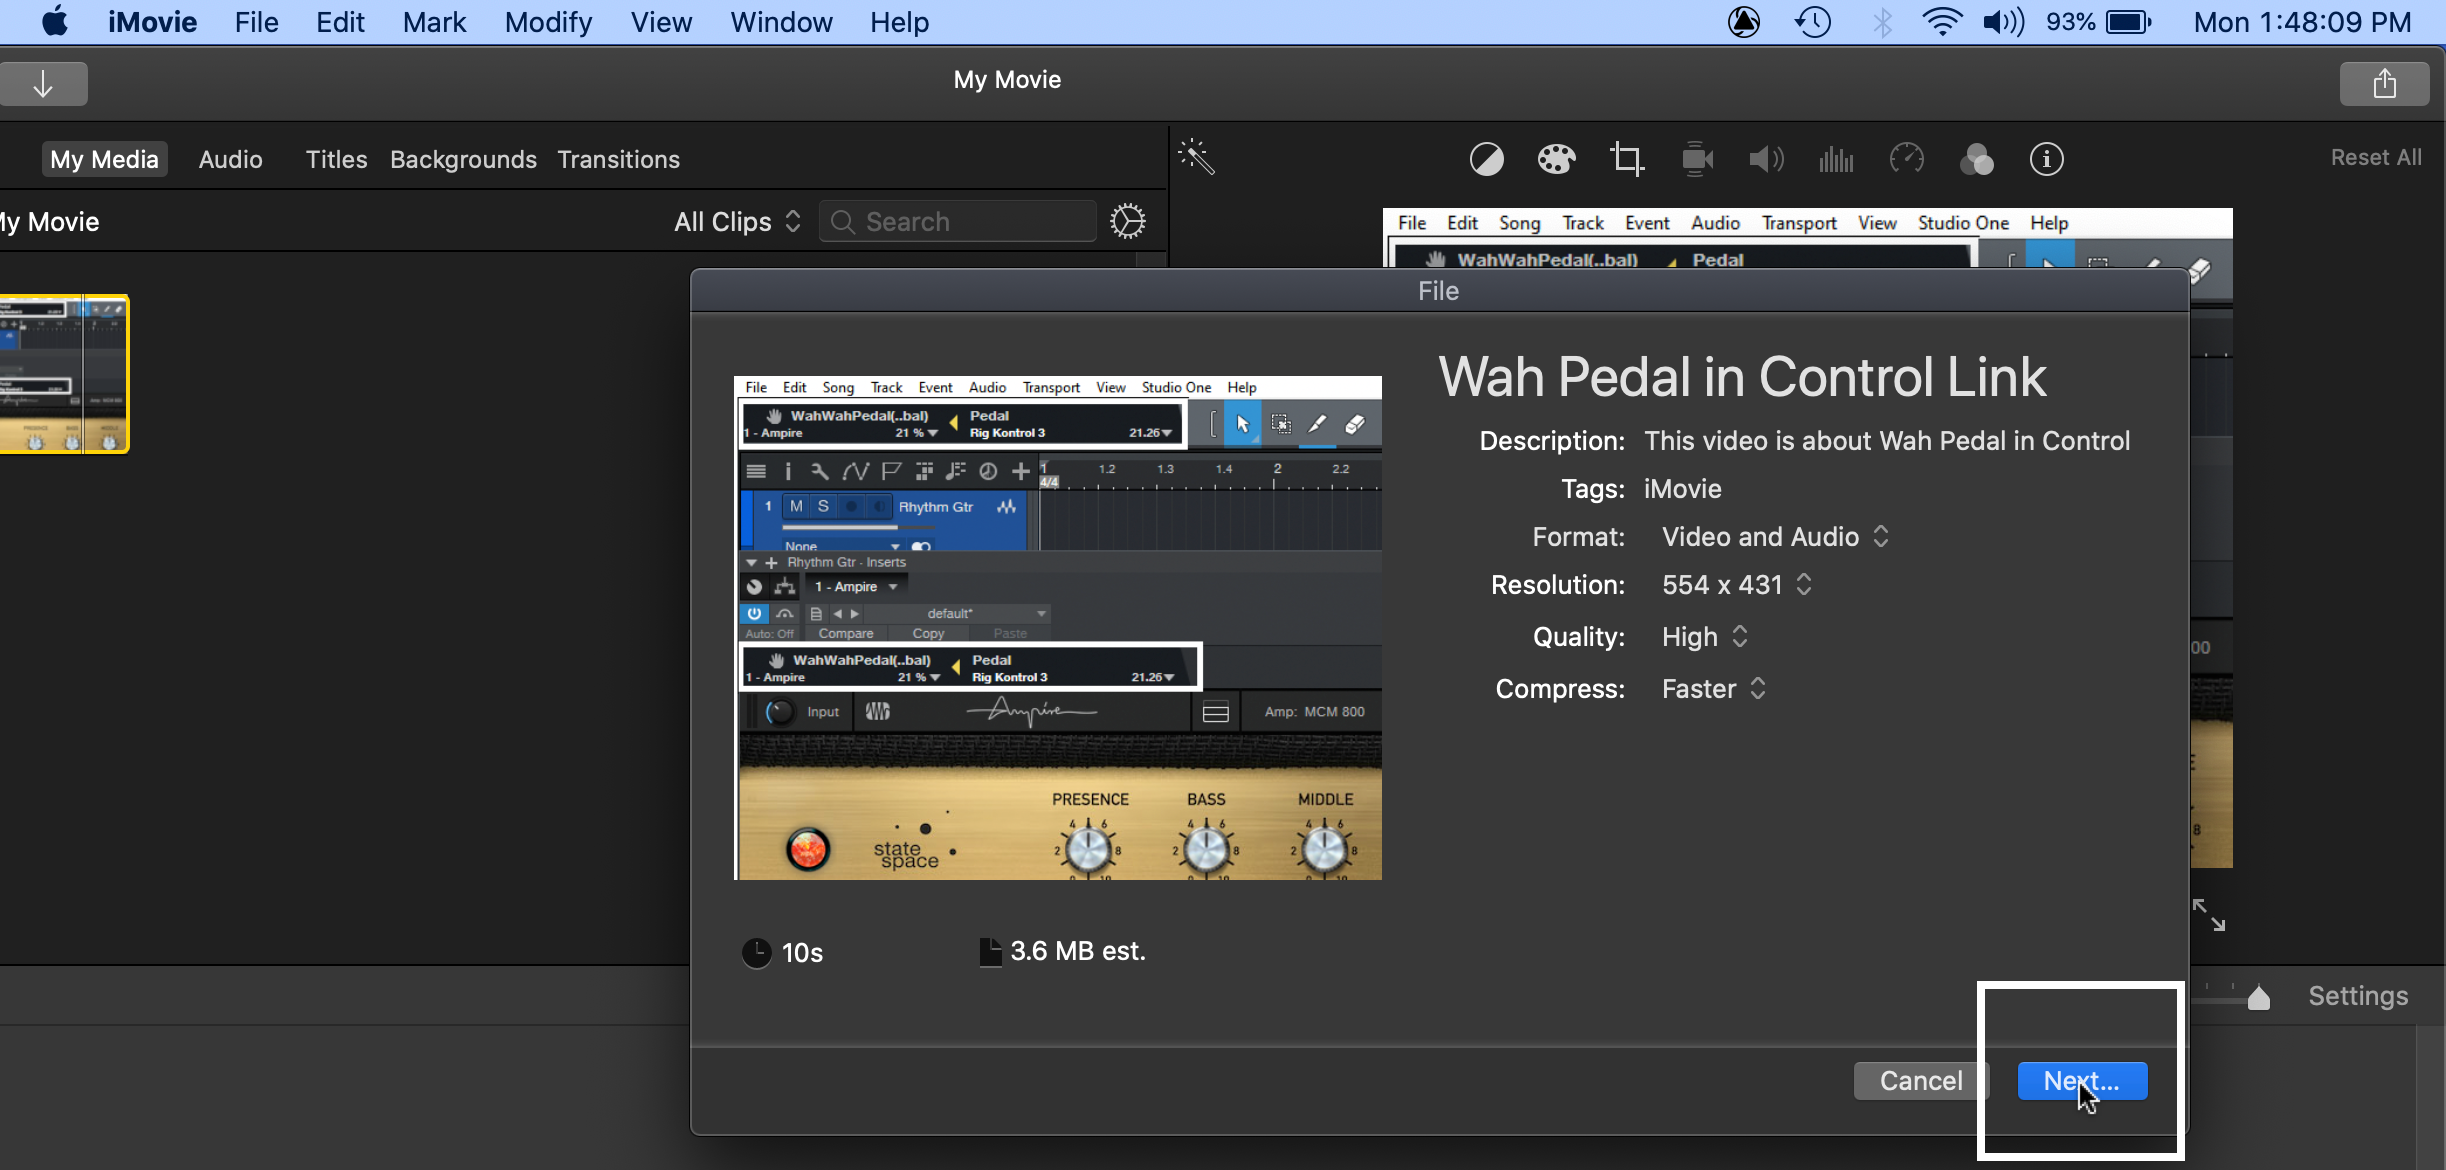
Converting with the Mac
1. Open iMovie, click on Create New, and then choose Movie.
2. Click on Import Media. Navigate to the location of the image you want to convert, and open it in iMovie.
3. Choose File > Share > File.
4. In the window that opens, click Next…
5. Navigate to where you want to save the file, and click on Save. You now have an MP4 file.
If you need a longer video than the default 3 seconds, drag more copies of the file to the timeline before saving. Or, drag the file into Studio One multiple times.
Converting with Windows
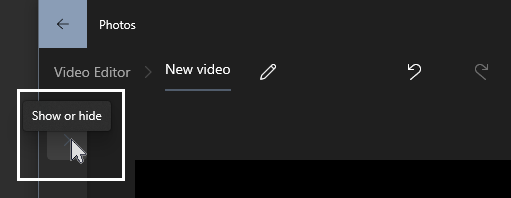
1. Open Video Editor (it’s not necessary to install Clipchamp). Click on New Video, and name it.
2. Click on the nearly invisible Project Library button.
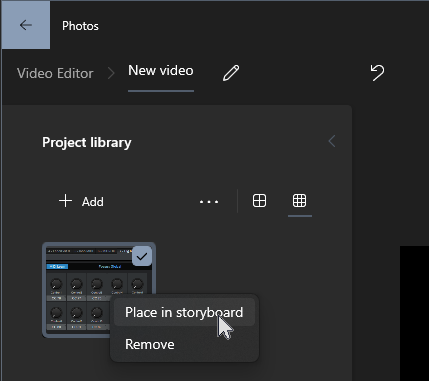
3. Drag the image you want to convert into the Library. Then right-click on the image, and choose Place in Storyboard. The default length is 3 seconds. If it needs to be longer, select Place in Storyboard again. Or, drag the finished file into Studio One multiple times.
4. Click on Finish video (in the upper right), then click on Export.
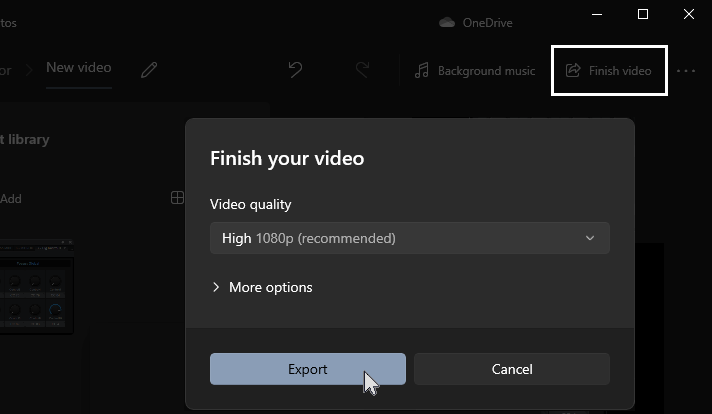
5. Name the file, navigate to where you want to save it, then click on Export. Done! Your image is now an MP4 video you can insert into Studio One.