Mid-Side Reverb for Studio One Artist (and Pro)
But first: free stuff news! The eBook How to Create Compelling Mixes in Studio One Version 2.0 is now available as a free update to anyone who bought the original version (for new buyers, it’s $14.95)—just go to your PreSonus account, and download it. There’s new material on mix referencing and LCR mixing, numerous tweaks, additional tips, and a new layout that’s more smartphone- and tablet-friendly.
Okay…back to reverb. The blog post Mid-Side Meets Reverb used the Splitter, which is included only in Studio One Pro. However, when the post got comments like “OMG! Just did this for a simple guitar and vocal demo, and now it sounds massive and super-professional. This technique really gives space and depth to the mix!,” I thought I’d better come up with an Artist-friendly version. Pro users might even prefer this bus-oriented implementation. And because the tip is dedicated to reverb, it’s simpler than the more general-purpose blog post on Mid-Side Processing with Artist (which includes a refresher course on mid-side processing, if you need more background).
How It Works
It’s common practice to use a track send to feed audio to a reverb bus. But with this mid-side technique, there are two sends, which feed two reverb buses. One bus has reverb for the Mid (centered) audio (like bass, kick, snare, etc.), while the other reverb processes the Sides (what’s panned more toward the left and right, like hi-hat, doubled guitars, background vocalists, room mics, etc.). This can give an outstanding stereo image, more flexible editing, and you can use different reverbs for the mid and sides. Also, for those who like to use a dedicated vocal reverb, if the vocal is mixed to center it won’t be influenced by the reverb used on other instruments.
Fig. 1 applies this technique to processing a mixed drum loop.
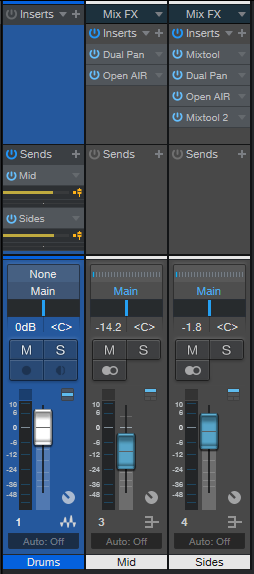
Figure 1: Mid and Sides reverb buses, being fed by a mixed drum loop.
The mid audio is just the sum of the left and right channels, so all we need is a Dual Pan before the mid reverb, with both controls panned to center (Fig. 2).
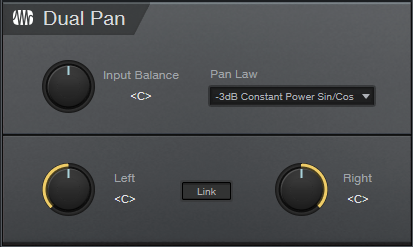
Figure 2: Dual Pan settings for the Mid reverb bus.
Fig. 3 shows the effects used in the Sides reverb bus.
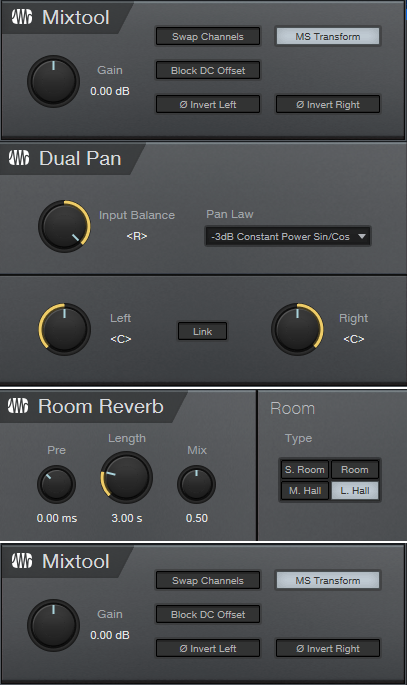
Figure 3: Effects for the Sides reverb bus.
When a signal enters the Sides bus, the first Mixtool encodes the audio. The sides end up on what would usually be a stereo signal’s right channel, while the mids occupy what would normally be the left channel. By setting the Dual Pan Input Balance to right, only the sides go to your reverb of choice (it doesn’t have to be Room Reverb). Then, the processed sides go to the bottom Mixtool, which decodes the sides back into standard stereo.
Now you’re ready to choose your balance of the Mid and Sides reverb. Note that bringing up the sides widens the stereo image. The audio example plays a 4-measure drum loop without reverb, then only the mid reverb, then only the sides, then both together, then fades out on the dry drums.
For the reverbs, my go-to is the Open Air reverb, with impulses from the Surreal Reverb Impulse Responses pack. The Sides reverb uses the 4.00s Bright impulse, while the Mid uses the 2.00s Thinner impulse. The “Thinner” impulse reduces the bass response, so instruments like kick and bass don’t clutter up the reverb, but snare and other midrange instruments panned to center get reverb.
Happy ambiance!