Friday Tips: The Limiter—Demystified
Conventional wisdom says that compared to compression, limiting is a less sophisticated type of dynamics control whose main use is to restrict dynamic range to prevent issues like overloading of subsequent stages. However, I sometimes prefer limiting with particular signal sources. For example:
- For mixed drum loops, limiting can bring up the room sound without having an overly negative effect on the drum attacks.
- With vocals, I often use a limiter prior to compression. By doing the “heavy lifting” of limiting peaks, the subsequent compressor doesn’t have to work so hard, and can do what it does best.
- When used with slightly detuned synth patches, limiting preserves the characteristic flanging/chorusing-like sound, while keeping the occasional peaks under control.
- Limiting is useful when following synth sounds with resonant filters, or with instruments going through wah or autofilter effects
THE E-Z LIMITER
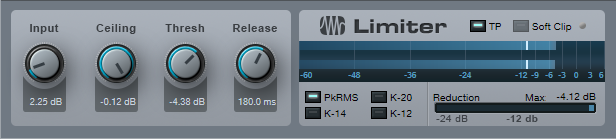
Some limiters (especially some vintage types) are easy to use, almost by definition: One control sets the amount of limiting, and another sets the output level. But Studio One’s limiter has four main controls—Input, Ceiling, Threshold, and Release—and the first three interact.
If the Studio One Limiter looked like Fig. 1, it would still take care of most of your needs. In fact, many vintage limiters don’t go much beyond this in terms of functionality.
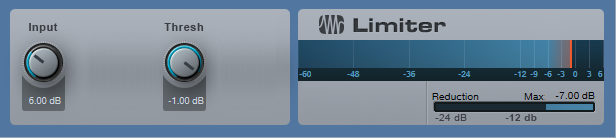
Figure 1: If Studio One’s Limiter had an “Easy Mode” button, the result would look something like this.
To do basic limiting:
- Load the Limiter’s default preset.
- Turn up the input for the desired limiting effect. The Reduction meter shows the amount of gain reduction needed to keep the output at the level set by the Threshold control (in this case, -1.00 dB). For example, if the input signal peaks at 0 dB and you turn up the Input control to 6 dB, the Limiter will apply 7 dB of gain reduction to keep the Limiter output at -1.00.
Note that in this particular limiting application, the Threshold also determines the maximum output level.
THE SOFT CLIP BUTTON
When you set Threshold to a specific value, like 0.00 dB, then no matter how much you turn up the Limiter’s Input control, the output level won’t exceed 0.00 dB. However, you have two options of how to do this.
- With Soft Clip off, gain reduction alone prevents the waveform from exceeding the ceiling.
- With Soft Clip on, clipping the peaks supplements the gain reduction process to keep the waveform from exceeding the ceiling (Fig. 2).
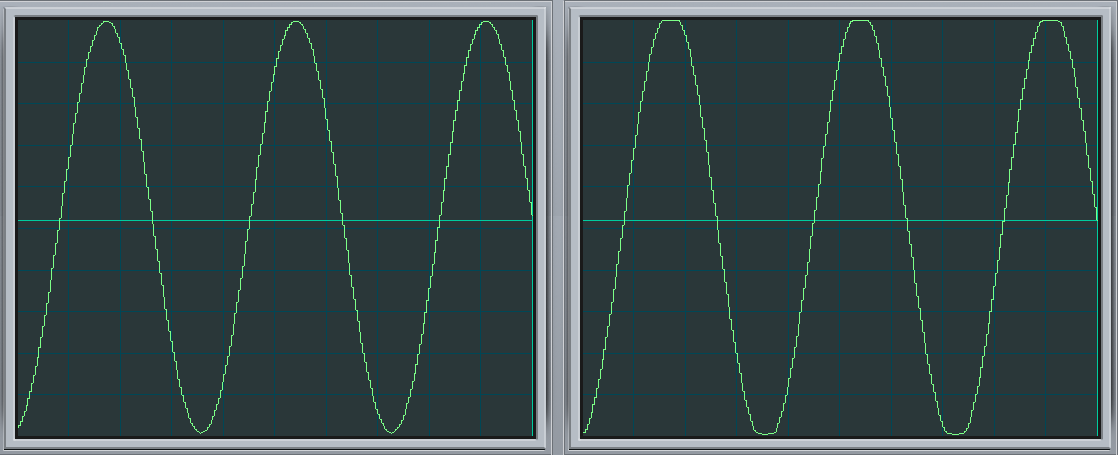
Figure 2: The left screen shot shows the waveform with the input 6 dB above the Threshold, and Soft Clip off. The right screen shows the same waveform and levels, but with Soft Clip turned on. Note how the waveform peak is flattened somewhat due to the mild saturation.
While it may sound crazy to want to introduce distortion, in many cases you’ll find you won’t hear the effects of saturation, and you’ll have a hotter output signal.
ENTER THE CEILING
There are two main ways to set the maximum output level:
- With the Threshold set to 0.00, set the maximum output level with the Ceiling control (from 0 to -12 dB).
- With the Ceiling set to 0.00, set the maximum output level with the Threshold control (from 0 to -12 Db).
It’s also possible to set maximum output levels below -12.00 dB. Turn either the Ceiling or Threshold control all the way counter-clockwise to -12.00 dB, then turn down the other control to lower the maximum output level. With both controls fully counter-clockwise, the maximum output level can be as low as -24 dB.
SMOOTHING THE TRANSITION INTO LIMITING
Setting the Ceiling lower than the Threshold is a special case, which allows smoothing the transition into limiting somewhat. Under this condition, the Limiter applies soft-knee compression as the input transitions from below the threshold level to above it.
For example, suppose the Ceiling is 0.00 dB and the Threshold is -6.00 dB. As you turn up the input, you would expect that the output would be the same as the input until the input reaches around -6 dB, at which point the output would be clamped to that level. However in this case, soft-knee compression starts occurring a few dB below -6.00 dB, and the actual limiting to -6.00 dB doesn’t occur until the input is a few dB above -6.00 dB.
The tradeoff for smoothing this transition somewhat is that the Threshold needs to be set below 0.00. In this example, the maximum output is -6.00 dB. If you want to bring it up to 0.00 dB, then you’ll need to add makeup gain using Mixtool module.
Studio One’s Limiter is a highly versatile signal processor, so don’t automatically ignore it in favor of the Compressor or Multiband Dynamics—with some audio material, it could be exactly what you need.