Tag Archives: Studio One
End Boring MIDI Drum Parts!
I like anything that kickstarts creativity and gets you out of a rut—which is what this tip is all about. And, there’s even a bonus tip about how to create a Macro to make this process as simple as invoking a key command.
Here’s the premise. You have a MIDI drum part. It’s fine, but you want to add interest with a fill in various measures. So you move hits around to create a fill, but then you realize you want fills in quite a few places…and maybe you tend to fall into doing the same kind of fills, so you want some fresh ideas.
Here’s the solution: Studio One 4.5’s new Randomize menu, which can introduce random variations in velocity, note length, and other parameters. But what’s of interest for this application is the way Shuffle can move notes around on the timeline, while retaining the same pitch. This is great for drum parts.
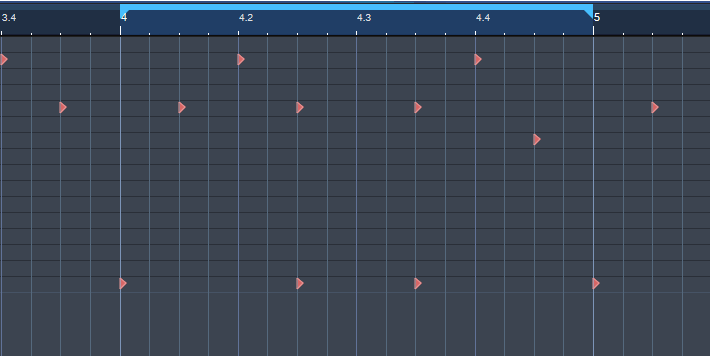
The following drum part has a really simple pattern in measure 4—let’s spice it up. The notes follow an 8th note rhythm; applying shuffle will retain the 8th note rhythm, but let’s suppose you want to shuffle the fills into 16th-note rhythms.
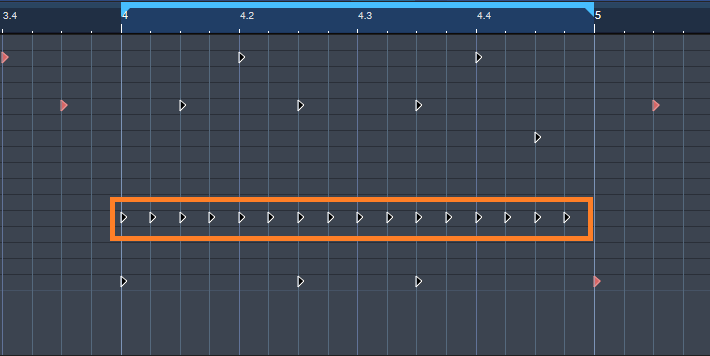
Here’s a cool trick for altering the rhythm. If you’re using Impact, mute a drum you’re not using, and enter a string of 16th notes for that drum (outlined in orange in the following image). Then select all the notes you want to shuffle.
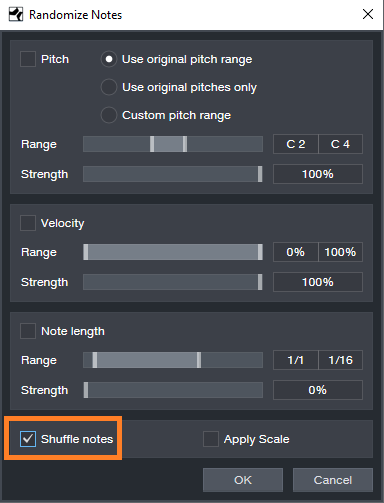
Go to the Action menu, and under Process, choose Randomize Notes. Next, click the box for Shuffle notes (outlined in orange).
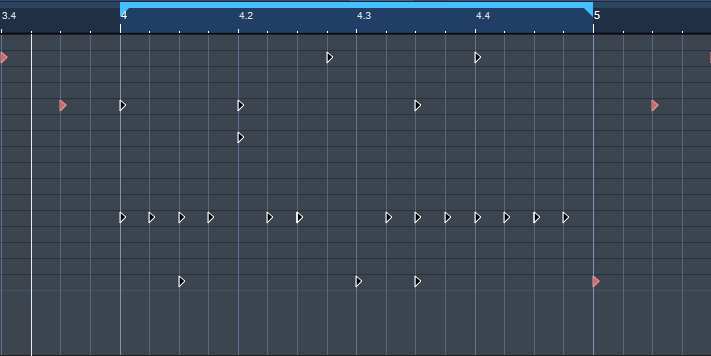
Click on OK, and the notes will be shuffled to create a new pattern. You won’t hear the “ghost” 16th notes triggering the silent drum, but they’ll affect the shuffle. Here’s the pattern after shuffling.
If you like what you hear from the randomization, great. But if not, adding a couple more hits manually might do what you need. However, you can also make the randomizing process really efficient by creating a Macro to Undo/Shuffle/hit Enter.
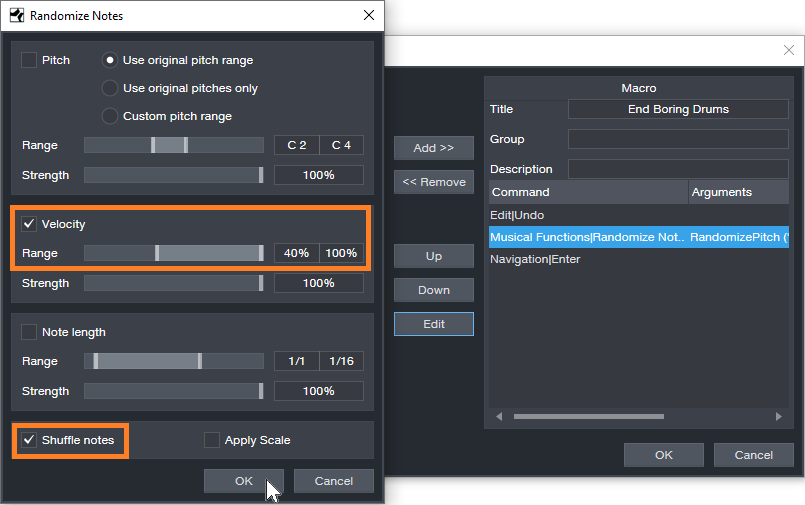
Create the Macro by clicking on Edit|Undo in the left column, and then choose Add. Next, add Musical Functions|Randomize. For the Argument, check Shuffle notes; I also like to randomize Velocity between 40% and 100%. The last step in the Macro is Navigation|Enter. Finally, assign the Macro to a keyboard shortcut. I assigned it to Ctrl+Alt+E (as in, End Boring Drum Parts).
With the Macro, if you don’t like the results of the shuffle, then just hit the keyboard shortcut to initiate another shuffle…listen, decide, repeat as needed. (Note that you need to do the first in a series of shuffles manually because the Macro starts with an Undo command.) It usually doesn’t take too many tries to come up with something cool, or that with minimum modifications will do what you want. Once you have a fill you like, you can erase the ghost notes.
If the fill isn’t “dense” enough, no problem. Just add some extra kick, snare, etc. hits, do the first Randomize process, and then keep hitting the Macro keyboard shortcut until you hear a fill you like. Sometimes, drum hits will end up on the same note—this can actually be useful, by adding unanticipated dynamics.
Perhaps this sounds too good to be true, but try it. It’s never been easier to generate a bunch of fills—and then keep the ones you like best.
Friday Tips: The Air Machine
Boosting the highs a bit is a time-honored mixing and mastering technique. You don’t want to overdo it, but a little brightness can give a song a lift, increase vocal intelligibility, articulate instruments better, and add some welcome “ear candy.” If you look at the spectral energy of a lot of hit records going back decades, you’ll often find a few extra dB of boost in the 7 to 10 kHz range, to add some “air” and sweetness.
So just boost the EQ a little bit, right? Well, that’s one option…but we can do better. The Air Machine FX Chain (Fig. 1) is equally at home on individual tracks in the Song page (try it judiciously on drums, drum room mics, acoustic guitar, piano, vocals, etc.), or on finished mixes in the Project page. And yes, there’s a download at the end so you don’t even have to create this yourself.
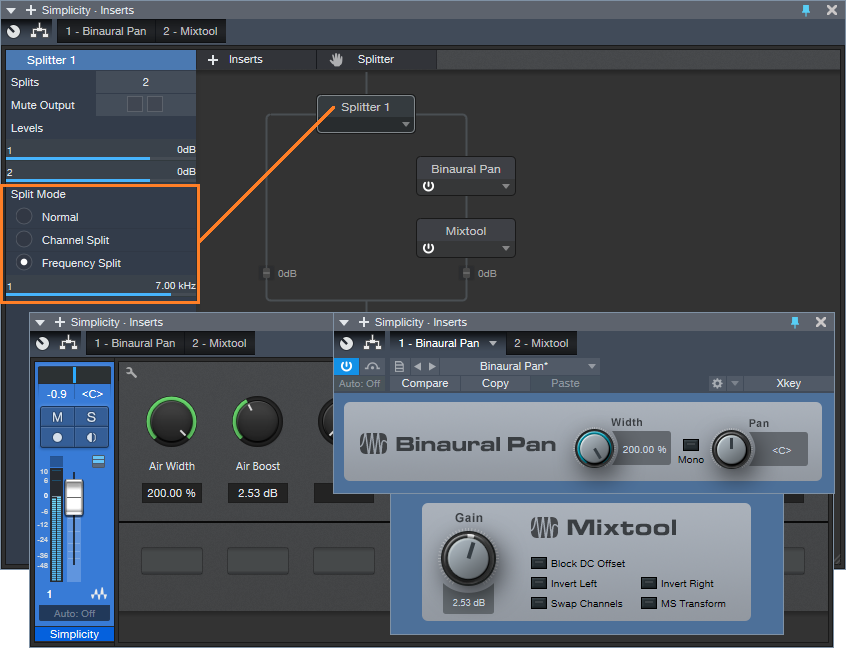
Figure 1: The Air Machine modules.
Here’s how it works. By choosing the Splitter’s Frequency Split mode (outlined in orange), the Splitter acts as a crossover that sends the high frequencies through the right-hand split. The default crossover frequency is 7 kHz, but we’ll have more to say about this later.
The high frequencies then go through the Binaural Pan processor, which spreads out the stereo imaging. Because high frequencies are very directional, this not only increases the sense of “air,” but the feeling of space. Then, the Mixtool adds the appropriate amount of high-frequency boost.
As to assigning controls to the FX Chain, see Fig. 2.

Figure 2: Under the hood of the Air Machine FX Chain.
The Air Width parameter alters the Binaural Pan Width parameter over its full range. The Air Boost control sweeps from no boost (0 dB Gain on the Mixtool) up to a maximum of about 6 dB. You really don’t want to go any higher than that.
The one control I couldn’t put in the FX Chain was the Splitter’s crossover frequency, so you may want to open up the FX Chain to alter this. The higher the frequency, the more boost you can apply without the high frequencies becoming overbearing. Sometimes, though, you might want to bring the crossover frequency down to 5 kHz or so if you want a more pronounced effect…or even up to 10 kHz for just a light dusting of high frequencies.
Yes, it really is that simple. And yes, the effect is best when used subtly. But try it—I think there’s a chance this may end up becoming one of your favorite FX Chains.
Download the Air Machine FX Chain here.
The Latest and Greatest Just Added to the SHOP!
We recently welcomed a lot of newcomers to the PreSonus Shop! Here’s a round-up of all the latest additions.
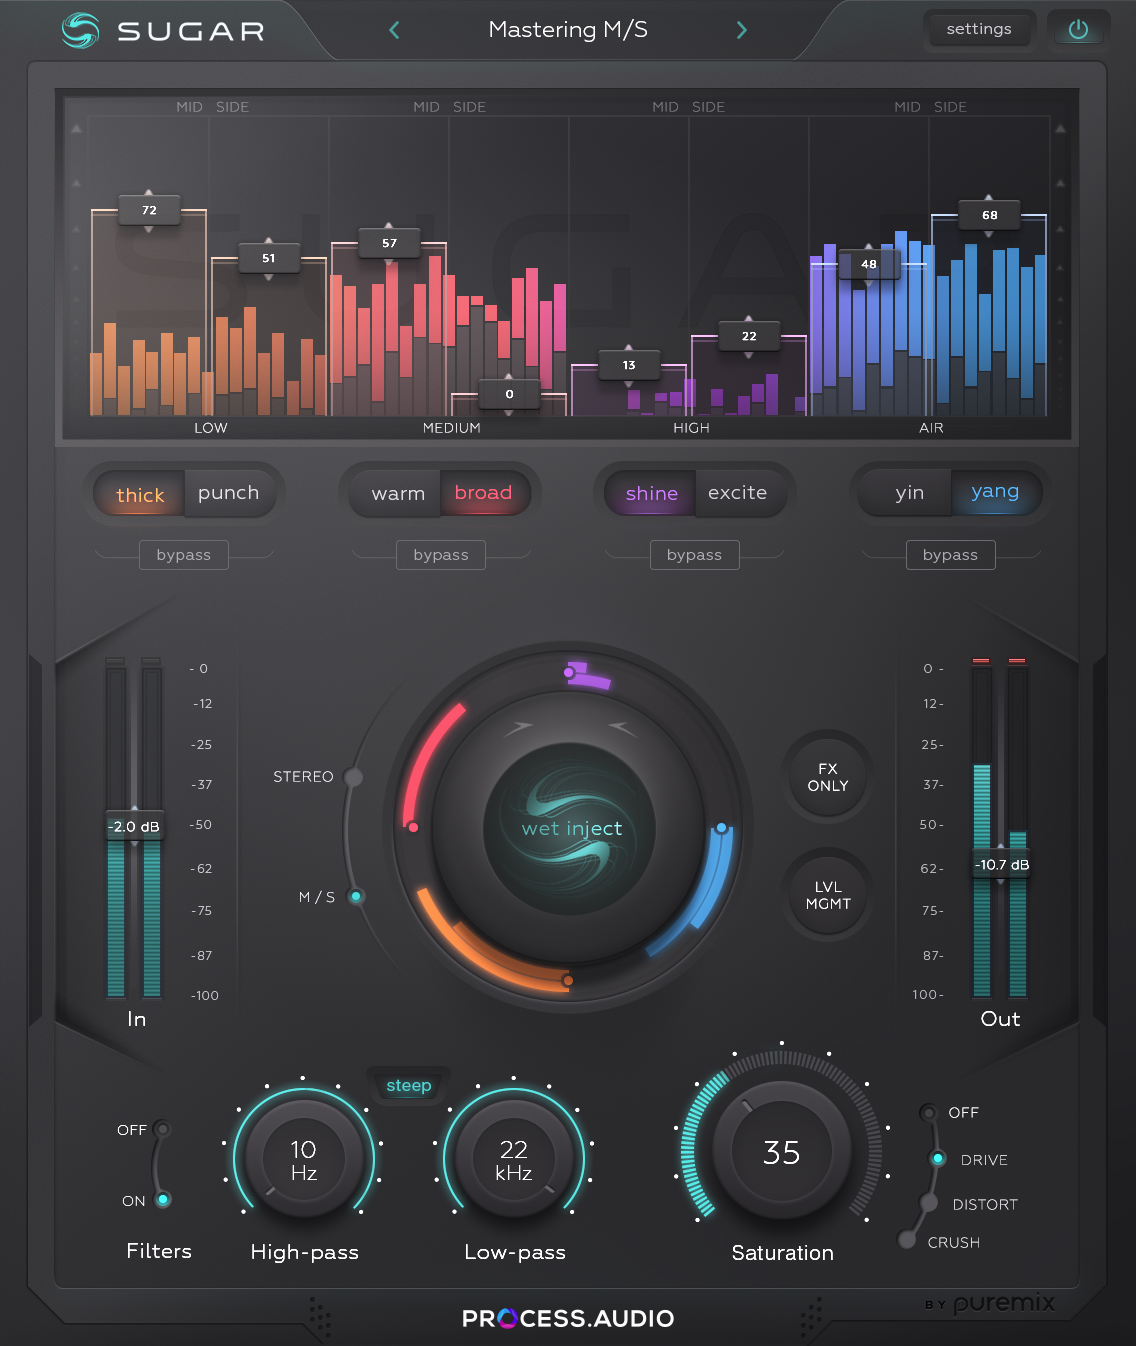
First up, Sugar: The Ultimate Full Spectrum Enhancer.
Shop Now!
Sugar is designed by a team of award-winning engineers to offer their most useful and essential harmonic enhancement techniques in one centralized plug-in. The resulting color palette is a fast lane to pro-sounding records—Sugar is a full-spectrum enhancer that will add punch, thickness, depth, warmth, edge, and grit to all your tracks. Sugar is a shortcut to those punchy kick drums, thick basses, sharp snares, edgy guitars, airy and creamy vocals, warm mixes and wide masters and much more.
Add Sugar to your workflow here!
Next, from Cherry Audio, check out Voltage Modular Core and Electro Drums and Voltage Modular Ignite!
SynthAnatomy.com says Voltage Modular is the:
“Best Software Modular Synthesizer Plugin Release of the year 2018!”
Voltage Modular is a virtual modular synthesizer that delivers the sound quality and “hands-on” experience of modular synthesis for a tiny fraction of the cost of equivalent hardware systems. Patches ranging from simple tones to wildly elaborate evolving soundscapes are easily created with surprisingly light processor overhead requirements. Voltage Modular is designed to be the best sounding, most powerful, flexible, and easy-to-use virtual modular instrument available.

Shop Here!

Shop Here!
Shop Now!
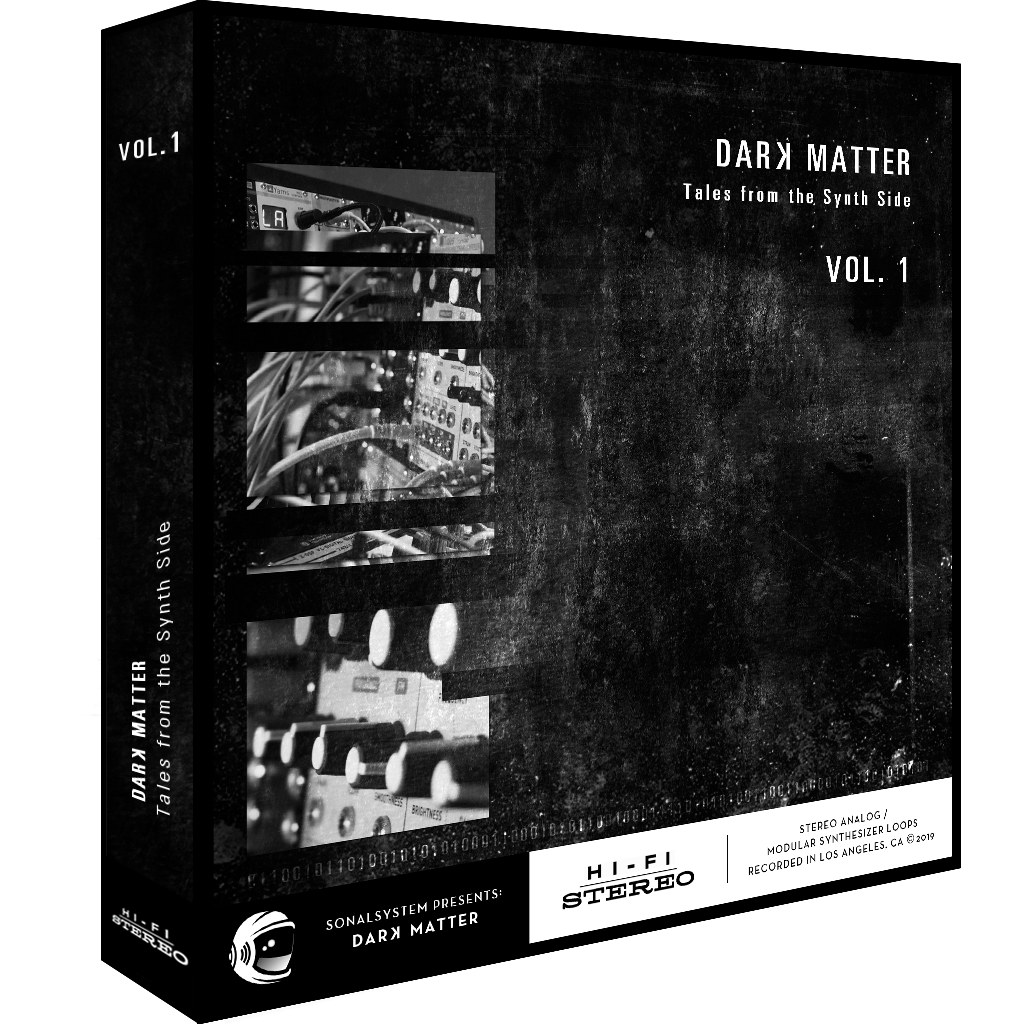
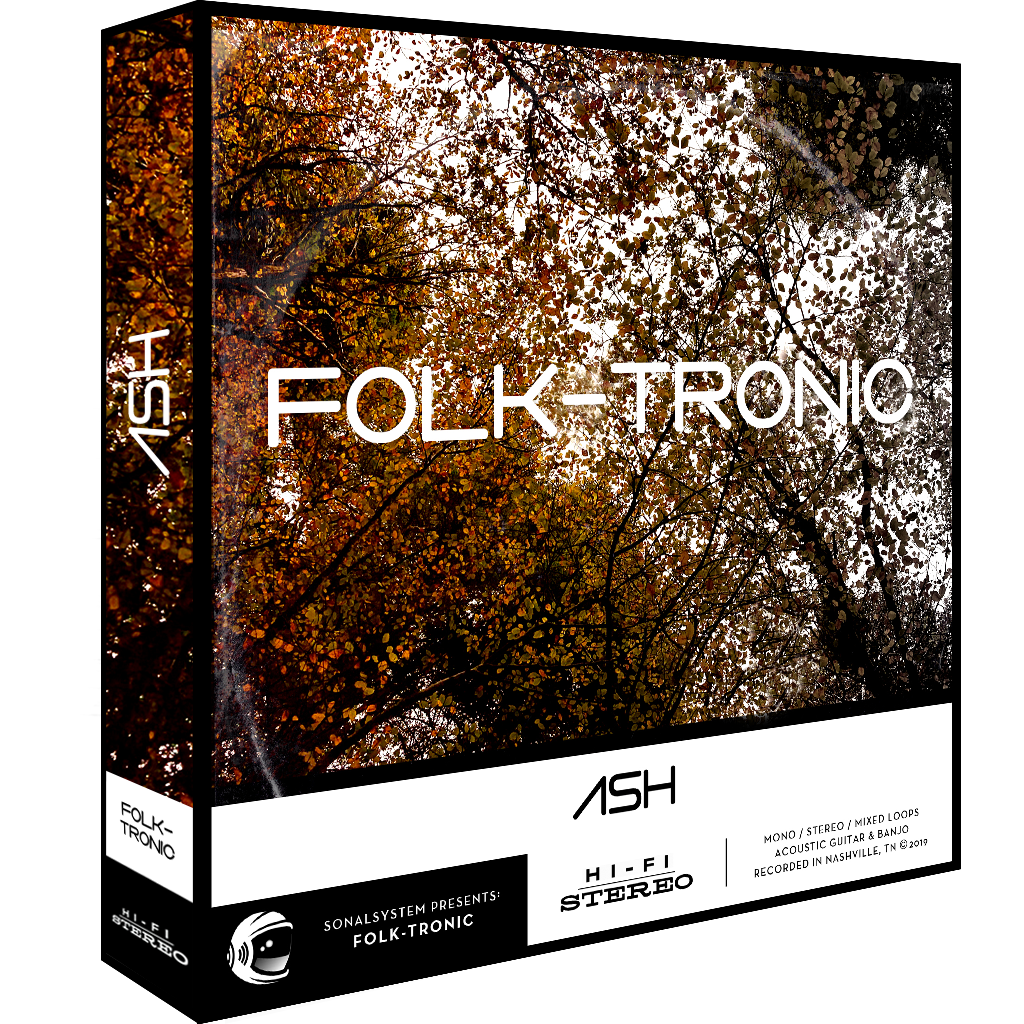
New from SonalSystem the Folktronic series and Dark Matter series.
Thoughtfully designed around electronic, left of center sounds and textures, Dark Matter was conjured for all types of users and scenarios: composers/artists/producers interested in cinematic style sounds and sequences, and anyone looking to add evocative modular and synthesizer based elements to their compositions.
Shop now!
Organic meets electronic in the latest loop packs from SonalSystem. While it may seem like an unusual pairing on the surface, Folk-Tronic allows you the freedom to explore new sonic possibilities and stretch the limits of your arrangements. Take your audience on a journey to escape the noise of the world and dive into a pastoral plane.
Last but not least, check out what’s new from BingoShakerz!
Shop Now!
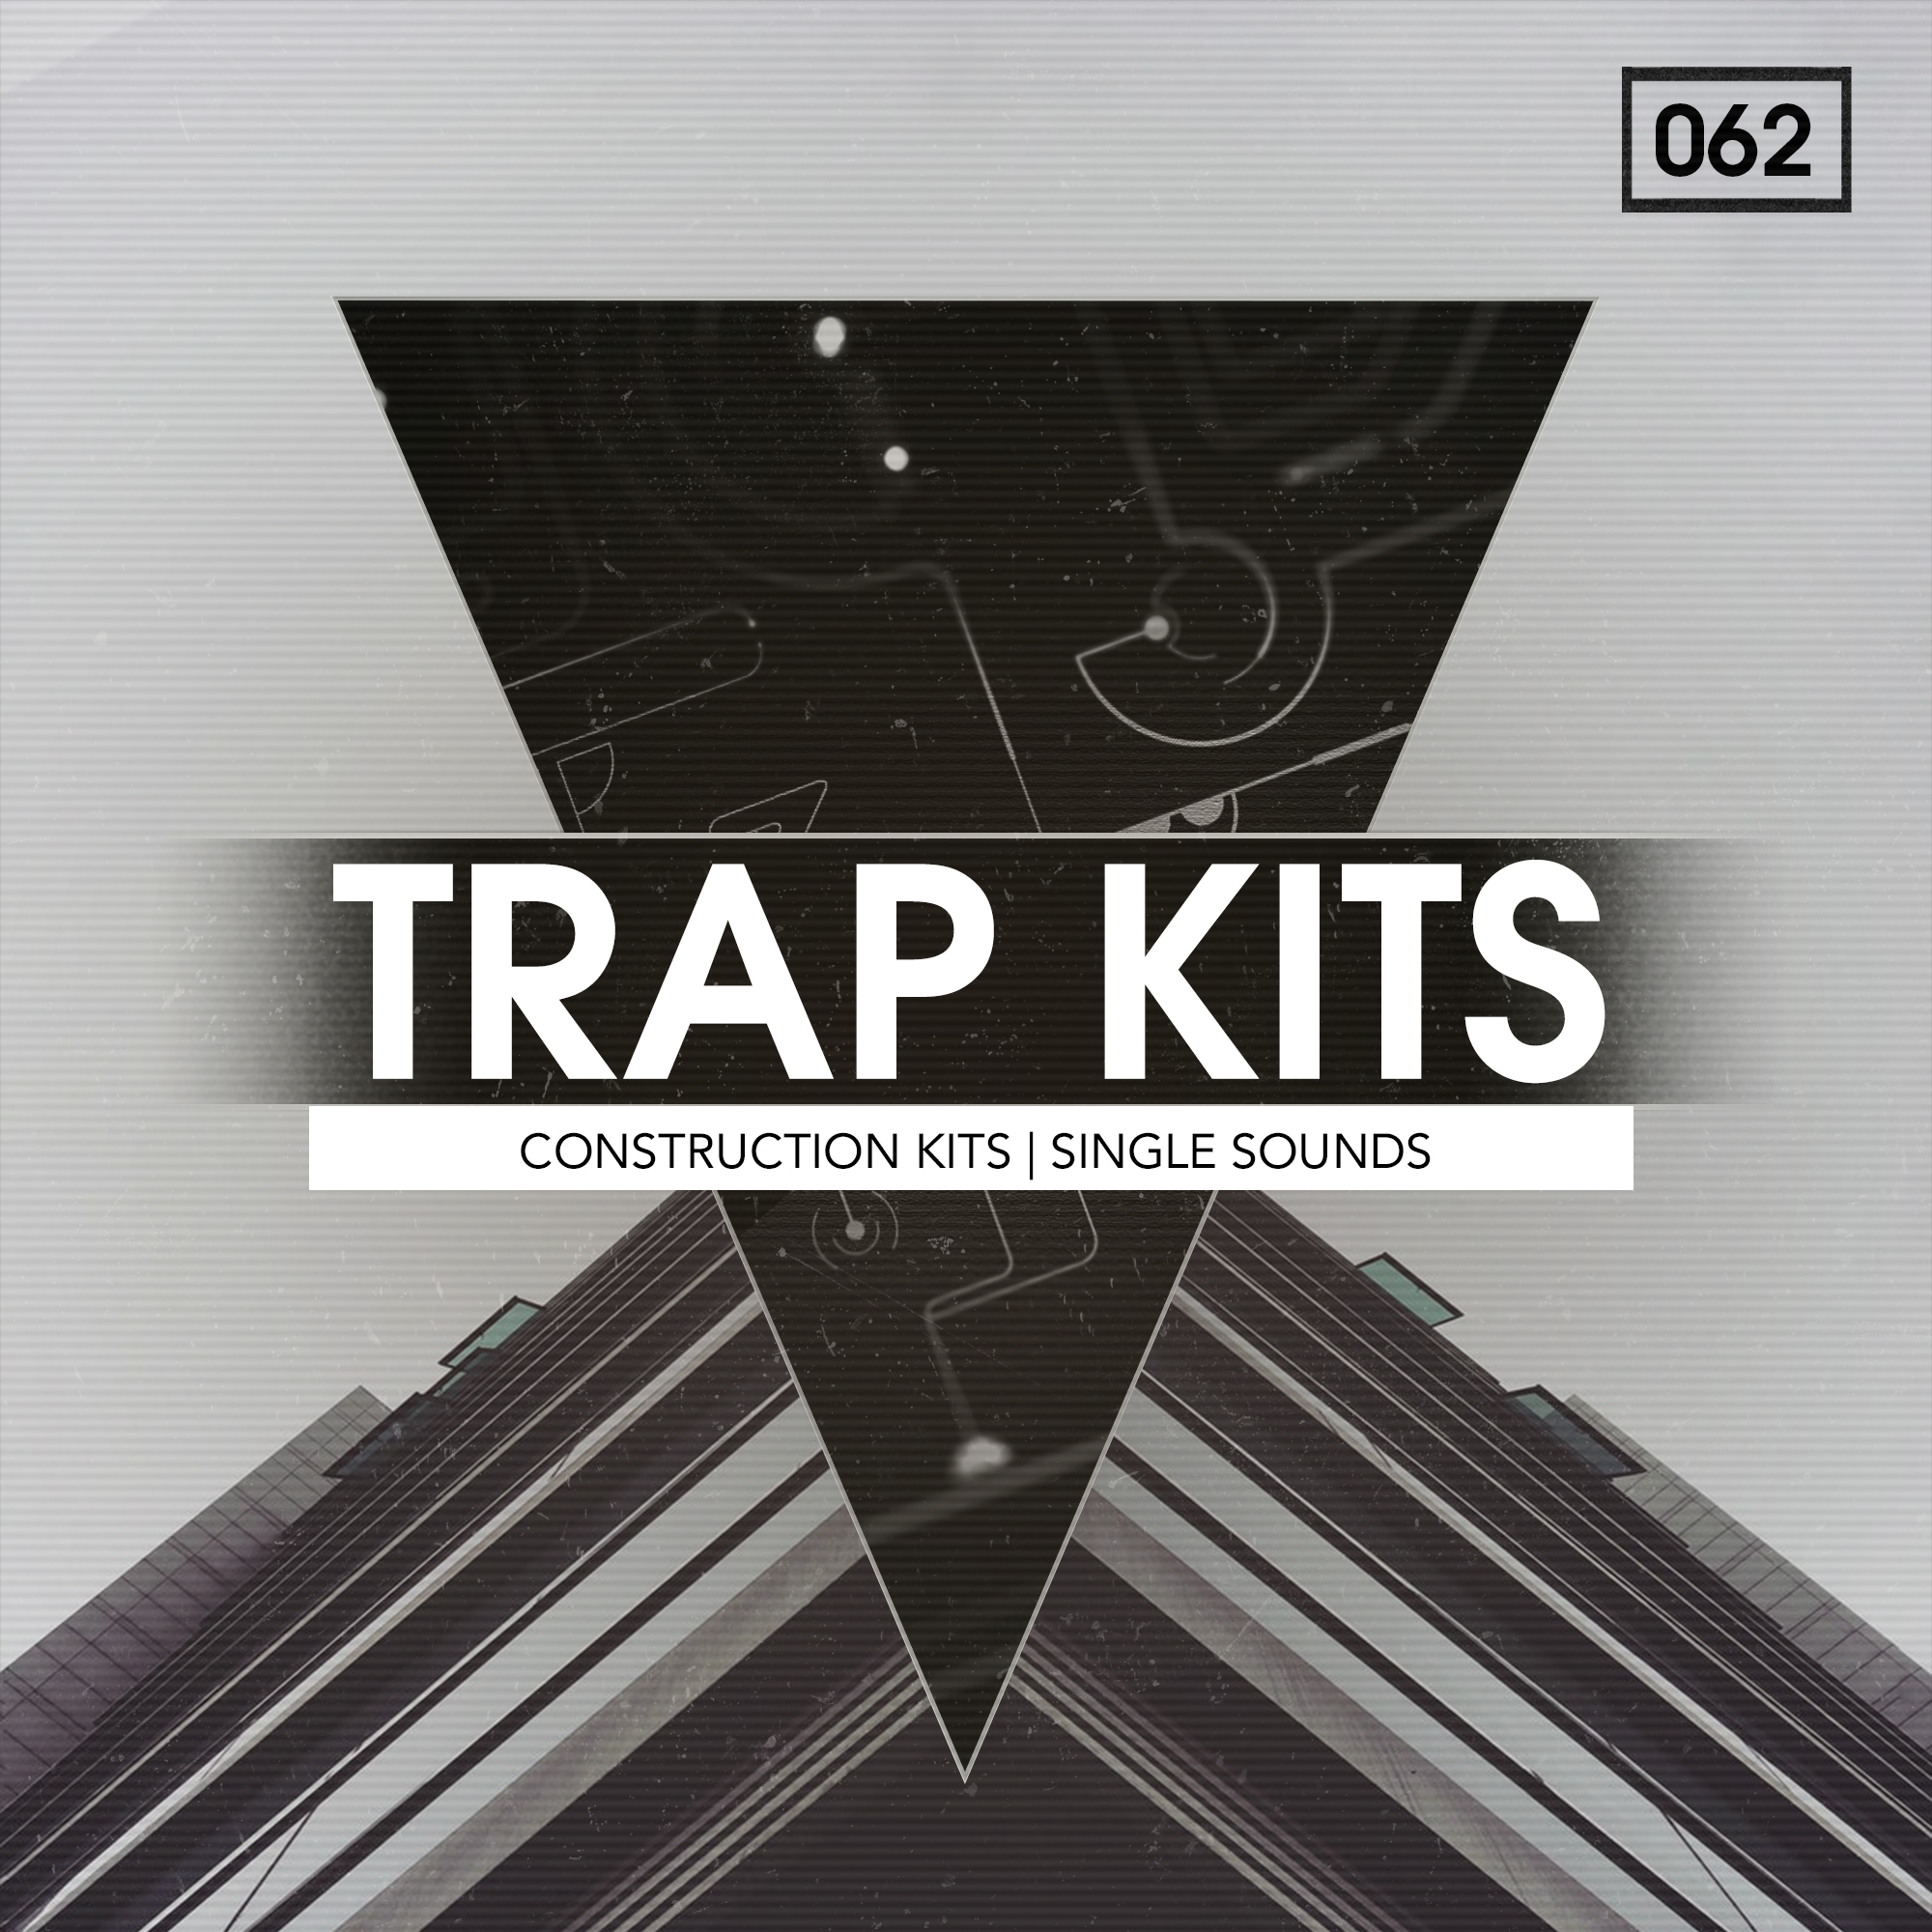
“Trap Kits” features 630+ MB (uncompressed) of prime-time Construction Kits and samples for instant beat inspiration.
Packed with five fully mixed and mastered Construction Kits and an additional selection of single 808, Clap, Hat, Kick, and Synth sounds.
Each Construction Kit offers full mixes, and all components are broken out into constituent parts for maximum programming ease.
Booming 808 sounds, lush pads, crispy snares, warm chords, nostalgic synth and choir loops… “Trap Kits” delivers an expansive collection of sounds for any hip-hop and trap music producer.
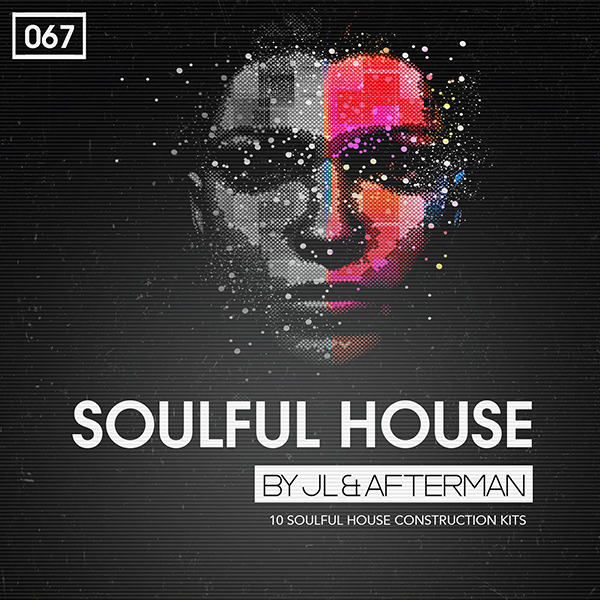
JL & Afterman are back with their brand new package of essential production tools!
Soulful House is loaded with ten fully mixed and mastered construction kits and captures deep bass loops, funky beats, chunky guitars, soulful piano, Rhodes loops, no-kick top loops, driving percussion workouts, blistering pads, and string loops.
Each Construction Kit offers club-ready full mixes and all components broken out into constituent parts for maximum programming ease, including MIDI files.
Expertly crafted by JL & Afterman – Soulful House is a must-have collection for any Funky, Classic or Soulful House music producer!

Let’s Shop
Bingoshakerz are happy to present their latest imprint – Afro & Melodic House, by Lowton Records!
This collection features ten fully mixed and mastered Construction Kits. Packed with 550+ MB (uncompressed) of tribal beats, analogue bass loops, ethno-grooves, melodic synths, native and organic vocal sounds, percussion, and FX loops!
Each Construction Kit offers club-ready full mixes and all components broken out into constituent parts for maximum programming ease, including MIDI files.
All loops are ready for instant drag & drop action into Studio One.
This is a prime-time collection of sounds for any Deep, Afro, and Melodic House producer!
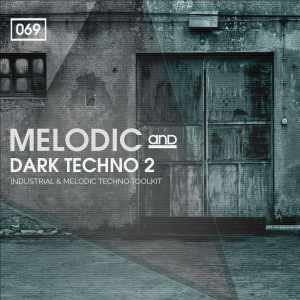
Explosive underground beats, industrial vibes, and analogue melodics: Melodic & Dark Techno 2 is here!
Packed with 630 MB (uncompressed) of analogue bass loops, dark and moody textures, stripped beats, pounding kick drums, tech-twisted percussion and top loops, modular synths, pulsating melodics, and FX loops!
This collection also offers a massive stack of single drum hits including kicks, claps, snares, percussion, and synth shot sounds!
Expertly crafted by Dominik Saltevski, (Autektone, Reload Black) Melodic & Dark Techno 2 is the definitive collection for any modern techno producer.
Melodic & Dark Techno 2 delivers the essential track building tools which are ready to be instantly loaded into Studio One.
ALL this for less than $20 US:
- 10 Atmosphere Loops
- 15 Bass Loops
- 15 Clap Loops
- 11 Song-starting Drum Kits (77 loops in total)
- 30 FX Loops
- 15 Hat Loops
- 15 Kick Loops
- 15 Melodic Loops
- 15 Percussion Loops
- 15 Synth Loops
- 20 Top Loops
- 75 Single Hits/One-Shots

Shop Now!
Introducing the SPARK Collections!
Hit the ground running with the new Spark Collection of loops and add-ons from PreSonus! These low-priced loop packs are a great place to start making music for less. These professional, royalty-free tracks are a great source of inspiration for starting a new song, learning how to mix, or adding a little flavor to your existing compositions. We’ve launched Spark Collections with a whopping 35 packs… with many more to come!
Everything from trap, reggae, pop, and sound FX are available in the Spark Collections – for just $4.95 USD each!
Shop Now!
Tailor make your ATOM!
Express yourself with these custom vinyl adhesive skins for your ATOM! Exclusively available at shop.presonus.com, you can pick a skin that best suits your creative mojo.
Available in seven stylish styles and for less than $10 USD!
Friday Tips: How to Normalize Comped Takes
Comping’s goal is to piece together the best parts of multiple Takes (vocals, guitar, etc.) into a single, cohesive part. This involves Studio One’s loop recording, which repeats a section of music over and over during a looped section. You record another Take during each pass, while previous Takes are muted. Doing multiple takes without having to stop lets you get comfortable, and try different approaches. Once you have multiple versions, you audition and select the best sections.
However, when auditioning the Takes to decide which sections are best, it’s helpful to compare levels that are as similar as possible. Normalization is the right tool for this—but while it’s not yet possible to normalize individual Takes, there’s a simple solution.
- Right-click on the main, parent Track for the Takes and choose Unpack Layers to Tracks (Fig. 1).

Figure 1: The four Takes right immediately below the parent vocal have been unpacked into four Tracks (color-coded blue).
- Next, select all the audio in the new Tracks.
- Type Ctrl+B and then Alt+N. This normalizes all the Tracks.
- Right-click on each Take’s audio and choose Delete (do not delete the Take itself; see Fig. 2).
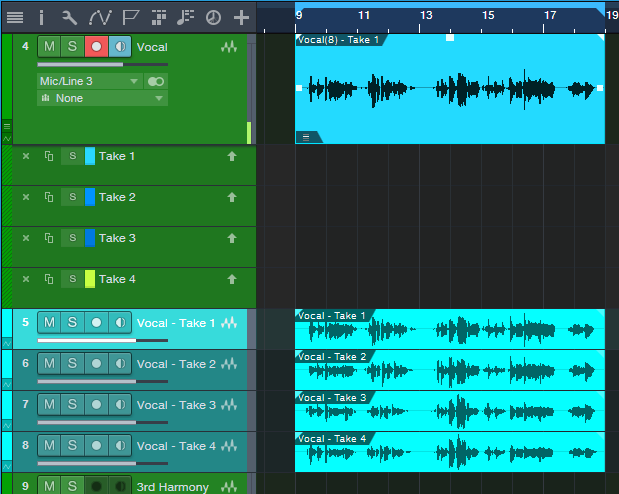
Figure 2: The Takes have been deleted. The four normalized tracks are below.
- Select the audio in the new Tracks.
- Drag the audio from the new Tracks up, so that they replace where the Takes were (Fig. 3).
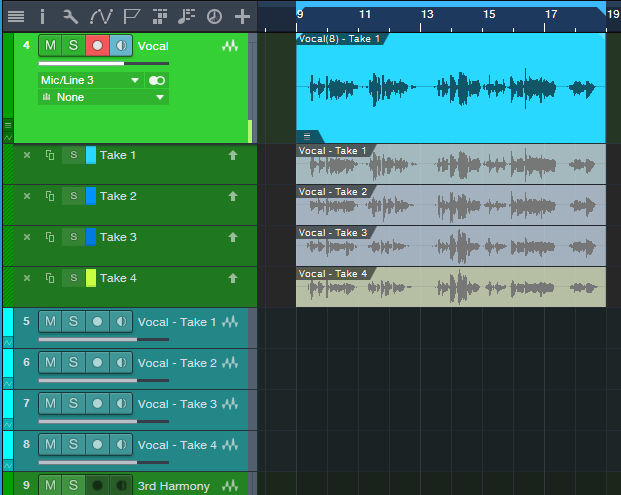
Figure 3: The normalized Track audio now occupies the Take Lanes.
- The empty Tracks are no longer needed, so remove them.
- And that’s all there is to it—now you can take advantage of Studio One’s Take-oriented comping tools, as well as the Listen tool (keyboard shortcut 8), with normalized audio.
Glenn Rosenstein on the FaderPort 16 and and the StudioLive Ecosystem
This just in from Glenn Rosenstein, a three-time Grammy-winning mix engineer whose credits include U2, Madonna, Talking Heads, The Ramones, James Brown, Miles Davis and many others. His work in film and television has landed him both an Oscar and a Golden Globe while working on projects including The Sopranos, Celebrity Circus, The Last Emperor, Blown Away, Married To The Mob, Charmed, Beverly Hills 90210, All My Children and Buffy The Vampire Slayer. We recently got in touch with him to get his perspective on all things PreSonus.
Hey Glenn. Tell us about yourself!
I’ve had a fun career that’s led me to many musical adventures. I started early on at Power Station in NYC, then as a staff engineer at Sigma Sound Studio. I became an independent mixer, then producer, eventually winning some Grammys and selling a bunch of records, back when that was a possibility. I’m still producing both for my Sony labels, as well as independently. I partner in a number of project studios in Nashville, Muscle Shoals, and New York, as well as having a room at historic Fame Studios.
What PreSonus products have you used and which do you currently use?
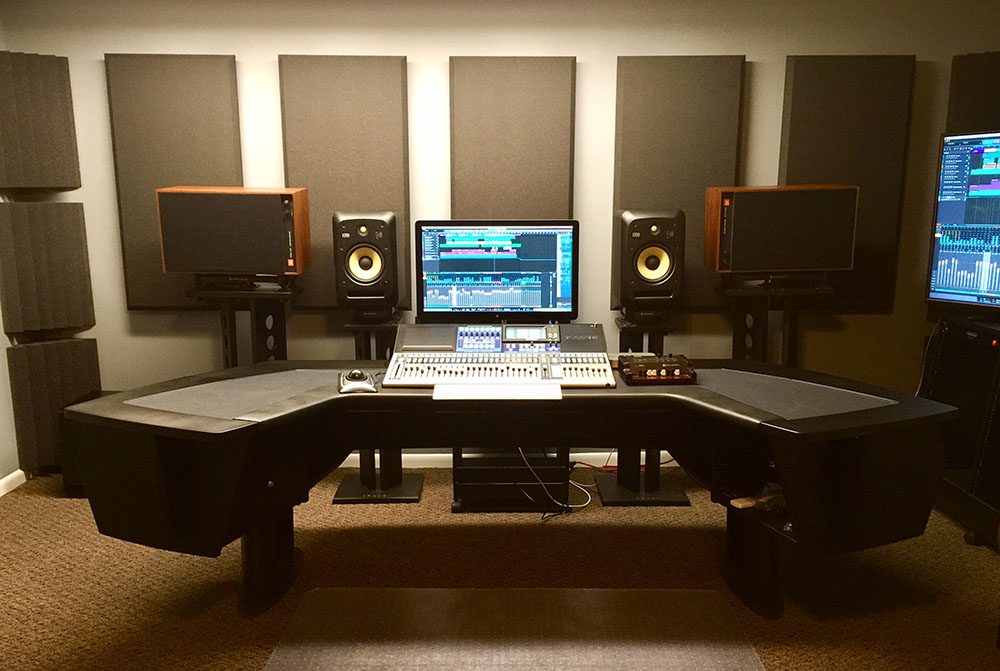
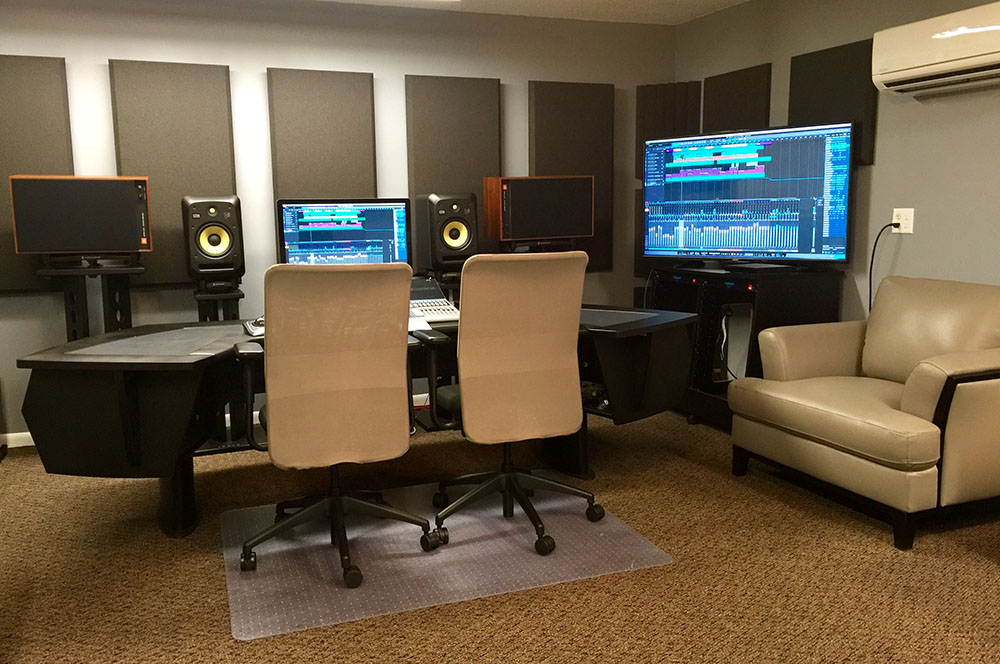
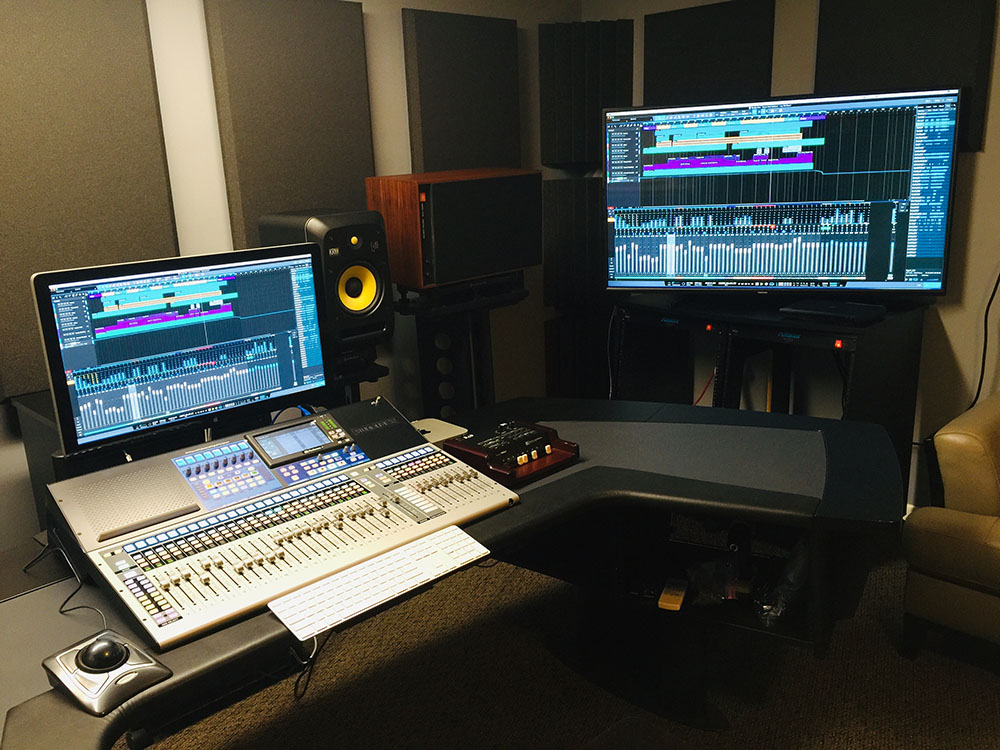
I’ve always been a PreSonus user. As time goes on, PreSonus continues to release products that almost anticipate my needs. I started out with the ADL 600, a very tasty stereo mic pre from a few years back. I’ve put together a pretty cool room in my Muscle Shoals facility that’s centered around the StudioLive 64S, along with some great AVB powered PreSonus peripherals: The StudioLive 32R, the EarMix 16M, and the SW5E among them. Also to be found are the PreSonus R80 monitors and, of course, Studio One. And I always travel with my Faderport 16. Always.
For what applications are you using the products?
My PreSonus facility is very much a writing/production room that is easily convertible to a full-blown production studio. I like the creative ease and intuitive design that is integrated into all of the PreSonus cosmos of products. It’s simple to start off small—just creating some beats or a few phrases on guitar or a vocal idea—and easily push that to a bigger, more robust production without having to shift rigs.

What led you to choose these particular PreSonus products?
I had a pretty solid awareness of the PreSonus offerings for many years and was fortunate enough to meet and spend some time with Jim Odom. His backstory is steeped in music production and performance, and, ultimately, creating solutions that he wanted for himself. I liked that a lot. I still do. I totally get the narrative of PreSonus products, their evolution over the past few years, and their remarkable value. Jim and his team are always pushing the boundaries—they’re taking insane amounts of features and options and putting them in boxes that should cost five times what they’re asking. I have no idea how they get it done, but they do. And all that filters down into very usable tools that sound great and are fun to work with.
Having used the gear, what do you like most about the specific PreSonus products you use?
Let’s talk about the Faderport 16: A 16-channel control surface that fits under your arm—brilliant design and execution. Regardless of my preferred DAW, I always feel right at home. I’m in a hotel, it’s there. I’m in a rehearsal room, it’s there. Perfect combination of small footprint and functionality.
Spoons’ Jeff Carter and Sandy Horne on PreSonus Studio One
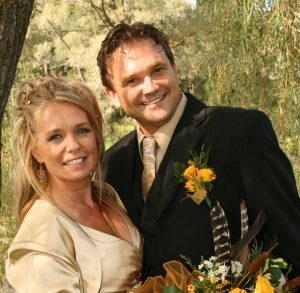
Sandy and Jeff
Spoons are a long-haul Canadian new wave band formed 1979 in Burlington. Jeff Carter is their longtime producer, collaborator, and husband to founding member/bassist Sandy Horne. Jeff got into Studio One after years in analog recording, including some time with PreSonus’ FireStudio interfaces when collaborating with Sandy and helping her set up her studio.
When Studio One version 1 was released, they switched from Cubase… and were able to collaborate so effortlessly together that Jeff actually credits Studio One with helping cement a relationship with Sandy—which culminated in their marriage!
On the other hand, Sandy calls this scenario the “Hire-a-Husband” program, so the truth is probably somewhere in the middle. But they’re married and happily making beautiful music together to this day. Jeff has a lot of nice things to say about why he chose Studio One and how he uses it:

Sandy and Jeff in the Studio
What PreSonus products have you used and which do you currently use?
I’ve used all kinds of PreSonus hardware, going back to the early FireStudios, then the Firestudio Project, and then the Firestudio Tube, which I still use on our older iMac system—the new system is using a Thunderbolt interface. Static in Transmission was recorded entirely with those various FireStudio interfaces, with the help of a Presonus HP4 headphone amp. We also use a new PreSonus Studio 26 as an interface for live shows, for the keyboard player’s virtual instrument outputs and backing tracks. I’ve also had the opportunity to mix live on various versions of the StudioLive consoles, going back to the first generation, which has been a joy, as they’ve all had an intuitive layout, similar in philosophy to Studio One. I’m now using a Faderport Version 2 in the studio as well, which has been great for streamlining certain functions, like scrolling the timeline, mutes and solos, transports, and writing automation.
But overall, Studio One Professional has been far and away the most important addition to Sky Studios, and since its inception, we’ve used every subsequent version of it since the beginning. I have other DAWs… pretty much all of the major ones; I keep them around, mostly just in case clients bring files in from other systems for me to mix; but even then, I’ll bounce the stems over to Studio One, or just export the files as OMF—which is another fantastic addition to Studio One that’s made my life so much easier!

Spoons’ Latest Album
For what applications are you using Studio One Professional?
I use Studio One for almost anything audio and/or MIDI related: composing, recording, mixing, re-mixing, post-production, sound design, and mastering. Now, with Studio One, the big eye-opening moment for me happened with version 3, when the Console Shaper was first added. Finally, my mixes started to have some of that subtly-more dynamic, organic, and harmonically “gelled-together” sound that I had been chasing ever since my days mixing on that big ol’ Trident console back in the 90s. When CTC-1 (on sale now!) came out soon after, I immediately bought it, and it’s made a stunning difference. On New Day New World, I tended to use the Tube Mode on bass and certain synth busses, because there’s a low-end warmth that it imparts that I really dig, and the Classic Mode was sometimes used on guitar or vocal busses—but the big winner was the Custom Mode, which was used on many things, but always used on drums, and on the 2 buss, boosting the “drive” and “character” parameters just enough to get the tracks into that sweet spot where things sound full, yet detailed, and open, yet tight. For all those who have Studio One Pro 3 or above, try it: you’ll know what I’m talking about as soon as you hear it.
What led you to choose Studio One? Was it the company’s reputation, audio quality, ease of use, specific features, price, other factors?
PreSonus has always had a solid reputation, but it was being shown real-world examples of how intuitive it is to work with that really sold me. With Long and McQuade, I almost always physically demonstrate Studio One, as opposed to just talking about it; the workflow sells itself. The audio quality of the 64-bit mix engine, especially with CTC-1 in use, is like nothing I’ve ever worked with, excluding large analog consoles. The Presonus Symphonic Orchestra Add-on is also great sounding, from the subtle, switchable articulation in the string sections, to the warm brass, to the orchestral timpani and percussion. You can hear it all over the opening track of New Day New World, and on the strings at the end of “Love Recall.” The pricing for Studio one is more than reasonable considering what you get; and the Artist version being included with even the least expensive PreSonus interfaces is honestly a total steal.
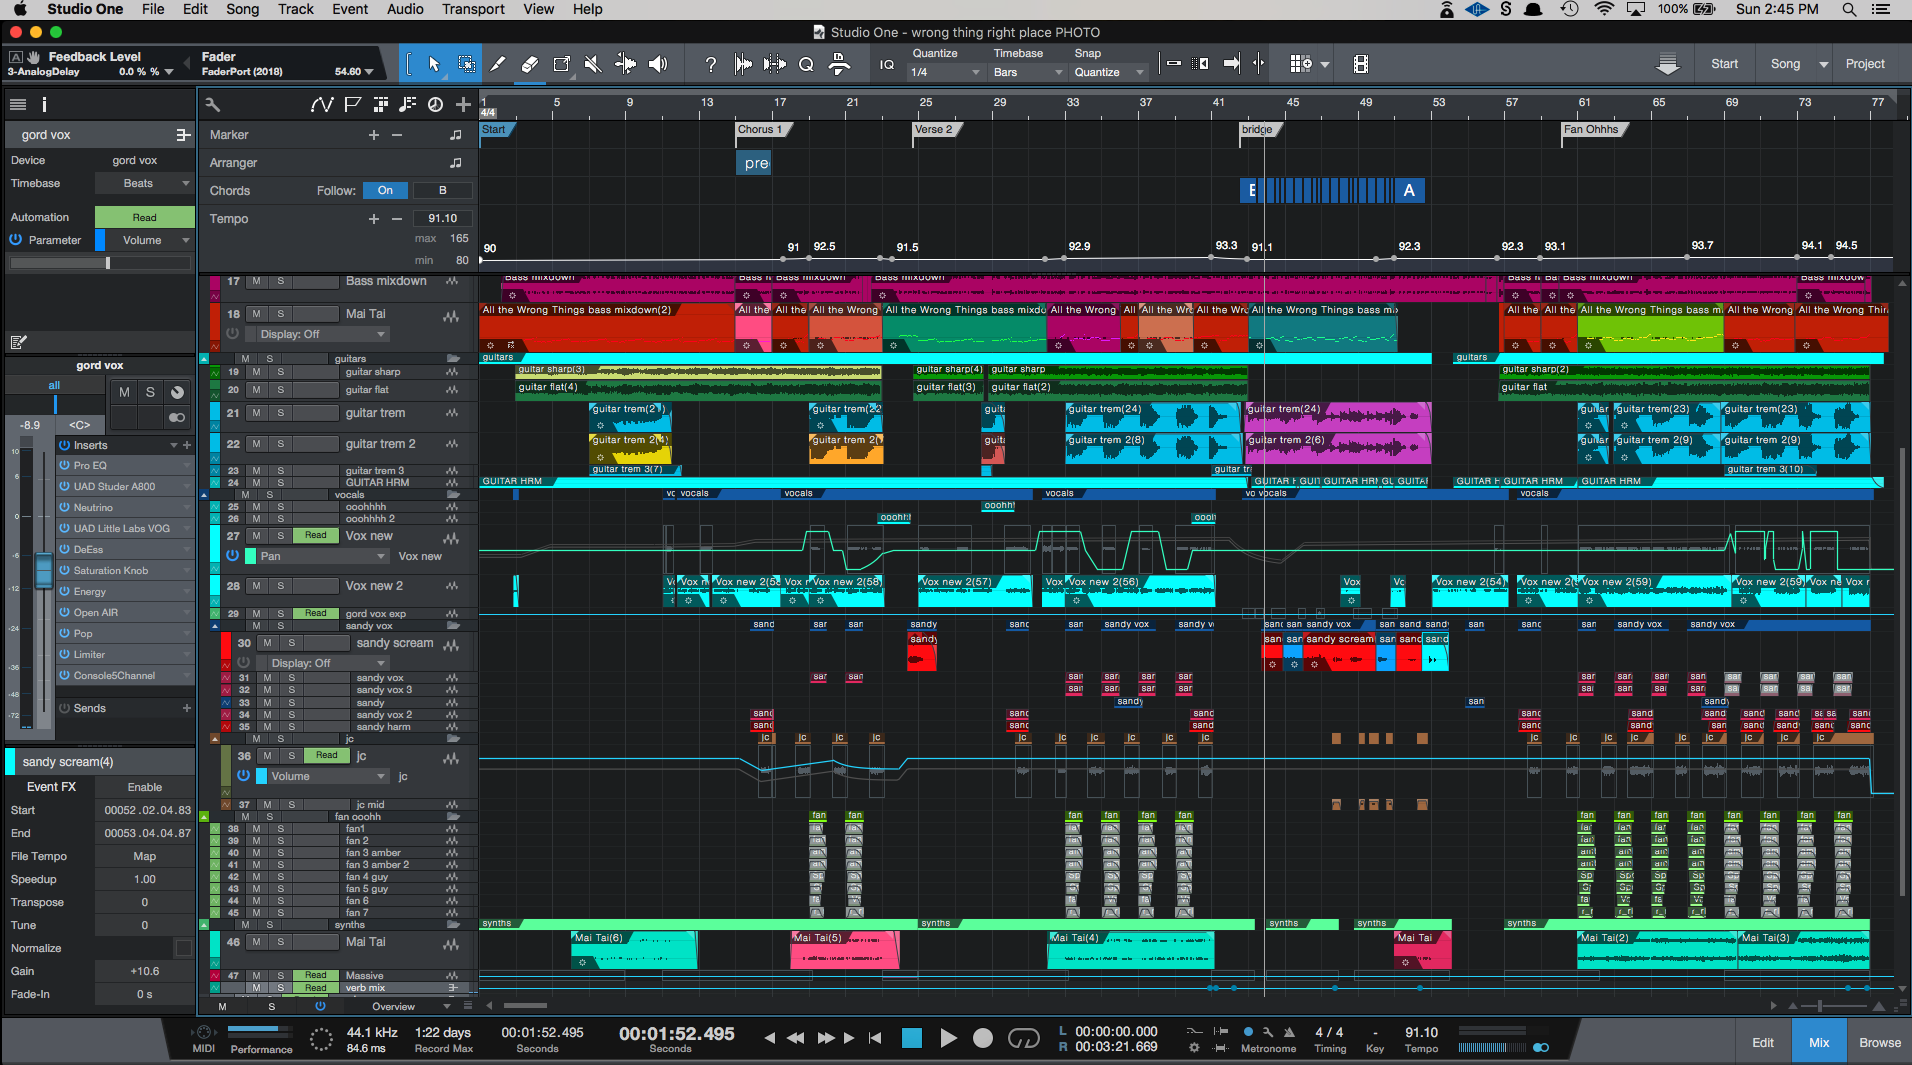
Screenshot of “All the Wrong Things”
What Studio One features have proven particularly useful and why?
The automation mapping is so simple that it encourages me to get more creative, easily automating subtle things like synth detuning, delay mixes, and feedback, or rotary speaker speeds. I’m no longer afraid to try things like that while working with an artist in the studio with me, as it doesn’t really slow down the pace of work, or hamper the creative process, because it can be done so quickly. On previous DAWs, If it was too time-consuming or tedious, I might have to try things like that on my own time, or possibly not at all. There’s a part in the dub/soca-influenced bridge of “All the Wrong Things (In the Right Places),” off New Day New World, where the guitar track pans wildly back and forth, but still in rhythm with the song, while you can hear the Analog Delay plug-in (the long echo on Gord’s vocal) subtly deepening its modulation depth (which detunes the vocal only in the feedback loop), which were all relatively easy to do with the preset automation shapes coupled with the transform function.
Being able to cross-fade overlapping audio clips with just the press of the “x” key, and adjusting the slip points and volume offsets of clips with such easily variable curves is dynamite… something I use all the time. The VCA implementation is logical, and being able to easily write VCA automation to tracks is a real-time saver as well.
The new chord track has come in very handy too; in “Repeatable,” there’s a guitar solo that comes in around the one minute mark that I thought was too similar to the one near the end of the song, so I extracted the chords from another (rhythm) guitar track, then transposed that first solo up 5 or 6 semitones (which obviously put it out of key), but then set it to follow the rhythm guitar’s chord track, which not only put the solo back in key, but it made sure the lead part still followed the song’s changes, creating this new solo part that had the same feel as the later solo, but with a new, higher-pitched variation on the notes, making it quite distinct.
How does Studio One compare to other DAWs you have used? What does it give you that other DAWs don’t?
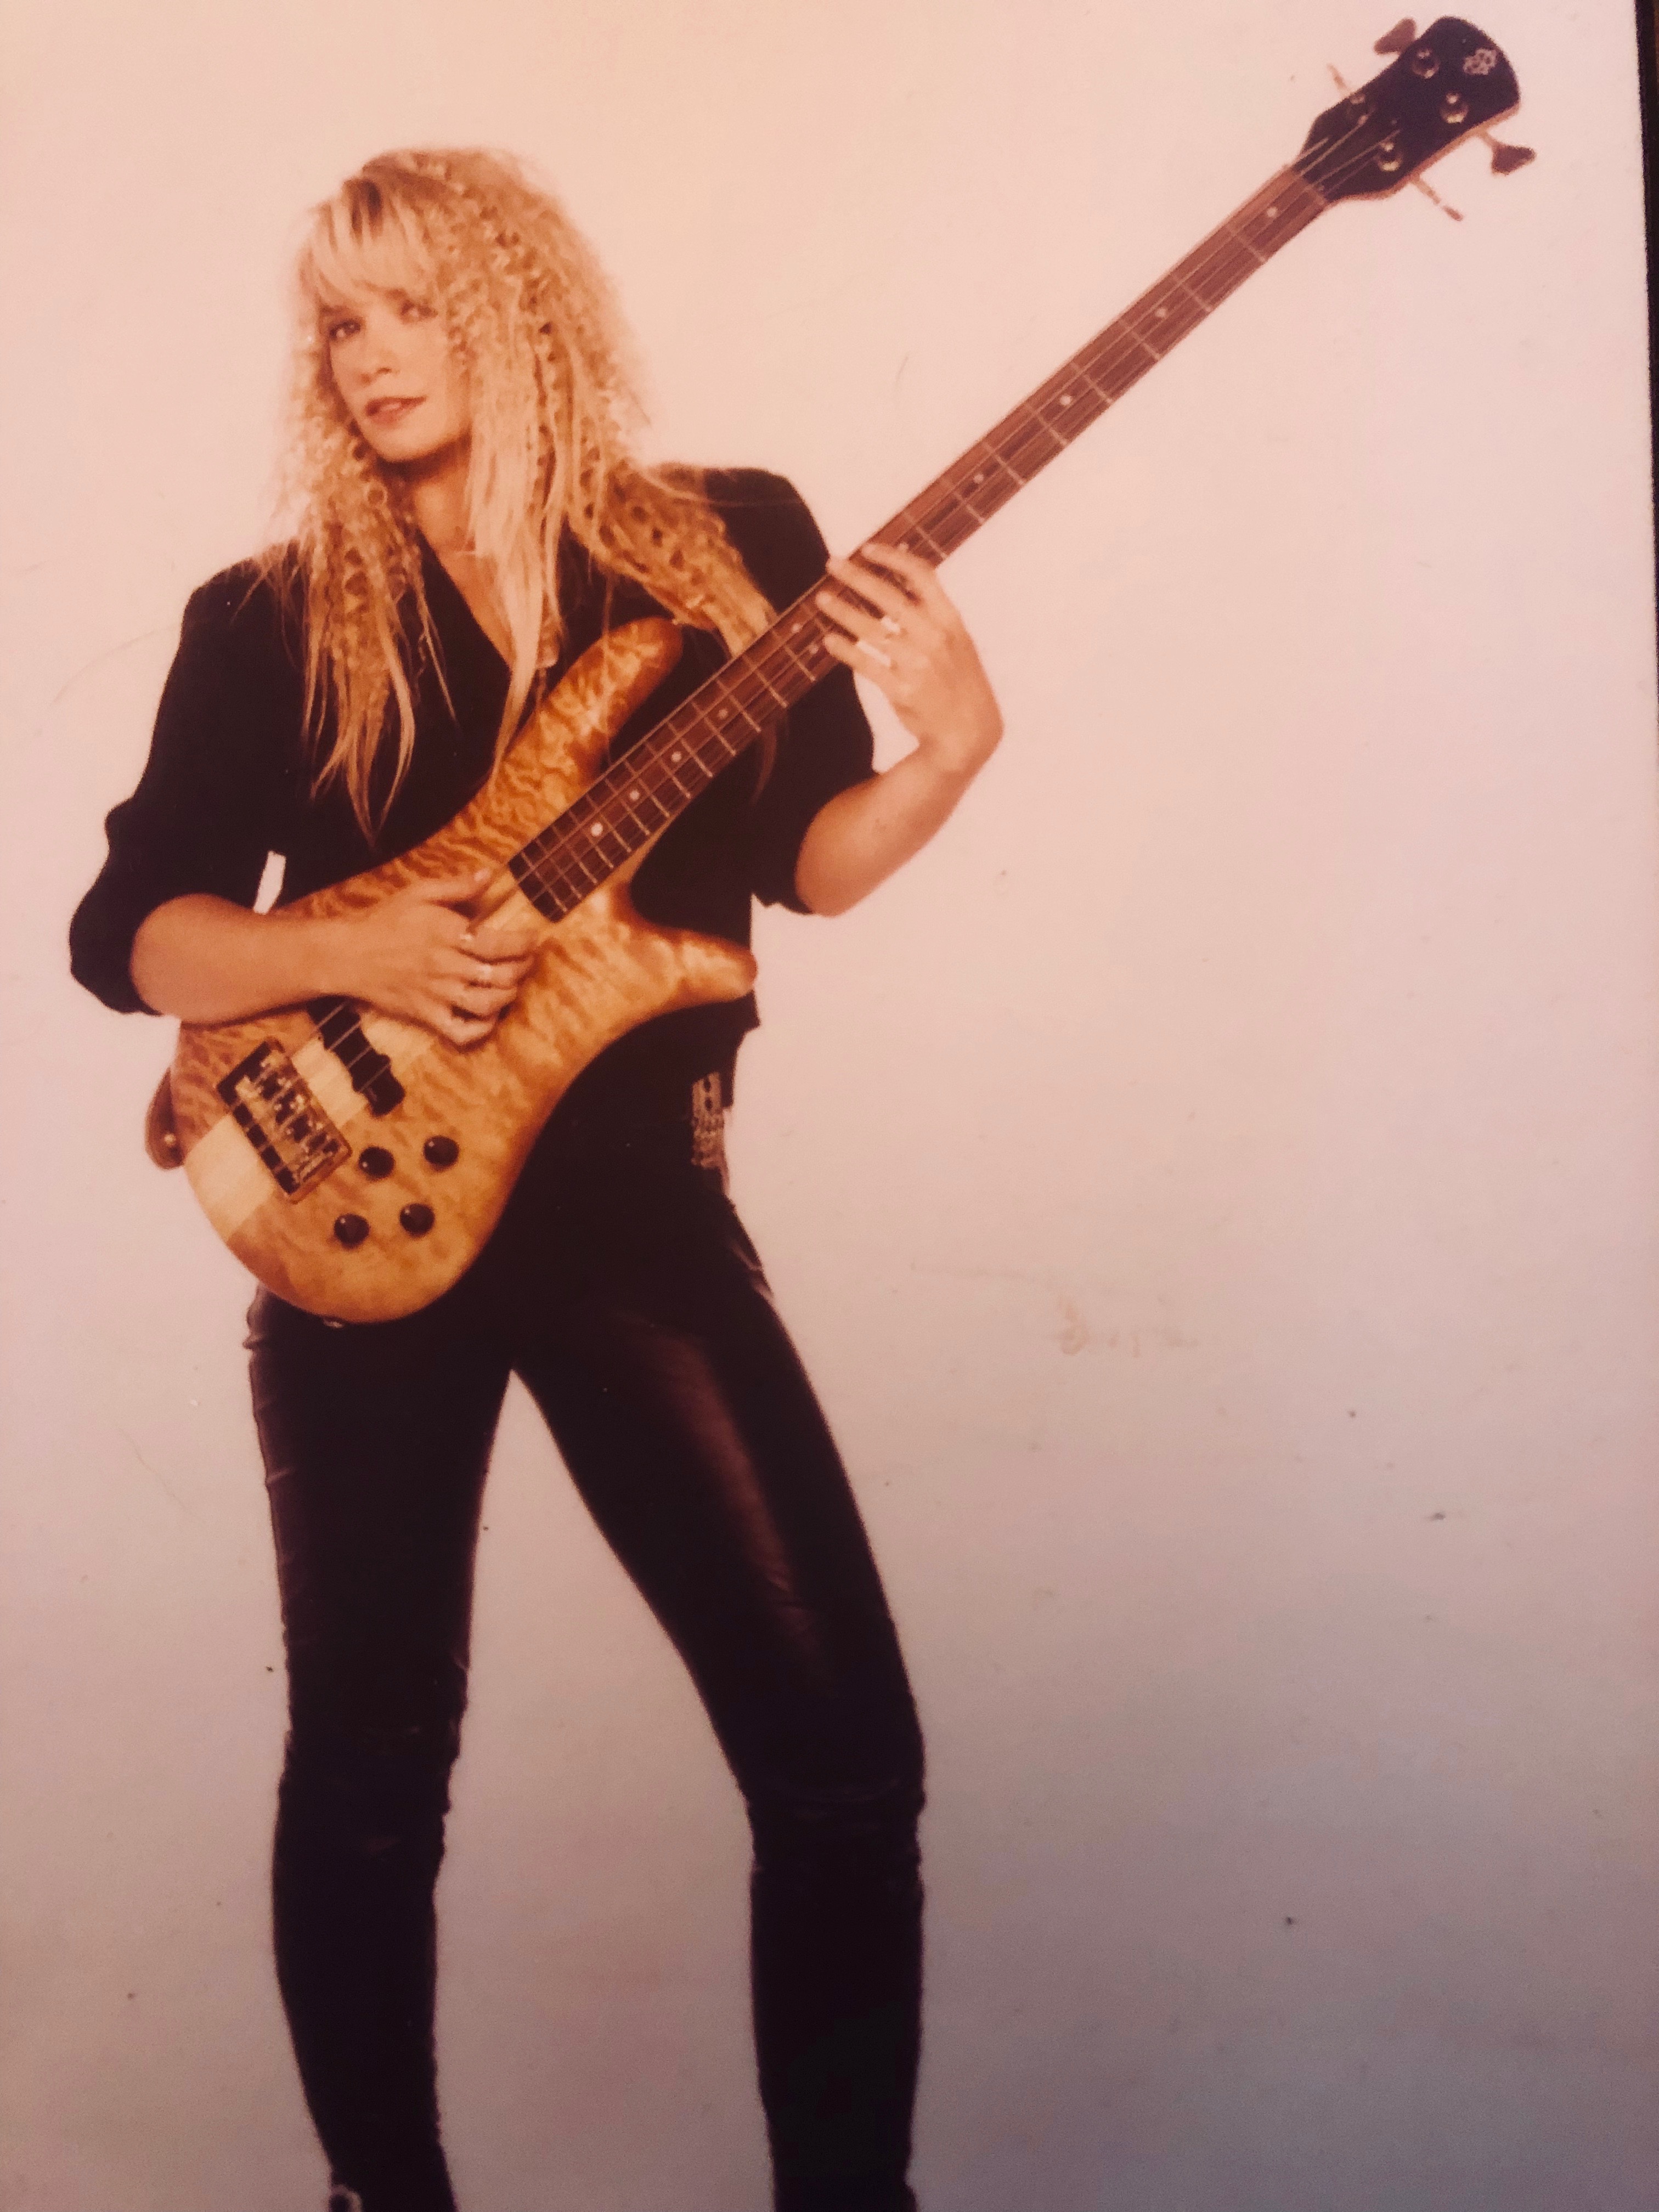
“Sandy_Pants.JPG”
Like I’ve mentioned, workflow is one of the biggest reasons to use Studio One; automation assignments of almost anything that moves on-screen are only a right-click away (or a simple drag-to-track from the little hand in the top right) Clip gain offsets, slip edits, and fade-in/fade-out/crossfade edits are super easy and fast. Time-stretching clips to bar and beat lines is a similarly-simple Alt+drag. In Studio One, I use custom keyboard shortcuts for changing the note values in the drum editor; that way I can switch between painting in 8th note/16th note/and 32nd note hi-hat rolls, for example, on the fly. In most DAWs, that’s not something that’s easy to set up, if possible at all.
The new Tempo editor, with its easy to draw in curves, is a vast improvement over the previous version; I used those curves to give a subtly-increasing energy-boost to the choruses of “All the Wrong Things”.
The MIDI editing is, and has always been great, and it’s not cluttered, and the automatic assignment of sample-pad names (Kick 1, Snare 2, etc.) to lanes in the drum editor is a huge time-saver, and about as easy as I could imagine it being. But I’d really like to see 1/8D and 16D (duplet) showing up by default in the quantize options, along with ⅓ and ⅔ (33.3% and 66.6%) swing values. Would be handy for the jazz and hip-hop crowds as well. Along those lines, I use the X-Trem effect a lot, like on the rhythmic guitar stutter in “Life on Demand,” and the quick, sliced-up synth in the chorus of “Snowglobes.”
Being able to extract MIDI note data from audio recordings (via the Melodyne Editor) is something I never imagined possible, and it’s so simple to do: just drag the “Melodyned” audio clip to an instrument track! I used that trick to create a sub-octave synth bass (triggering the Mai Tai analog synth plugin) that follows along with Sandy’s live electric bass all the way through “All the Wrong Things,” and in certain parts of several other tracks.
Which Studio One feature or concept doesn’t get enough spotlight (or isn’t talked about enough) in your opinion?
CTC-1 and Mix Engine effects doesn’t get near enough praise! Especially the “custom” model. Absolute magic. There’s a screen-shot here of the mixer, with lots of instances of CTC-1 open on all the busses. I’d like to try out the Softube tape shortly as well, as it looks very promising.

CTC-1 in use all over “All the Wrong Things”
Mai Tai is also a fantastic-sounding yet still perhaps under-praised synth; I used it all over this record, not only for pads and sub-bass, but critically, the main, echoed synth-patch which sets the overall tone and vibe of “Landing Lights” is a Mai Tai patch (Poly-Arp3), that I modified to be a bit tighter and pluckier.
Any useful tips/tricks or interesting stories based on your experience with Studio One that would be of interest to our user base?
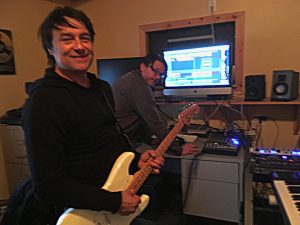
Jeff and Gord of Spoons in the Studio
With Mai Tai, you can get some FM-ish (frequency modulation synthesis) tones out of it, by modulating the rate of LFO 1 (set to max speed) with the rate of LFO2 (also set fairly high, which sends LFO 1 into audio rates) and then assigning LFO1 to oscillator pitch. Then, modulating the rate or amount of LFO2 can give you some cool, edgy/grindy synth FX patches, that are somewhat controllable, but still musical. I used that trick to create the wild “CPU-freaking out” synth-madness you hear on “Perfect Exception”. Of course, I’d LOVE to see a simple, dedicated FM synth added at some point (or even straight-up FM added to Mai Tai!)
Another thing I discovered was a variation on Craig Anderton’s “Tonal Verb” concept, that he wrote about a while ago on the Presonus blog.
But instead of using two nearly identical reverbs on an FX buss, I use the same technique to create two nearly-identical, but out of phase compressors, inserted directly, just changing the attack or release on one or the other; all you end up hearing is the difference between the attack (or release) portions, and I’ve used this to get rid of excessive decay or resonance in snare and shaker parts, setting one compressor’s attack to “0”, and opening the other one up a bit, leaving only the transients. Use longer attacks on both comps to create “soft” guitar or drum parts, where the pick attacks and stick hits swell in.
Similar concept can be used with two near-identical but out-of-phase EQs, where one EQ has peak or valley points and the other doesn’t; all you hear is what’s “inside” those difference-peaks, and nothing else…sort like a multi-band bandpass filter. Great for capturing only the “ring” or resonance points of an interesting, but otherwise-messy snare sample, which can be blended in with other, cleaner snares. ( I used this on one of the drum layers in “Repeatable”, where the original loop was recorded from a drum loop in a vox amplug practice device, that had a neat character that I only wanted to capture certain parts of) The groove extraction feature came in very handy there as well, as I was able easily match up the feel of that sampled drum loop with my added Impact drum samples.
Any final comments about PreSonus and Studio One?
This is the second interview with me that PreSonus has been so kind to do; the first one came out almost eight years ago after Static in Transmission was released. I have to say that PreSonus, as a company, has not only had great support for me and thousands of other customers, but you’ve seemed to go out of your way to encourage and inspire musicians of all kinds. In the past eight years, I’ve grown more and more comfortable with Studio One, but despite that level of comfort, I’m still discovering new things I can do with it every week, partly thanks to the great articles and learning videos you post on your blog. It’s been an incredibly satisfying and exciting experience growing along with your software and your company, and I look forward to it remaining an integral part of my musical life. Thanks for making great software!
Jeff Carter and Sandy Horne—Spoons.
Keep up with Spoons:
- Website
- Sandy Horne Project
- Shroud (Jeff’s Sci-fi / Fantasy animation project!)
Friday Tips: Crazee Snare Enhancements!
You never know where you’ll find inspiration. As I was trying not to listen to the background music in my local supermarket, “She Drives Me Crazy” by Fine Young Cannibals—a song from over 30 years ago!—earwormed its way into my brain. Check it out at https://youtu.be/UtvmTu4zAMg.
My first thought was “they sure don’t make snare drum sounds like those any more.” But hey, we have Studio One! Surely there’s a way to do that—and there is. The basic idea is to extract a trigger from a snare, use it to drive the Mai Tai synth, then layer it to enhance the snare.
Skeptical? Check out the audio example.
ISOLATING THE SNARE
If you’re dealing with a drum loop or submix, you first need to extract the snare sound.
- Create an FX Channel, and insert a Pro EQ followed by a Gate.
- Add a pre-fader send from your mixed drums to the FX Channel. Aside from providing a more consistent level for triggering, a pre-fader send lets you turn down the main drum track. This way you hear only the FX Channel, which makes it easier to tweak the EQ and isolate the snare.
- With the Gate bypassed, tune the Pro EQ to the snare frequency. Use the LC and HC with a 48 dB/octave slope to provide the preliminary isolation, then use a super-sharp bandpass setting to zero in on the snare frequency (Figure 1). The EQ’s background spectrum analyzer can help by making sure the bar in the range you’re boosting goes as high as possible. In stubborn cases, you may need to double up the bandpass filter with a second sharp bandpass filter.
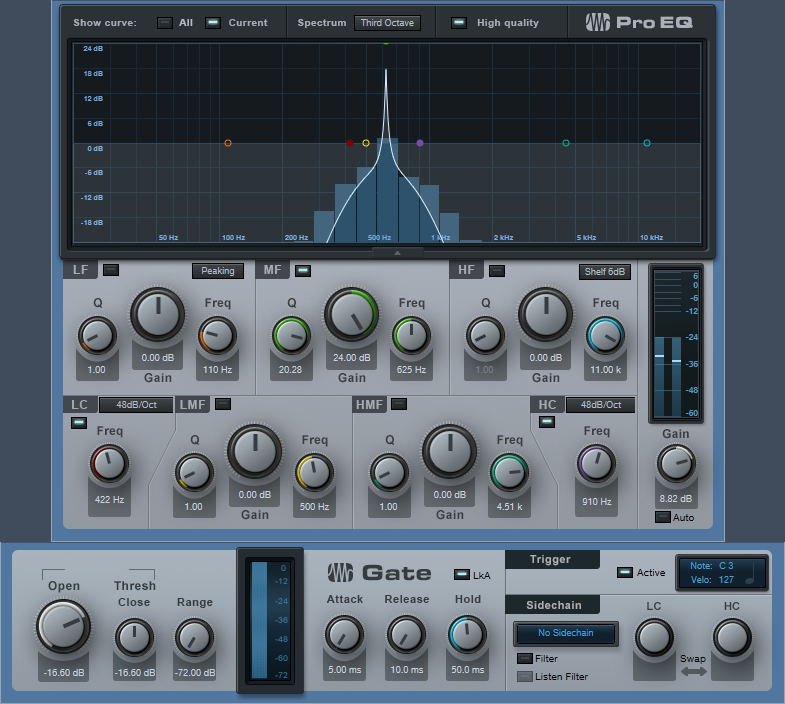
Figure 1: Use the Pro EQ and Gate to extract a snare drum trigger.
- Enable the gate, and click on Active to enable the trigger output. Set the Note and Velocity as desired (however when using noise with Mai Tai, the specific Note isn’t that critical). Adjust the Gate’s settings so that it triggers on the snare hits. Like the Pro EQ, the controls here are critical as well.
- A short attack is usually best.
- Keep release relatively short (e.g., 10 ms), unless you want to mix in some of the peaked/gated sound from this channel along with the Mai Tai and drums.
- Hold times around 50 ms can help prevent false triggering. But you can also get creative with this control. If you don’t want to trigger on hits that are close together (e.g., fills), a long Hold time will trigger on the first snare of the series, but ignore subsequent ones that fall within the hold time.
- Insert the Mai Tai. Set its input to Gate, and enable the mixer’s Monitor button. Figure 2 shows the finished track layout.

Figure 2: Track layout for snare drum extraction.
TWEAKING THE MAI TAI
Now the fun begins! Figure 3 shows a typical starting point for a snare-enhancing sound.
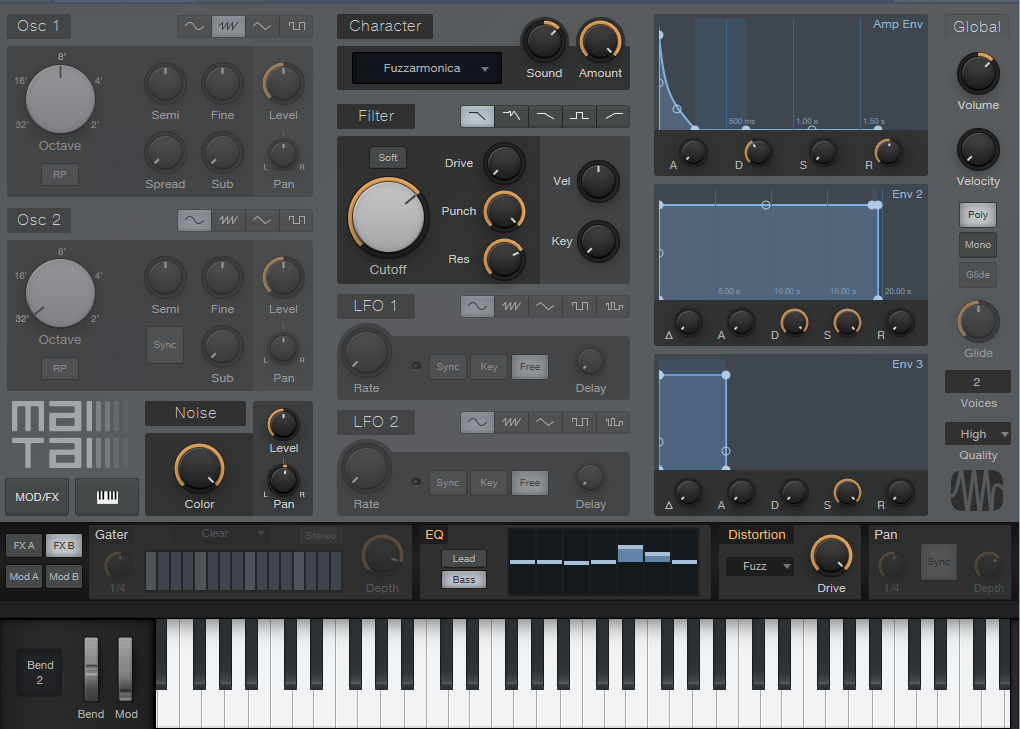
Figure 3: Starting point for a cool snare drum sound with Mai Tai.
The reason for choosing Mai Tai as the sound source is because of its “Character” options that, along with the filter controls, noise Color control, and FX (particularly Reverb, EQ, and Distortion), produce a huge variety of electronic snare sounds. The Character module’s Sound and Amount controls are particularly helpful. The more you play with the controls, the more you’ll start to understand just how many sounds are possible.
BUT WAIT…THERE’S MORE!
If the snare is on a separate track, then you don’t need the Pro EQ or FX Channel. Just insert a Gate in the snare track, enable the Gate’s trigger output, and adjust the Gate Threshold controls to trigger on each snare drum hit. The comments above regarding the Attack, Release, and Hold controls apply here as well.
Nor are you limited to snare. You can isolate the kick drum, and trigger a massive, low-frequency sine wave from the Mai Tai to give those car door-vibrating kick drums. Toms can sometimes be easy to isolate, depending on how they’re tuned. And don’t be afraid to venture outside of the “drum enhancement” comfort zone—sometimes the wrong Gate threshold settings, driving the wrong sound, can produce an effect that’s deliciously “right.”
Friday Tips: Frequency-Selective Guitar Compression
Some instruments, when compressed, lack “sparkle” if the stronger, lower frequencies compress high frequencies as well as lower ones. This is a common problem with guitar, but there’s a solution: the Compressor’s internal sidechain can apply compression to only the guitar’s lower frequencies, while leaving the higher frequencies uncompressed so they “ring out” above the compressed sound. (Multiband compression works for this too, but sidechaining can be a faster and easier way to accomplish the same results.) Frequency-selective compression can also be effective with drums, dance mixes, and other applications—like the “pumping drums” effect covered in the Friday Tip for October 5, 2018. Here’s how to do frequency-selective compression with guitar.

- Insert the Compressor in the guitar track.
- Enable the internal sidechain’s Filter button. Do not enable the Sidechain button in the effect’s header.
- Enable the Listen Filter button.
- Turn Lowcut fully counterclockwise (minimum), and set the Highcut control to around 250 – 300 Hz. You want to hear only the guitar’s low frequencies.
- You can’t hear the effects of adjusting the main compression controls (like Ratio and Threshold) while the Listen Filter is enabled, so disable Listen Filter, and start adjusting the controls for the desired amount of low-frequency compression.
- For a reality check, use the Mix control to compare the compressed and uncompressed sounds. The high frequencies should be equally prominent regardless of the Mix control setting (unless you’re hitting the high strings really hard), while the lower strings should sound compressed.
The compression controls are fairly critical in this application, so you’ll probably need to tweak them a bit to obtain the desired results.
If you need more flexibility than the internal filter can provide, there’s a simple workaround.
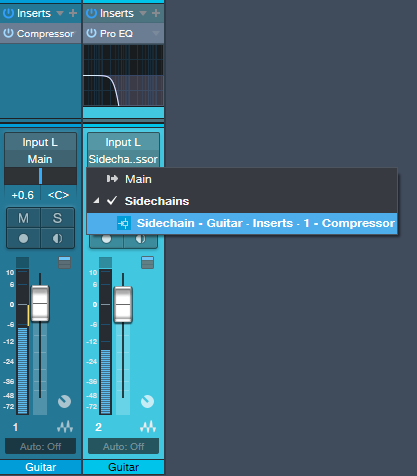
Copy the guitar track. You won’t be listening to this track, but using it solely as a control track to drive the Compressor sidechain. Insert a Pro EQ in the copied track, adjust the EQ’s range to cover the frequencies you want to compress, and assign the copied track’s output to the Compressor sidechain. Because we’re not using the internal sidechain, click the Sidechain button in the Compressor’s header to enable the external sidechain.
The bottom line is that “compressed” and “lively-sounding” don’t have to be mutually exclusive—try frequency-selective compression, and find out for yourself.
Friday Tips: The Sidechained Spectrum
You’re probably aware that several Studio One audio processors offer sidechaining—Compressor, Autofilter, Gate, Expander, and Channel Strip. However, both the Spectrum Meter and the Pro EQ spectrum meter also have sidechain inputs, which can be very handy. Let’s look at Pro EQ sidechaining first.
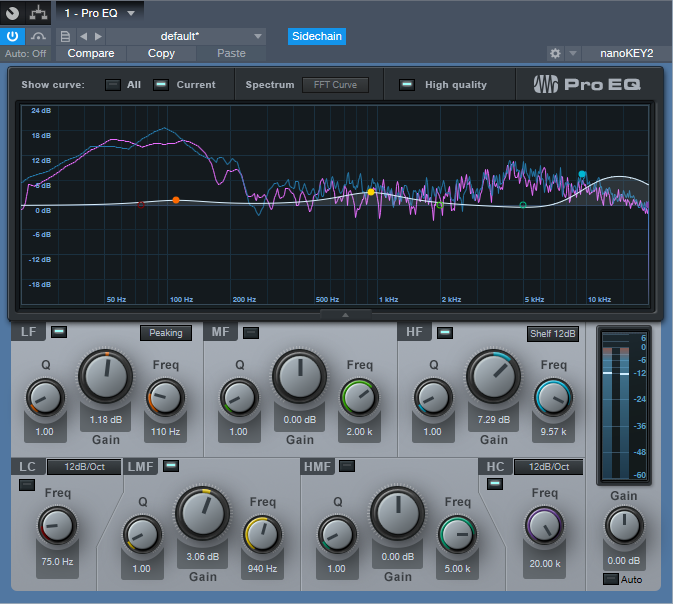
When you enable sidechaining, you can feed another track’s output into the Pro EQ’s spectrum analyzer, while still allowing the Pro EQ to modify the track into which it’s inserted. When sidechained, the Spectrum mode switches to FFT curve (the Third Octave and Waterfall options aren’t available). The blue line indicates the level of the signal going through the Pro EQ, while the violet line represents the sidechain signal.
As a practical example of why this is useful, the screen shot shows two drum loops from different drum loop libraries that are used in the same song. The loop feeding the sidechain loop has the desired tonal qualities, so the loop going through the EQ is being matched as closely as possible to the sidechained loop (as shown by a curve that applies more high end, and a slight midrange bump).
Another example would be when overdubbing a vocal at a later session than the original vocal. The vocalist might be off-axis or further away from the mic, which would cause a slight frequency response change. Again, the Pro EQ’s spectrum meter can help point out any differences by comparing the frequency response of the original vocal to the overdub’s response.
The Spectrum Meter
Sidechaining with the Spectrum Meter provides somewhat different capabilities compared to the Pro EQ’s spectrum analyzer.
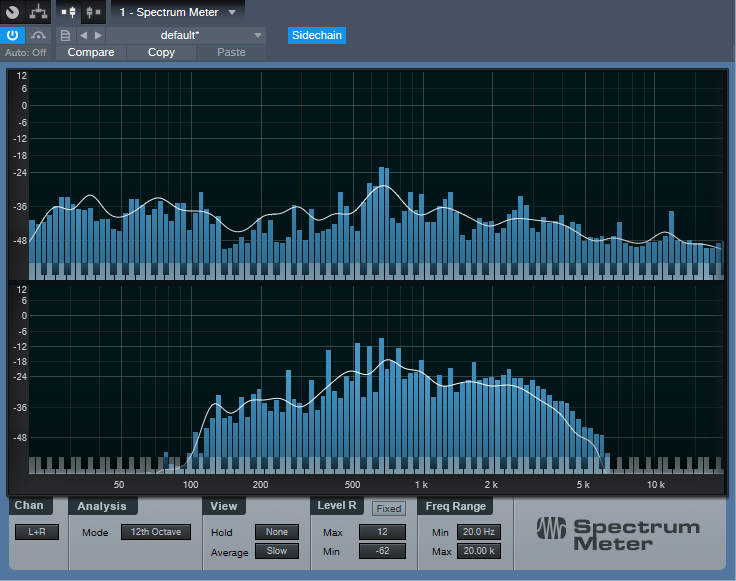
With sidechain enabled, the top view shows the spectrum of the track into which you’ve inserted the Spectrum Meter. The lower view shows the spectrum of the track feeding the sidechain. When sidechained, all the Spectrum Meter analysis modes are available except for Waterfall and Sonogram.
While useful for comparing individual tracks (as with the Pro EQ spectrum meter), another application is to help identify frequency ranges in a mix that sound overly prominent. Insert the Spectrum Meter in the master bus, and you’ll be able to see if a specific frequency range that sounds more prominent actually is more prominent (in the screen shot, the upper spectrum shows a bump around 600 Hz in the master bus). Now you can send individual tracks that may be causing an anomaly into the Spectrum Metre’s sidechain input to determine which one(s) are contributing the most energy in this region. In the lower part of the screen shot, the culprit turned out to be a guitar part with a wah that emphasized a particular frequency. Cutting the guitar EQ just a little bit around 600 Hz helped even out the mix’s overall sound.
Of course, the primary way to do EQ matching is by ear. However, taking advantage of Studio One’s analysis tools can help speed up the process by identifying specific areas that may need work, after which you can then do any needed tweaking based on what you hear. Although “mixing with your eyes” isn’t the best way to mix, supplementing what you hear with what you see can expedite the mixing process, and help you learn to correlate specific frequencies with what you hear—and there’s nothing wrong with that.
Studio One in the City of Angels with Josh Cumbee!
If you’re not following PreSonus on Instagram, you’re missing out!
We post the latest things going on around the office, photos of our products in action, reviews, and we also connect with our users one on one. Most recently we connected with Singer/Songwriter/Producer Josh Cumbee from Los Angeles, CA. Josh is a diehard Studio One fan, and often shares his expertise with his Instagram following, and we are quick to share. We took the opportunity to talk to him more about his craft, Studio One, and what’s on the horizon for him.
 Give us some background on yourself. How long have you been making music?
Fully professionally, it has only been about 4 years—that was the first time a song came out with my name in the credits where I had to pinch myself. I had been playing piano and guitar since I was a kid, which drew me to USC for their music business degree as I figured there was no way to make the creative side into an actual job. I started moonlighting with composing for TV backing tracks concurrently with my day job—a couple twists of fate, a lot of hard work, and a few key helping hands later and it blossomed into a full-time profession.
What do you like about PreSonus?
PreSonus to me exemplifies accessible, no-compromises quality. With a lot of brands in the audio space, you either have to shell out a lot of hard-earned cash to get a high-end product, or the budget product sounds/feels/functions like a cheap imitation of the real thing. To me, Studio One is a top-shelf program that I’d be willing to pay a lot more forthe fact that it’s priced low enough for me to recommend to my peers, shoot, even my little brother who’s getting into making music… now, that’s cool.
What PreSonus products do you use?
I’m a die-hard Studio One evangelist. I also have a tried and true Central Station in my studio that I’d guess has been rocking for a solid 400 years at least.
Describe the first time you wrote a song? Produced it?
I’m not even sure what the first song I wrote/produced would have been… but it was probably done on the ridiculous combination of Sony Acid 3 and a four-track Tascam tape recorder I stole from my dad’s electronics drawer. It was generally a misshapen cacophony of loops, poorly played guitar and tape hiss until I got into Garageband a while later in high school.
When did you first hear about Studio One?
A great producer from Nashville mentioned it to me. Pro Tools was the first serious DAW I learned, which I promptly abandoned for Logic because at the time working with MIDI was extremely difficult in PT. I had spent several years in Logic, but the updates (particularly in the GUI department) personally didn’t jive with me. Studio One was there in my moment of software weakness, and became one of very few tools I feel like I can’t live without.
What features are you most impressed with in Studio One?
Working with audio is a dream in Studio One. It is so easy to render, stretch, pitch shift, chop, Melodyne, change the BPM of the whole song at the drop of a hat… you name it. VST3 integration is a great CPU saver. The dual buffer is genius. Shout-out to those string samples. And Fat Channel. OK, someone stop me…
 Any user tips or tricks or interesting stories based on your experience with Studio One?
With the stems feature being as rock solid as it is, I am a big believer in setting up your template with stems in mind—that way you learn to work within that structure and if/when it comes time to export them for a collaboration, mixer, delivery, etc., you can really take full advantage of Studio One’s built in set up for that. I think everyone should at least know how to use the routing feature in the channel editor—you’ll be surprised when it might come in handy. If you’re a Logic refugee you can bring all the .SDIR’s from Space Designer into Open Air AND the .EXS instruments into Presence, which is great if there’s sounds you just can’t let go of. Also, I built a macro that removes all unused audio files, copies all external ones to the session folder, then saves it—highly recommended. Big fan of VST3’s, they’re way easier on your CPU and cross-platform compatible if you need to move a session across OS’s.
How easy/difficult was Studio One to learn?
It’s a great cross between almost every DAW; mix window feels like PT, main window reminds me of Logic, arranger functions feel like Ableton… sort of all the best parts of each plus some sauce all of its own. Porting and recreating my key commands was a hassle, and the depth of sub-menus can be a little intimidating at first. There’s a lot of genius features but sometimes you have to dig for them! So all that to say, easy at points, hard at others, worth it… 100x over.
Where’d you go for support?
Where else? Straight to the support ticket portal (once I have exhausted the forums of course).
What features do you want to see next in Studio One?
MIDI capture to complement the existing armed audio track capture feature. Mid-side mode for pan knobs. A native Auto Tune competitor for when I’m too lazy to tune backing vocals in Melodyne. Native WASAPI driver for Windows similar to FL Studio’s (which rocks). More control over multicore/threading. Dare I say… integration with UAD Hardware monitoring just to have the option.
Any other thoughts on Studio One?
Of course, if I were starting to make music now, knowing what I know, I’d definitely start with Studio One. But personally, having to start over in a new program proved an even greater gift for my creative process. It made me rethink all of my go-tos, presets, channel strips, templates, etc., even a preference to MIDI over audio or vice versa. Of course, you get set back a week or two in productivity as you’re relearning everything, but that process of education at this stage in my career definitely took the music to the next level for me. I’d recommend it no matter how entrenched you might be in your program of choice, even if just for that.
Recent projects? What’s next for you?
Just co-wrote and produced on Adam Lambert’s latest single, Feel Something (about which I’m very excited), and also a single for a band called Flawes entitled Don’t Count Me Out that I feel really jams. I’ve got a couple other things cooking as a writer/producer that I’m stoked on but my baby is definitely my artist project, for which I’ve written and produced an album on the heels of a feature with Armin Van Buuren that did pretty well. We have an upcoming feature slated (so excited) and going to start rolling out tracks as a solo artist this year once the partnership side is finalized.