Tag Archives: Studio One
Friday Studio One Tip: Virtual “Nashville Tuning”
Nashville tuning is a popular sound for rhythm guitar parts, and not just in country music: a few hit songs with Nashville tuning include Wild Horses (Rolling Stones), Dust in the Wind (Kansas), Gimme Danger (Iggy Pop), Phase Dance (Pat Metheny), Hey You (Pink Floyd), Wicked Game (Chris Isaak), and many others. It’s not an alternate tuning in the standard sense, because the strings are still tuned (low to high) E A D G B E. Instead, it adapts a 12-string set of strings, or string sets dedicated to Nashville tuning, to a conventional six-string guitar. The first and second strings are the usual E and B respectively, but the lower four strings are tuned an octave higher than standard tuning.
So what does this have to do with Studio One? Well, the downside to Nashville tuning is that you really need to dedicate a guitar to it; you’ll have to adjust the intonation (maybe the truss rod too), and besides, you don’t want to have to change strings all the time. Granted, after playing with Nashville tuning, you might want to dedicate a guitar to it—but in the meantime, we can create a similar effect with Studio One. Although the sound isn’t technically the same, it produces much of the same result: a bright, present rhythm sound (somewhat like a 12-string, but less dense), that’s mostly layered with a companion guitar part. Here’s how to do it.
- Copy your rhythm guitar track, and select it.
- Type F4 to bring up the Inspector.
- Set Transpose to 12 (Fig. 1).

Figure 1: Tune your copied guitar part up an octave.
That’s pretty much all you need to do, but here are some notes on how to apply Nashville tuning.
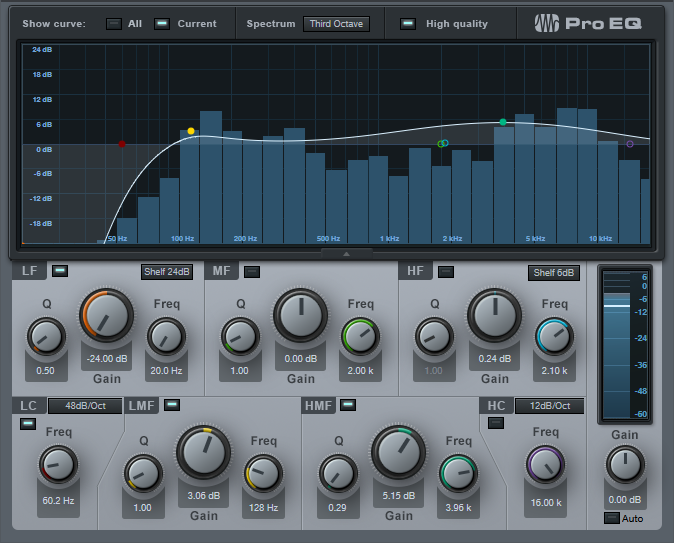
- Studio One produces amazingly good octave-above sound quality, but it’s not perfect. Another issue is that with physical Nashville tuning, the 1st and 2nd strings aren’t transposed up an octave. This shouldn’t really matter much, because if you can hear the Nashville-tuned guitar prominently, you’re missing the point—it’s to add texture. However, you might want to roll off the highs somewhat, and give a little upper midrange boost, so the sound sits a bit better in a mix (Fig. 2).
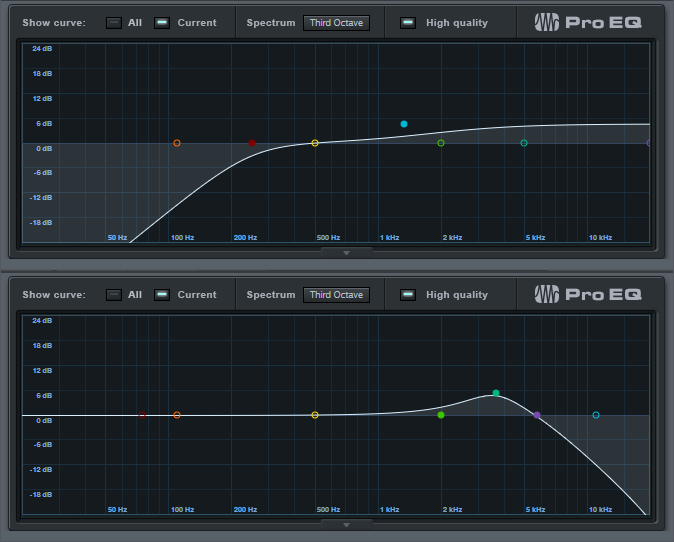
Figure 2: Optional EQ settings for the Nashville-tuned track.
- Often, Nashville tuning is layered with a standard guitar part. Due to slight detunings between two different guitars, you’ll sometimes hear some “shimmer,” like with a 12-string guitar or by adding a chorus unit. However, because the Nashville-tuned track in Studio One is a copy of the original guitar track, the layering is perfect. If you don’t want perfect layering, raise the Inspector’s Tune control by around 10 or 15 cents to add some detuning. (For some reason, I find tuning slightly sharp sounds better than tuning slightly flat).
It’s really that simple, and the bright sound can add a lot to a mix—listen to the audio example, which plays a rhythm guitar part, and then layers the virtual Nashville-tuned guitar part. The copied part is mixed a little than usual to get the point across, but even so, it still sounds pretty cool:
Football, Podcasts and Studio One
Over here stateside, ‘Tis the season for family, over-eating, traveling, watching football, and more eating. You may not be a huge fan of the holidays, but I love them! The holidays have something for everyone, much like a recent podcast I came across on Twitter called The F.A.N. Show.
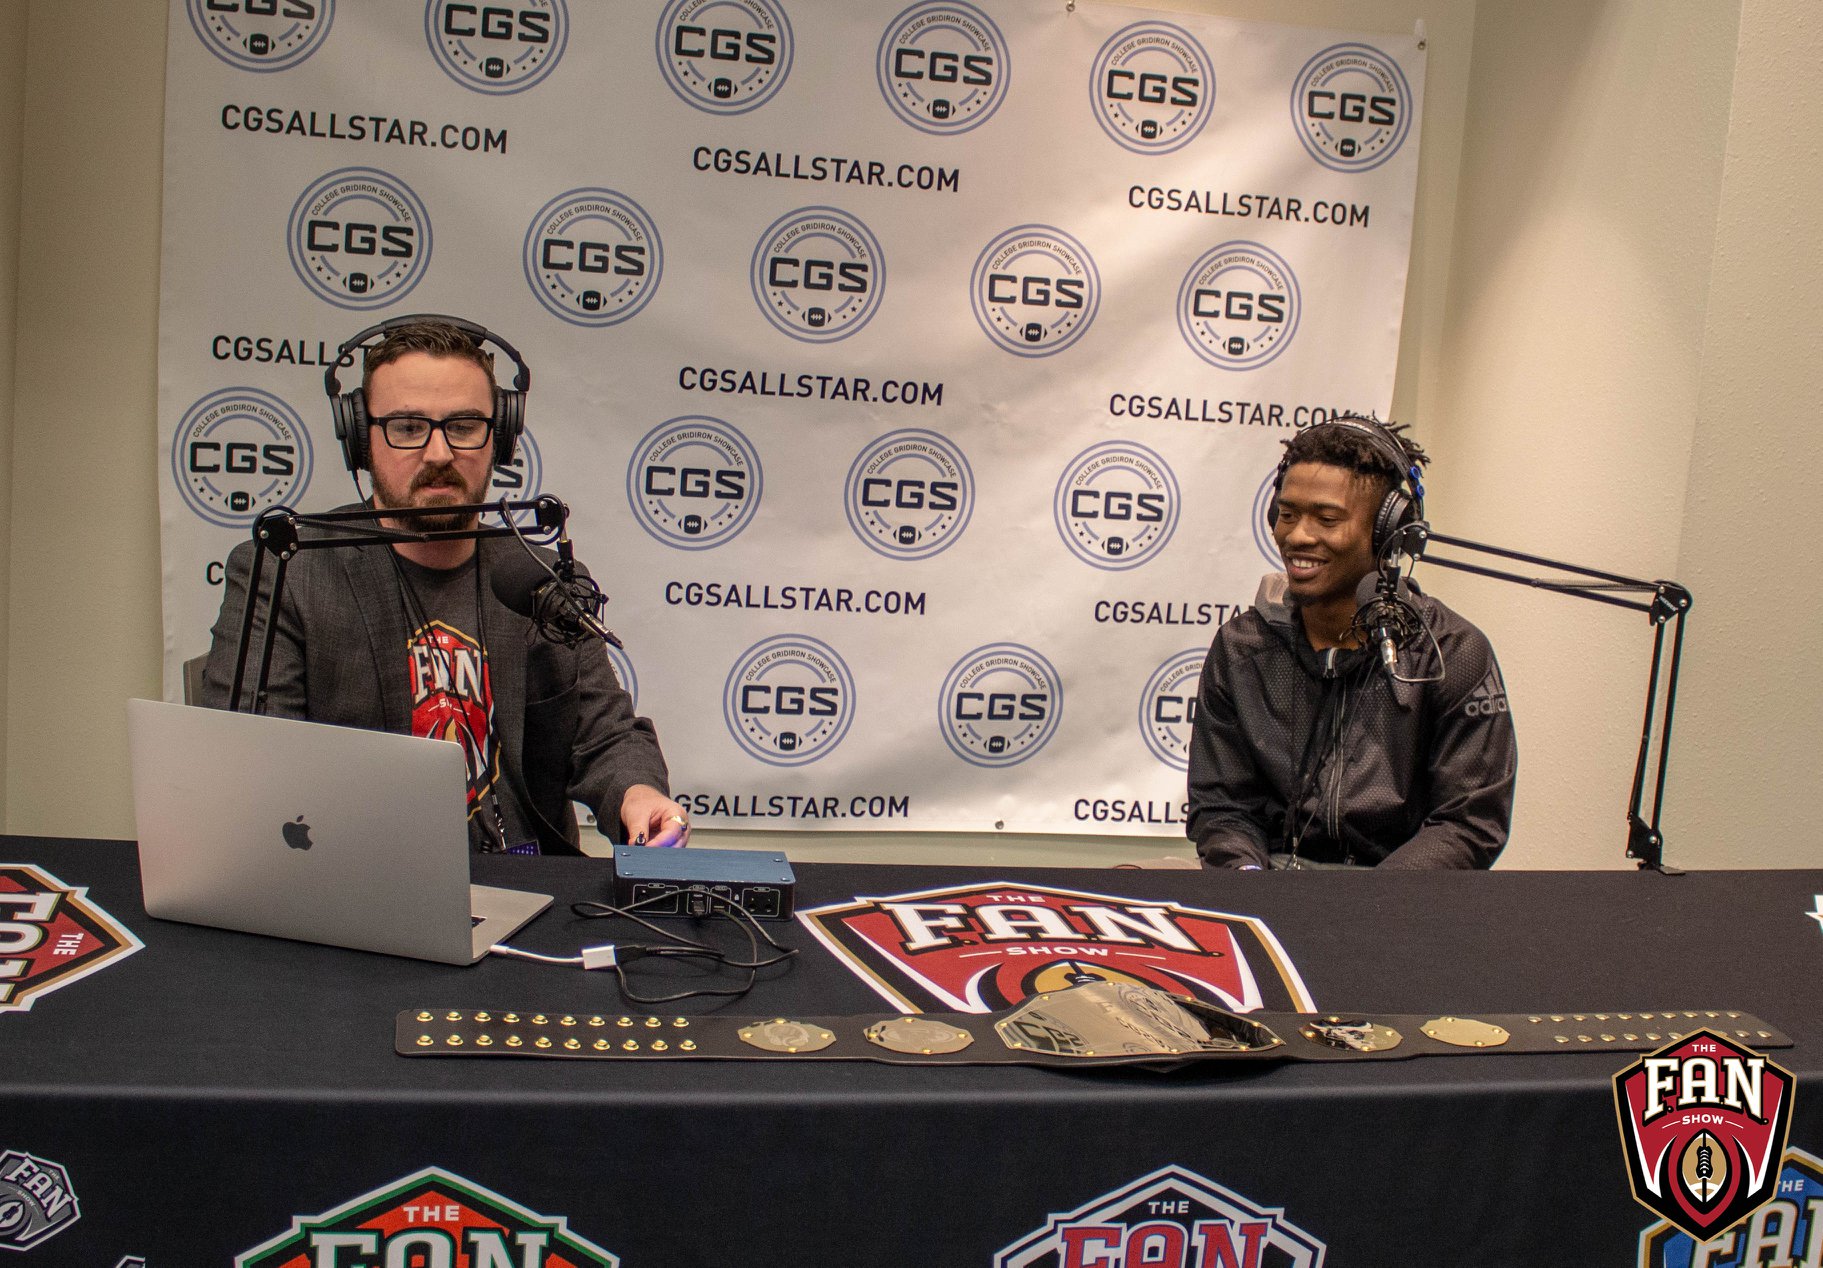
The F.A.N. Show is a one-man, award-winning sports variety show based in Spokane, WA—and it’s in a league of its own. There’s something for every fan. The show is hosted by Richard Tieman, who is a musician, producer, sports fanatic, and Studio One user. After five years of recording 440 podcast episodes on the same AudioBox iTwo he purchased in 2015, Richard shows no signs of slowing down. We wanted to know more about how his podcast came to be so successful.
Tell us about your background. How long have you been in the audio industry?
I was a drummer for a punk rock band since I was 17, and loved music, performing live, and traveling to different cities. I also love a variety of things like football, the outdoors, pop culture, and even pro wrestling. I had a knack for entertaining people, and I’ve always been comfortable on a microphone. I met my wife seven years ago and we’ve been married for five, and she is my single greatest supporter and biggest fan. I’ve been in audio for about 15 years. 10 years ago I got really passionate about it when I started hosting karaoke at a local bar while I was still touring with my band. Then when we broke up five years later, a friend suggested that I should start my own podcast, so I figured… why not?
How has the audio industry changed since your early days? 
It’s changed quite a bit. When I was in the band, podcasts weren’t very popular yet. Not many people even knew what they were. Recording and editing equipment and software were super expensive, so you had to really have a passion for audio/video in order to justify going all-in on the idea. I remember making a business proposal for starting my own karaoke and entertainment company in 2015, and the money I needed for karaoke equipment and songs, just to get started, was about $3,000. Now, everyone and their mom has a podcast or YouTube channel and the cost to buy a “starter kit” for those is around $300. Quite the difference.
What’s your favorite podcast right now?
As a wrestling fan, he’s one of my favorites. He’s also the frontman for the band Fozzy, and he doesn’t just interview wrestlers. He has a wide variety of different guests and that’s what I love about his show. The mix. I guess his podcast is what inspired me to branch out to talk about more than just football. Yes, I love football, but I love other things as well. Music, comics, the outdoors. Why limit myself?
Tell us about your podcast.
At first, it was just me and my thoughts about football and my 49ers. It’s the sport I know well, and the one I felt the most comfortable talking about. I also hated all the irrelevant news you started to see and hear on mainstream sports media. It was less about stats and highlights and more rumors and gossip. I wouldn’t say I started my podcast out of spite, but the idea of being different was certainly appealing. What was a weekly podcast called The ButtFumble Show is now a live-streamed variety show that airs three times a week and covers a little bit of everything: The F.A.N. Show. “Everyone’s a FAN of something, and we have something for every fan.”
Where did the idea for your podcast come from?
The rooftop of a bar in downtown Spokane where my 10-year high school reunion was happening. My buddy Cameron and I were talking about his Seahawks and my 49ers. and going back and forth about their last season and stuff that needed to happen in the offseason. He was really impressed with not only my knowledge of my team and the league, but that I could carry a conversation and could back up my opinions with facts. So he asked if I had ever thought of becoming a sports analyst, and I laughed and said, no thanks. That’s when he suggested starting my own podcast.
How does your first podcast compare to your most recent?
Oh boy. My first episode was terrible. 20 minutes of me sitting in a chair in the spare room of our house, just rambling on about the upcoming season and what to watch for. I’d never used any PreSonus equipment before, or any podcasting equipment for that matter, so my mic was turned down really low and I didn’t know how to edit the recording. Like I said, terrible. Now, almost 440 episodes later, I have my own intro theme, I have segments, sound effects, I know how to edit and get the best sound quality I want. My best episode is always my next episode.
There are so many podcasts these days. How do you stand out?
In all honesty, I can’t say that I do “stand out.” I know that I’ve learned a lot in five years of doing my podcast, and even though all the changes and trying new things, I’ve always stuck to what I believe and not trying to conform to certain styles just to get clicks or downloads. My fans are my fans, and as long as they tune in and listen, I’ll keep doing it. But I do know what makes my show “different,” is that even after five years, I’m still doing it. Not everyone who has thought “Hey, I can do that,” has actually done it for very long. Some guys I know that started podcasts never made it past 10 episodes. I’m about to do my 440th. I pride myself on constantly wanting to learn and get better. Try new things. And I’m persistent.
 What advice do you have for someone who wants to start a podcast?
Be ready for criticism and be open to feedback. Feedback is one of the hardest things because it’s not all good feedback, but you need people supporting you that will be honest with you and tell you what they liked and more importantly, what they didn’t like. That, and to be consistently persistent. Like I said, I know people that never made it more than 10 episodes. There will be a lot of excuses you can make for yourself, but if it’s really something you’re passionate about, you’ll make it a priority. I’ll tell anyone and everyone what programs or equipment I use, and people think I’m crazy for giving away my “secrets to success.” That’s not the secret. I don’t even have a secret. I just made my show a priority and have built a brand as a result.
How did you first hear of PreSonus?
Google. Haha. I talked with my wife about the podcast idea and since the band had broken up and I was going back to school for my AA degree in Business Management, she said I needed a hobby and thought the podcast would be good for me. So we searched “Podcasting kits” and the 2nd or 3rd result was the “PreSonus AudioBox iTwo.” About $220, it came with the AudioBox, mic, mic cord, headphones, and Studio One for editing. Connect it to the USB port on your computer and you’re ready to roll. I loved how simple the set up was, and that it didn’t take up a lot of space. It travels easily too, so it’s easy to take with me when I do podcasts on location.

What PreSonus products do you use?
I still use that same AudioBox iTwo (five years later) and I absolutely love it. I actually want to get another one so I can have one for my studio and one specifically for traveling. Or have one as a backup at the very least. You can never be too prepared when it comes to technology. I’ve since upgraded my mics, but still use Studio One and that same box for my show.
Why was PreSonus a good option for you? Was it easy to learn?
It was convenient, easy to use, and not a lot of extras. The less you have to worry about when it comes to recording, editing, and producing, the better. Not everyone has a producer or even an assistant, so if you’re a “one-man show” like I am, PreSonus is amazing. There was definitely a learning curve. A lot of it was self-explanatory, but I have a lot of audio friends that were happy to help me. YouTube is also an amazing learning tool, haha.
Do you ever take your podcast on the road? 
All the time. I’ll take it to local events like Comic-Con and interview special guests and cosplayers, or I’ll go to the comedy club and interview the comedians in the green room before their show. I’ve even interviewed bands at our local concert house before their shows. But my favorite time of the year is my annual tour. I take the AudioBox and my set up and go to different events across the country like BattleBots, or arena football games and I’ll host tailgate parties and use it for a live stream, or I’ll interview players and coaches after the game. I’ve gotten pretty good at setting up in hotel rooms and at arenas.
Recent projects? What’s next for you?
I just finished my third tour, which was awesome, and I was also hired to do media for different events where I would go and interview players, coaches, staff, cast and crew and publish them as podcasts to help promote the events. The show has a great following and I’ve gotten more and more opportunities like these as a result. I recently accepted the position of Director of Communications for the Sioux Falls Storm. An indoor football team that had heard of me and my podcast and wanted me to be apart of their winning team for 2020. I will be doing that as well as continuing what I do with my podcast. I’m hoping 2020 is my biggest year yet and that moving to a new city will hopefully create new opportunities. The new owners of the Storm were very adamant about me continuing to do my podcast and continuing to grow my brand, so that is what I will look to do next year!
Where can we listen to your podcast?
The F.A.N. Show is available on most major podcasting platforms including:
- iTunes: https://podcasts.apple.com/us/podcast/the-f-a-n-show/id1086005267
- Spotify: https://open.spotify.com/show/5uapKFdFfmrrUIzC8UaFTa
- SoundCloud: https://soundcloud.com/thefanshow
- iHeartRadio: https://www.iheart.com/podcast/53-the-fan-shows-track-28512625/
- Spreaker: https://www.spreaker.com/user/thefanshow
Follow The FAN Show on Instagram!
Follow the FAN Show on Facebook!
Interested in joining the Studio One Family? Click here for the best price all year!
The VoxTool FX Chain
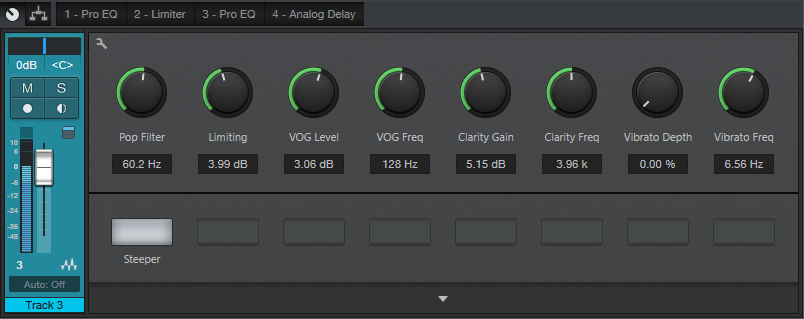
Y’all seem to like FX Chains, so here’s one of my favorites—the VoxTool, a toolchest for bringing out the best in vocals and narration as quickly as possible. You’ll still need to add any desired time-based effects (doublers, reverbs, or whatever), or perhaps some compression, but this will help take care of pops, EQ, peaks/transients, and vibrato during the songwriting process. In fact, this FX Chain may even do the job all the way to the final mix.
You can download the FX Chain from the link at the end of this tip; but let’s cover how the various modules affect the sound, so that (if needed) you can tweak this FX Chain for your particular voice.
1. PRO EQ
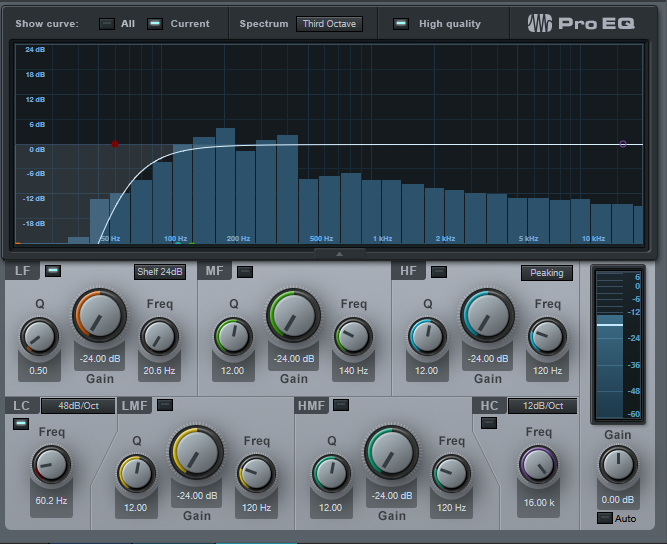
This stage uses the Low Cut Filter, set to 48 dB/octave, with the cutoff frequency controlled by the Pop Filter control. Turning up this control attenuates the low frequencies where pops occur. The Steeper button adds a bit more low-frequency attenuation, aimed specifically at subsonics, by enabling the LF stage.
2. LIMITER
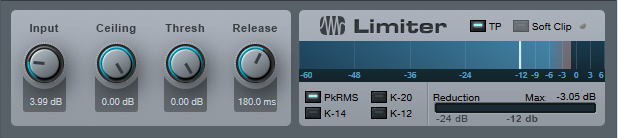
Now that the p-pops are reduced, we can add some limiting to tame any vocal peaks or transients. The Limiting control in the Macro Controls panel turns up the Limiter’s input control to increase the amount of gain reduction.
3. PRO EQ
This link in the FX Chain uses four filter stages. Like the first Pro EQ, the Low Cut stage ties to the Pop Filter control for further attenuation of sub-vocal low frequencies, while the Steeper switch enables the LF stage for additional pop filtering. The LMF section provides the VOG effect (what narrators call “Voice of God”). This adds fullness to the bass, like an FM late-night DJ, which can also help restore some low-end depth in the vocal range if removing pops extends a bit into the vocal range. The HMF stage is the engine for the Clarity Gain and Clarity Frequency controls. Increasing Clarity Gain adds intelligibility and articulation to the vocals; vary the Clarity Frequency control to find what works best with your voice.
4. ANALOG DELAY
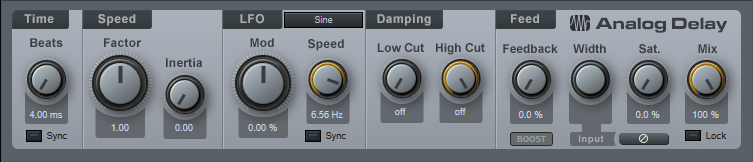
This provides a vibrato effect, with Vibrato Depth and Vibrato Frequency controls applied to the Analog Delay module. You likely won’t want to leave Vibrato Depth up, but instead, control it with automation, a footpedal, mod wheel, or whatever to add vibrato when needed.
That’s all there is to it! So download the VoxTool FX Chain, and bring your vocals up to speed—fast.
Studio One Tutorials!
These PreSonus Studio One Tutorials starring Gregor Beyerle will help you learn how to make beats on Studio One – and more! You’ll find everything you need to know to get started producing in Studio One in this breakthrough series—from set-up and Studio One basics to more advanced topics like the Project page.
Enjoy!
Click here to view the full playlist on YouTube.
Tighten Mixes with the “Tightener” FX Chain
Sometimes when you’re mixing, sounds conflict because they have too much energy in the same part of the spectrum. The usual solutions are to lower the level of the sound deemed less important, or use EQ to try to ensure that each sound carves out its own part of the spectrum. This week’s tip presents an entirely different solution. It’s the kind of tip where people will likely go “yeah, whatever…” until they run into this problem, try the tip, and find that amazingly enough, it works.
But we’ll also take advantage of this tip to describe how to make a simple FX Chain. FX Chains are an extremely powerful Studio One feature, so if you haven’t gotten into creating your own yet, this is a good project for getting started.
HOW IT WORKS
The Tightener creates four sharp, narrow notches in a Pro EQ, at frequencies related to the musical key. For example in the key of A, the notches are at 110 Hz, 220 Hz, 440 Hz, and 880 Hz. If you have, for example, a song in the key of A where the guitar conflicts with the piano, to have less piano and more guitar, insert the Tightener FX Chain for the key of A into the piano track, and increase the depth of the notches. Here’s how to create a Tightener FX Chain.
- Insert a Pro EQ into a track, and open its interface.
- We’ll be using the LF, LMF, MF, and HMF stages. Set the Q for each stage to 24.00.
- Referring to the chart at the end, type a filter frequency into each filter stage. For example, with the key of A, choose 110 Hz for the LF stage, 220 Hz for the LMF stage, 440 Hz for the MF stage, and 880 Hz for the HMF stage (Fig. 1).
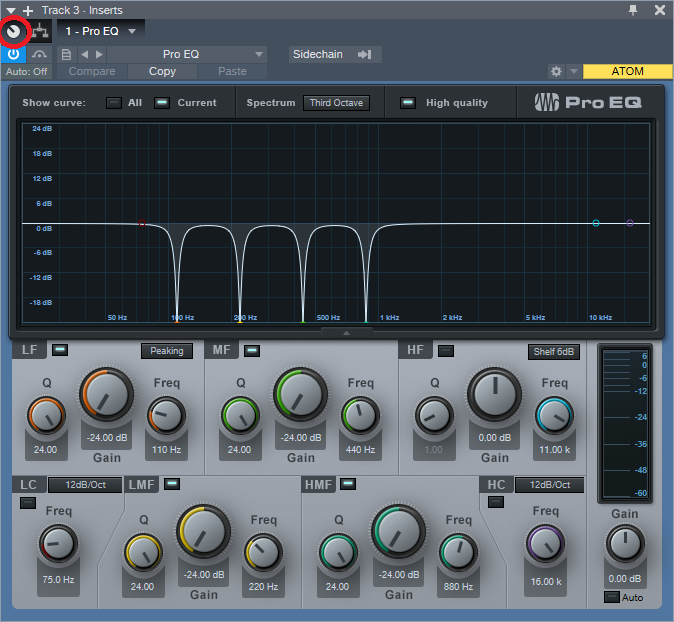
Figure 1: The filter settings for the key of A Tightener, with the notches set to maximum depth.
- Click on the knob icon in the effect’s upper left corner (just above the enable/bypass “power” button; it’s circled in red in Fig. 1). This opens the FX Chain Macro Controls interface. Then, click on the interface’s Wrench icon to open the Macro Controls editor.
- In the right-hand pane, unfold the Pro EQ folder, then unfold the Low Frequency, Low-Mid Frequency, Mid Frequency, and High-Mid Frequency folders.
6. Ctrl+click on LF-Gain, LMF-Gain, MF-Gain, and HMF-Gain to select all four parameters. The FX Chain Editor should now look like Fig.

Figure 2: The FX Chain Editor shows the Pro EQ parameters used for the tightener.
- Now click on Add Targets. The Gain control parameters will appear in the middle pane. They’ll all be controlled by the one knob at the bottom.
- I wanted the knobs to work so that when the control is full up, there’s no notch and the EQ works normally. Then to reduce the energy at a particular key, turning down the control increases the notch depth, producing more of a cut. However, if you turn the Macro control at the bottom of the window and watch the filter response, you’ll see it goes from full notch at minimum, to full boost when turned up. We don’t want the boost.
- Click on one of the Trans graphs, and drag the node in the upper-right-hand corner down to 0. This ensures that when the knob is up all the way, its filter gain is zero. Then, click on Copy (Fig. 3).

Figure 3: Adjust one of the graphs so that the maximum value is 0, then copy and paste to the other graphs.
- Click on the other three graphs, and choose Paste. Now all the Gain controls will track each other.
- Look at the filter, and vary the knob at the bottom of the FX Chain Editor. All the notches will go from maximum notch with the control fully counter-clockwise, to minimum notch with the control clockwise.
- Now double-click on the knob label, and type a name like “Tightener A” or “Tightener C#” or whatever, depending on the filter frequencies.
- Click on the wrench to close the Editor. To save the FX Chain, click the downward arrow in the Macro Control panel’s upper left, and choose where to store your preset (Fig. 4).
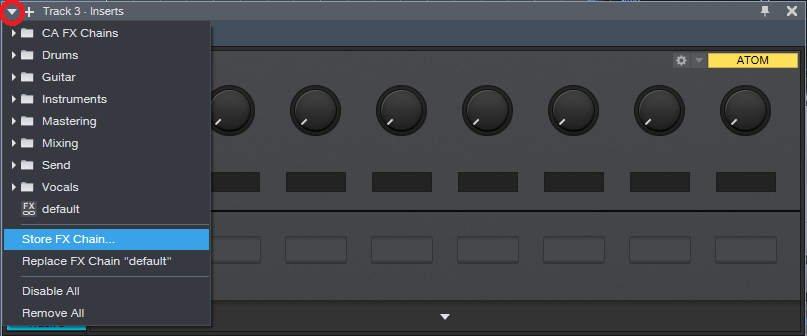
Figure 4: Don’t forget to store your FX Chains, so you can use them again.
And now you have a Tightener FX Chain! But you’ll want one for each key. It’s easy enough to do—type new frequencies into the four EQ bands, rename the control for the appropriate key, and then save the FX Chain under the name of the new key. For example, if you change the frequencies to 147 Hz, 294 Hz, 587 Hz, and 1175 Hz, you now have a key of D tightener. Here are the frequencies for all the keys (Fig. 5).

Figure 5: Frequencies for an octave’s worth of tighteners.
You need to be a little strategic about applying this FX Chain; it’s needed only when you want to help keep instruments from stepping on each other.
So that you can get started experimenting with this as easily as possible, all the Tightener FX Chains are available for download. After downloading, place them in the folder Studio One Songs and Projects\Presets\PreSonus\FX Chains\Tighteners, or wherever you specified the location for presets in Studio One > Options > Locations > User Data.
But even if you download them, try your hand at creating an FX Chain if you haven’t done so already. They’re really handy.
Download ALL 12 Tighteners Here!
New Arcades and Studio One!
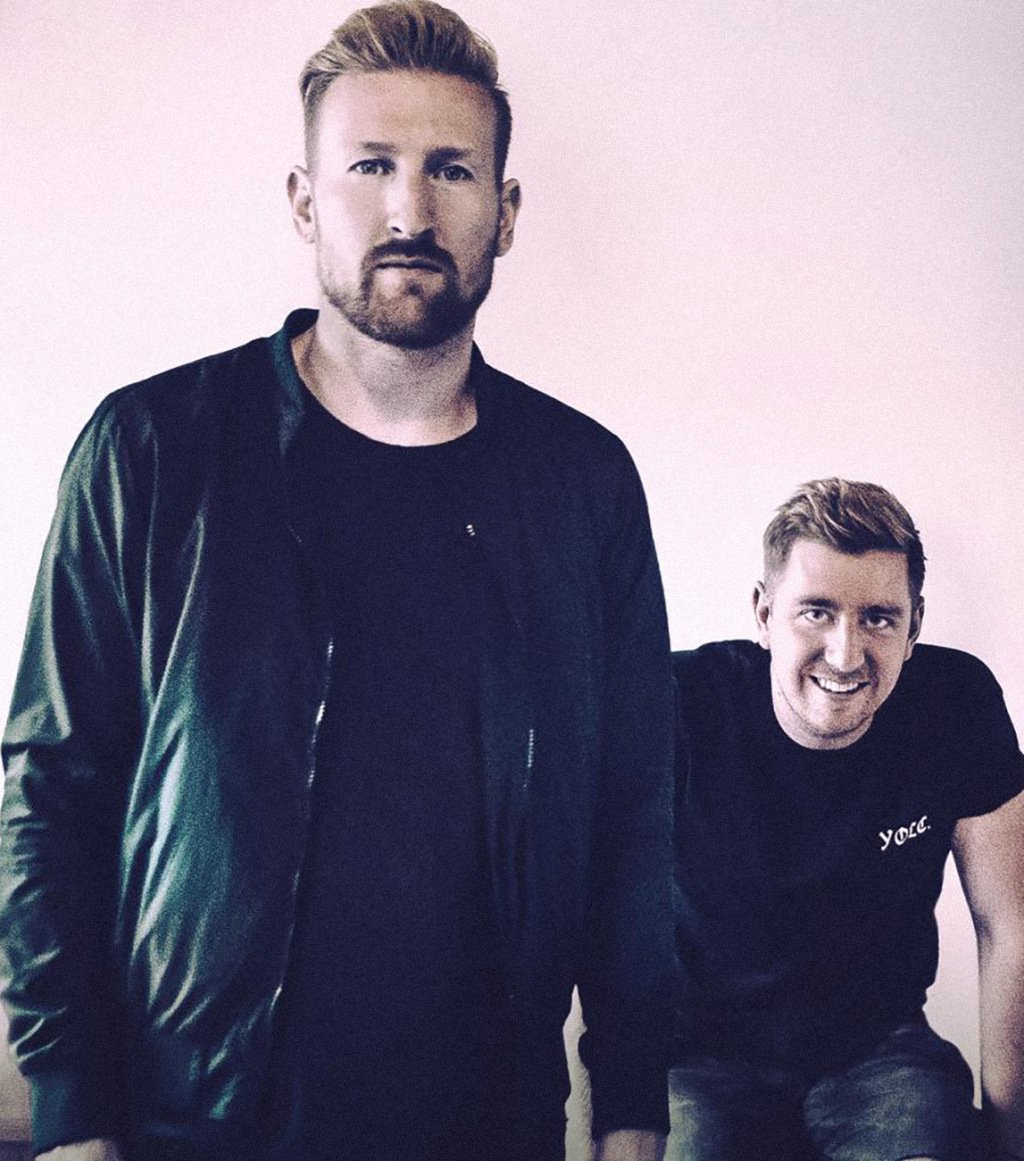
Instagram isn’t just for cute, filtered images of yourself and your dog or gear! It’s a great community uniting musicians and artists brave enough to put their best work out there. One of those Instagram accounts is run by our friend and Studio One user, Adam Sullivan—one of the front men for New Arcades, a UK duo inspired by nostalgic memories of 80s cinema and vintage synth sounds. Think of blue skies, urban nightlife, and hazy sunrises and you have the New Arcades!
Studio One is Adam’s go-to DAW since 2.0! He also has a FaderPort and StudioLive 24R.

Give us some background on yourself. How long have you been making music?
I’ve been a musician from a very young age, nowadays I’m a jack of all trades, master of none. I obtained a degree in music technology and sound engineering/composition at Lancaster University (UK). We started creating music and mixing tracks in 2008 and haven’t quit. It has become more and more serious in the last few years. This all in conjunction with being one of the main FOH Engineers at my church in London, Holy Trinity Brompton. Now I mix various artists’ tracks and create my own music for New Arcades. Additionally, my side project is known as “Shred Ministries” which has developed quite a decent following from the church/Christian scene as a comical reproduction of modern worship. Check it out on YouTube for a laugh.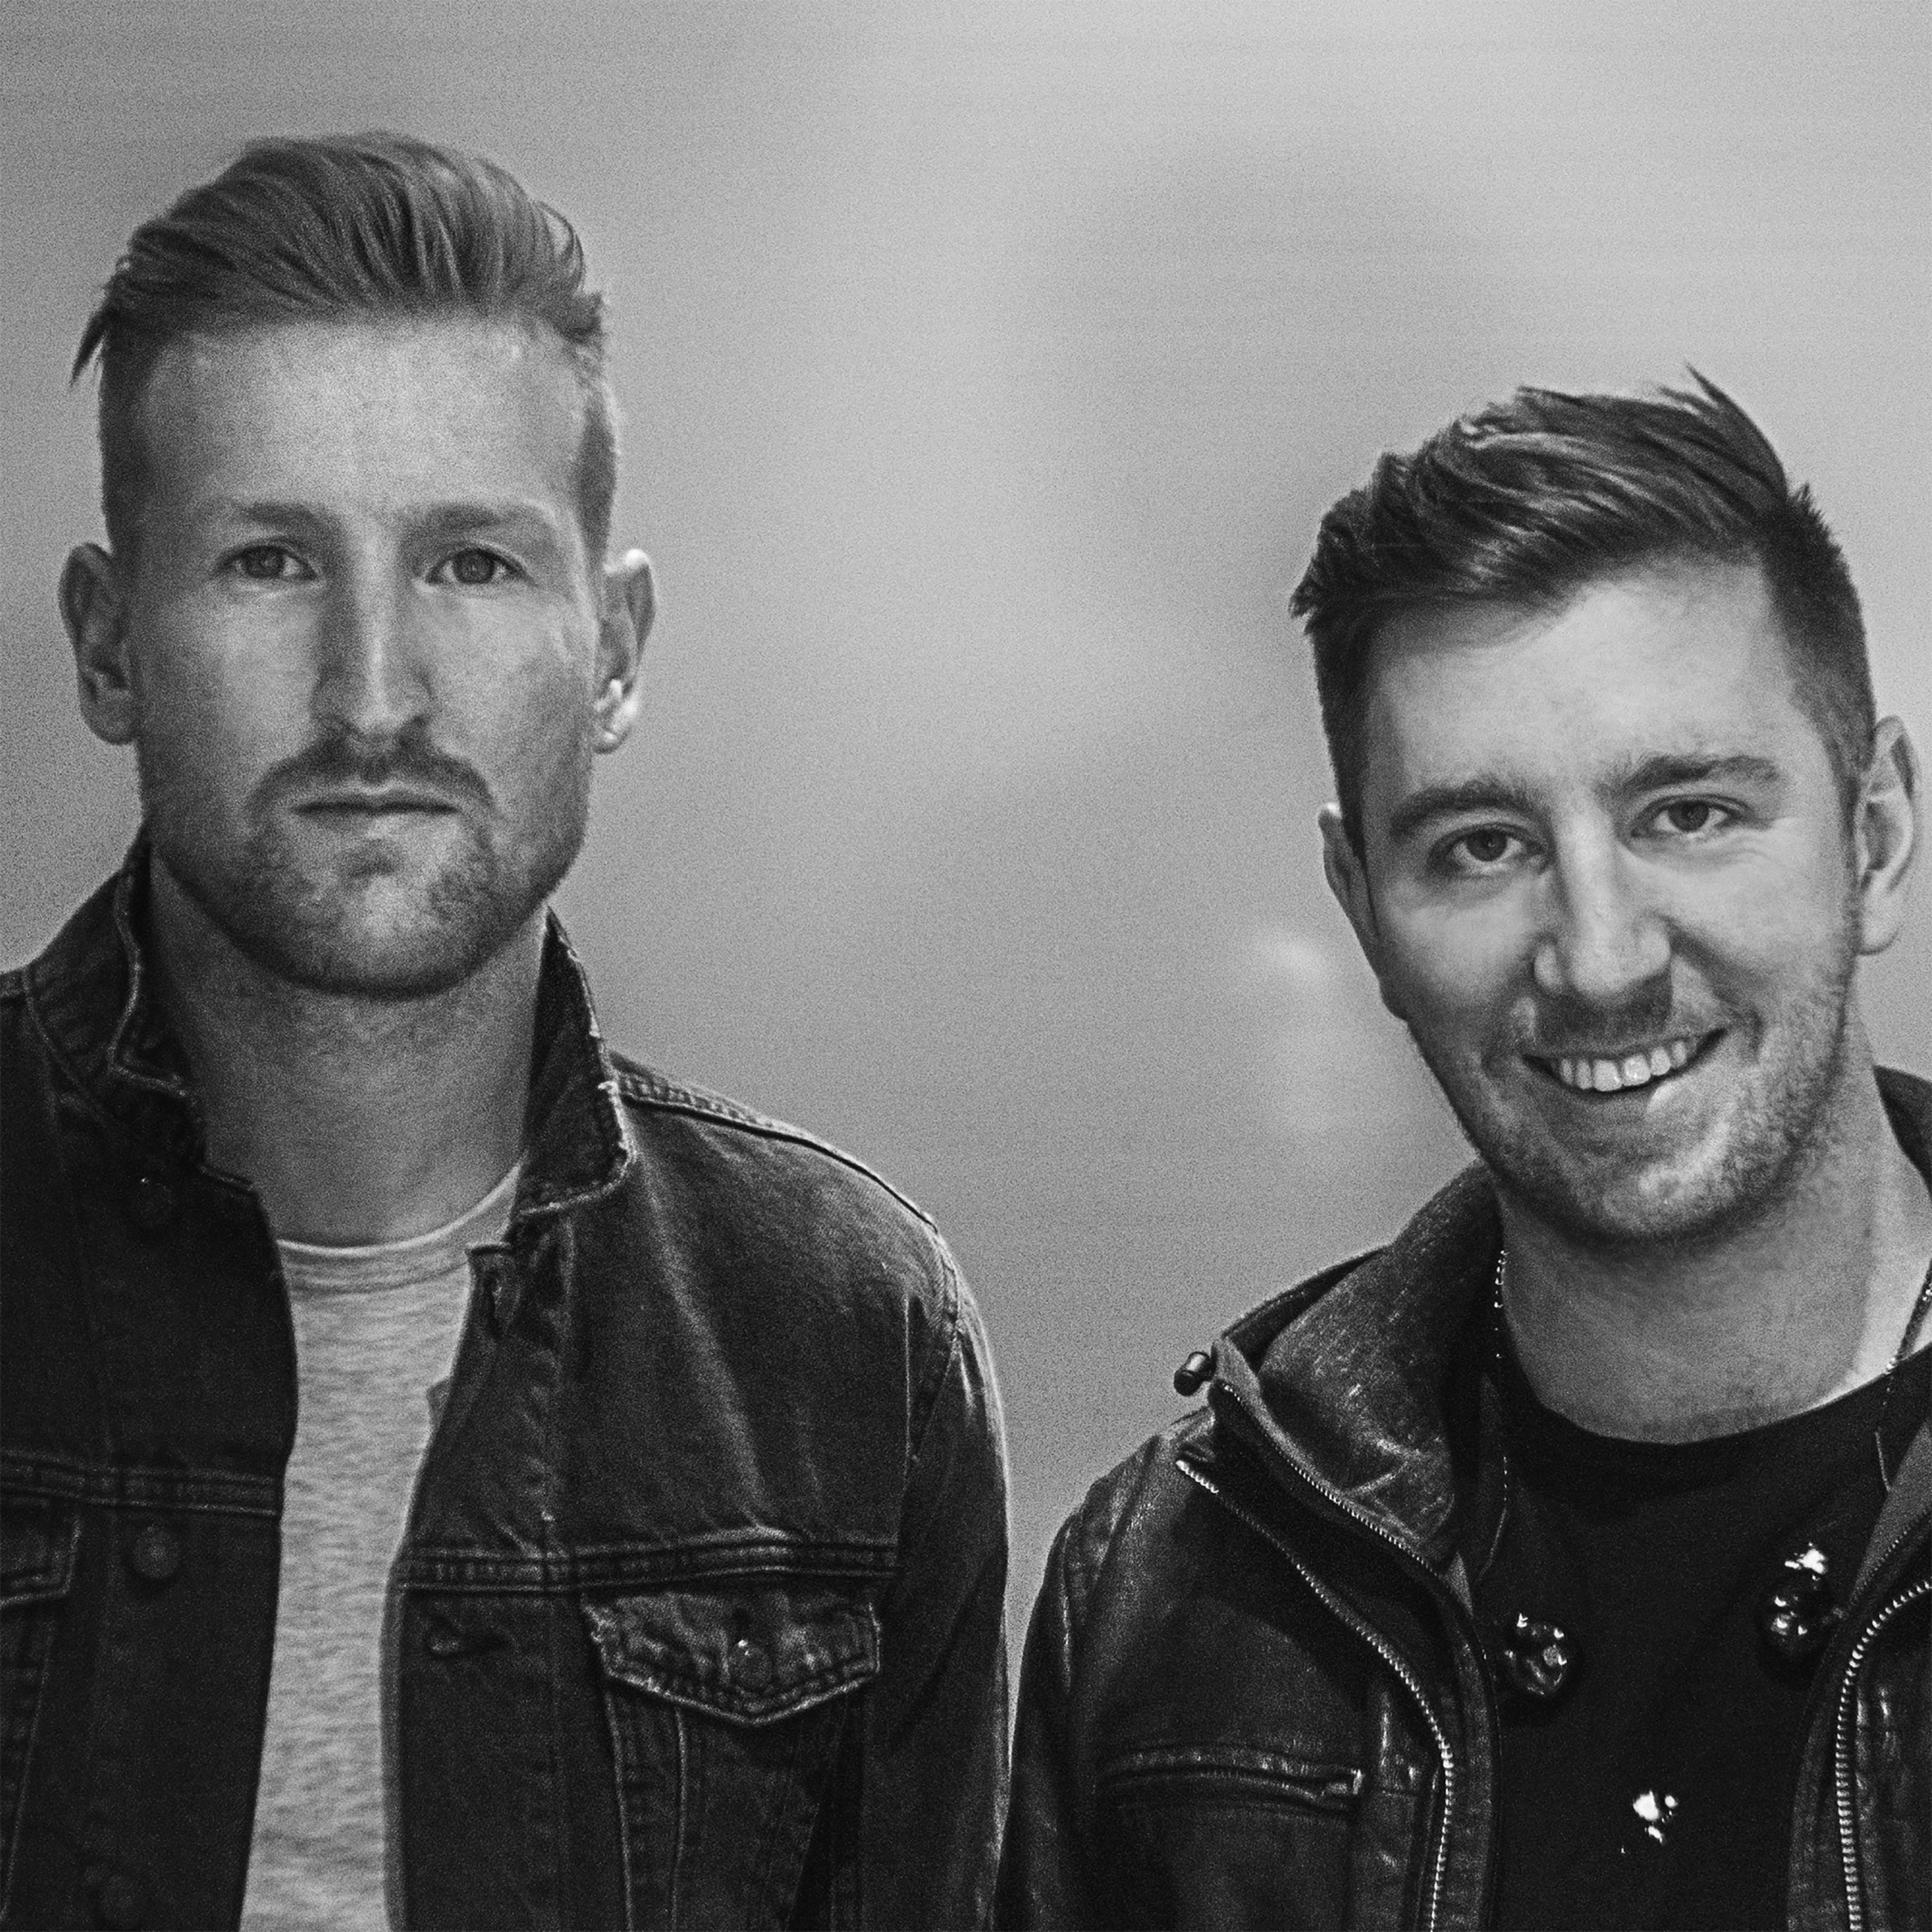
How has the music industry changed since your early days?
Less and less are the labels willing to part with cash in order to promote, the risk is far greater for the artist it seems unless you are manufactured by the giant label themselves. Back in early days with medium independents, there might be a decent(ish) advance in exchange for the master copyright recordings. But it’s tragically at the point now, where for a promise of exposure, and (hopefully) enough money made is usually in exchange for the masters… I think now you have to do so much work, have many friends help push and support you and really drive home the music you create and believe in passionately. I stand by never giving up my masters indefinitely, and I would encourage all artists to be the same even if the promise of a bright future is tempting. Another area: digital music plugins have just stepped up… I now use a kemper when I play live, it’s just fantastic! It sounds incredible and it now would be for me favored over a guitar amp in a room! which I feel is insane! Nothing better than authentically playing the instrument though–somehow that’s always been the same.
Describe the first time you wrote a song? Produced it?
It was a co-write with my fellow band members. I’ve always produced and mixed the tracks but my first one was a pop/Indie/Rock track. I was dead proud! I look back on it now though, it was the early days, I’ve progressed, as has the DAW and the plugins! 😉
Who has been an influence in your life?
Chris and Tom Alge. Absolutely phenomenal mix engineers. Clarity and Punch. Love them.
Have you ever wanted to give up on music? What keeps you going?
A few times I have thought about stopping but I absolutely cannot help my need to create and ultimately, I persevere. I think also having a writing partner and bandmate always helps! Especially when you are both in tune, have similar styles and principles in your songwriting.
What do you like about PreSonus? What caught your eye?
The first thing that caught my eye was back in 2011: Studio One 2.0. It had this simple “Drag and drop” feature. I just loved how easy it was to slap something on the channel… The layout of the mix window and the integration of Melodyne. That, along with the power and depth of the EQ, Room Reverb, and Compressor that came with the package as standard had me hooked!
What PreSonus products do you use?
Studio One 4.5, FaderPort, various bundled software. StudioLive 24R rack mixer. I also use it in conjunction with the StudioLive 24 mix desk that I TOTALLY love!) It works great for all my function work, and is such a flexible setup.
When did you first hear about Studio One?
I was actually referred to it by a friend. They said they’d seen a review in Sound on Sound, which is very well respected. I went home, downloaded the free trial and haven’t looked back!
What features are you most impressed with your gear?
The interface of the Q-Mix and UC Surface app is great. The sound of the preamps in the Series III equipment. Capture 3.0 is fantastic also. Onboard SD card stem recording on the desk itself. I’ve yet to put the StudioLive 24 in with my DAW, but I’ve seen it can be a great surface, along with the remote control iPad app for vocal booth recording.
 Any user tips or tricks or interesting stories based on your experience with Studio One?
Super easy actually! I had a decent understanding of several other DAWs. But Studio One was quite intuitive. I watched a few tutorials and just trial and error massively reap benefits. Studio One 4 is so powerful and versatile. Go exploring!
Where do you go for support?
YouTube, forums, etc. I have friends who are also well-established producers/mix engineers who I can pick the brains of on the regs. But I’m quite independent and I hate being defeated by things—so I usually resolve things myself!
Where do you go for inspiration?
I listen to other artists in the scene or genre I’m in, I watch movies that inspire creativity and put you in a hungry mindset… A bit like watching the movie “Creed” would make you want to train your socks off and chin someone in the ring. 😉 I do similar for my music. There are so many inspiring artists and creators out there, listening to fantastic scores and tracks just make me want to compete to be the best and make something as exciting and epic.
Recent projects? What’s next for you?
I just finished my album for my band New Arcades. I’ve been working on it since 2012! It’s being mastered as we speak, so hopefully won’t be long before it drops. Recently also did a track for well know acoustic/folk artist Roo Panes. He is a fantastic performer and the song we worked on together was called “Thinking Of Japan.” Everything has been recorded and mixed on Studio One. Next, will continue to do loads of live events and functions using all the gear, hopefully, make my own second album and work with more and more artists.
Follow them on Instagram!
Join the Studio One family at the best price all year—NOW!
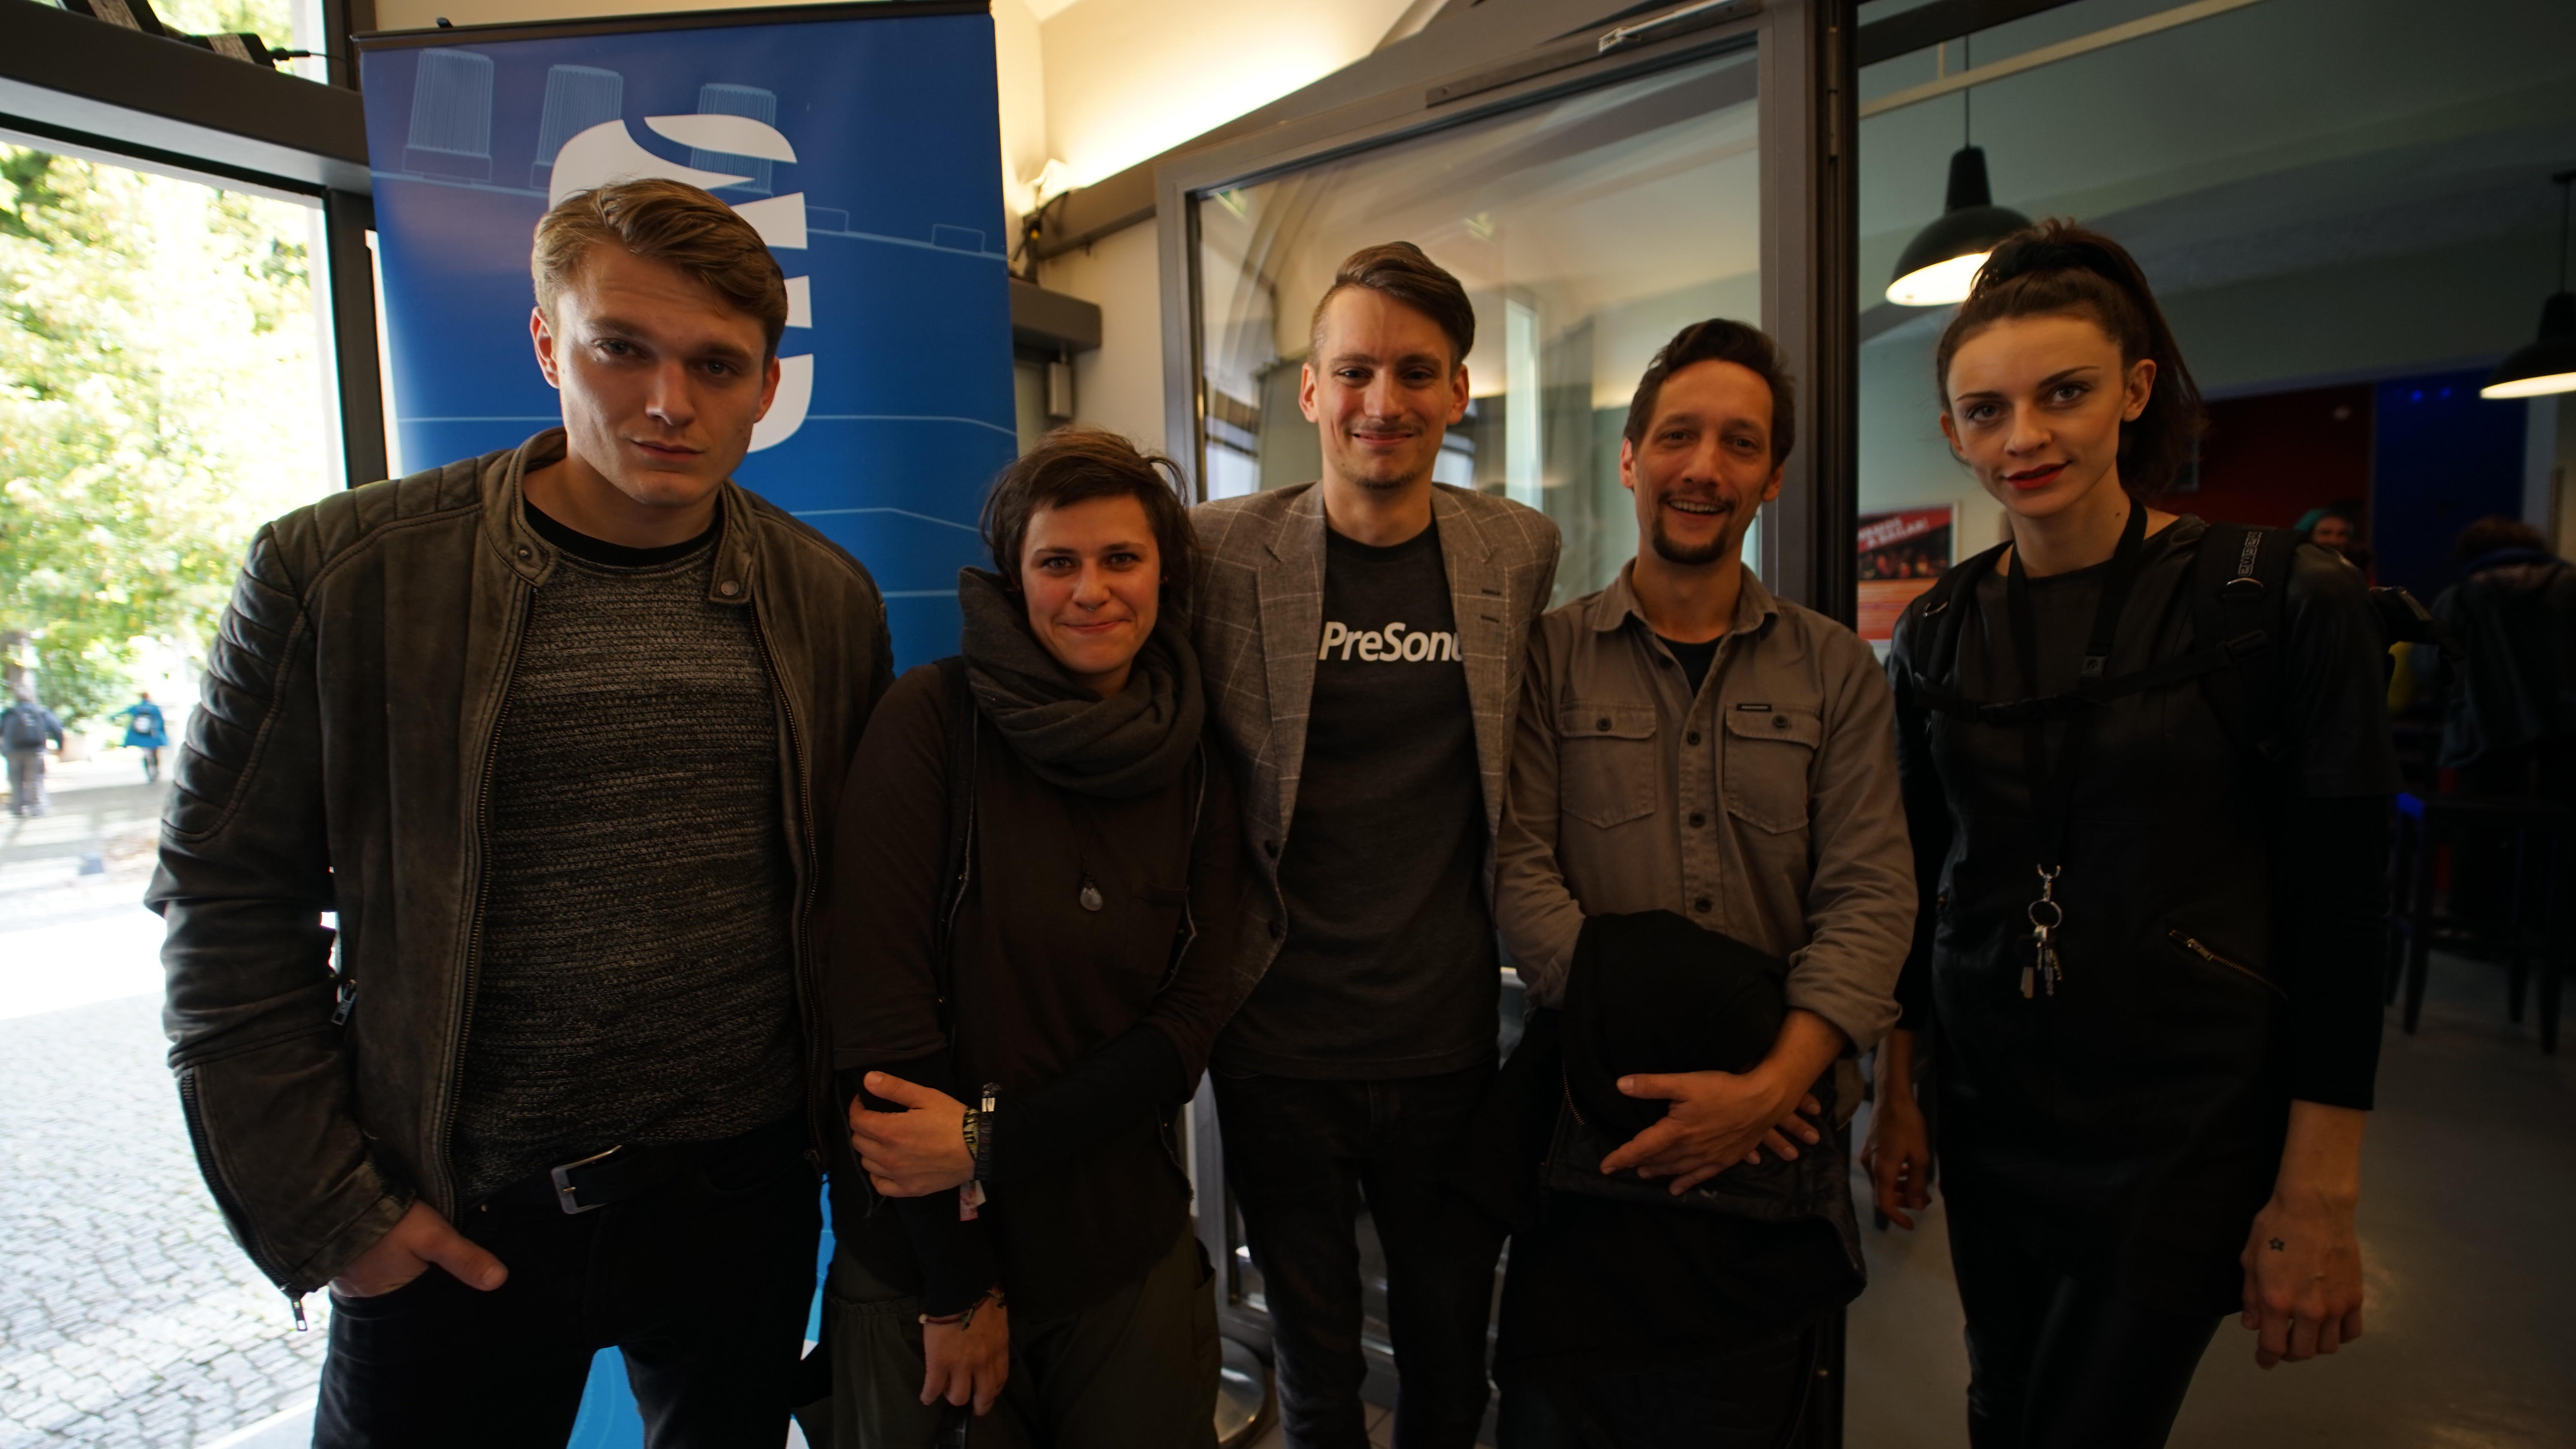
WAVE AKADEMIE was a blast!
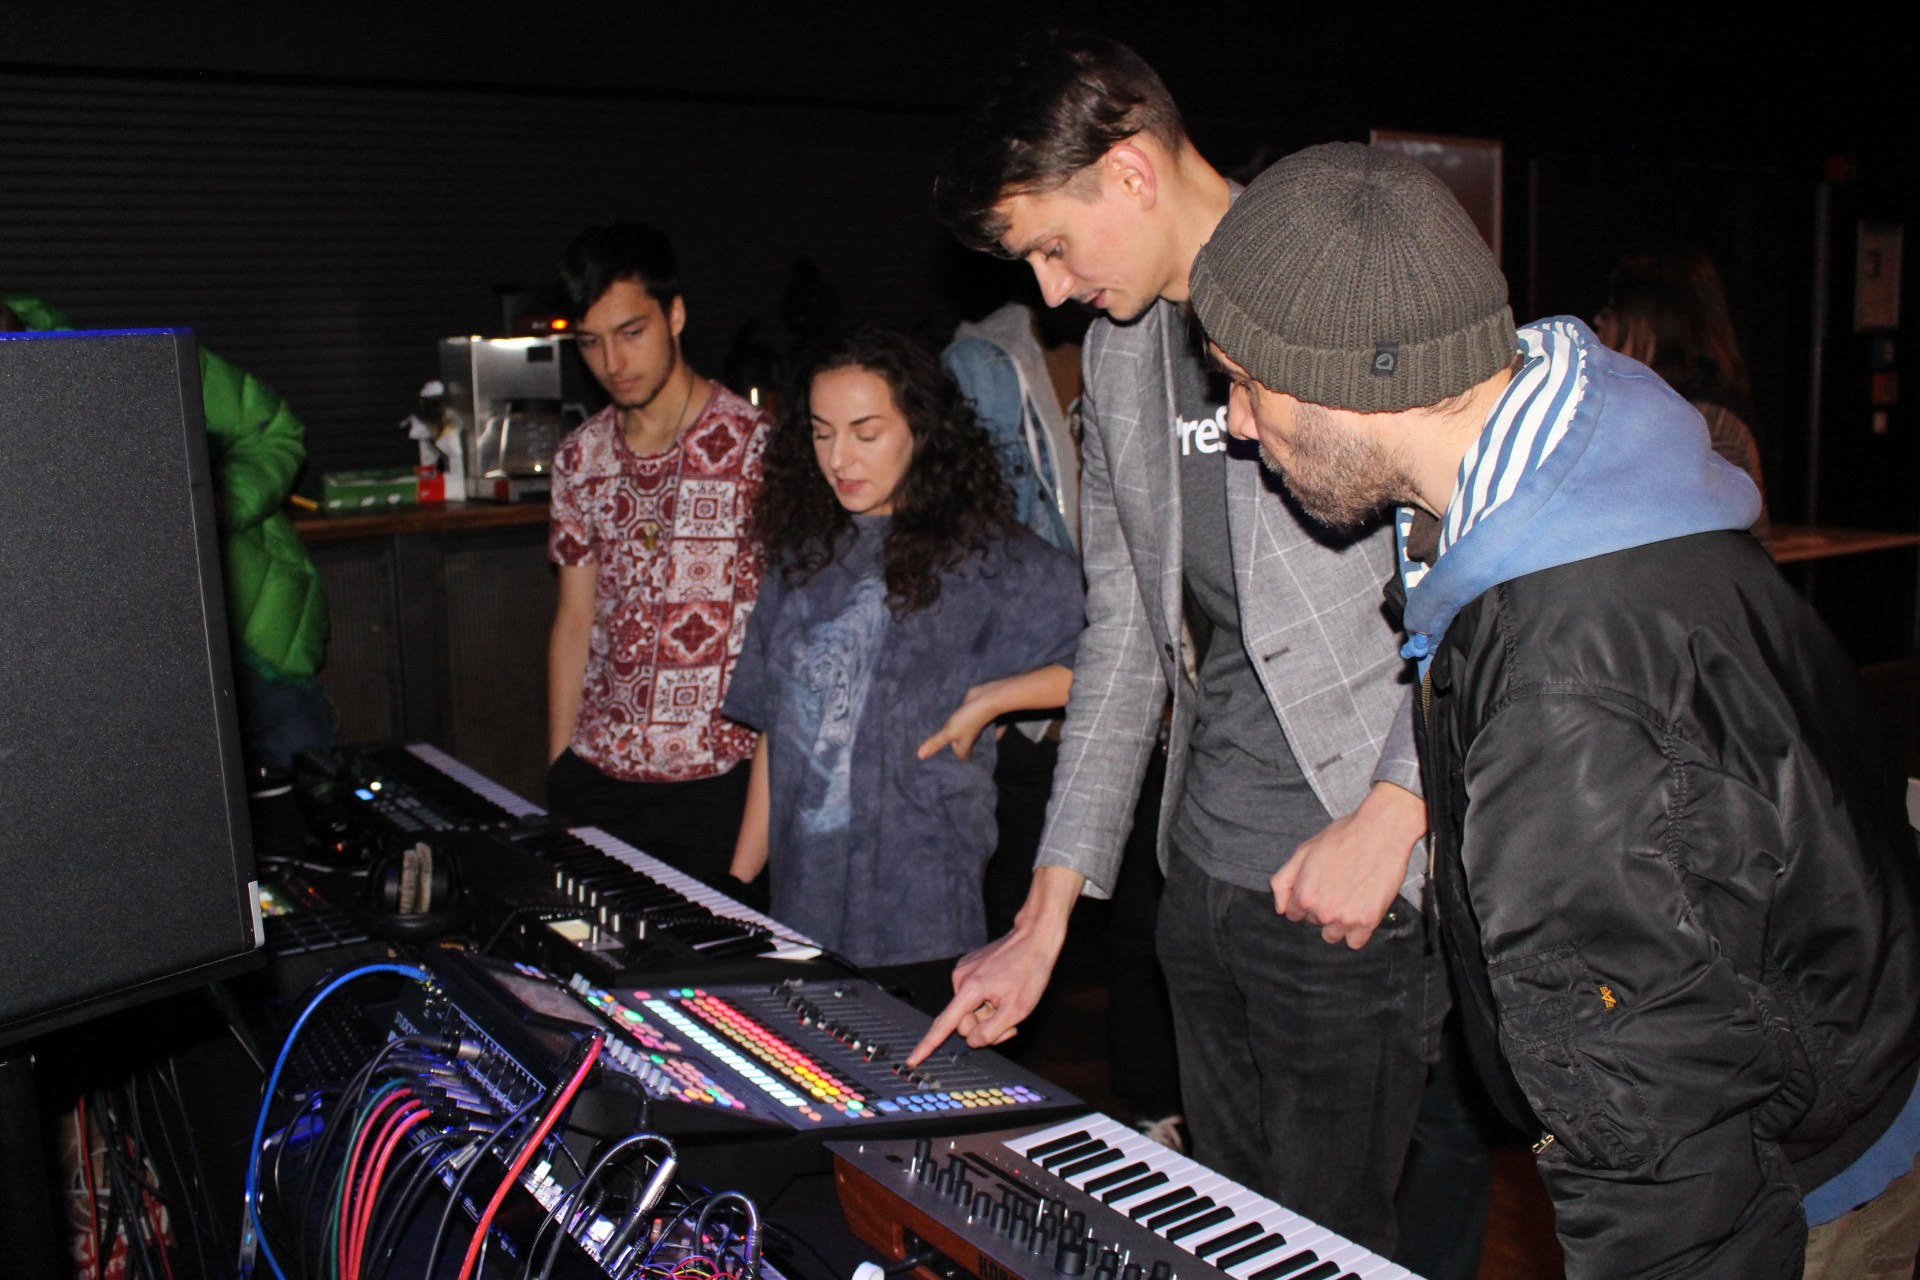
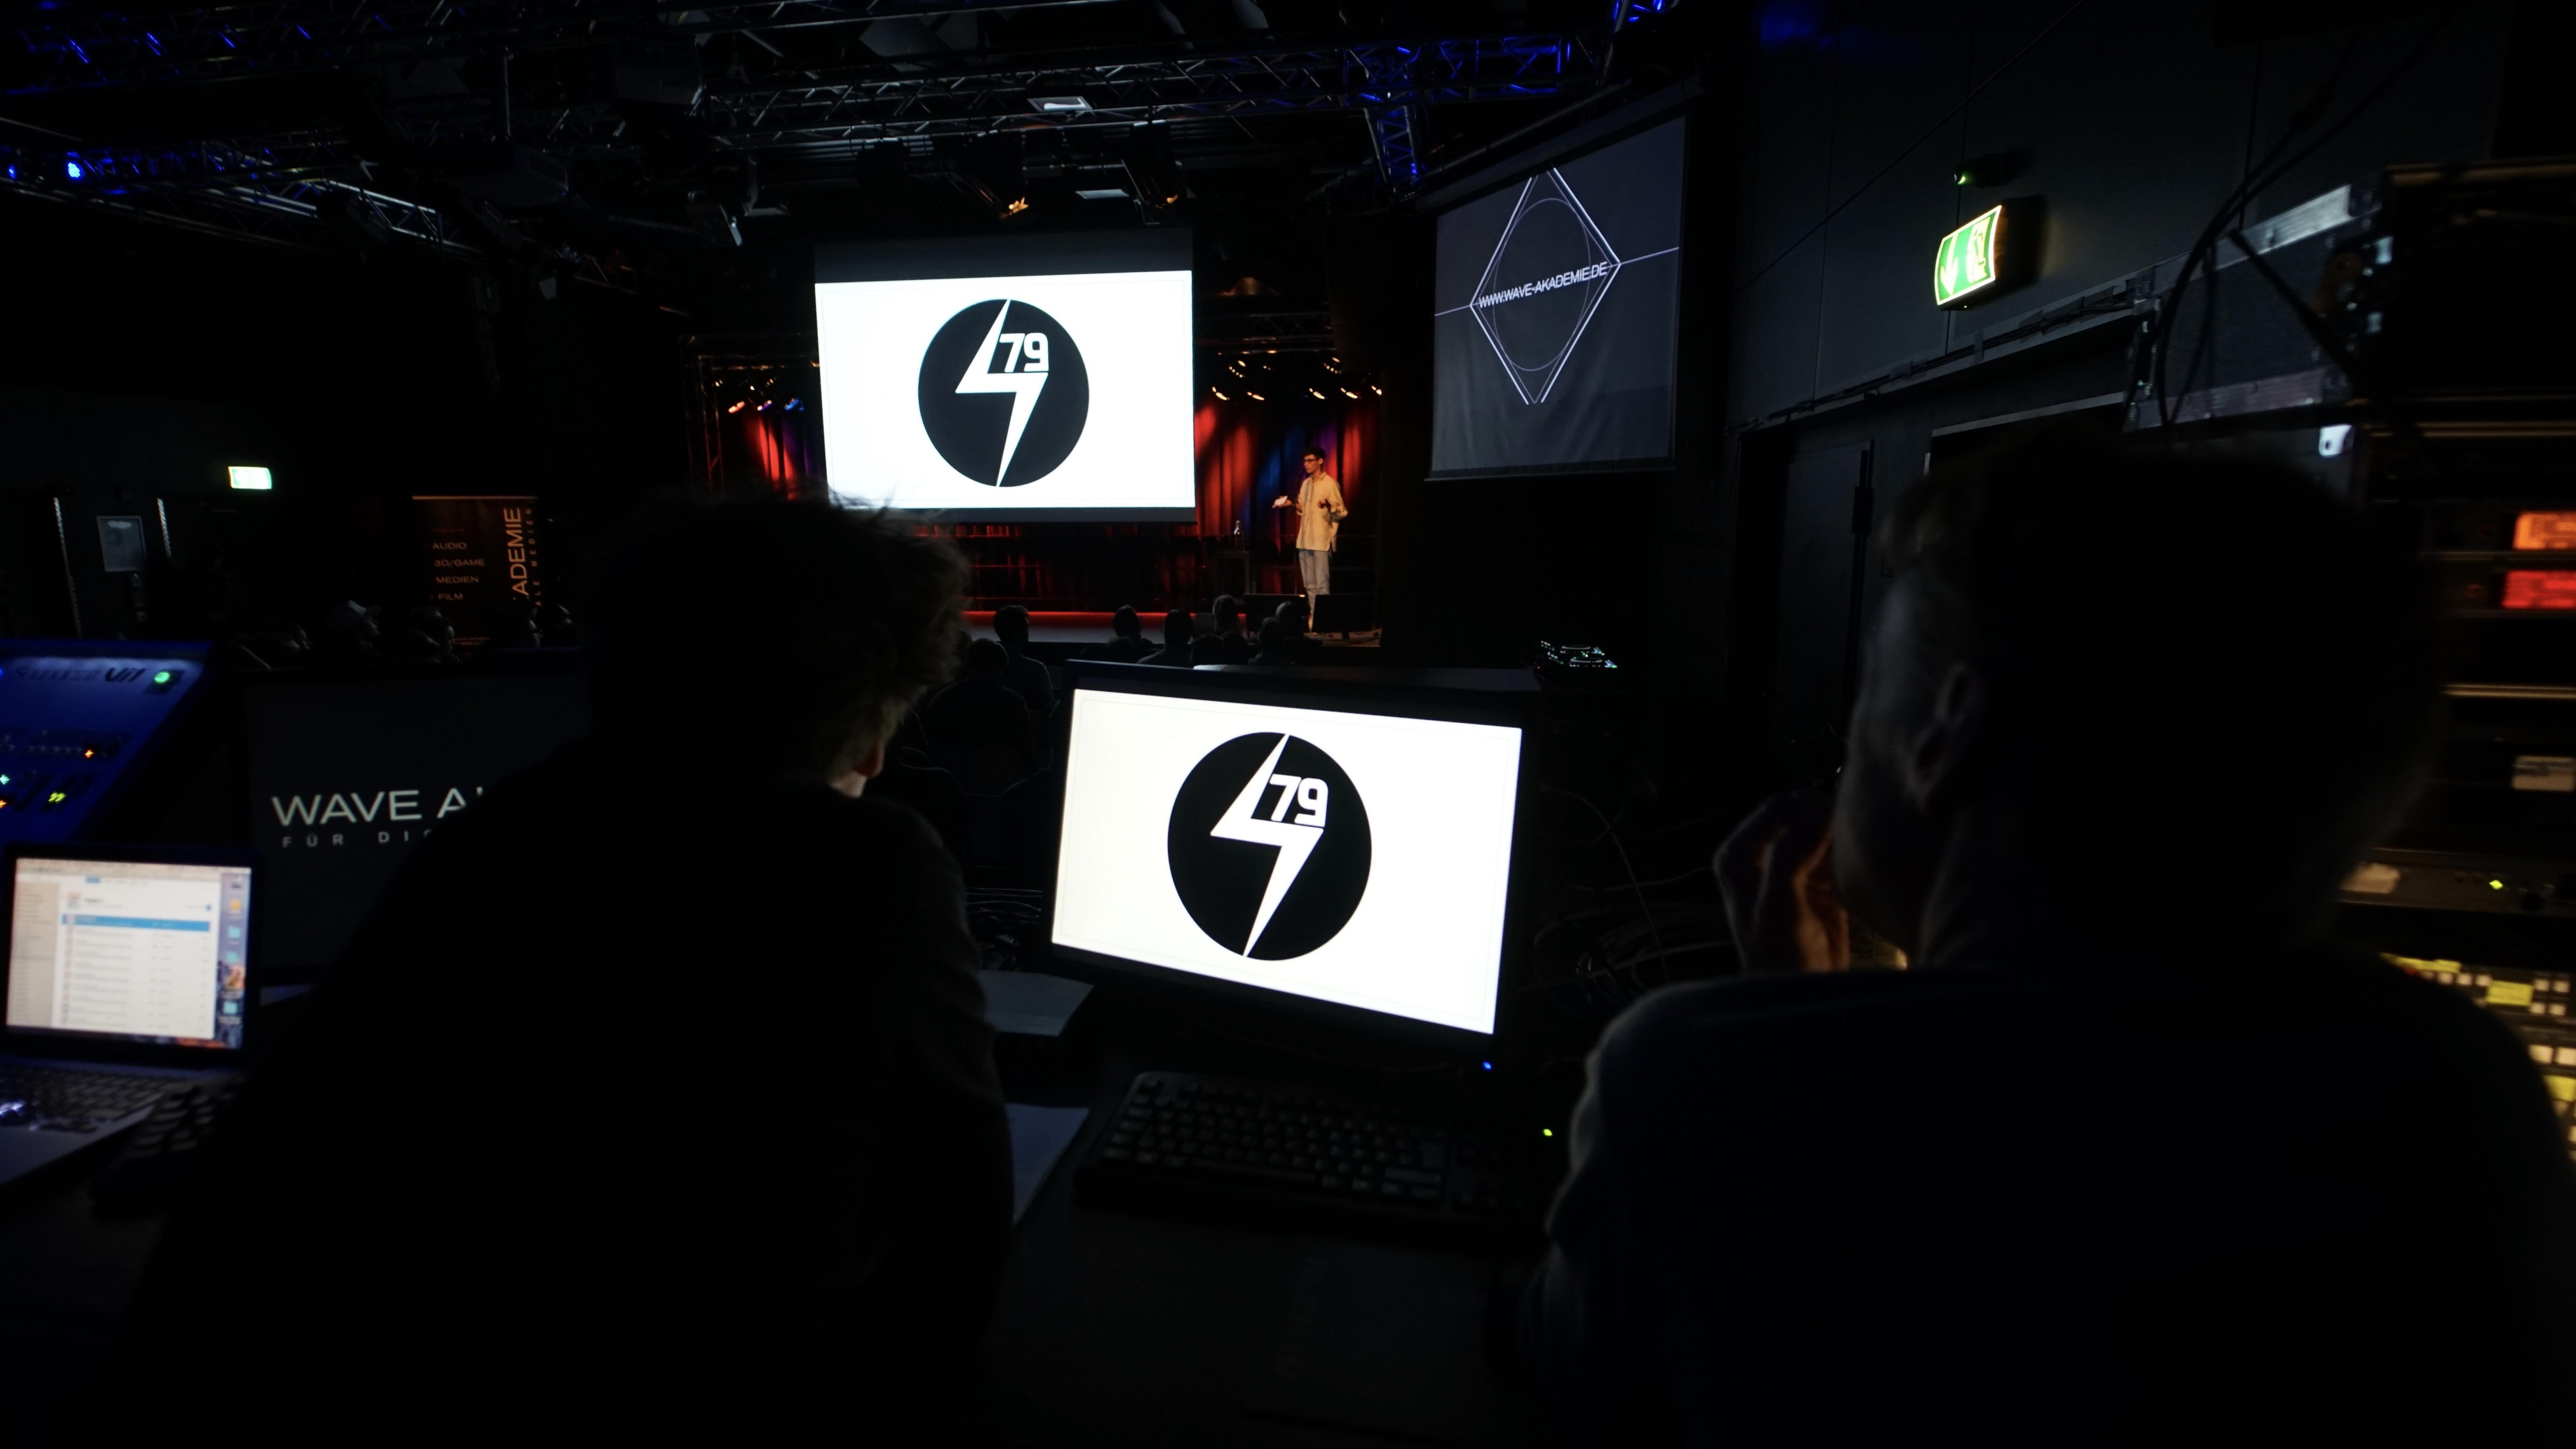
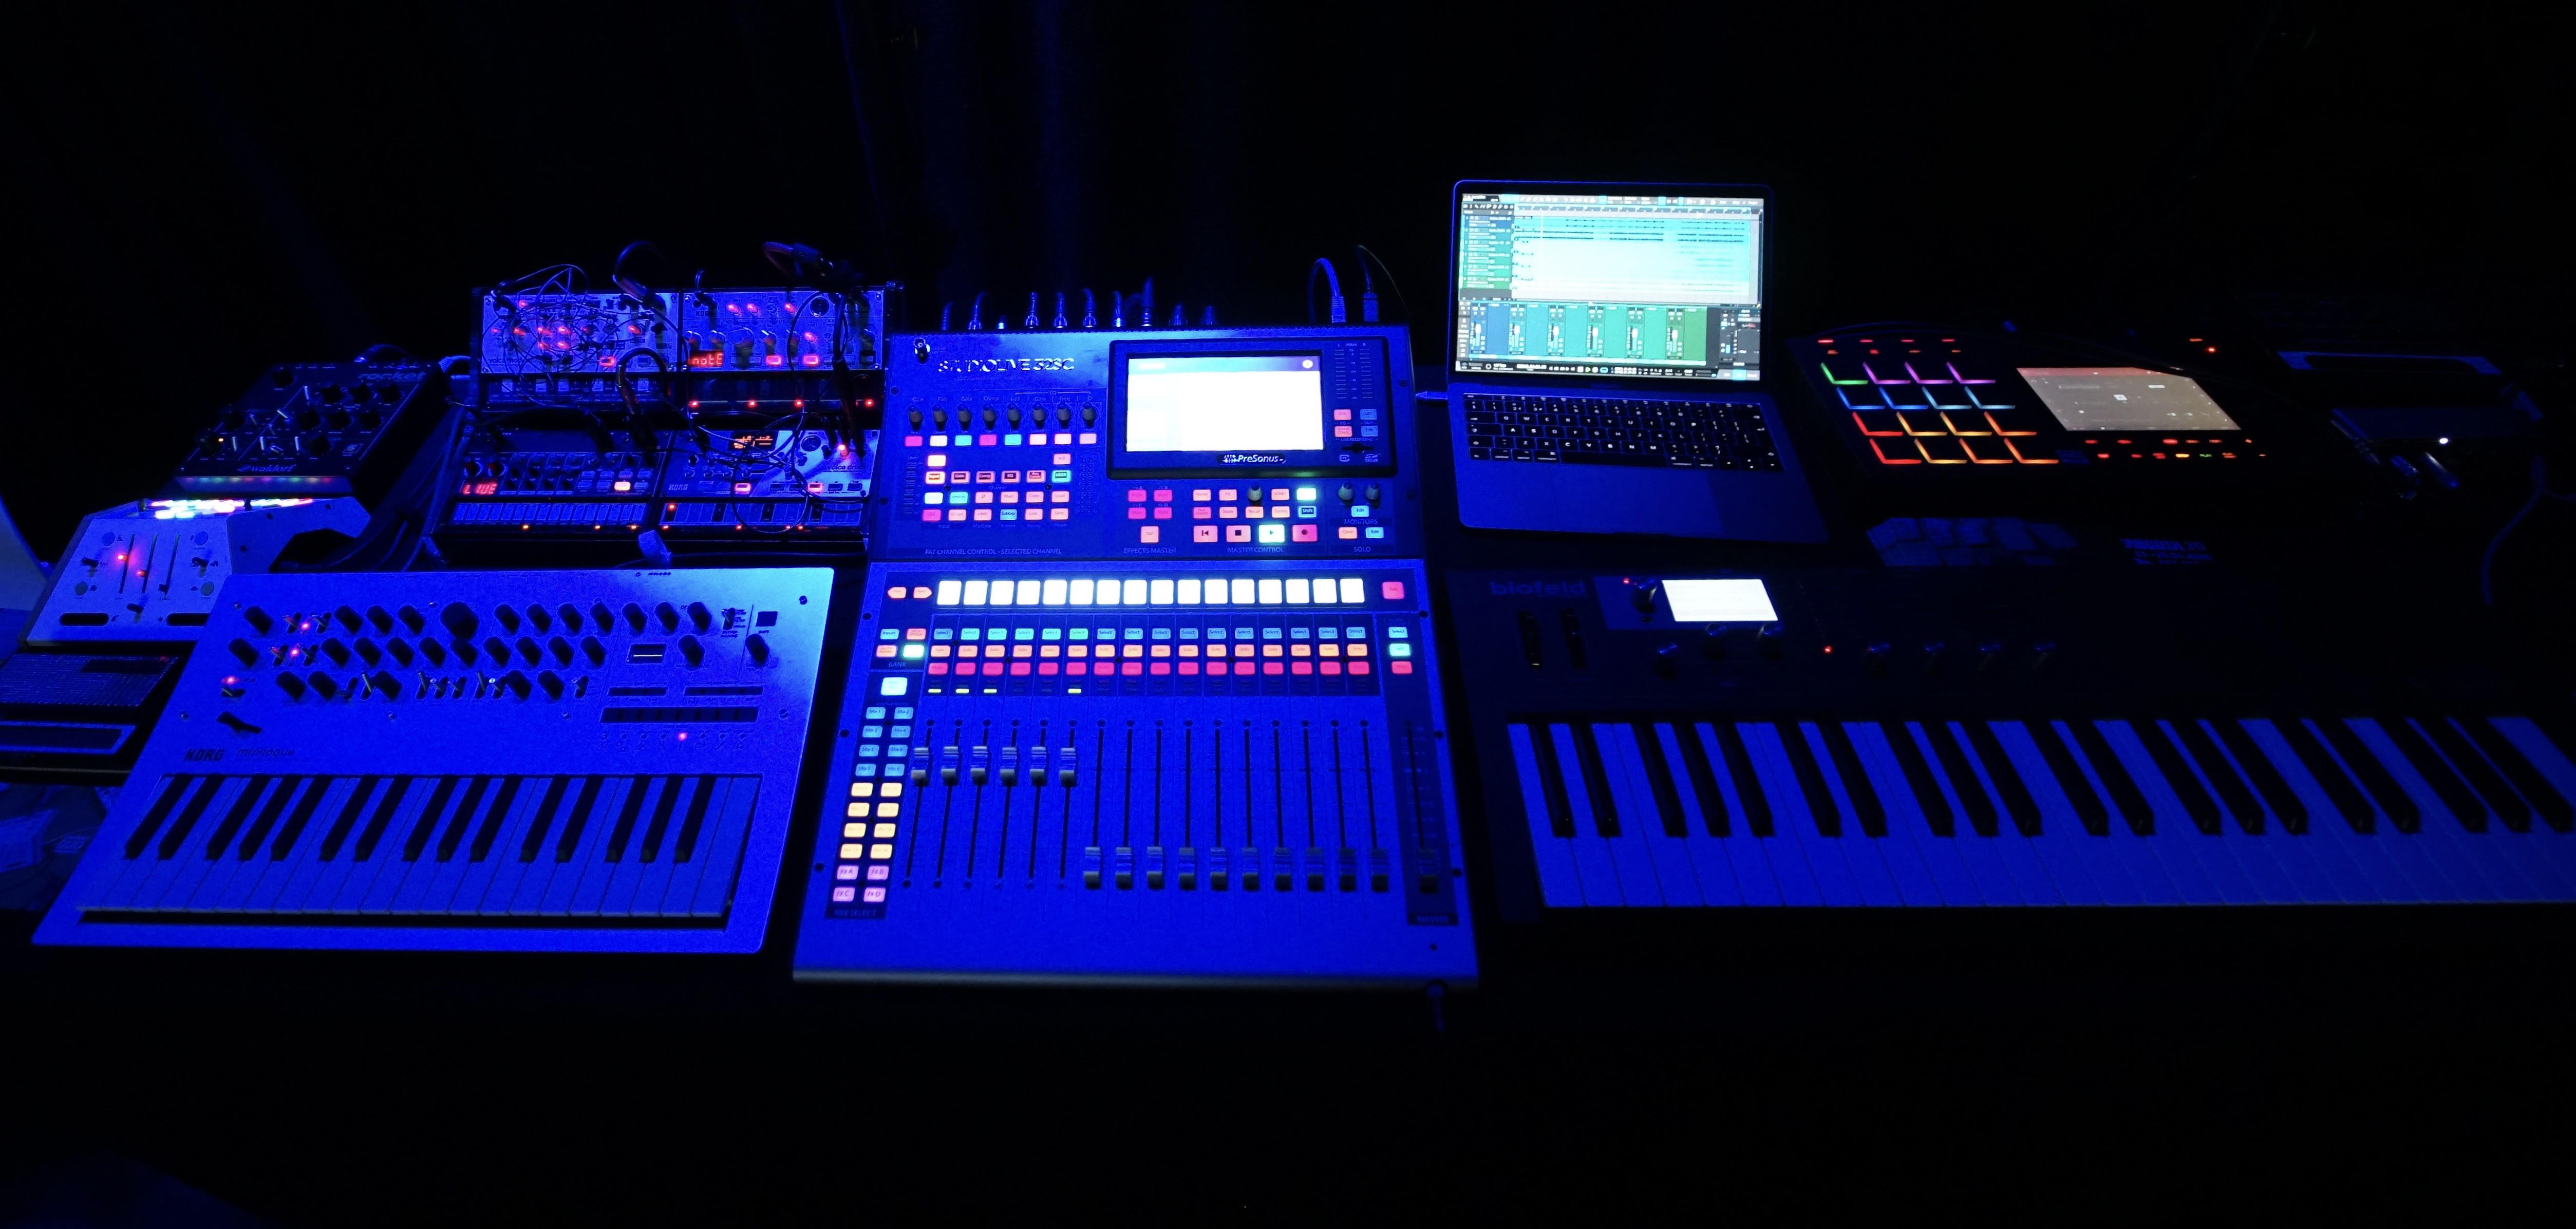
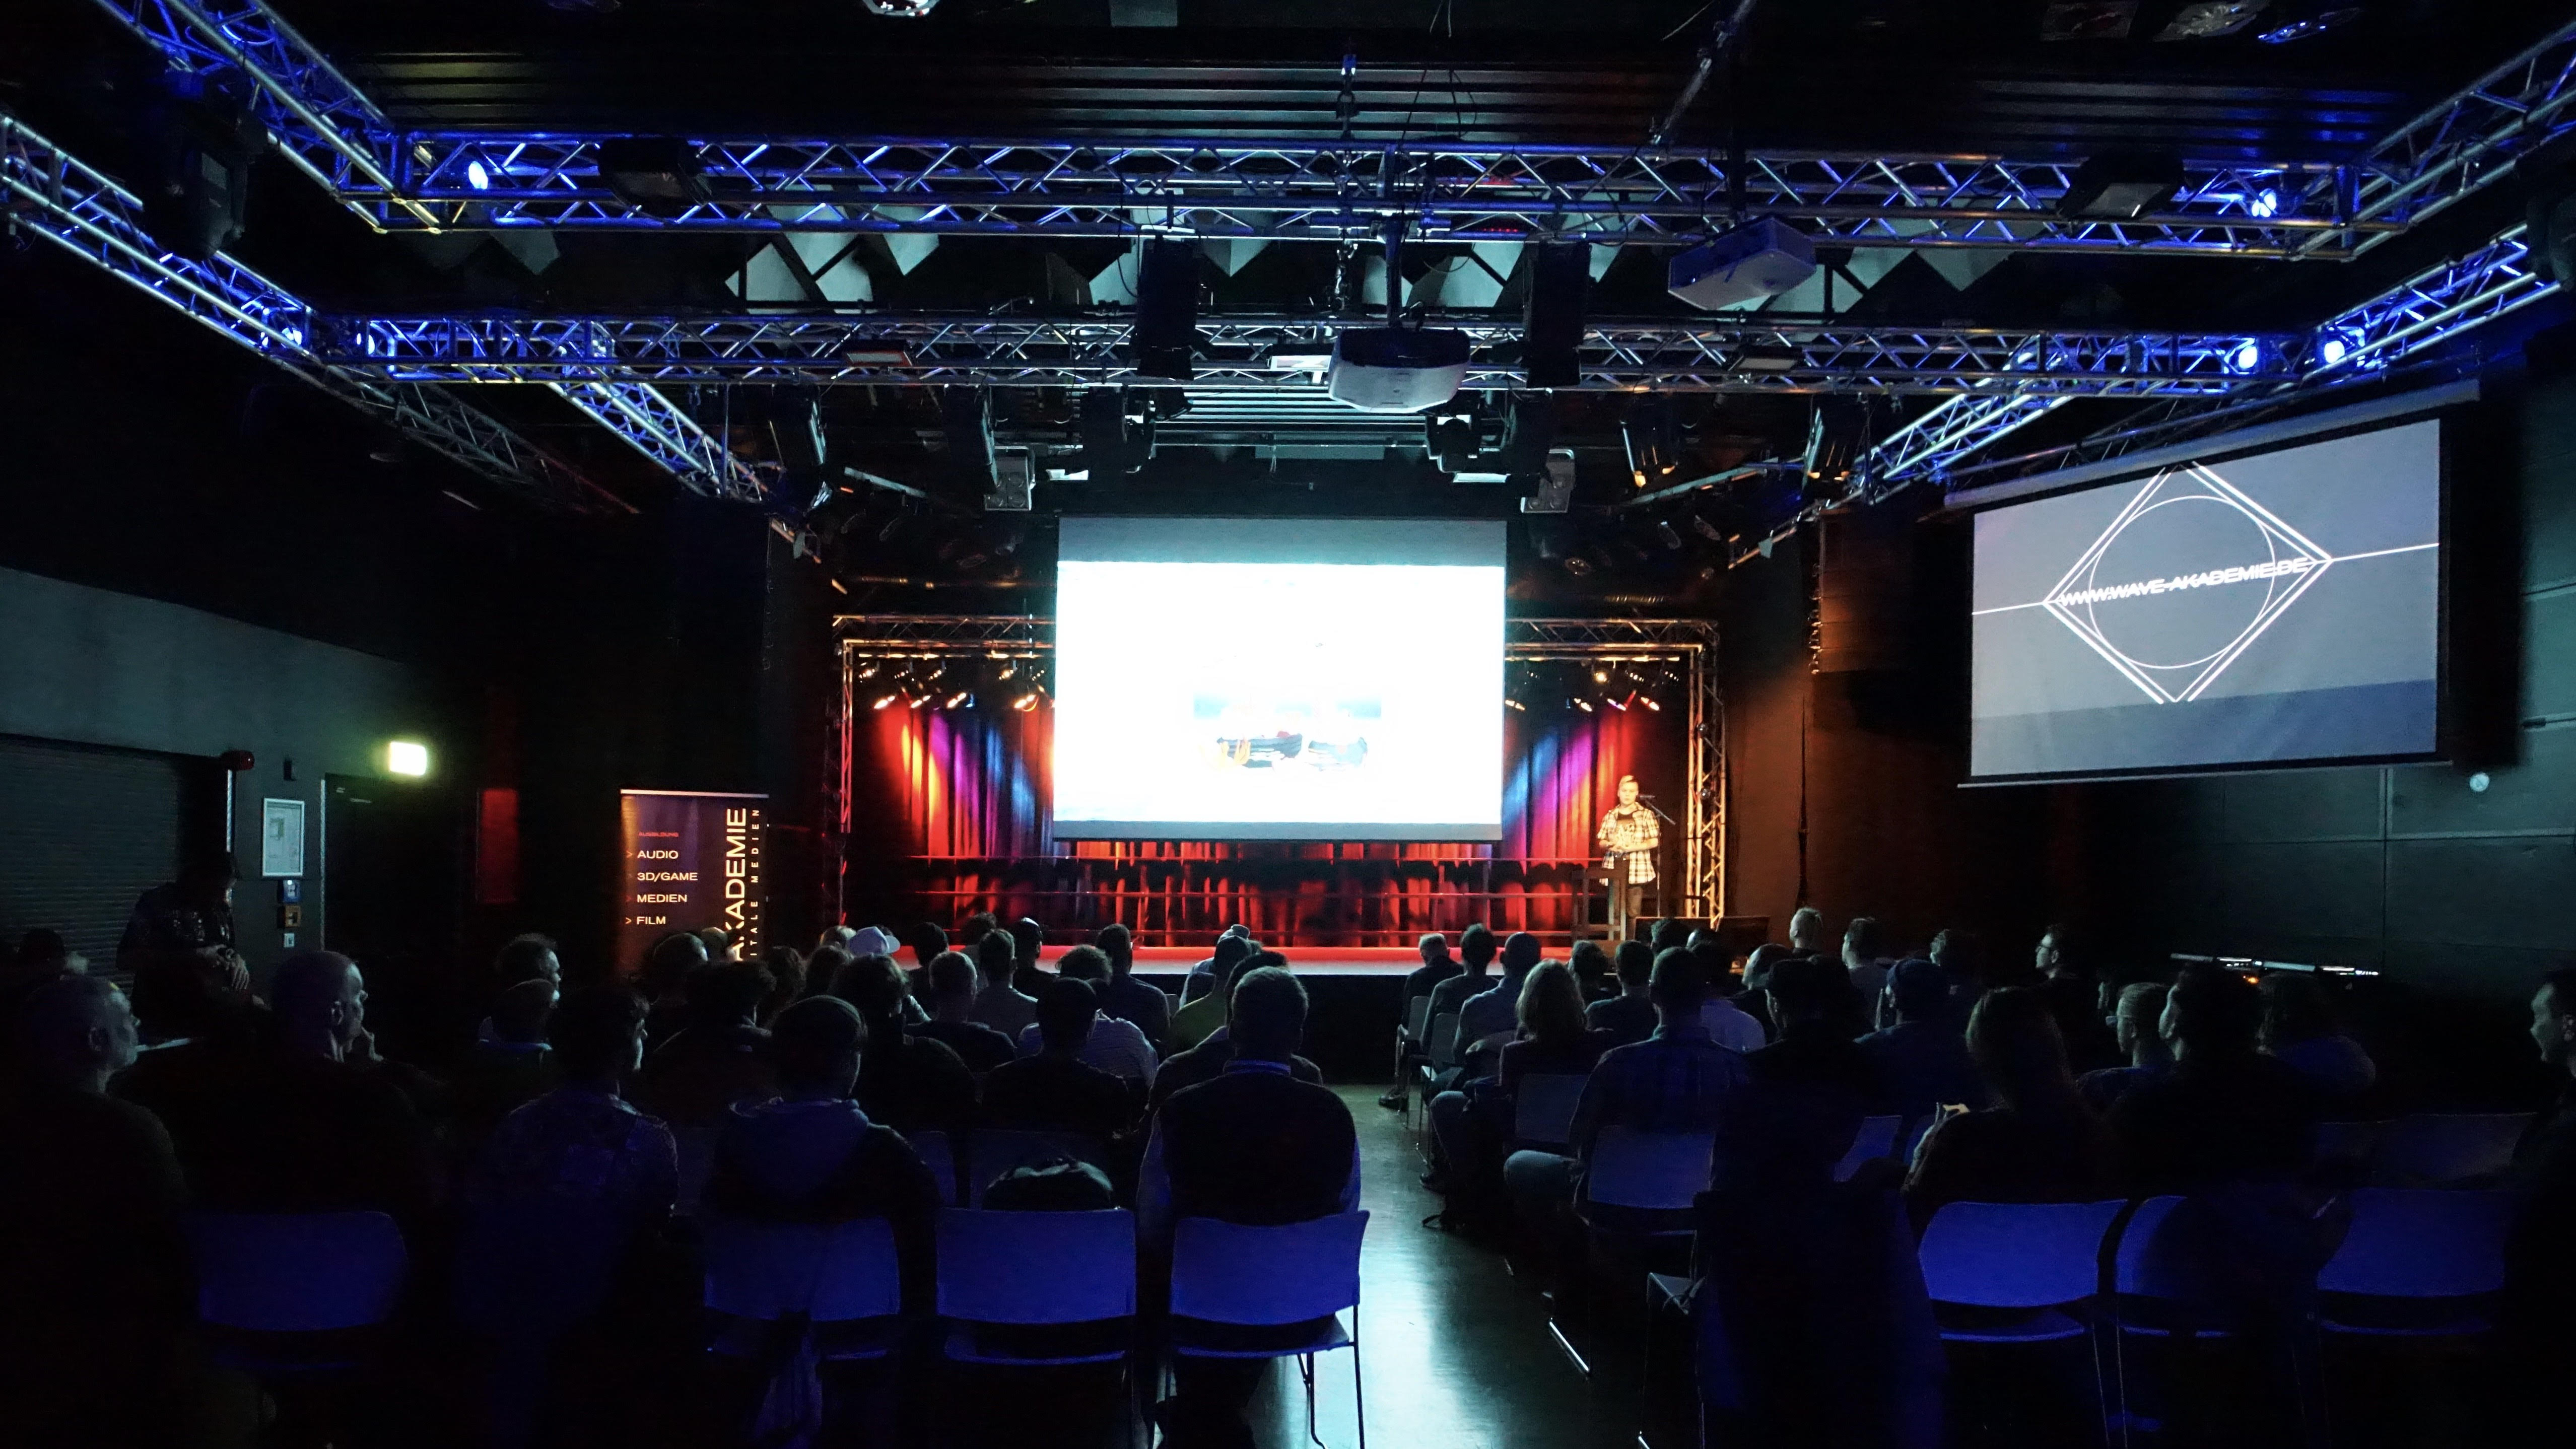
On October 11, our own Software Specialist Gregor Beyerle attended WAVE AKADEMIE Berlin’s Dissertation Presentation of Audio Engineering and 3-D/Game Design to demonstrate the StudioLive 32SC mixer’s DAW mode in conjunction with Studio One. The StudioLive 32SC is the new centerpiece of WAVE AKADEMIE’s “Soundlab,” where a large variety of both hardware and software instruments are accessible to the students.
Students and lecturers alike were amazed by the hybrid workflow of the StudioLive 32SC, which excels at integrating tons of outboard gear (like drum machines and synths) with software instruments, especially when used with Studio One. The ability to assign any channel to send or receive via analog, USB, or network gives WAVE AKADEMIE the flexibility they need in their Soundlab.
The ability to multitrack record jam sessions onto an SD card was also received with great enthusiasm, as it enables the students to record songs directly into the mixer before getting them into Studio One for post production.
Check out photos and video from the event below, and visit Wave-akademie.de for more information on upcoming events!
How to Create Compelling Mixes in Studio One—New from Craig Anderton
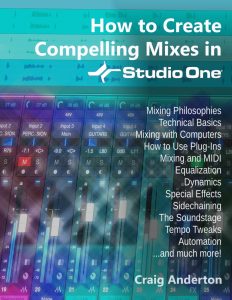
Available NOW at shop.presonus.com from Craig Anderton… How to Create Compelling Mixes in Studio One! This is Craig’s third book on Studio One, and it weighs in at a whopping 258 pages!
Click here to read more and shop!
Mixing is where you create an experience that transports the listener into your musical world. And now, renowned music technology expert Craig Anderton brings his years of production and mixing expertise to an easy-to-understand, comprehensive guide about all aspects of mixing. Chapters include Mixing Philosophies, Technical Basics, Mixing with Computers, How to Use Plug-Ins, Mixing and MIDI, Prepare for the Mix, Adjust Equalization, Dynamics Processing, Sidechaining, Add Other Effects, Create a Soundstage, Mix Automation, Final Timing Tweaks, and Review and Export.
Profusely illustrated, and loaded with constructive, practical, meaningful advice that will improve your mixes dramatically, this 258-page eBook sets the standard for discovering how to make compelling mixes in Studio One.
- 258 pages, 67,500 words, over 180 four-color illustrations
- Downloadable PDF, with links from the contents to book topics
- “Key Takeaways” section for each chapter summarizes chapter highlights
- “Tech Talk” sidebars do deep dives into selected topics
- Covers all aspects of mixing with Studio One
Chapter 1: Mixing Philosophies
Chapter 2: Technical Basics
Chapter 3: Mixing with Computers
Chapter 4: How to Use Plug-Ins
Chapter 5: Mixing and MIDI
Chapter 6: Prepare for the Mix
Chapter 7: Adjust Equalization
Chapter 8: Dynamics Processing
Chapter 9: Sidechaining
Chapter 10: Add Other Effects
Chapter 11: Create a Soundstage
Chapter 12: Mix Automation
Chapter 13: Final Timing Tweaks
Chapter 14: Review and Export
Appendix A: Mixing with Noise
Appendix B: Calibrating Levels
Friday Tip: Percussion Part Generator
Just as we can use plug-ins to process audio, Studio One’s Note FX are plug-ins for MIDI data. They tend to be overshadowed by our shiny audio plug-ins, but have a lot of uses…like generating cool percussion parts.
This may sound like a stretch (“c’mon, can it really generate a musical percussion part?”), but the audio example will convince you. The first four measures are a percussion part created by the Arpeggiator NoteFX, the second four measures combine the percussion part with a house drum loop, and the final four measures are the house drum loop by itself—so you can hear how boring the loop sounds without the added percussion part.
This part was created with three conga and two bongo samples, each assigned to its own MIDI note. The initial “part” was just those five notes, each with a duration of four measures. It doesn’t really matter how long the notes are, you just want them to be continuous for the duration of the drum part. I then added the Note FX Arpeggiator plug-in to arpeggiate the notes (Fig. 1).

Figure 1: The Note FX Arpeggiator, set up to play different drums at different velocities.
By themselves, the standard up/down and down/up patterns tend to sound overly repetitive. The Random option (outlined in red above) helps, but then you have a random percussion part, which doesn’t relate to the music. So let’s introduce the secret sauce: automation (Fig. 2).
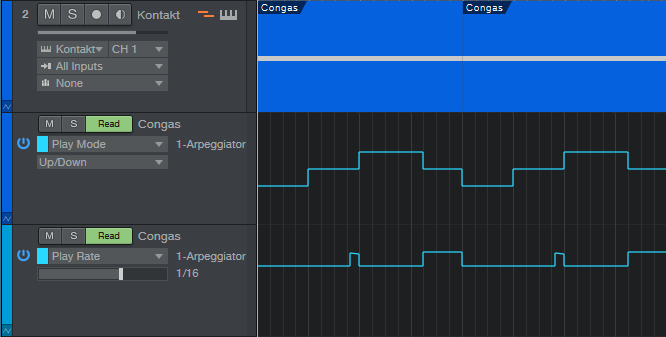
Figure 2: The automation lanes control Note FX parameters.
The key here is automating the Play Mode and Rate. The Play Mode automation starts with up/down for a measure, then down/up, then random for a bit more than a measure, and then down/up again. This adds variety to the part, and when it repeats, the random section creates additional variations so that all the parts don’t sound the same.
But what really adds the human element is varying the Rate. It starts off as 1/16th, but then just before the third measure starts, does one beat that starts with 1/32nd notes and ramps down over the beat to 16th-note triplets. The last three beats of the four measures uses a 32nd-note Rate so that the “robot percussion” adds some tasty, faster fills to lead into the next measure. I used down/up during these faster parts, but random can sound good too.
The final touch is Swing, which is set to around 70% in the audio example. Note how even though the drum loop is metronomically correct, adding swing to the percussion part lets it “dance” on top of the drums.
Now, here’s a very important consideration: You may look at the above and think “this sounds too easy,” or maybe “but what are the exact settings I should use?” The answers are yes, it really is that easy; and the exact settings really don’t matter all that much—feel free to experiment. Studio One’s little robot percussionist is full of surprises, and the way to uncover those is to play around with the settings, and automate them to create variations.
Finally, I’d like to mention that I have a new eBook out! At 258 pages, “How to Create Compelling Mixes in Studio One” is considerably longer than my two previous Studio One books. I’ve been working on it for the past year, and it’s finally available in the eBook section of the PreSonus shop. Check it out—I sincerely hope it helps you make better mixes.
10 Presence XT Techniques
September is winding down, but we still have one week left to celebrate Studio One’s 10th anniversary—so it’s time for another Friday Tip with 10 Tips! Let’s take a look at some practical, convenient techniques you can do with Presence XT. And yes, there’s a fun downloadable preset at the end.
- “Tighten” and “Loosen” Drum Kits

The Artist Instruments folder has a bunch of drum kits. However, I like to fine-tune drum pitches—higher pitches for a tighter, more beatbox/analog drum sound, or lower for a big rock vibe. Although the Sample Shift control can change pitch, it also changes where the drum appears on the keyboard. For example, if you Sample Shift a snare on the F key by +3, then the drum is lower in pitch, but it now plays back on D instead of F.
There’s a simpler way to tune your drums. Set Env 2 to Full Sustain, and modulate Pitch with it. Turn the modulation amount up to tighten the sound, or down to loosen.
- Control Presence Effects with the Mod Wheel

According to Presence, you can’t control effects parameters with the mod wheel—but there are a lot of useful techniques you can do with a mod wheel, other than control vibrato. Here’s one way to control the effects with your keyboard controller’s mod wheel.
- Choose Studio One > Options, and click on External Devices.
- Click on Add, and choose New Control Surface. Set Receive from your keyboard. You’ll get a scary message warning you “This port is already in use,” but just ignore it and click OK.
- Click OK on the Add Device menu, and now Studio One thinks your keyboard is a control surface.
- In the Mix view, click on the External button toward the left. When the External Devices column appears, double-click on New Control Surface.
- Click on MIDI Learn, and move your mod wheel. Name it to make it feel welcome, and then disable MIDI Learn.
Now you can link anything you want with the mod wheel, including effects. For example…
- Control Distortion Drive with the Mod Wheel
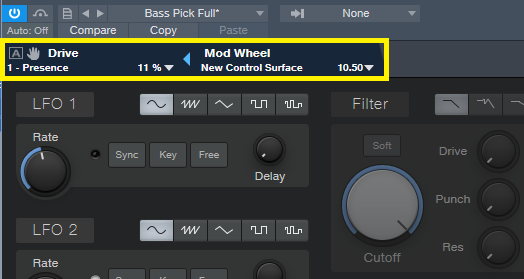
Adding distortion to bass is a beautiful thing, and it’s even more beautiful when you can control the distortion amount with the mod wheel.
- Click on the Edit Mapping button in Presence’s upper right (the somewhat inscrutable gear symbol). Now you can see the control mapping in Presence—which is really important if your monitor isn’t wide enough to show the Edit Mapping option in the toolbar.
- Contrary to the help, which assumes you’re rational and using a separate hardware control surface, move the Mod wheel and it should show up in the right side of the Edit Mapping section.
- Move the Distortion Drive control, which will show up on the left side of the Edit Mapping section.
- Click the “assign” triangle in the middle of the Edit Mapping section, and now the Mod Wheel will control the Drive control. (Another tip: distortion gourmets recommend “Bad Tube” as the best choice for bass distortion.)
- More Expressiveness
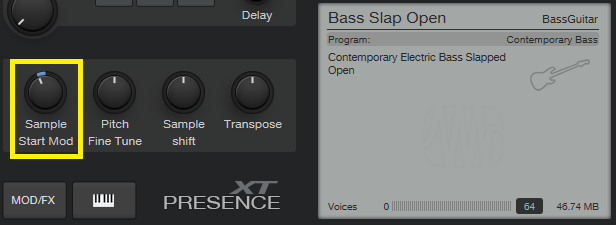
The Sample Start Mod control can add major expressiveness because it lets you control the attack’s character via velocity. Here’s how it works: when Sample Start Mod turned counter-clockwise off-center, with low velocities playback starts further into the sample, past the initial attack. But higher velocities trigger the full attack sound. For example, with an instrument like Slap Bass, this technique can emphasize the slap component with high velocities, while lower velocities bypass the slap. However, Sample Start Mod can affect any instrument with a defined attack.
Because a sample may not start at a zero-crossing, you may hear a click with some velocity values. Adding a little bit of Amp Env attack (usually only a millisecond or two) fixes this.
- Change the Female Choir into Monks
Call up the Vox > Choir > Choir Full preset. Set Transpose to -12, and Sample Shift to Semi-Tone: 12. You might also want to slather on some more reverb by turning up the Size and Mix, but regardless, you’re ready for your next moody movie soundtrack, or Gregorian chants dance remix.
- Get Saxy
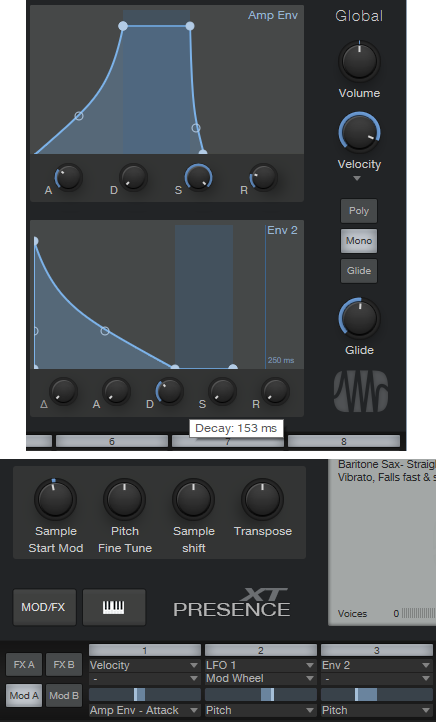
Let’s face it, John Coltrane fans—a sampler will never replace a sax player. However, the Winds > Baritone Sax > Baritone Sax Full preset is pretty good, so it seemed like a useful starting point for something a little more expressive. There are several treaks, but the main action is with the modulation.
- Set Sample Start Mod to -7000. If you play softly, this starts playback further into the sample, so you don’t hear the attack. However, as mentioned previously, modulating sample start can produce clicks because playback may not start on a zero crossing, so…
- Set the Amp Env Attack to 83 ms. This gets rid of any clicks. However, we want a fast attack with high velocities, so…
- In the Mod section, use Velocity to apply negative modulation to the Amp Env attack (you don’t need much) so that hitting the keys harder gives a faster attack.
- We also want to have notes bend up to pitch somewhat, so set the Decay for Env 2 to 153 ms. Again in the Mod section, use it to apply negative modulation to pitch. This causes the pitch to start off somewhat flat, then slide up to the correct pitch.
The penultimate touch is some vibrato by modulating Pitch. I used LFO set to about 4.5 Hz, with 680 ms of Delay time, controlled by the Mod Wheel (although I think Aftertouch is an even better choice, if your controller supports it). And of course, we want some reverb. The existing reverb is okay, but push the Size to 2.45 seconds, and Mix to 45%. Yeah, that’s the ticket! You might also want to choose Mono, unless you know any saxes that play chords. And yes, I’ve provided a downloadable preset for your playing pleasure—scroll down to the end.
- Foolproof Bass Slides

Set the bend to +7 for bend up, and 0 for bend down. Now when you want to slide down to a note, start at the top of the mod wheel, and then bring it down at whatever rate you want. It’s impossible to “overshoot” the target note, even when using the virtual mod wheel on the instrument GUI, with bend down set to 0.
- Add Analog Synth “Drift”
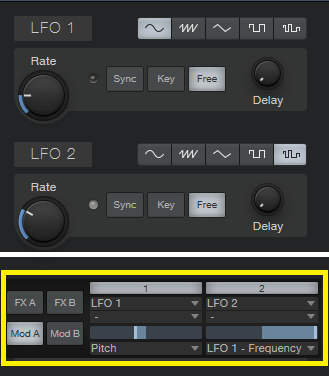
The pitch of analog synths drifts over time. Although Presence XT has a random LFO waveform, it’s stepped, and there’s no way you can “round off” the corners to create smooth variations. But there’s a solution (isn’t there always…). Use the sine waveform for LFO 1 and set it to a low rate, like 0.1 Hz. Select the random waveform for LFO 2, set to a slightly faster rate (like 0.4 Hz), and use it to modulate LFO 1. Meanwhile, use LFO 1 to modulate pitch; you don’t need to use much modulation to obtain a useful effect. Try this with Artist Instruments > Synths > Analog Fifths—you’ll be impressed.
- The Presence XT Editor Is Worth It

There might be a tendency to overlook the editor because Presence XT does enough on its own. And yes, I know the editor is $79.99. But, it’s cheaper than getting another sampler, and the capabilities are impressive. It’s easy to figure out, and it doesn’t take long to add samples—for example, you can specify the root note, high note, and low note by hitting keys. When using per-note samples, you can do fine-tuning, as well as add expressive features like sample start. Presence XT Editor is also a development system, so if you come up with some amazing presets, you can put them into a saleable bundle, and even password-protect it. If you’re into sound design and creating sample-based instruments, I highly recommend unlocking Presence XT’s Editor page.
- But Wait—There’s More!
Presence XT can load sounds from other formats—EXS, Giga, Kontakt version 4 (and below), and Sound Fonts. Finally, check out Tip 1 in the September 13 Friday Tip on using ATOM as an auxiliary keyboard. This makes it easy to access the keyswitching in Presence XT presets that contain this feature, even if you have only a four-octave keyboard.
I hope y’all enjoyed this month’s special editions of the Friday Tip. Happy birthday, Studio One!
Download the saxy sax preset, CA Baritone Sax Full