Tag Archives: Studio One
How to Make Spotify Happy

With physical audio media in its twilight, streaming has become the primary way to distribute music. A wonderful side effect has been the end of the loudness wars, because streaming services like Spotify turn levels up or down as needed to attain a specific, consistent perceived level—squashing a master won’t make it sound any louder.
However, the “garbage in, garbage out” law remains in effect, so you need to submit music that meets a streaming service’s specs. For example, Spotify prefers files with an LUFS of -14.0 (according to the EBU R128 standard), and a True Peak reading of -1.0 or lower. This avoids adding distortion when transcoding to lossy formats. If the LUFS reading is above -14.0, then Spotify wants a True Peak value under -2.0.
Fortunately, when you Detect Loudness for a track on the mastering page, you’ll see a readout of the LUFS and LRA (a measure of overall dynamic range), as well as the True Peak, RMS (average signal level), and DC offset for the left and right channels. Fig. 1 shows an example of the specs generated by detecting loudness.
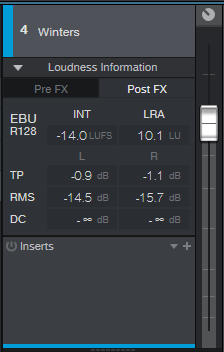
Figure 1: Although the LUFS reading meets Spotify’s specs, True Peak doesn’t, and the RMS value of the left and right channels isn’t balanced.
Note that this hits Spotify’s desired LUFS, but the left channel’s True Peak value is higher than what’s ideal. This readout also shows that the average RMS levels for each channel are somewhat different—the left channel is 1.2 dB louder than the right one, which also accounts for the higher True Peak value. This may be the way the artist wants the mix to sound, but it could also indicate a potential problem with the mix, where the overall sound isn’t properly centered.
A simple fix is to insert a Dual Pan into the Inserts section. Use the Input Balance control to “weight” the stereo image more to one side for a better balance. After doing so and readjusting the LUFS, we can now give Spotify exactly what it wants (Fig. 2). Also note that the left and right channels are perfectly balanced.
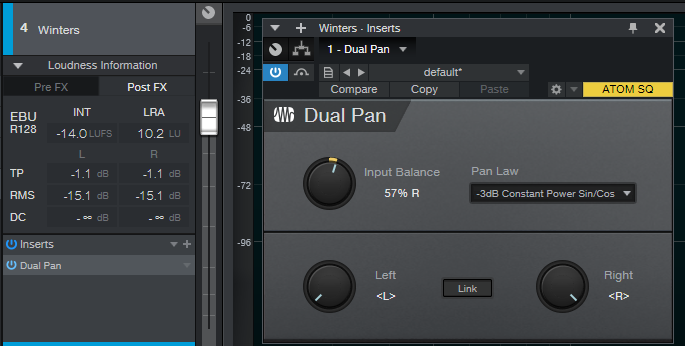
Figure 2: The True Peak and RMS values are now identical, so the two channels are more balanced than they were without the Dual Pan.
A Crucial Consideration!
You don’t want to mix or master based on numbers, but on what you hear. If you set up Dual Pan to balance the channels, make sure that you enable/bypass the plug-in and compare the two options. You might find that balancing the left and right channels not only accommodates Spotify’s requirements, but improves the mix’s overall balance. If it doesn’t, then leave the balance alone, and lower the track’s overall output level so that True Peak is under -1.0 for both channels (or under -2.0 for LUFS values above ‑14.0). This will likely lower the LUFS reading, but don’t worry about it: Spotify will turn up the track anyway to reach -14.0 LUFS.
Coda: I always thought that squashing dynamic range to try and win the loudness wars made listening to music a less pleasant experience, and that’s one of the reasons CD sales kept declining. Does the end of the loudness wars correspond to the current music industry rebound from streaming? I don’t know… but it wouldn’t surprise me.
My Craziest Mastering Salvage Job (So Far)

My mastering specialty is salvage jobs, which has become easier to do with Studio One. But this gig was something else.
Martha Davis’s last solo album (I Have My Standards, whose mastering challenges were covered in this blog post) has done really well. Since the pandemic has sidelined her from touring as Martha Davis and the Motels or going into the studio, she’s releasing a new song every month online. These involve excellent, but unreleased, material.
That’s THE good news. The bad news is that her latest song choice, “In the Meantime,” had the drum machine kick mixed so loud the song should have been credited as “Solo Kick Drum with Vocal Accompaniment.” With a vocalist like Martha (listen to any of her many hits from the 80s), that’s a crime. She was hoping I could fix it.
Don’t tune out, EDM/hip-hop fans. What about those TR-808 “toms” that are always mixed way too high? When I was given a Boy George song to remix, those toms were like sonic kryptonite before I figured out how to deal with them. And let’s not get into those clichéd 808 claps, okay? But we have a solution.
What Didn’t Work
I tried everything to deal with the kick, including EQ, iZotope RX7 spectral reduction, mid-side processing using the Mixtool, and more. The mix was mostly mono, and the kick was full-frequency—from low-frequency boom to a nasty click that was louder than the lead vocal. Multiband dynamics didn’t work because the kick covered too wide a frequency range.
What Did Work
In desperation, I thought maybe I could find an isolated kick sound, throw it out of phase, and cancel the kick wherever it appeared in the song. Very fortunately, the song intro had a kick sound that could be isolated as an individual sample. So instead of going directly to Studio One’s mastering page, I went into the Song page, imported the stereo mix into one track, created a second track for only the kick, and dragged the copied kick to match up with every kick instance in the song (yes, this did take some time…). It wasn’t difficult to line up the copied kicks with sample- (or at least near-sample) accuracy (Fig. 1).
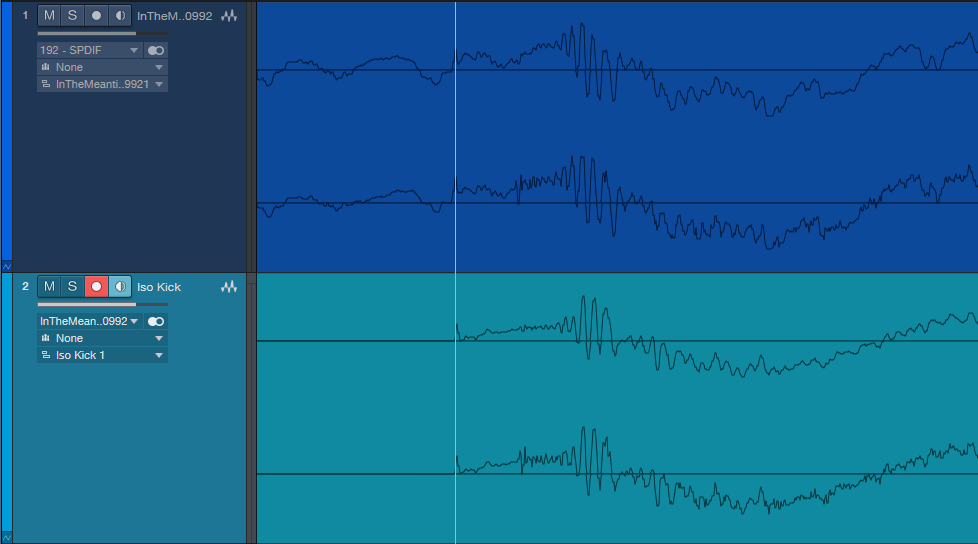
Figure 1: The top track is from the original song, while the lower track is an isolated kick. After lining the sounds up with respect to timing, flipping the kick track phase removed the kick sound from the mixed tracks.
The payoff was inserting Mixtool in the kicks-only track and flipping its phase 180 degrees. It canceled the kick! Wow—this physics stuff actually works.
But now there was no kick. So, I added the Waves LinEQ Broadband linear-phase equalizer (a non-linear-phase EQ can’t work in this context) in the kick drum track. This filtered out some of the kick drum’s lower frequencies so there was less cancellation while leaving the highs intact so they would still cancel as much as possible. Adjusting the shelving frequency and attenuation let in just enough of the original kick, without overwhelming the track. Even better, because the kick level was lower, I could bring up the low end to resurrect the bass part that had been overshadowed by the kick.
The Rest of the Story
The mix traveled to the mastering page for a little more processing (Studio One’s Pro EQ and Binaural Pan, IK Multimedia’s Stealth maximizer, and Studio One’s metering). After hitting the desired readings of -13.0 LUFS with -0.2 True Peak readings, the mastering was done. Sure, I would much rather have had the individual tracks to do a remix, but it was what it was—a 28-year-old two-track mix.
To hear how this ended up, the audio example first plays an excerpt from the mastered version. Then there’s a brief pause, followed by the same section with the original file. I’m sure you’ll hear the difference in the kick drum.
Listen to an audio example from In the Meantime here:
Pigface: Everywhere All At Once
Saturday, October 10th
(click)?Pigface will go live online HERE at 6PM (CST)?(click)
 (Concert photography by: Bobby Talamine)

Martin Atkins has been a longstanding PreSonus artist/endorser and we’re excited that both he and his audio engineer, Mark Williams have embraced our StudioLive 64S Series III console mixers are their go-to “mission control” for their studio recording workflows.
Let’s find out more about them and what’s new in the Pigface camp in these surreal times we’re in:

Martin: I’ve had a long storied career – starting in 1979 when I joined Public Image Limited (the band started by Johnny Rotten when the Sex Pistols imploded) for a 5 year spell that included world tours and their most successful albums. A few years with Killing Joke (who just opened for Tool last year) some work with Nine Inch Nails (appearing on the Grammy award winning Wish) touring with Ministry and founding my own band Pigface – an industrial ‘supergroup’ that has included Mary Byker (PWEI, Gaye Bykers On Acid), Chris Connelly (Revolting Cocks, Ministry), Randy Blythe (Lamb Of God), Danny Carey (Tool), Curse Mackey (Evil Mothers), En Esch (KMFDM), Lesley Rankine (Silverfish, Ruby), Charles Levi (My Life With The Thrill Kill Kult), Bobdog Catlin (Evil Mothers), Bradley Bills (Chant), Andrew Weiss (Ween, The Rollins Band), Greta Brinkman (Moby, Druglord), Orville Kline (Porn and Chicken), Gaelynn Lea, Dirk Flanigan (77 Luscious Babes), Leanne Murray (Beer Nuts), Chris Harris (Project 44), Mike Reidy (Worm), Leyla Royale, Andrew Apocalypse, Ali Jafri, Roger Ebner, Bruce Lamont, Jesse Hunt, Dai, C.A.M., J Lamar, Just Chris (courtesy of Add-2) and Rona Rougeheart.
I started my own label Invisible Records in 1988 and, after a few short years it was obvious I should open my own studio – I bought Steve Albini’s tape machines (an 8 Track ½” and a ¼” machine both by Otari.) As digital started to enter our lives my studio became a hybrid of cool quirky analog, circuit bent pieces, and whatever digital interfaces were affordable at the time.
More and more of my time was spent either in the studio or out recording live events with my band in the US or over in China where I travelled a couple of times. I’ve always been impressed by how supportive PreSonus is to artists– either with no nonsense customer support when needed or by carefully crafting new pieces of equipment that just make sense. I think the piece that illustrated their support of artists for me was the now “classic” Faderport– when most companies were trying to sell multi-fader automation they (and then I) realized that most of us only needed one channel to write volume and pan automation – so, that, I guess, cemented everything for me.
It feels like things are really coming to fruition now, with support from PreSonus and my good friend and audio engineer, Mark Williams. I got to see the StudioLive 64S Series III console mixer in action first at Mark’s studio in Baton Rouge where he laid out all of the tracks, but then we got to work at River City Studio, which is an amazing recording facility, right there at the PreSonus office building. Everyone was so welcoming, people jumping out of meetings to say hi that I had met speaking at PreSonuSphere years ago (you should bring that back!) and I even met the CEO. Mark and I were able to tweak the tracks there and then finish up any tweaks remotely from Chicago.
All of this made the need for a StudioLive 64S console essential for my studio– with so much catalog and multi-track sessions it will be an essential hub of our next few years of activity as a band and as a label. I have the ability to quickly communicate the power of these live shows we have been creating. We recorded many of the shows during our 2019 tour – the line up was just AMAZING and, just be reading through the names you’ll know this was nothing to roll the dice with – the new format allows seamless passing of sessions, follow up tweaks, and easy workflows. Not only has the StudioLive 64S made the mixing of the live tracks from the last tour possible, it’s enabling possibilities of making other shows available for the fans who want more material from us.

Mark: I met Martin the first time in 1993 while working in college radio at the University of Alabama. I worked for him as a field representative for Invisible Records for about 5 or 6 years. Martin contacted PreSonus about one of his ACP88’s and became an Endorser for the company. Throughout the years, PreSonus has outfitted his studio with products including: the ADL600, Central Station, Fadeport, Digimax 96, and their award-winning DAW software, Studio One.
I’ve worked on numerous recording projects and mixes throughout the years with Martin and in November 2016, we recorded the Pigface 25th anniversary concert at the Chicago House of Blues using 2 StudioLive RM32 rackmount mixers and Capture recording software.
In 2019, I supplied Martin with a Quantum interface to record all Pigface live concerts with. The front-of-house (FOH) engineer for the final concert at Thalia Hall sent me all 32 channels of the recording. I synced up the 26 channels from the multitrack with 6 additional channels from the board mix and FOH feed.
Breaking down the 32 channels, 48khz recording down by song was quite an undertaking, as it was a massive amount of data to go through.
Martin flew down the last week of February 2020 so we could mix the album in my studio. The heart of our system was an IMAC with 32 gigs of RAM with a few external terabyte drives, a StudioLive SL64 console mixer, Scepter 8 monitors and Avantone Mixcubes. We went through each song to evaluate what we would use. As we did that, we created template fat channels for each musician. We had 3 drummers, 3 bassists, 2 guitarists, a DJ, 3 saxophones, cello, viola, violin, sitar and more vocalists than I can remember.
Basically we mixed everything “live” using the StudioLive 64S, relying on the console for dynamics processing and effects. We did some simple edits in Studio One. However, to maintain the integrity of the recording, we didn’t repair or fix anything. We used the recording as is in all its chaos and beauty. We didn’t correct any timing, pitch (i.e. no Auto-Tune!). I wanted to stay true to the Pigface form for the live energy.
A couple of days went by of mixing in my studio and then went to River City Studio. I was able to store the presets for the StudioLive 64 on the iMac. We just carried it up to the studio and plugged it in. The scenes loaded up quickly and easily. The transition from my studio to the PreSonus studio was seamless. We were able to get a different perspective in PAE HQ due to the different room and monitoring.
Then, we finalized the mixing in my studio and I uploaded the mixes online for filesharing, as Martin had to fly home to Chicago. He and I tweaked the final mixes over the next month easily to get to the final product that has been pressed to a beautiful Double LP. Y’all need to check it out… click on the link below for more info!
The mix that we did there is what is being used for the live video concert on October 10th.

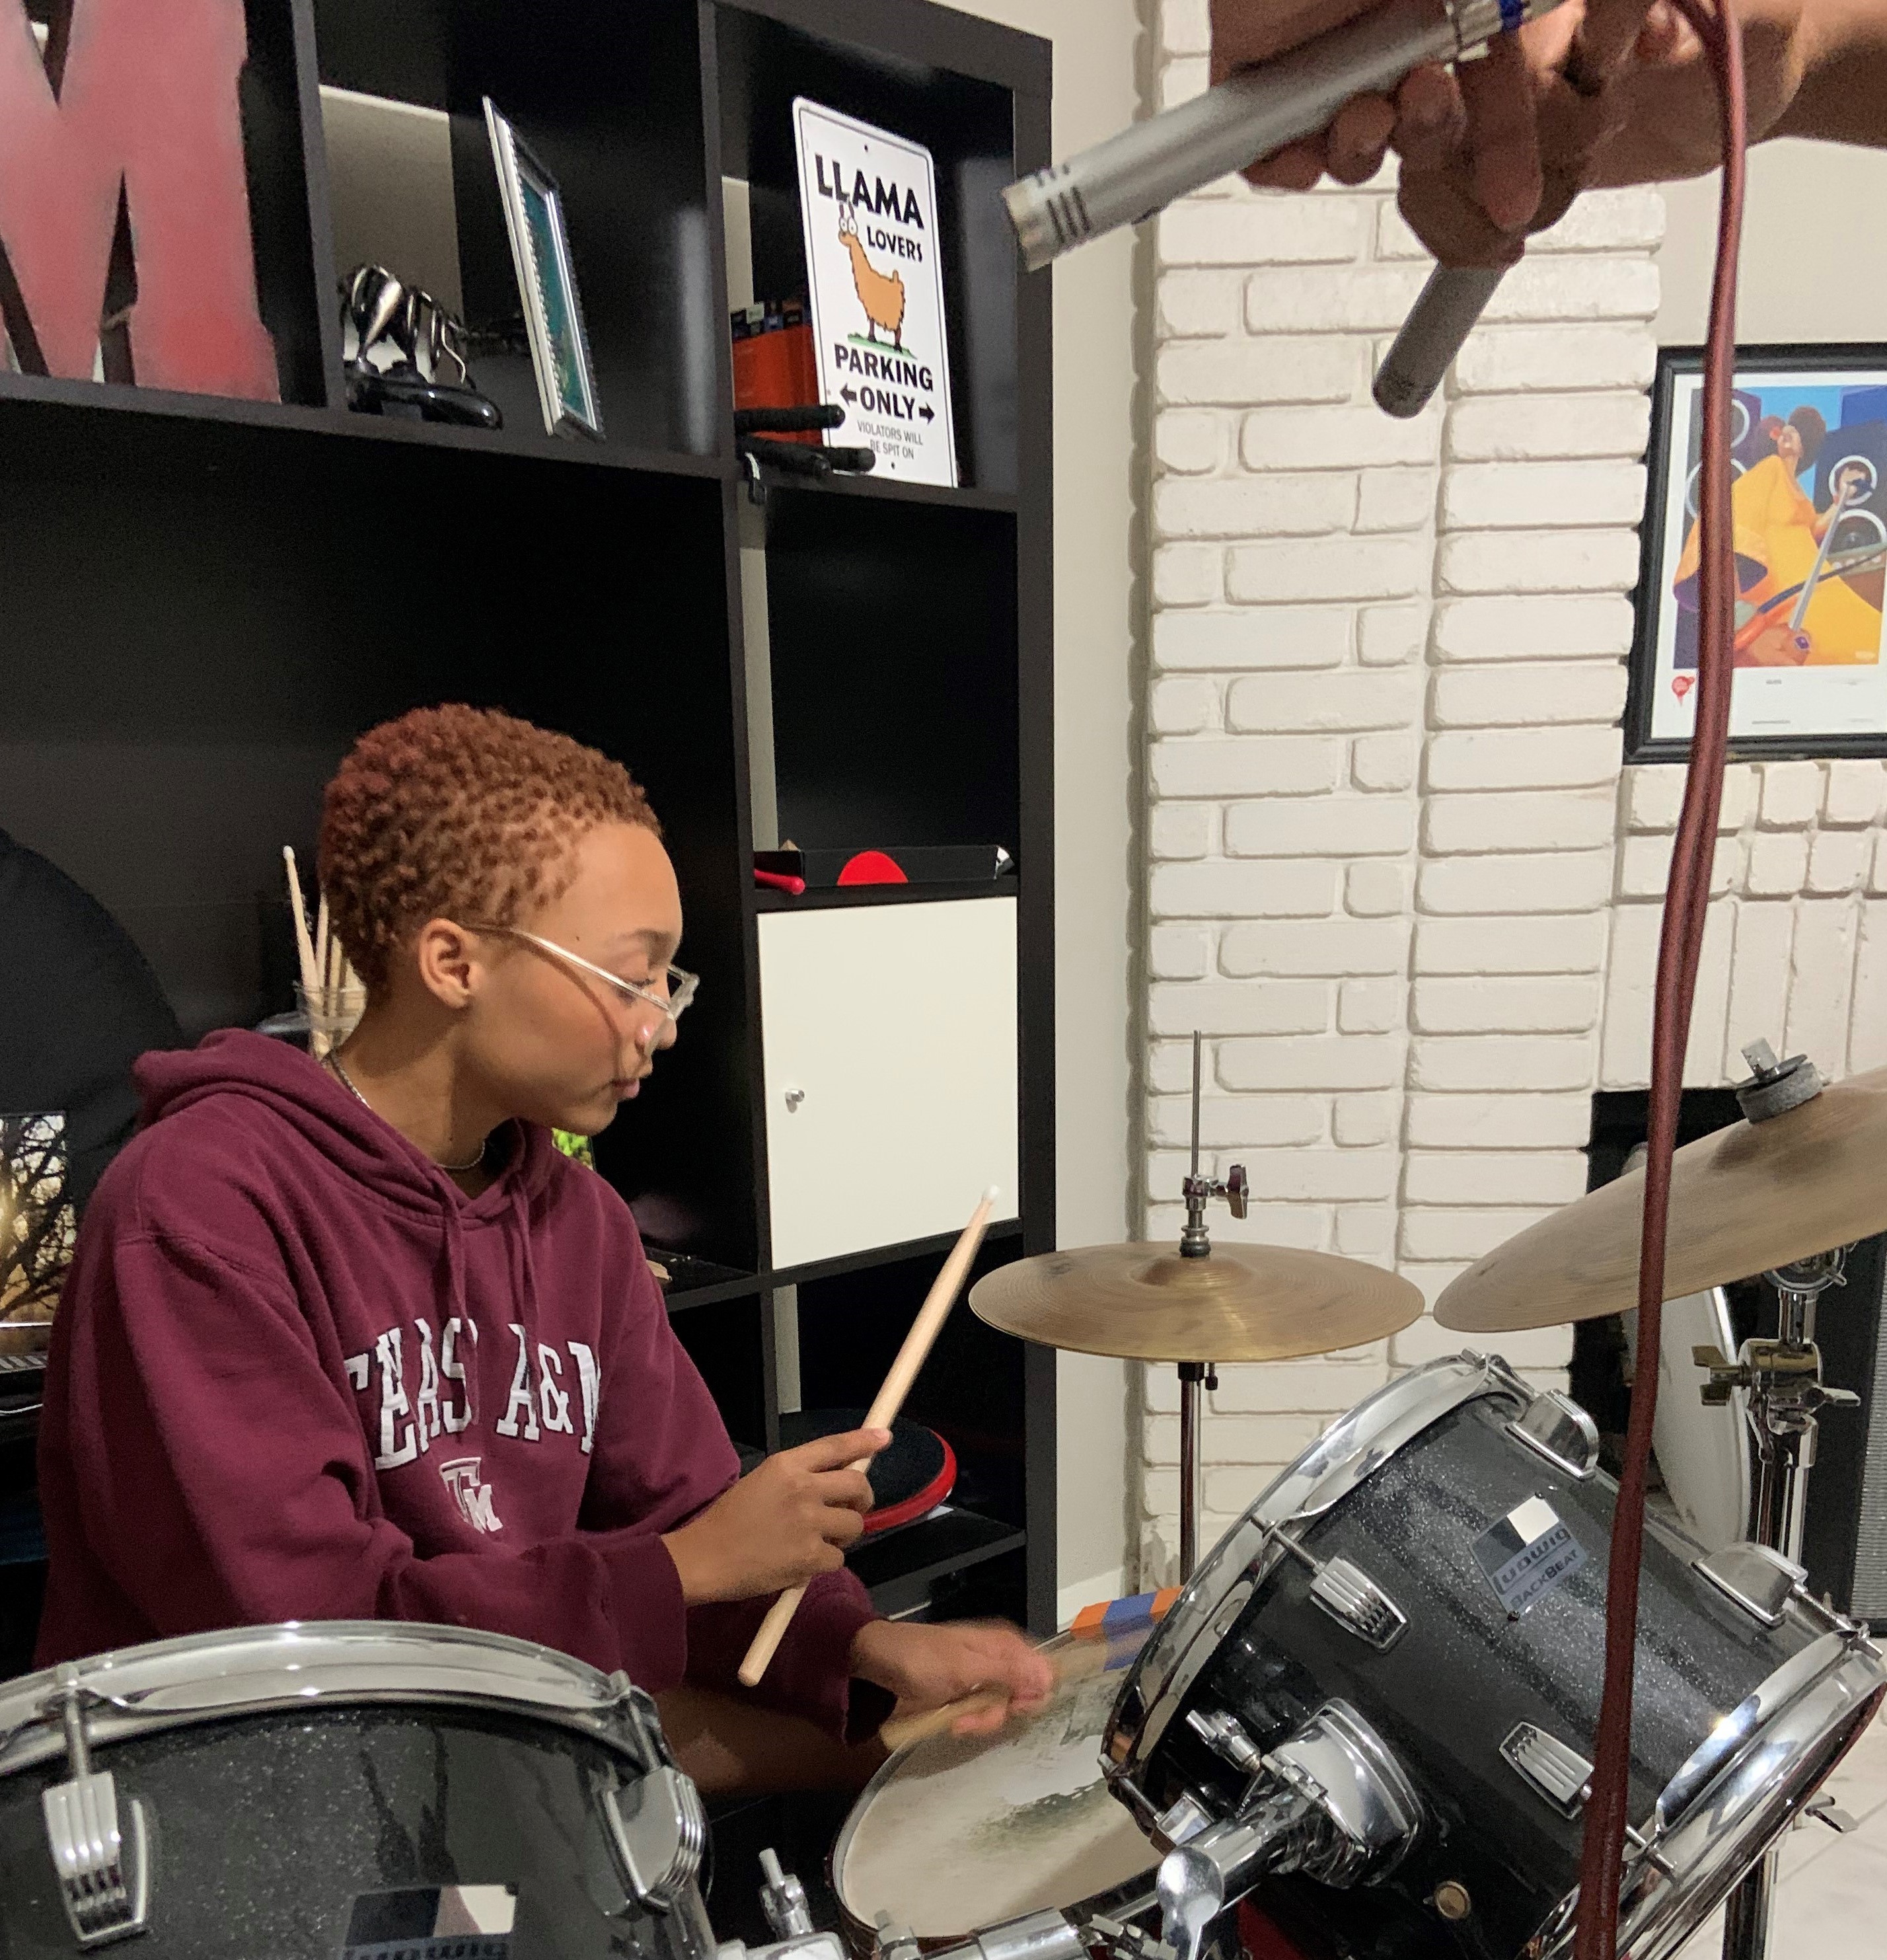
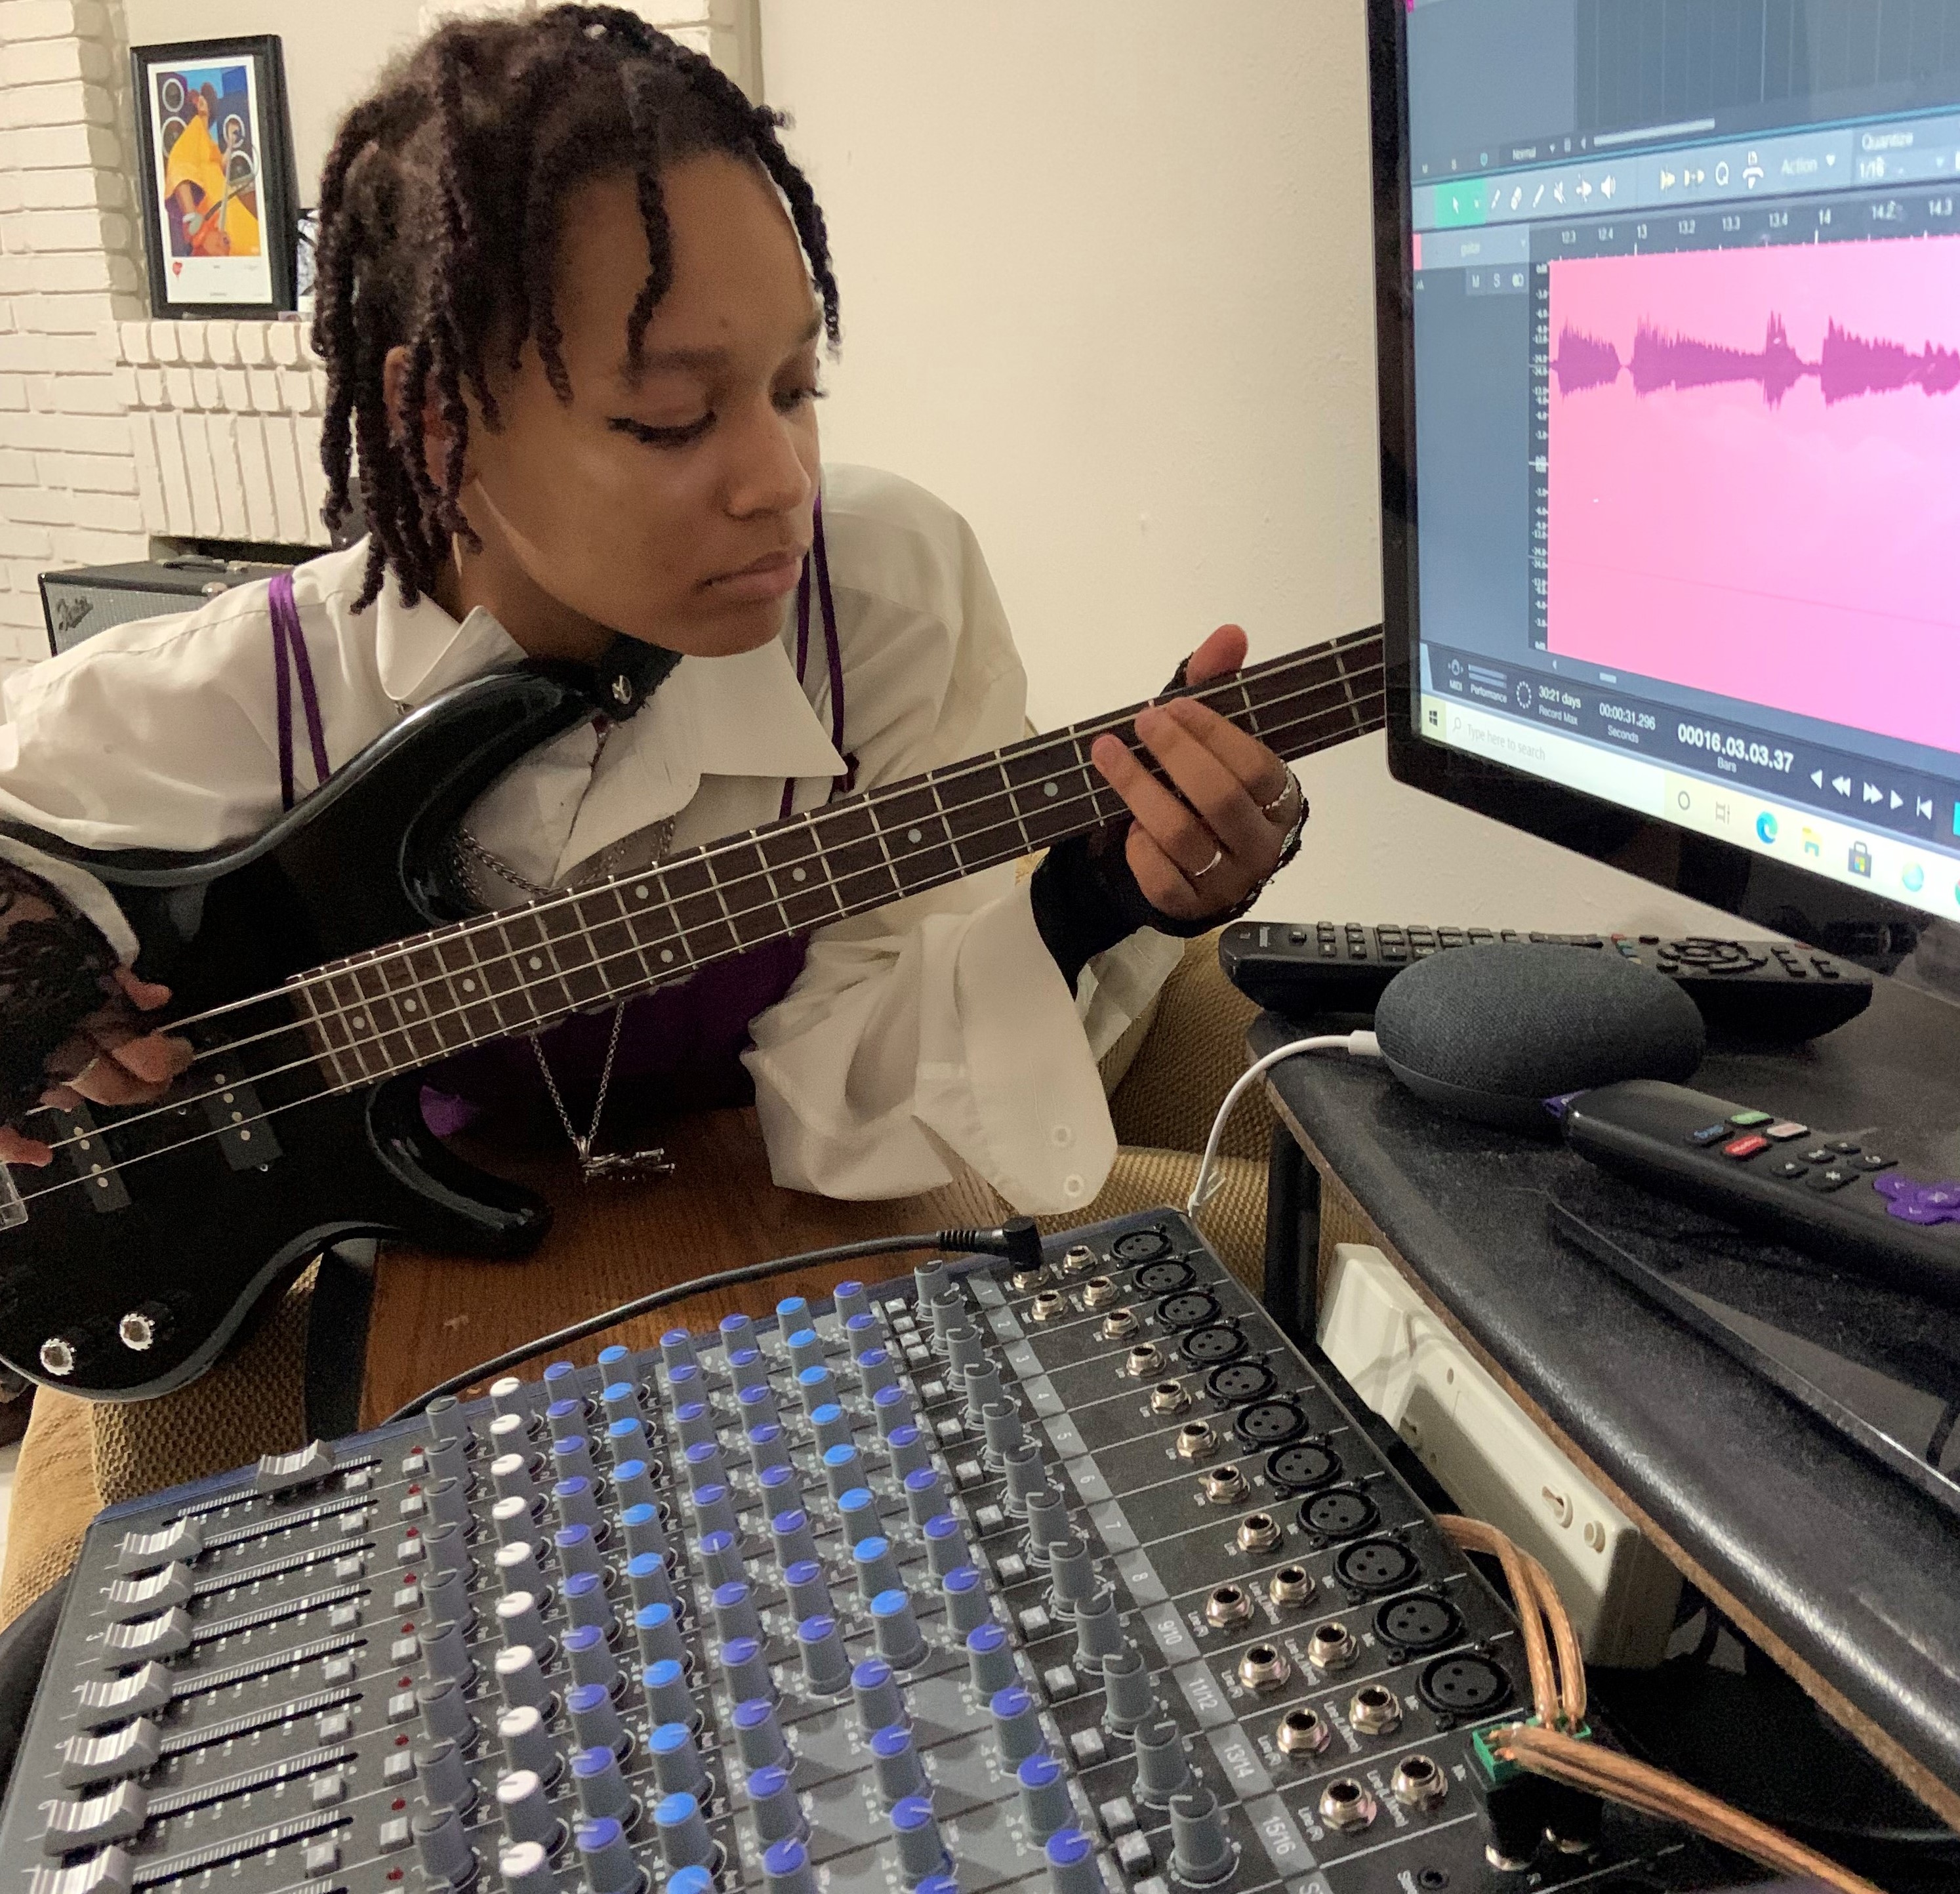
We Don’t Ride Llamas… yes. WDRL!
Afropunk. Counterculture. Art. Rock Music. Weird things. Generation Z.

These 4 siblings hail from Austin, TX and have been a band for 6 years now.
Around the end of 2019, We Don’t Ride Llamas (WDRL) was introduced to PreSonus by Grammy nominated music producer, King Michael Coy (Dr. Dre, H.E.R, Anderson .Paak, Ms Lauryn Hill, Busta Rhymes, Snoop Dogg, Bilal, Kendra Foster, Frank N Dank) who has been a Studio One Professional endorser for several years now.
By March of 2020, the group was armed with an AR16c mixer, a PX-1 condenser microphone, the PM-2 stereo pair mics and Studio One Professional DAW software, the kids have been upping their recording game while staying home during the time of COVID-19.
Being the super-duper creative explorers that they are, WDRL has maximized their use of these products in true DIY fashion:
From creating cool voice-overs (did y’all ? the trailer video above ☝️ yet?), producing band interviews and promotional videos to the more obvious use case of recording original music and cover songs… the band can now achieve high quality recorded or live streamed audio that kids from previous generations would not have been able to do.
As a matter of fact, We Don’t Ride Llamas recently just wrote a song called “Buddy” that is featured in Welcome To Sudden Death, now streaming on Netflix. You can check out both the “Groove” and “Dance” mix versions on Spotify here!!!
Synecdoche is the long awaited EP that’s on the horizon for release. The recording is an extremely personal project for WDRL as it explores feelings of being displaced, yearning for the future, their general melancholy at the current state of the world and how everything (for them at least) always comes full circle.
Here are a few things they had to say to us:
“We knew that he company has a longstanding reputation for products that are easy to use, sound great and within the budget for most rock bands. These are the reasons we initially were interested in PreSonus. Can’t wait to get our hands on one of those ATOM pad controllers (hint, hint)… :)”
“We love how user friendly and multifunctional everything is! Your products make us feel like sound alchemists even though we’re still fairly new to recording our own stuff at home.”
“The fact that the AR16c mixer is pretty simple to understand and we can just pick it up and go record somewhere is amazing. Also the amount of product videos and training tutorials PreSonus has available online now makes a huge difference.”
Instagram | Official Website
The Vocal Repair Kit
Although it’s always better to fix issues at the source, here’s a tip to help repair recorded vocals during the mixing phase. The technique (which is featured in the new book How to Record and Mix Great Vocals in Studio One – 2nd Edition) combines multiband dynamics processing with equalization to both de-ess and reduce plosives. Although the screen shot shows the Multiband Dynamics processor in Studio One 5, this technique will work with previous Studio One versions if you duplicate the settings.

In the screen shot, the Multiband Dynamics’ Low band settings are outlined in red, and the High band settings are outlined in blue. (Note this is not the actual interface; the high band panel is pasted into the image from a different screen shot so you can see both the Low and High band settings simultaneously.)
The High band acts as a de-esser, because it applies compression to only the high frequencies. This helps tame sibilance. The Low band compresses only the low frequencies, which reduces pops. However, this preset also takes advantage of the way Multiband Dynamics combines equalization with dynamics control. Turning down the Low stage Gain all the way further reduces the low frequencies, where pops like to hang out and cause trouble.
For the High band, vary compression to taste. The compression settings are less critical for the Low band if you turn the Gain down all the way, but in either case, you’ll need to tweak the settings for your particular vocal track.
And that’s all there is to it. When a loud pop or sibilant sound hits the Multiband Dynamics, it’s compressed to be less annoying, while leaving the rest of the vocal intact. Vocal repaired!
Sound on Sound Reviews Studio One!
Sound on Sound Magazine is “the independent voice of music recording technology for over 34 years.” Their team is based in the United Kingdom and, like the rest of the world, Covid-19 has thrown a wrench in their day-to-day and service to their customers. In response to the lockdown, they’re now offering access to their September issue for FREE! Read cover to cover digitally here.
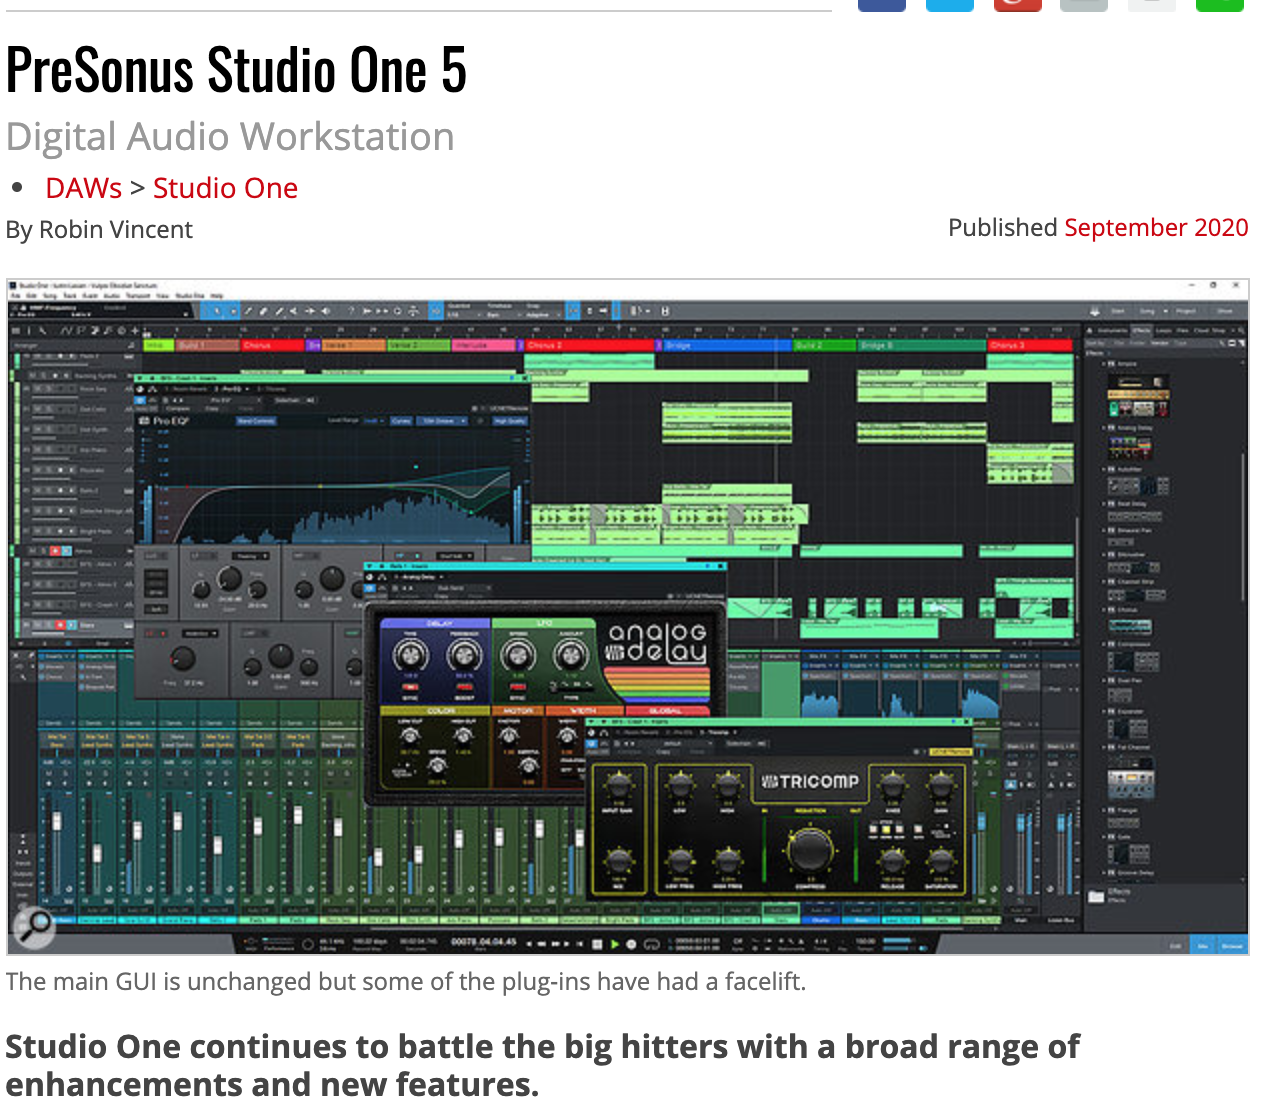
The PreSonus Quantum landed on the cover of Sound on Sound back in 2017. We are very excited to see Studio One featured in their latest issue! Writer Robin Vincent gives an extremely detailed review of many of Studio One 5’s enhancements, new features and so much more. All we can say is THANK YOU!
Here is a direct link to their deep dive into Studio One 5!
They also shout out to PreSonus Sphere! Here’s a little snippet:
The pricing is impressive, achievable, realistic and it keeps you in the upgrade loop.
Learn more about PreSonus Sphere here: https://shop.presonus.com/PreSonus-Sphere

Transient Shaper FX Chain
![]()
As you can probably tell, I’m a fan of FX Chains—they satisfy my inner DIY impulse to put things together, and result in some cool, useful, new processor I didn’t have before. For this Friday’s tip, let’s put together a Transient Shaper designed specifically for drums and percussion. It can emphasize the attack, the post-attack section (called “Girth” in the FX Chain), or both, as well as mix any blend of them. Of course, there’s a download link for the multipreset—but first, let’s listen to what transient shaping can do.
The first two measures are the straight Crowish Acoustic Bridge 2 w. Fill drum loop from Studio One’s sound library. The next two measures add Attack shaping, the next two add Girth only, and the final two measures combine Attack and Girth, with 1 dB of limiting. All examples are normalized to the same peak level.
How it Works
Fig. 1 shows the block diagram. Mixtool 3 adjusts the input level, because when feeding any dynamics processors, you need to find the sweet spot where the processors act as expected. In this case, you want the input level to provide a signal that uses up most of the headroom.
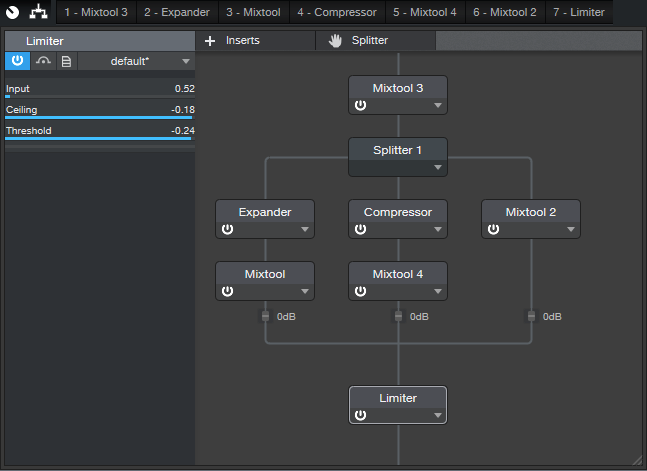
Figure 1: Block diagram for the Transient Shaper FX Chain.
The incoming audio splits into three paths. The left path is an expander, set up to provide upward expansion. This is what emphasizes the attack. The Mixtool adjusts the path’s level.
The middle path is a compressor, set for the shortest attack time possible to reduce any existing attack to a minimum. Some compression brings up the post-attack part of the audio. Mixtool 4 adjusts this path’s level.
The right-most path sets the dry signal’s level. This is an important parameter, because you can take out the dry signal and be left with only what’s contributed by the Attack and Girth paths, or use them to enhance the dry sound.
The Macro Controls
It takes a little effort to get familiar with the controls. The Attack shaper is the main point of this FX Chain, so to acquaint yourself with what the Attack parameters do, load up a drum loop of your choice, and then do the following.

Figure 2: Default control settings for the Transient Shaper FX Chain.
- Turn Girth, Dry, and Limiting down all the way.
- Turn off all switches except Attack Enable.
- If the drum loop doesn’t use up the available headroom, normalize it, or turn up the input control.
- Turn the three attack-related controls up about 2/3 of the way. Vary Attack Width; turning it clockwise shortens the attack transient.
- Set Attack Width to around 1:4.5. Now, vary the Attack Amount. Turning it counter-clockwise raises the level below the attack. This provides a smoother transition if the enhanced attacks sound too isolated.
- Turn up the Dry control about 2/3 of the way. Mix in the desired amount of attack with the Attack Level control.
- Next, disable Attack, enable Girth, and vary the Girth control to find out how it affects the sound. As with Attack, you can vary the proportion of the Girth and Dry sounds.
- The Inv Phase button inverts the Dry path phase. It’s not something you’d normally enable, unless you’re in search of bizarre special effects…but you’re a creative bunch, so I figured I might as well put it in.
- If you want to perk up those drums even further, go ahead and slam the limiter.
One final comment: It’s easy to go overboard with transient shaping, but after the novelty wears off, you’ll find that even a little bit of enhanced attack can make a track sound more lively. And while we’ve covered this only with drums, it also works for bass attacks, plucked strings, and strange percussion instruments…basically if something has an attack, this FX Chain can shape it.
Download the preset here!
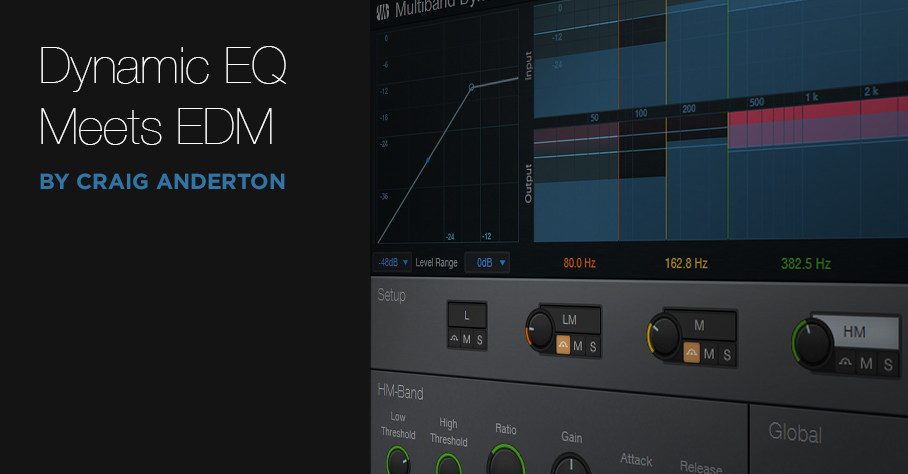
Studio One 5’s Dynamic EQ Meets EDM
I’ve always loved having one track impart its characteristics to a different track (“cross-modulation”), particularly for EDM. A good example is using a vocoder for “drumcoding,” where drums—not a microphone—provide the vocoder’s modulation source. Previous Friday Tips along these lines include The Ultra-Tight Rhythm Section, Smoother/Gentler Sidechain Gating, Pumping Drums – With No Sidechain, and most recently, Rockin’ Rhythms with Multiband Gating.
Sending audio from one track over a sidechain to control dynamic EQ in another track is great for cross-modulation effects—and now this is easy to do in Studio One 5 because sidechaining has been added to the Multiband Dynamics processor. One of my favorite effects is using the kick drum to boost the upper midrange on a rhythm guitar part or keyboard pad so that the guitar or pad emphasizes the rhythm…and that’s just one possibility.
This isn’t about “textbook” dynamic EQ in the sense of being able to use any type of filter (e.g., highly resonant bandpass) as the EQ, but as pointed out in the Friday Tip Studio One’s Secret Equalizer, the Multiband Dynamics combines both EQ and dynamics. We’ll use that to our advantage—and in a way, a relatively broad filter response is better for this kind of application. (The typical dynamic EQ application involves fixing a problem, and for that, you often need precise filtering.)
The Setup
Insert the Multiband Dynamics in the Target track, like guitar, pad, organ, etc. Then, insert a Send (pre-fader is probably best) in the Source track (e.g., kick or snare drum). Assign the Send to the Multiband Dynamics sidechain (Fig. 1).
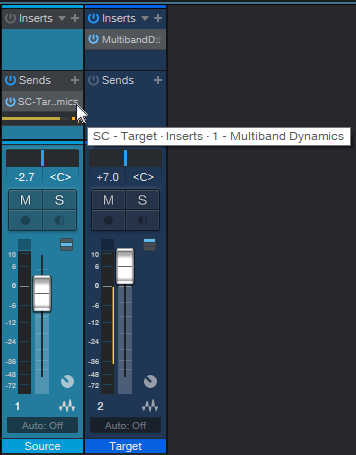
Figure 1: This technique requires a source track to trigger the Multiband Dynamics’ sidechain and a target track that’s processed by the Multiband Dynamics.
Multiband Dynamics Settings
This is where the fun begins. The sidechain feeds all Multiband Dynamics bands simultaneously, so the most basic implementation would be bypassing all the bands except for one, which you then set to either cut or boost a particular frequency range. The amount of boost or cut depends on the level that the source track sends to the sidechain.
For example, with compression, you can create pumping effects (Fig. 2).
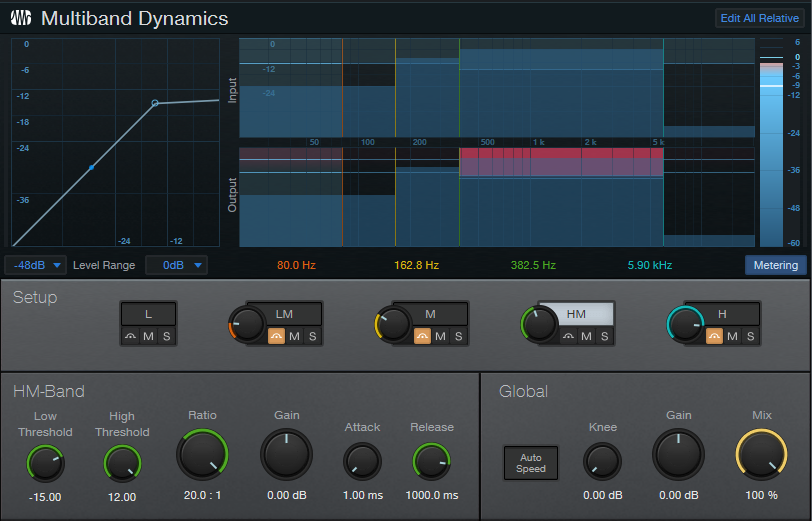
Figure 2: The Multiband Dynamics attenuates the selected frequency range whenever it receives a signal from the source track.
In this example, a kick drum is modulating a pad. Every kick drum hit attenuates the HM (High-Mid) range; the amount of attenuation fades over the 1000 ms Release time. A shorter Release parameter creates a more percussive effect. Choose the frequency range you want to modulate by adjusting the crossover frequencies. Even better, note that you can automate the Multiband Dynamics’ crossover frequencies, so the frequency range can sweep over time—this is a novel effect that adds considerable animation.
Another option is to raise the target band’s Gain so that any modulation lowers the band’s level. In other words, the default state for that band is boosted, and modulation reduces the boost.
You can also boost a band’s level in response to dynamics, by setting the Multiband Dynamics parameters for upward expansion (Fig. 3). Note how the graphic in the upper left shows an expansion curve instead of one for compression.

Figure 3: Upward expansion boosts the target audio in the selected frequency range.
The control settings here are fairly crucial. Ratio must be set for upward expansion, so the second number in the ratio control needs to be greater than one—the bigger the number, the steeper the expansion. For the maximum expansion effect, set High Threshold to 12.00. The Low Threshold parameter determines where expansion begins, and Gain increases the overall level to compensate for the lower level below the point where expansion kicks in. Adjust Attack and Release to shape the boost’s dynamics. Because upward expansion boosts the output signal level, you may need to reduce the Global gain somewhat.
But Wait—There’s More!
The best way to understand all the possibilities is to create a basic setup like the one in Fig. 1 with a kick drum as the source and a very simple, sustained pad (e.g., a chord with sawtooth waves) as the target. This will make it easy to hear the results of playing around with the Multiband Dynamics’ controls. And of course, it is a multiband processor, and the sidechain feeds all the bands, so you could have one band attenuating while another is boosting. If you get into automating parameters, the sky’s the limit.
Dynamic EQ can also be useful to process signal processing. For example, suppose there’s a main reverb inserted in a bus, to which you send drums, guitar, voice, etc. To avoid muddiness, insert a Multiband Dynamics after the reverb, use kick as the sidechain source, and attenuate the low frequencies whenever the kick hits.
Cross-modulation with dynamic EQ can be serious fun…give it a try.
The Envelope, Please
Studio One V5 adds Event Gain Envelopes for audio, which joins Event Level Envelopes and Track Automation Envelopes. So, how do you choose the right tool for the right job? Let’s use a paint brush analogy: Event Level Envelopes (ELE) are like broad brushes, Track Automation Envelopes (TAE) are medium brushes, and Event Gain Envelopes (EGE) are the fine-pointed brushes you use for detail work.
EVENT GAIN ENVELOPE BASICS
- To work with EGEs, right-click on an audio Event (EGEs don’t work with Instrument Tracks unless transformed to audio) and check the Gain Envelope box. Unchecking this show/hide function does not remove edits, it just hides the EGE.
- The envelope will be visible on that Event and any copies of the Event.
- Editing an Event’s EGE makes the same edits in any copies.
- If you don’t want a copy to be affected, bounce it to itself before adding an envelope.
- Editing an EGE is like editing a TAE: add nodes, bend curves, type in values, hover over the Event’s upper quarter and drag up or down to alter the envelope gain over a selected range, etc.
- Like TAE, if you move the Event, the EGE moves with it.
Next, let’s turn our attention to which envelope type is best suited to particular use cases.
EVENT LEVEL ENVELOPE
Some people think the EGE replaces the ELE, but I think the ELE remains the fastest way to trim an Event’s level—click and drag. This is particularly useful to change the response of subsequent level-sensitive processors, like compressors, amp sims, limiters, envelope followers, and so on. For details on this technique, check out the Friday Tip Yet Another Use for Event Envelopes. ELEs are also the quickest way to add a fade in or fade out to a group of multiple Events. For example, if you’ve split a series of vocal Events just before an inhale, it’s easy to reduce the inhale on all Events simultaneously.
EVENT GAIN ENVELOPE
I’ve often mentioned that rather than use heavy compression on vocals, I instead adjust levels manually to even out variations, before applying a light amount of compression. This is covered in the Friday tip Better Vocals with Phrase-by-Phrase Normalization. While this technique is still fast and effective with ELEs, EGEs allow for much more detailed editing.
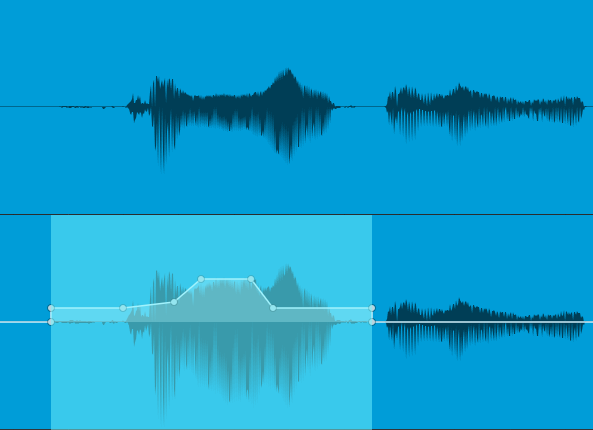
Figure 1: The EGE in the lower view has smoothed out level changes in the upper waveform.
In Fig. 1, the first waveform in the upper image would be difficult to level with an ELE. Splitting would likely cause some discontinuities, resulting in potential pops. Fixing this would then require crossfading across the split.
The EGE makes levelling much easier. Furthermore, selecting the Region containing the envelope allows using the Trim function to bring up the audio’s overall level. (And before proceeding, it’s time for a moment of levity: Microsoft Word automatically writes Alt Text to caption images based on pattern recognition. It determined that Fig. 1 was “a picture containing water, outdoor, dog, lake.”)
The EGE is also great for reducing levels of p-pops, manually editing “ess” sounds, reducing pick noise at the beginning of a guitar attack, minimizing the severity of inhales, and more. It can bring up the decay of a guitar note to provide a more consistent signal to a compression, create extremely precise fadeouts, and more. The bottom line is when you need detailed level control, EGE is the droid you’re looking for.
TRACK AUTOMATION ENVELOPE
Prior to the addition of EGE, this was the preferred way to do what the EGE can do. However, there are three main drawbacks compared to the EGE.
- The waveform graphic doesn’t change to reflect level changes, whereas with the EGE, you can see how level change affect the waveform level.
- Changes made to one Event aren’t duplicated in other Events.
- You’ve now dedicated the TAE to a specific function, so using it for traditional level automation can be more of a problem.
The latter showcases a major advantage of having multiple envelopes: the EGE and ELE can do detailed changes on specific Events, while the TAE does overall level changes for the track. For example, imagine if you had to use the EGE in Fig. 1 to create an overall level fade. It’s doable, but would take a lot more work than just using a TAE to fade out over the duration of the clip.
FINAL COMMENTS
All these envelopes can exist concurrently. However, you may need to change the editing environment. For example, suppose you’ve added an EGE to an Event, and now you want to add an ELE. You can’t do that while the Envelope Gain is showing, because Studio One assumes that any editing you want to do is to the Envelope Gain. So, uncheck the Envelope Gain box, and now you can use the ELE to change the level or fade. The waveform will reflect these changes, as well as any you added with the EGE.
Sometimes it’s a toss-up as to which approach is best. To even out level variations in vocals, if it’s mostly a question of changing the level of phrases, it’s often easiest to split at the beginning and end of the phrase and alter the level with the ELE. But if you need to go granular with changing overbearing consonants, breath noises, mouth clicks, and the like, then the EGE is the way to go.
An interview with UJAM’s Jannik Hainke and Christoph Lange

[UJAM is a prolific developer of virtual instruments located in Bremen, Germany. Jannik Hainke and Christoph Lange were kind enough to talk to us a little bit about life behind the scenes at UJAM, and what it is about Studio One that makes it such an excellent host DAW for their world-class instruments.]
PreSonus: Introduce yourselves! Who are you and where is your team located? How long has UJAM been around?
J&C: Hi there! We’re a music software company based in the beautiful city of Bremen in the north of Germany! Our company was founded in 2010 by musicians and technology nerds, and we’re proud to say that two of our co-founders include Pharrell Williams and Hans Zimmer. For many years we were a consulting company developing cool technologies for ourselves and others, but in 2016, we decided to branch out and start making our own virtual instruments and plug-ins. It’s been great—we’ve discovered that we love making instruments and plug-ins for musicians.
P: What makes UJAM products different from the WIDE array of virtual instruments available from other developers? What sets UJAM apart?
J&C: Our products sound amazing, and we pride ourselves on our quality German engineering 🙂 but I think what really sets us apart is our fanatical obsession with ease-of-use. I think from day one, our goal has always been to build instruments that are simple enough for total beginners in a bedroom studio but great-sounding enough that serious professionals will use them on their big-budget productions.
We don’t want our products to feel super tech-y or require years of production experience to use properly. That’s why we design the interfaces for maximum clarity and set up our “frustration-free” controls so you always get musically interesting results no matter how you set the knobs and other controls. Basically, you can be up and running in a few seconds with very little knowledge but there is enough depth there that you can keep using our instruments years later when you’ve become a professional! That’s what we strive for, anyway.
P: How do you choose what niche to fill in a product family? For example, Virtual Bassist or Virtual Guitarist each have up to five stylistic varieties. How do you choose what styles to pursue and develop an instrument for?
J&C: There’s no simple answer for this one. In general, we look at what our customers are saying, what is happening in the marketplace, and what kind of genres we are excited to cover ourselves. I can say that we definitely avoid chasing trends since trends come and go quickly and end up sounding dated. Instead, we do our best to find styles and genres that musicians will continue to find useful and interesting for many years.
Once we decide on a certain genre or style, we hire session musicians to record the sounds and patterns we need for a virtual instrument. If we’re developing a plug-in effect, we research and create the effects and effect chains in-house. Thanks to our glorious Gorilla Engine software development kit, we’re able to create products very quickly!
P: The new Finisher series seems to be a different and exciting direction for UJAM. What (or who) inspired it?
J&C: Finisher is actually a spin-off feature from our highly successful Virtual Guitarist CARBON. For CARBON, we realized we needed something special to get those beautifully distorted sounds happening quickly so we invented Finisher. As soon as CARBON was released, customers started asking us to give them just the Finisher part as its own separate plug-in! We released Finisher MICRO as a small, free product in December 2019 and it was a huge success, so we followed in 2020 with Finisher NEO (an expanded version of MICRO) and VOODOO.
For those that aren’t familiar, our Finisher products are really cool—this plug-in is like having the mother of all pedalboards to process your sounds. Each Finisher product (currently Micro, NEO and VOODOO) has its own sonic signature and has up to 50 separate effects inside itself. Those effects are connected and routed to each other in dozens of different ways that you can load instantly. The cool thing is that our sound design team puts in countless hours to find those cool combinations, and countless more hours to figure out how to control all the available parameters with a super-simple interface. This lets you get totally awesome effects on your guitars, synths, drums and other sounds without spending an eternity setting up and dialing in 50 separate effects one by one. We do this crazy, difficult stuff so musicians can have fun. As someone here once said “It’s supposed to feel like flow, not work!”
P: Is there anything in particular about Studio One that you feel makes it a strong host for UJAM instruments?
J&C: Well let me start by saying that we have quite a few fans of Studio One here, so that certainly doesn’t hurt!
The recent addition of Chord Track and Key Switch Editing in Studio One 5 has made it a fantastic choice for our Virtual Bassist plug-ins! We’re delighted to be the first company to support these features right from the start. With the Key Switch integration, our Virtual Bassists (ROYAL 2, ROWDY 2, MELLOW 2 and the new DANDY) report their key switches display articulations with their names automatically. Chord Track detects and displays the chords that have been played, so newly recorded passages will follow the established chord progression. Our bassists automatically change the MIDI notes for you when Chord Track enabled, so things stay not only in time but also in tune. It’s really nicely integrated!
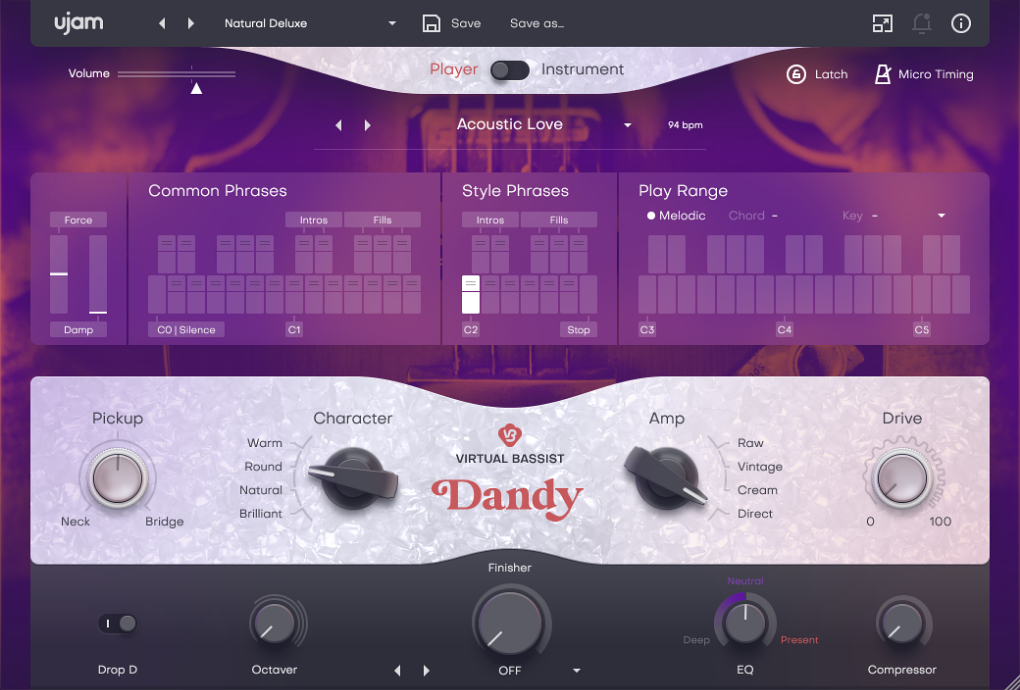
DANDY is UJAM’s latest product, and available at a discounted intro price of $89 USD!
P: In software development, it’s common to see customers using products in fascinating ways that were not intended during development. What are some of the uses you’ve seen of UJAM products that have surprised you?
J&C: You’re right—sometimes we’re surprised and delighted when we see our products being used in new or unexpected ways. Getting this feedback is incredibly valuable for us. It helps us learn what works well for customers and what doesn’t, and helps us figure out what to do with our product updates.
Once in a while we get feedback that really gets us right in the heart. Here’s a message from a customer in New Zealand. The whole ujam team loved this so much, we put it on our office wall:
“I’m a lifelong guitar player until the last few years as rheumatism has worked its devilish ways into my hands. My productivity with recording the songs I write fell off the proverbial cliff. Then, along comes Virtual Guitarist, I can “play” in ways I never could have in my best years as a player. Styles & genre’s I’d never attempted. Needless to say because of your products – I have all three: IRON, AMBER, and SPARKLE—my creativity scaled that cliff & put up a guardrail around the edge. Thank YOU for doing these VI’s. Please, keep them coming!”
- Find out more about UJAM at www.ujam.com
- Shop UJAM at shop.presonus.com