Category Archives: Studio One
LCR Mixing and Panning Explained
Lately, it seems there’s an increasing buzz about “LCR” mixing. LCR stands for Left, Center, and Right, and it’s a panning technique where all panpots are set to either left, center, or right—nothing in between. Look it up on the internet, and you’ll find polarized opinions that vary from it’s the Holy Grail of mixing, to it’s ridiculous and vaguely idiotic. Well, I’m not polarized, so I’ll give you the bottom line: it can work well in some situations, but not so well in others.
Proponents of this style of mixing claim several advantages:
- The resulting mixes sound very wide without having to use image processing, because there’s so much energy in the sides.
- It simplifies mixing decisions, because you don’t have to agonize over stereo placement.
- Mixes translate well for those not sitting in stereo’s “sweet spot,” because the most important material is panned to the center.
- It forces you to pay attention to EQ and the arrangement, to make sure there’s good differentiation among instruments panned hard left and hard right.
- If an LCR mix leaves “holes” in the stereo field, then you can use reverb or other stereo ambience to fill that space. As one example, stereo overhead mics on drums can pan hard left and hard right, yet still fill in a lot of the space in the middle. Or, place reverb in the channel opposite of where a signal is panned.
There are plenty of engineers who prefer LCR mixes for the reasons given above. However, LCR is not a panacea, nor is it necessarily desirable. It also may not fit an artist’s goal. For those who think of music in more symphonic terms—as multiple elements creating a greater whole, to be listened to under optimal conditions—the idea of doing something like panning the woodwinds and brass far left and the violins full right, with orchestral percussion and double bass in the middle, makes no sense. Conversely, if you’re doing a pop mix where you want every element to be distinct, an LCR approach can work well, if done properly.
Then again, some engineers consider a mix to be essentially a variation on mono, because the most important elements are panned to center. They don’t want distractions on the left and right; those elements exist to provide a “frame” around the center.
Another consideration is according to all the stats I’ve seen, these days more people listen on headphones than component system speakers. LCR mixing can sound great at first on headphones due to the novelty, but eventually becomes unnatural and fatiguing. Then again, as depressing a thought as this may be, a disturbingly large part of the population listens to music on computer speakers. Any panning nuances are lost under those conditions, whereas LCR mixing can sound direct and unambiguous.
Help Is on the Way!
So what’s a mix engineer to do? Well, a good way to get familiar with LCR is to load up some of your favorite songs into Studio One, and listen to the mid and sides separately. Hearing instruments in the sides tends to imply an LCR mix; Madonna’s “Ray of Light” comes to mind. For a “pure” LCR mix, listen to the original version of Cat Stevens’ “Matthew and Son” on YouTube. It was recorded in 1966 (trivia fans: John Paul Jones, later of Led Zeppelin, played bass). Back then, the limited number of tracks, and mixing console limitations, almost forced engineers into doing LCR. In case you wondered why some songs of that era had the drums in one channel and the bass in the opposite channel…now you know why.
Anyway, it’s easy to do mid-side analysis in Studio One (Fig. 1).
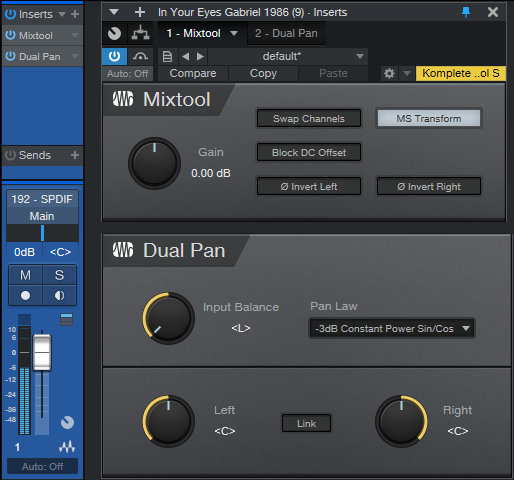
Figure 1: Setup for analyzing mid and side components of music.
The Mixtool, with MS Transform selected, encodes a stereo signal into mid (left channel) and sides (right channel). However, it’s difficult to do any meaningful analysis with the mid in one ear and the sides in the other. So, the Dual Pan’s Input Balance control chooses either the mid <L> or sides <R>. The panpots place the chosen audio in the center of the stereo field.
Once you start finding out whether your favorite songs are LCR or mixed more conventionally, it will help you decide what might work best for you. If you decide to experiment with LCR mixing, bear in mind that it kind of lives by its own rules, and it takes some experience to wrap your head around how to get the most out of it.
And the Verdict Is…
Well, you can believe whatever you like from what you see on the internet, and more importantly, choose what sounds best to you…but this is my blog post, so here’s what I think ?. Any and all comments are welcome!
As mentioned in a previous blog post, I always start mixes in mono. I feel this is the best way to find out if sounds mask either other, whether some tracks are redundant because they don’t contribute that much to the arrangement, and which tracks need EQ so they can carve out their own part of the frequency spectrum. That way, whether instruments are on top of each other or spread out, they’ll work well together.
But from there on, I split my approach. I still favor the center and use the sides as a frame, but also selectively choose particular elements (usually rhythm guitar, keyboards, and percussion) to pan off to the left or right so there’s a strong presence in the sides. For me, this gives the best of both worlds: a wide mix with good separation of various elements, but done in service of creating a full mix, without holes in the stereo field. Those who listen on headphones won’t be subjected to an over-exaggerated stereo effect, while those who listen over speakers will have a less critical “sweet spot” than if there was nuanced panning.
I came up with this approach simply because it fits the kind of music I make, and the way I expect most people will listen to it. Only later did I find out I had combined LCR mixing with a more traditional approach, and that underscores the bottom line: all music is different, and there are few—if any—“one-size-fits-all” rules.
Well, with the possible exception of “oil the kick drum pedal before you press record.”
Exploring PreSonus Sphere Membership Products with Jacob Lamb
When you join PreSonus Sphere your membership comes with Studio One Professional, Notion plus the native software instruments, effects and plug-ins that PreSonus offers.
Studio One Professional is a powerful and intuitive DAW that works for you – made only more powerful by the full catalog of plugins – while Notion is an easy way to create full scores, sheet music for individual instruments, or guitar tabs and chord charts. Sphere members can also enjoy ongoing software upgrades when new versions are released.
In this Sphere episode, Jacob takes us through a demo of the “Products” tab, and all that is included.
Join PreSonus Sphere today! Only $14.95 per month for Studio One Professional, Notion, and so much more.
Follow Jacob on Instagram
Learning More in PreSonus Sphere with Jacob Lamb
With a PreSonus Sphere membership you get access to exclusive masterclasses in the “Learn” section.
Here you can dive into practical recording topics from industry professionals, covering recording tips, manipulating compression, perfecting EQ on a track, general mixing/mastering techniques, and more! Beyond the recording side, you can explore PreSonus Sphere product-specific videos like dialing in your guitar tone with Ampire, navigating Studio One and learning Notion.
In this episode, Jacob shows us the layout of the “Learn” tab, and how to navigate this “one stop shop” of classes.
Join PreSonus Sphere today! Only $14.95 per month for Studio One Professional, Notion, and so much more.
Follow Jacob on Instagram
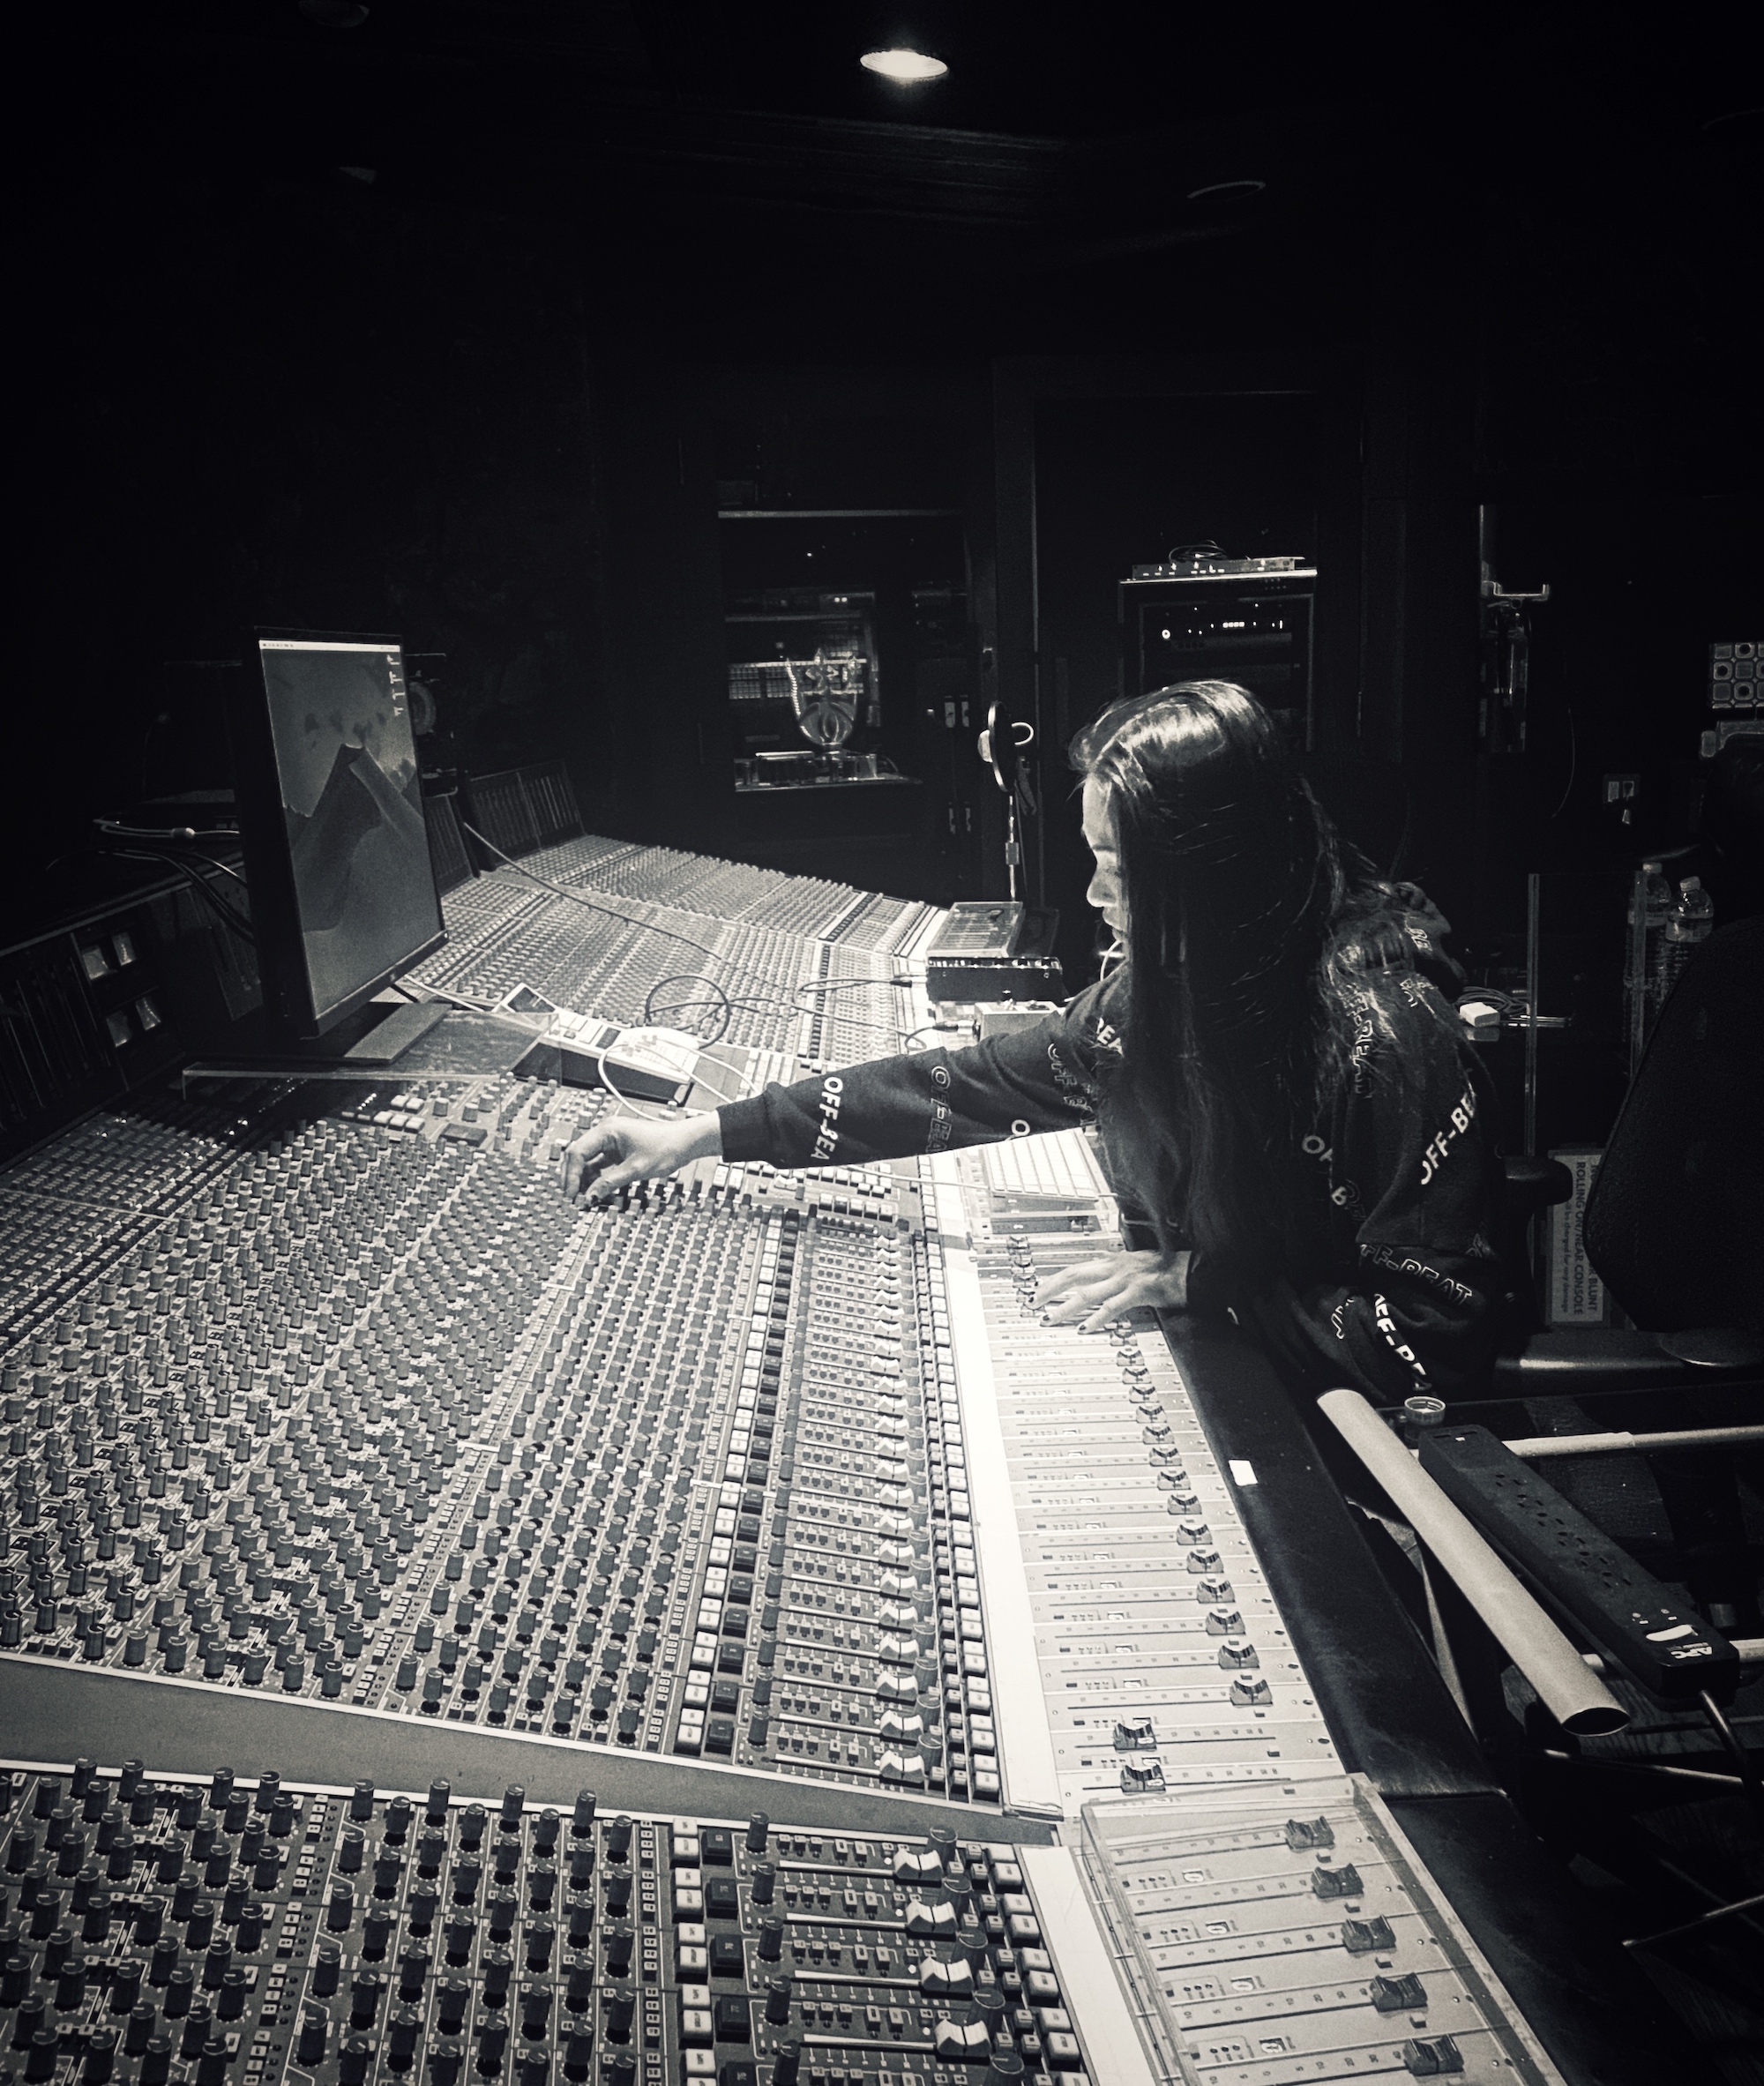
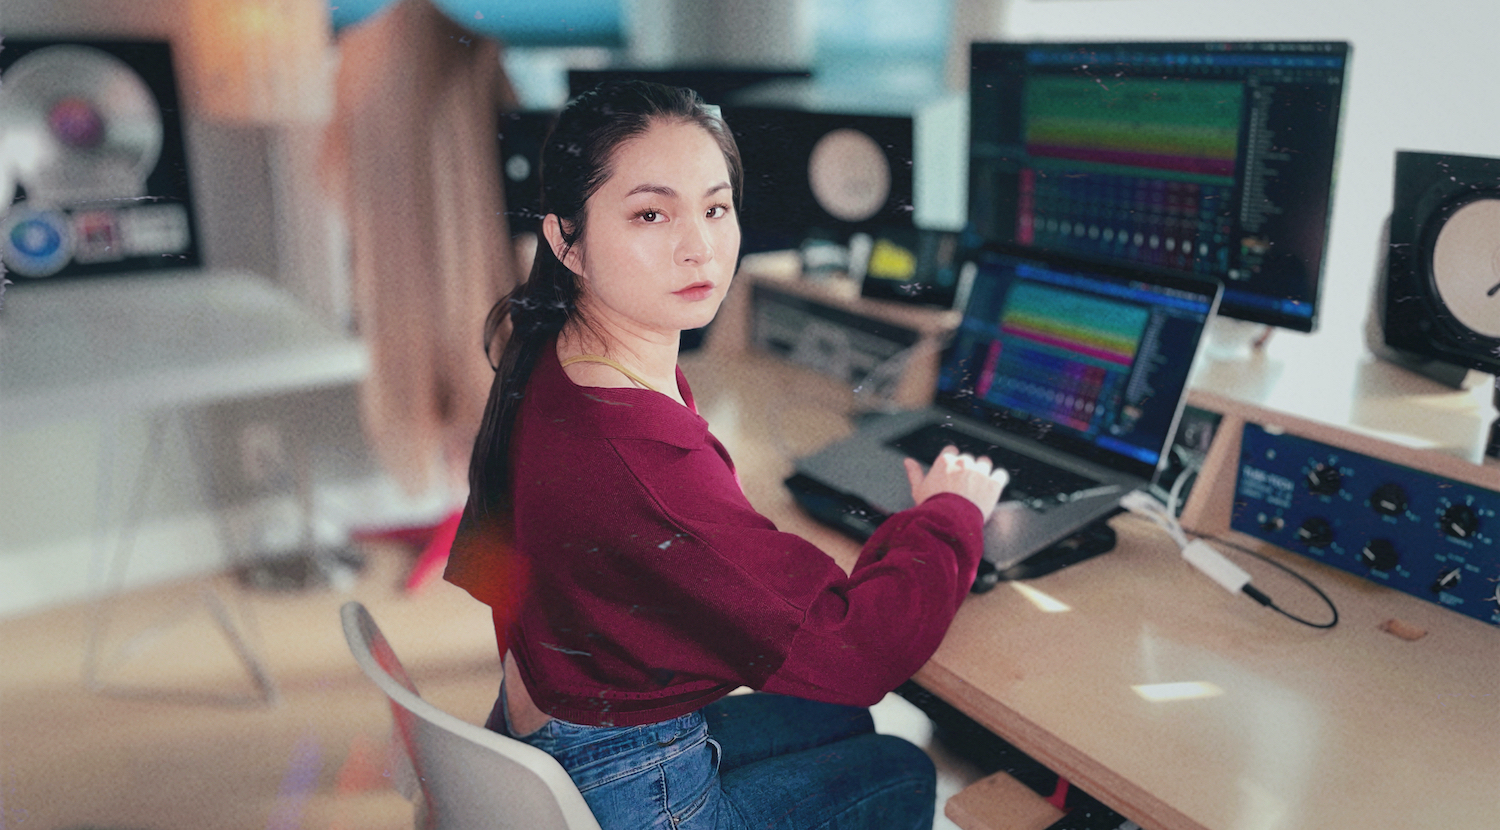
No Downtime with Studio One and Yang Tan

Yang Tan is the Founder and Engineer for Absolute Magnitude Entertainment (AME) Records, based in Los Angeles, California.
Her client list includes: YG, Jackson Wang, Nipsey Hussle, Bia, Kris Wu, Migos, A$AP Ferg, J Cole, Kanye West, Maddi Jane and Kid Cudi… to name a few. Let’s find out more about this rising young creative who paints with sound, and also happens to be a PreSonus Sphere member—and a featured artist as well!
 I am from Guangzhou, China, a metropolitan city close to Hong Kong where many imports and exports occur. As a child, I didn’t have the luxury of accessing music at the touch of my fingertips, like I do now. I remember going to secret spots on the weekends to pick out records among piles and piles of CDs with broken cases, which were smuggled in from overseas and were damaged by the customs. My mom had a Sony stereo set with a CD player and two cassette slots… it was pretty fancy in the ’90s. I was obsessed with recording my favorite songs to the cassette tapes. And then my mom bought a Walkman with recording ability through its built-in mic—I figured out how to play music in the background with my mom’s stereo and record bedtime stories I wrote. I paid for all of those CDs, but none of the profits went to the creators.
My family wanted me to follow in their footsteps and become a visual artist or a designer, but I was already obsessed with music. I always wanted to play the piano. So at the age of 16, I decided to pursue music secretly. I found two incredible music teachers on the Internet and started taking lessons, unbeknownst to my family. I learned how to read, play, and study music with strict and intense classical training. It was really difficult at the time because I didn’t know if anything would come from it, and I had to make money on the side to pay for the lessons. Looking back, I’m glad I took that risk. It was totally worth it. A year later, I was accepted to the Communication University of China, the best music and technology program in China, to study music. My music career began.
 The next part of my journey called for a relocation to the states, so I moved to Los Angeles after college. I started at Paramount Recording Studios and climbed the career ladder there. The learning never stops in Los Angeles; every day I pick up something new and practice until it becomes a habit. I am so inspired by the music culture in L.A., everyone I meet is just so talented, driven and inspiring. You don’t have to learn how to read music to be able to create music. How it sounds and how it connects with people is the most important part of the business.
The PreSonus audio products that I’ve been using are the StudioLive 16.0.2 digital mixer and their award-winning Digital Audio Workstation (DAW) software Studio One Professional, which I mostly use for producing.
 Its ease of use, flexibility and Macros are among the top features that led me to choose working creatively in this environment. Other DAWs usually require third-party software to program Macros, whereas with Studio One it is integrated natively as part of the DAW workflow itself.
Another particularly useful feature about Studio One that I find useful is the ARA integration (with Melodyne pitch correction) to the Studio One software engine. It saves so much time and I can edit vocal audio clips in real time at any stage of the process.
I love the quick-nudge capability inside of an audio clip. It’s a fast workflow and I don’t have to clean up the edit point or cross-fades every time I make an edit.
In short, Studio One flows really well, it’s quick and intuitive. No downtime for creativity. Truly amazing!
PreSonus Sphere Members: check out Yang Tan’s exclusive Vocal FX Chain Presets here
Visit her Website | Instagram
Recording ReWired Programs

I had a bunch of legacy Acid projects from my pre-Studio One days, as well as some Ableton Live projects that were part of my live performances. With live performance a non-starter for the past year, I wanted to turn them into songs, and mix them in Studio One’s environment.
Gregor’s clever video, Ableton Live and Studio One Side-by-Side, shows how to drag-and-drop files between Live and Studio One. But I didn’t want individual files, I needed entire tracks…including ones I could improvise in real time with Live. The obvious answer is ReWire, since both Acid and Live can ReWire into Studio One. However, you can’t record what comes into the Instrument tracks used by ReWire. Nor can you bounce the ReWired audio, because there’s nothing physically in Studio One to bounce.
It turned out the answer is temporarily messy—but totally simple. First, let’s refresh our memory about ReWire.
Setting Up ReWire
Start by telling Studio One to recognize ReWire devices. Under Options > Advanced > Services, make sure ReWire Support is enabled. In Studio One’s browser, under the Instruments tab, open the ReWire folder. Drag in the program you want to ReWire, the same way you’d drag in an instrument. (Incidentally, although you’re limited to dragging in one instance of the same ReWire client, you can ReWire two or more different clients into Studio One. Suitable clients includes Live, Acid Pro, FL Studio, Renoise, Reason before version 11, and others.)
After dragging in Ableton Live, open it. ReWired clients are supposed to open automatically, but that’s not always the case.
Now we need to patch Live and Studio One together. In Ableton Live, for the Audio To fields, choose ReWire Out, and a separate output bus for each track. In my project, there were 9 stereo tracks (Fig. 1).
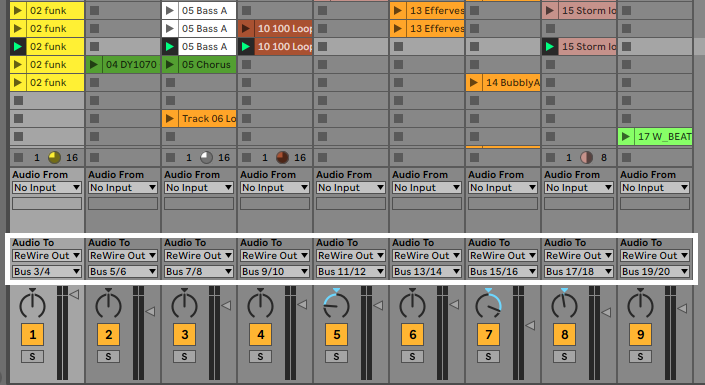
Figure 1: Assign Ableton Live’s ReWire outputs to buses. These connect to Studio One as track inputs.
Then, expand the Instrument panel in Studio One, and check all the buses that were assigned in Ableton Live. This automatically opens up mixer channels to play back the audio (Fig. 2). However, the mixer channels can’t record anything, so we need to go further.
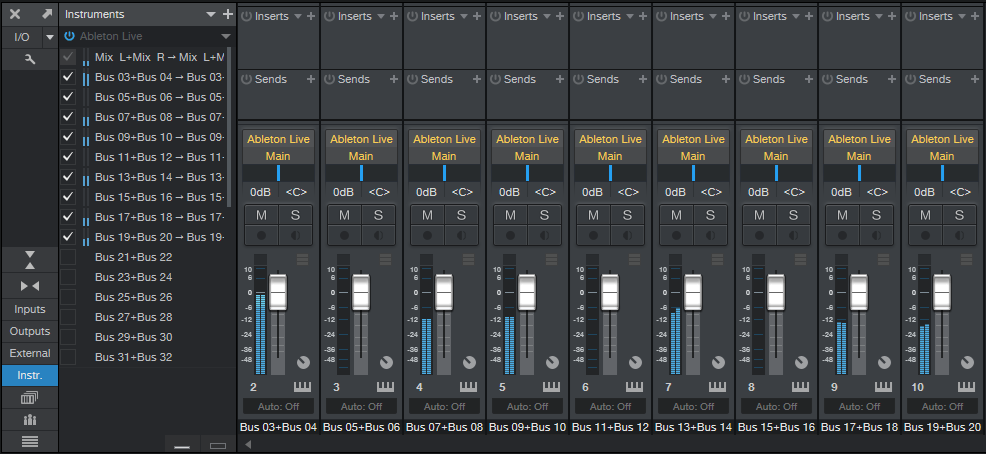
Figure 2: Ableton Live loaded into Studio One, which treats Ableton Live like a virtual instrument with multiple outputs.
Recording the ReWired Program
As mentioned, the following is temporarily messy. But once you’re recorded your tracks, you can tidy everything up, and your Live project will be a Studio One project. (Note that I renamed the tracks in Studio One as 1-9, so I didn’t have to refer to the stereo bus numbers in the following steps.) To do recording:
- In each Studio One track, go to its Send section and choose Add Bus Channel. Now we have Buses 1-9—one for each track.
- Our original instrument tracks have served their purpose, so we can hide them to avoid screen clutter. Now Studio One shows 9 buses (Fig. 3).
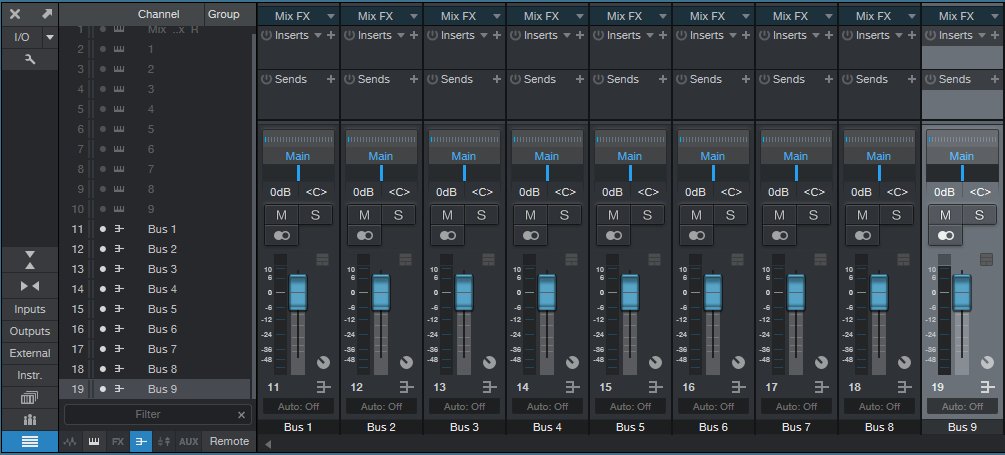
Figure 3: The buses are carrying the audio from Ableton Live’s outputs.
- Create 9 more tracks in Studio One (for my project, these were stereo). Assign each track input to an associated bus, so that each of the 9 buses terminates in a unique track. Now we can hide the bus tracks, and record-enable the new tracks to record the audio (fig. 4).
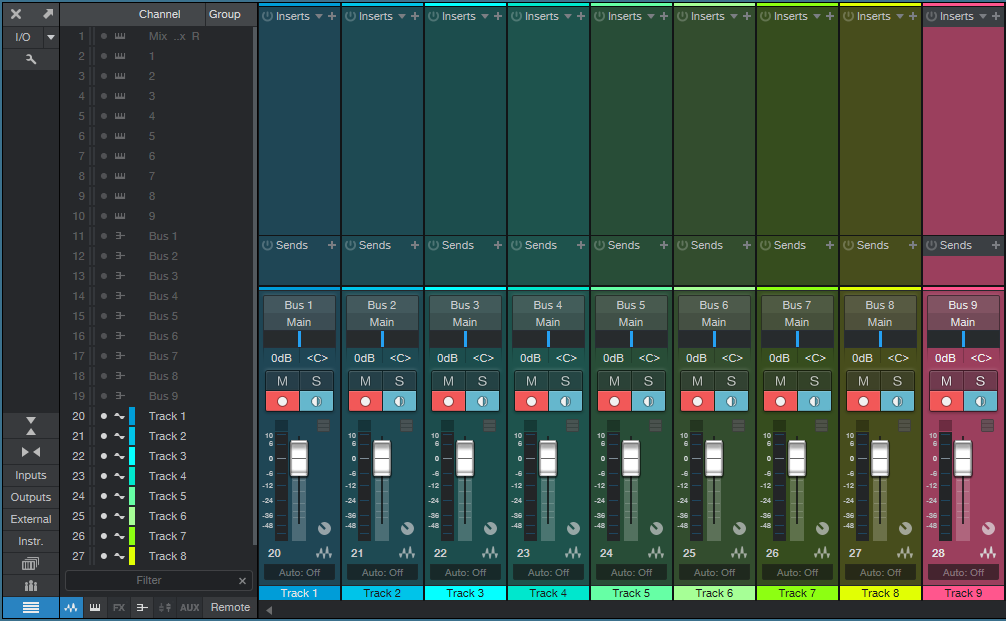
Figure 4: Studio One is set up to record the audio from Ableton Live.
- Now you’re ready to record whatever is in Ableton Live over to Studio One, in real time.
- Fig. 5 shows the results of unhiding everything, narrowing the channels, and hitting play. At this point, if everything transferred over correctly, you can delete the ReWired tracks, remove the buses they fed, close Ableton Live, and you’re left with all the Live audio in Studio One tracks. Mission accomplished!
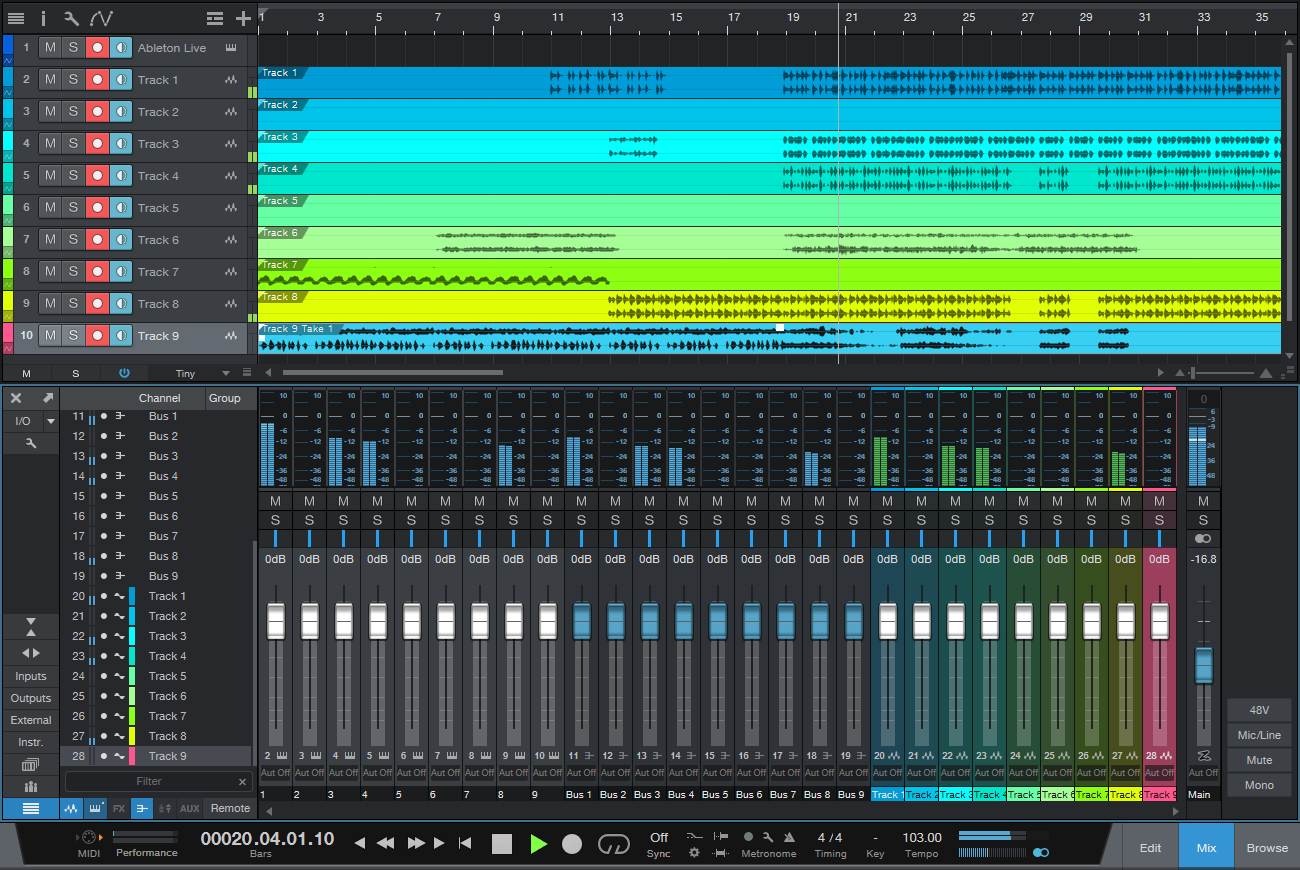
Figure 5: The Ableton Live audio has completed its move into Studio One. Now you can delete the instrument and bus channels you don’t need any more, close Ableton Live, return the U-Haul, and start doing your favorite Studio One stuff to supplement what you did in Live. Harmonic Editing, anyone?
Bonus tip: This is also the way to play Ableton Live instruments in real time, especially through Live’s various tempo-synched effects, while recording them in Studio One. And don’t forget about Gregor’s trick of moving Studio One files over to Live—this opens up using Live’s effects on Studio One tracks, which you can then record back into Studio One, along with other tracks, using the above technique.
Granted, I use Studio One for most of my multitrack projects. But there’s a lot to be gained by becoming fluent in multiple programs.
How to use PreSonus Sphere Workspaces with Jacob Lamb

If you’re a musician working with other artists, or working alone and trying to keep your folders organized and neat, the PreSonus Sphere Workspaces tab is an indispensable tool for file sharing and organization.
Collaboration has never been easier; share whole songs or individual instrument stems, with quick listening right inside the Workspaces page—no downloading needed! In this Sphere episode, Jacob Lamb takes us through some of his thoughts on how Workspaces can be utilized in his studio, for both song creation and teaching students.
Join PreSonus Sphere today! Only $14.95 per month for Studio One Professional, Notion, and so much more.
Follow Jacob on Instagram
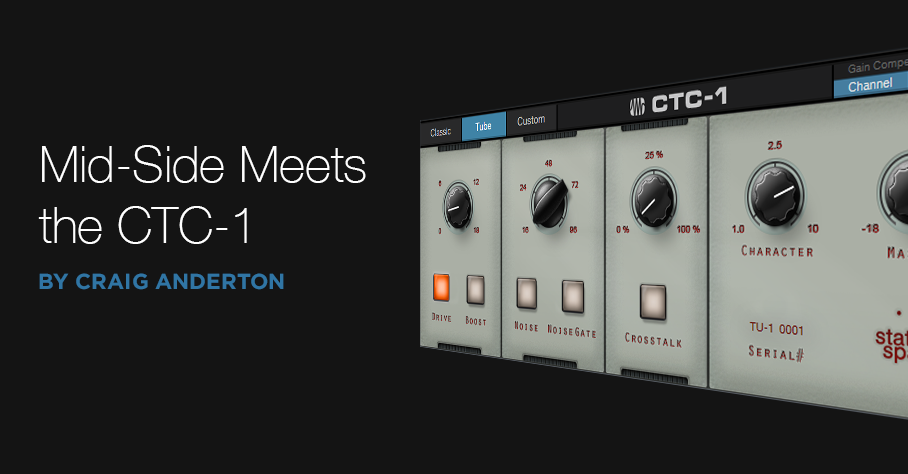
Mid-Side Meets the CTC-1
I’ve often said it’s more fun to ask “what if I…?” than “how do I?” “What-if” is about trying something new, while “how do I” is about re-creating something that already exists. Well, I couldn’t help but wonder “what if” you combined the CTC-1 with mid-side processing, and sprinkled on a little of that CTC-1 magic? Let’s find out. (For more information on mid-side processing, check out my blog post Mid-Side Processing Made Easy. Also, note that only Studio One Professional allows using Mix Engine FX.)
One stumbling block is that the CTC-1 is designed to be inserted in a bus, and the Mid-Side Transform FX chain won’t allow inserting Mix Engine FX. Fortunately, there’s a simple workaround (see Fig. 1).
- Copy the stereo track you want to process, so you have two tracks with the same stereo audio. One will provide the Mid audio, and the other, the Sides audio.
- Insert an MS-Transform FX Chain into each track (you’ll find this FX Chain in the Browser’s Mixing folder, under FX Chains)
- Create a bus for each track.
- Assign each track output to its own bus (not the main out). However, the bus outputs should go to the Main out.
- Add a CTC-1 Mix Engine FX in each bus.
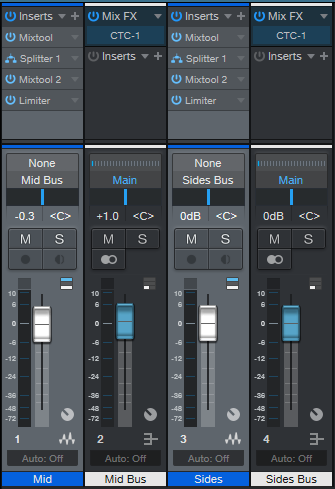
Figure 1: Setup for adding mid-side processing with the CTC-1 to a mixed stereo file.
- To dedicate one bus to the mid audio, and the other to the sides, open up the Splitters in the MS-Transform FX Chains.
- Mute the sides output for the Mid track (top of Fig. 2, outlined in orange). Then, mute the mid output for the Sides track (bottom of Fig. 2, also outlined in orange).

Figure 2: One bus is Mid only, the other is Sides only.
Now you can add the desired amount of CTC-1 goodness to the mids and sides. And of course, you can vary the bus levels to choose the desired proportion of mid and sides audio.
Audition Time!
The following example is an excerpt from the original file, without the CTC-1.
Next up, CTC-1 with the Custom option on the Mid, and the Tube option on the Sides. Fig. 3 shows their settings—a fair amount of Character, and a little bit of Drive.
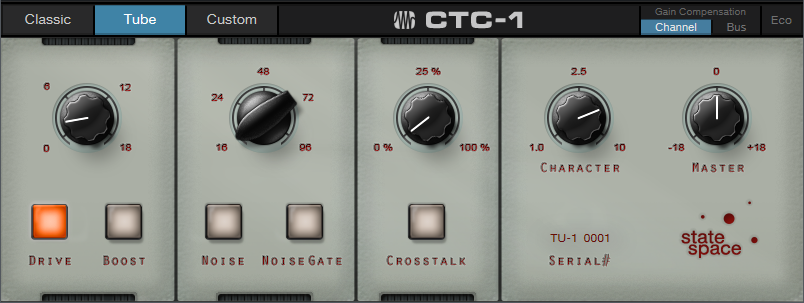
Figure 3: CTC-1 settings for the audio example.
If you didn’t hear much difference, trying playing Audio Example 1 again after playing Audio Example 2. Sometimes it’s easier to tell when something’s missing, compared to when something’s been added.
The more you know about the CTC-1, the more effectively you can use it. The bottom line is I now know the answer to my “what if” question: get some buses into the picture, and the CTC-1 can be hella good for processing mid and sides!
Studio One Remote 1.6 has been released!
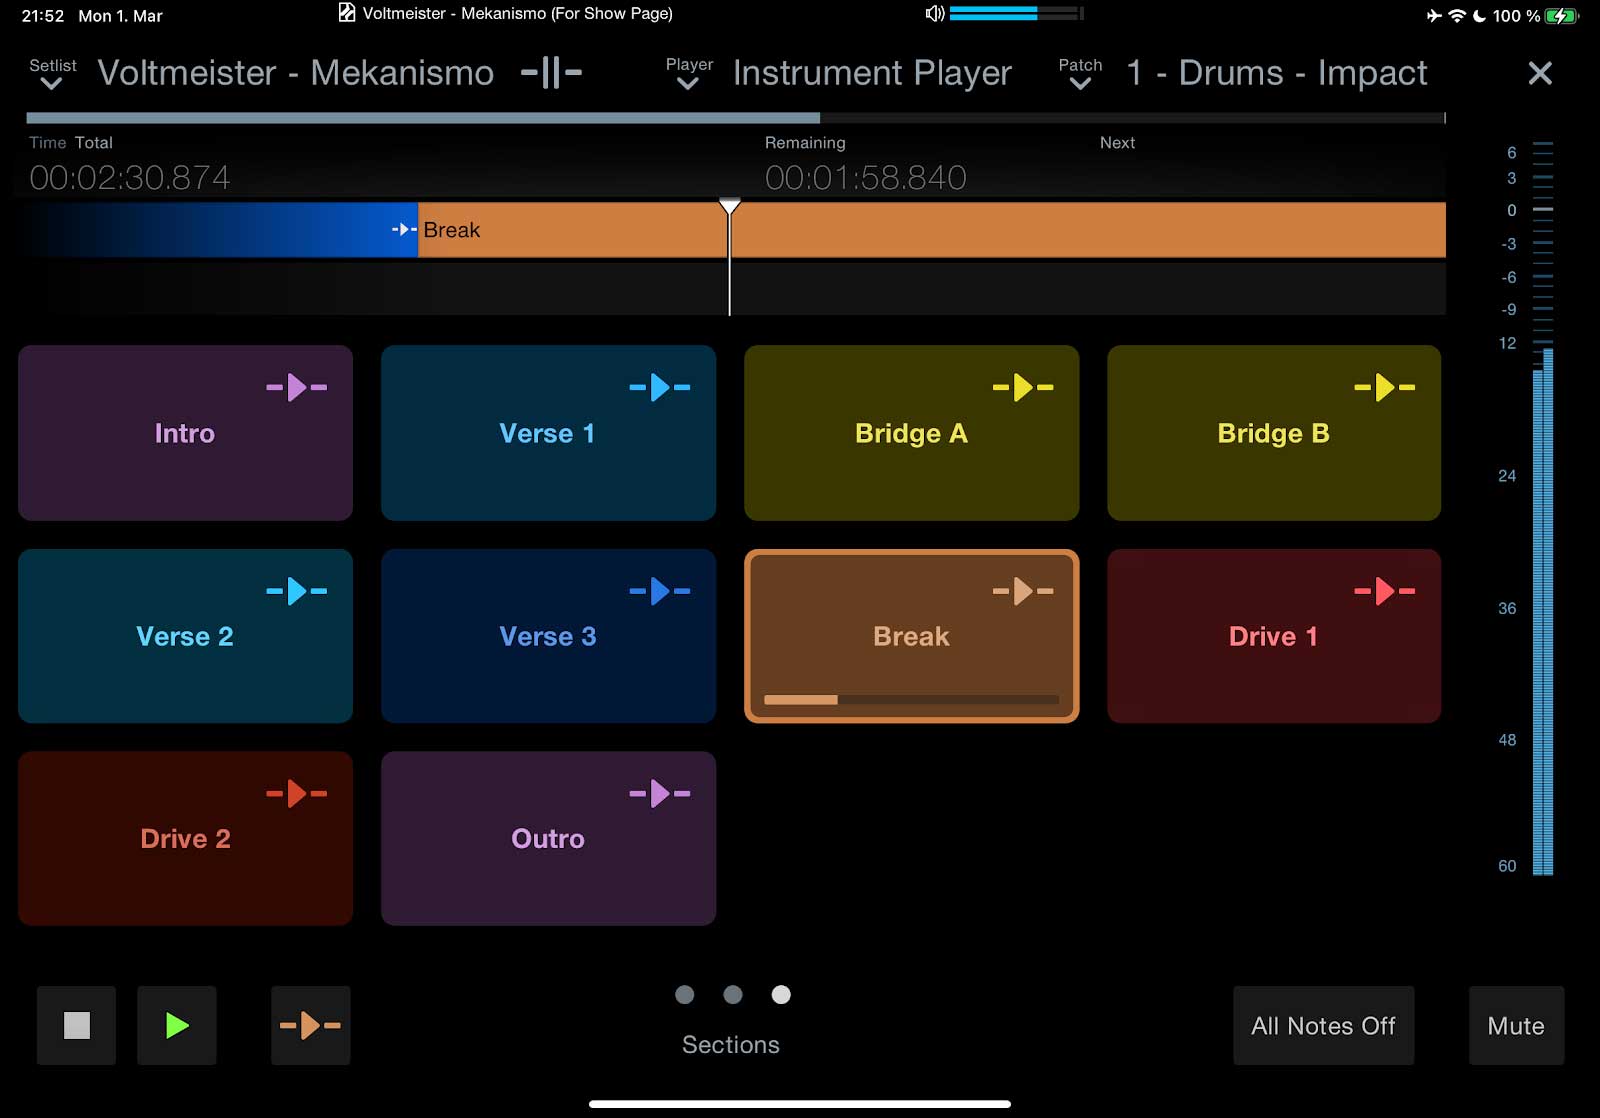 Studio One Remote 1.6 has been released! This free update adds support for the Listen Bus and the Show Page in Studio One 5.2. You’ll also find that Studio One Remote now offers the same Performance View as Studio One’s Show Page, allowing you to do all kinds of incredible things, like:
- Re-sequence your song’s Arranger Track sections live
- Control your patches per Show Player—even with multiple instances of Studio One Remote and multiple Players simultaneously!
- Navigate the Show Page’s Setlist
- Control any parameter from the Macro page
Studio One Remote 1.6 remains free of charge, and is compatible with Studio One 5 Artist and Professional.
- Get Studio One Remote from Google Play Store
- Get Studio One Remote from the Apple App Store
- Get Studio One Remote for Windows
Studio One 5.2 has arrived. Here’s what’s new!

Driven by a one-two combo of user requests and PreSonus Software innovation, Studio One 5.2 boasts over 30 new features and improvements… here’s a quick ten, with a full changelog linked below. This is a free update to PreSonus Sphere members and Studio One 5 owners, and can be obtained from your my.presonus account or by clicking “Check for Updates” on Studio One’s start page.
Arrange your songs live from the Show Page or Song Page
Use Studio One’s Arranger Track on the Show page to trigger different song sections during playback without missing a beat! You can even control your arrangement from the soon-to-be-updated Studio One Remote… and, actually, multiple Studio One Remote users will be able to control different elements of the same Show simultaneously.
You can also use Live Arranging on the Song Page to experiment with new song structures and arrangements without dropping the beat.
Sound Variations
Extensive support for articulations in orchestral libraries has arrived in Studio One via Sound Variations, with a powerful but intuitive mapping editor that provides tools for managing complex articulation maps. Trigger your Sound Variations from remote commands, key switches, hardware controllers, macros, and more. Furthermore, the new Dynamic Mapping API lets third-party developers enable their VST2 and VST3 instruments’ articulations to be queried by Studio One so that Sound Variation maps are automatically generated. Vienna Symphonic Library and UJAM are already on board.
Score View Improvements
We’ve added Drum Notation and Tablature to the Score view! Tablature supports multiple instruments and multiple tunings, for everything from Strats to baritone ukuleles, and you can even view tablature and standard notation simultaneously. Drum Notation has new symbols for open/closed/half-open techniques to be added as well.
And in standard Score View, notes can be entered into multiple voices for a single instrument; up to four voices can be created per staff.
PreSonus Sphere Workspaces in the Browser
PreSonus Sphere workspaces are also now available directly from the Studio One Browser for easy bidirectional file transfer. Drag and drop stuff from Studio One’s Edit window to your PreSonus Sphere workspace folders.
Splitter is now a plug-in
The Splitter—our powerful parallel processing tool in the Channel Editor—now lives alongside other Native Effects Plug-ins in Studio One’s Browser. If you haven’t experimented with this powerful processing option in the past, you should—and now it’s hard to miss!
Arrow tool Improvements
Genius updates to the Arrow tool make it easier than ever to edit Note Events in the Piano Roll.
Hardware Controller Improvements
ATOM SQ and FaderPort 8 and 16 now play better than ever with Studio One. ATOM SQ now supports Studio One’s Autofill command for plug-in control. Furthermore, you now get up to 8 pages of controls in Control Link for up to 64 individual controls. You can also now edit details of individual Pattern Steps with ATOM SQ.
FaderPort 8 and 16 users will be excited to know we’ve implemented grouping! Use multiple FaderPort 8/16s to create a robust mix setup that’s ideal for your space and process! You can also now deactivate Sends from your FaderPort as well as toggle the metronome and control volume level. Lastly, Studio One’s Channel visibility settings will now also be reflected accurately on your FaderPort(s).
Clip Versions
Now you can make edits to an Audio Clip that don’t affect every instance of the Clip in your Song; apply clip-based edits in Gain Envelopes or Melodyne independently!
New Safety Features
Studio One’s new “Boot with options” menu on launch allows you to troubleshoot problematic plug-ins and other culprits by selectively disabling them after a crash.
M1 Mac compatibility
Studio One 5.2 is compatible with M1 Macs running Rosetta 2.
And more…
Luke Mornay: Twenty Five Ten
We’re extremely excited for our good friend and recording artist Luke Mornay on the release of his new album Twenty Five Ten which has already grabbed a 5-Star review on New Sounds UK!
Let’s find out more about what he’s been up to with this project as a longstanding user of PreSonus hardware and software for his musical endeavors through the years.

Luke: I’m a producer / composer and mixing engineer best known for my remixes for Kylie Minogue (a Grammy-nominated Billboard #1), The Killers, Robbie Williams, Bob Marley and Amy Winehouse–to name but a few–I just produced Twenty Five Ten, an album in homage to my late mother.

It has sounds for here and now, rooted in decades of influences and experiences.
Featuring successful collaborations with Kevin Godley (10 CC, Godley & Creme), model Roxy Horner, Nick Tart (Diamond Head), Rachael & James Akin (EMF), Lucy Pullin (The Isle of Man, Robbie Williams), Melanie Taylor, Flora, Phat Hat.
My 18-track album was recorded in various places such as Brisbane (Australia), Tel Aviv, Mallorca, Brussels, Los Angeles, Dublin, Katowice (Poland), and Baton Rouge (USA).
Besides my emotional motivation to get this project done, I really wanted this record to connect genres, eras, and mix generations. Somehow connect the dots between timelines in a unified story, with its joyful and bonkers moments, with its own directions and contradictions, or more simply put: my story.
I have a rock-solid PreSonus eco-system based around a Quantum 2, FaderPort 16, and ATOM, nothing superfluous—they all have a purpose. The FaderPort 16 is giving me the gestures I’m used to when balancing tracks on a console; the vibe is based on even relationships between instruments.
It’s a different experience, and the decisions I’m making helped me to assign a more prominent role to sounds buried in a mix, with fingers on all faders I’m sorta painting a sonic picture based on my impression. With a mouse it’s also achievable, but it’s more cerebral; it’s laser focused, and less expressive.
The ATOM is perfect when I want to jam with drums or synth shots. It’s perfect for fortunate accidents! I come up with ideas I wouldn’t get from a keyboard. In some of my remixes I like to slice vocals that I then drop into impact to create what we call “vox lox” to build new lines, for example that was a centerpiece of my Kim Wilde Kids In America remix. The new chorus idea was all done with Impact XT and the ATOM.
Quantum 2 is just brilliant, it’s been my companion in so many tasks, it’s never let me down. As musical director for a Native American show I’m in charge of, I used this thing on stage in large venues with thousands of people, the sound was amazing and so stable. I also mixed a full season series for a TV network; a short film for Disney; sound mix for HBO; my album and remixes—it’s been so reliable and with a constant, pristine sound. It fits perfectly in my backpack, so I’m super mobile.
For what applications are you using Studio One Professional?
I’m working 100% in the box and I’m using Studio One for everything and anywhere.
I usually work from home, and when necessary I just take my laptop to a commercial studio, plug my Quantum 2 to their system, launch Studio One, and I’m set. I can do the adjustments I feel are needed and go back home.
My album was also mastered that way, I’ve had a reliable listening environment there, and all songs loaded into the project page. The big plus was when I felt that I was doing too much tweak, I could just open the song, fix whatever was needed with one click and go back.
Lately besides my remixes, I’ve been asked to mix a couple of original songs from the ’80s/’90s on which I’ve been given the multi-tracks, such as Fine Young Cannibals, Shakespear’s Sister, or Bananarama to name but a few.
I could really set up Studio One to be ready at all time and nicely organized like a vintage console, and now with Version 5 Professional, I can switch between an SSL or Neve sound in just 2 clicks. That’s fantastic.
What led you to choose Studio One?
Studio One is just another part of me, it never gets in the way. It’s a companion standing in front of me that is always ready for war.
The interface is very clean and soothing in a way, it always feels like some quietness before the storm. It also sounds great, fully-featured and with the Project page, you can virtually do anything within ONE app.
These days as a musician you have to wear so many hats that the last thing you want is distractions and learning curves on different apps. With Studio One I can produce, compose, mix, and master with features located in familiar places.
What Studio One features have proven particularly useful and why?
The drag & drop concept, be it for sounds, presets, instruments, or FX. This thing is a home run. When I feel that I’m not going to be in a productive mood, I spend a lot of time organizing all of the above for future sessions.
How does Studio One compare to other DAWs you have used?
 This software brings me peace of mind, and that’s priceless. PreSonus shines by making huge steps at their own pace with three priorities: the user experience, consistency and coherence.
They can be the adult in the room in a world where feature lists to sell new major updates are prioritized over the quality of their achievement.
With backward compatibility, if something is poorly implemented from the start, then you’re stuck with it until the end of days. We all love new features, of course, but it shouldn’t come at that price.
So when I see something not yet available in Studio One, I just tell myself: “If you can’t make music with what Studio One has to offer today, maybe you should just quit.” The kid in me is not a fan of that sentence, but it’s a nice motto to move on.
Which Studio One feature or concept doesn’t get enough spotlight (or isn’t talked about enough) in your opinion?
Without a doubt I’d say macros, they can be really powerful, I remember doing one for a friend of mine, he was new to Studio One, he was looking after a way to slice and map samples easily.
So I came up with one that analyzed the loop, detected transients, sliced at transients and sent them to Sample One XT, it was so good that I’ve added it to a shortcut and ended up using it myself. I’m thinking of sharing it with the community.

Any useful tips/tricks or interesting stories based on your experience with Studio One that would be of interest to our user base?
During the lockdown with friends we’ve had some virtual sessions, we were sending ideas back and forth and it appeared that none of them used MusicLoops, they were saving their ideas or overdubs as songs.
I told them that I have a folder called ideas, so every time I try a new synth or jamming with a virtual instrument, I just drag & drop it to that folder, and it then becomes an asset for my future project. Everything is saved in a single file with an audio version, MIDI, presets, and FX used all in one go.
From time to time, I like to browse that folder to see if there’s anything inspiring or useful.
That’s basically the story of the opening track on my album, I’ve had this nasty groove made with Impact XT floating around for some time, and one day it was the right idea for the mood I was in.
Never lose your ideas, phrases and so on, don’t expect to remember anything two years or two months from now with random or cryptic names… Just drag and drop in a place, where you’ll find your sparkles of ideas at all times!
Any final comments about PreSonus and Studio One?
I always found the name intriguing, now that I see how powerful it’s become over the years, and on its way to become the ultimate DAW, I take it that it was not just a name… it was a plan.
PreSonus Sphere Members: check out Luke’s newest Studio One Presets on his Featured Artist Profile!
Facebook | Instagram | YouTube | Spotify
Website : www.lukemornay.com