Friday Tips: In Praise of Saturation
Sure, everyone sorta knows about saturation. But let’s drill down, give some audio examples that really get the point across, and explain how saturation can help everything from individual tracks to master tapes. Really.
To be clear, we’re not talking about the distortion that “flat-tops” a waveform. Fig. 1 shows a comparison of unsaturated, saturated, and distorted versions of the same waveform (using version 4.5’s new “smooth” waveform view feature).
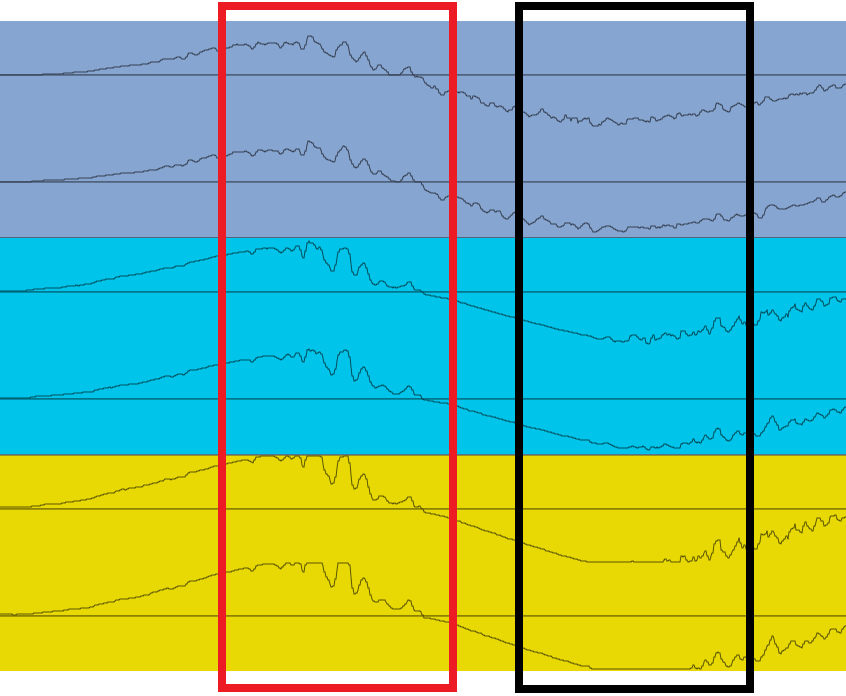
Figure 1: The gray waveform is unsaturated, the blue saturated, and the yellow distorted.
Comparing the three, in the section outlined in red, the saturated version is louder but the waveform isn’t all that different from the unsaturated audio. The distorted waveform is louder than the saturated one, but the peaks are flattened. This is particularly noticeable with the negative-going peak highlighted in black. Flattening peaks produces the kind of nasty digital distortion no one really likes, but saturation is a different animal…as the audio examples will show.
Before going any further, if you don’t have the free Softube Saturation knob, go to your PreSonus account and download it from Products > Add-Ons (Fig. 2).
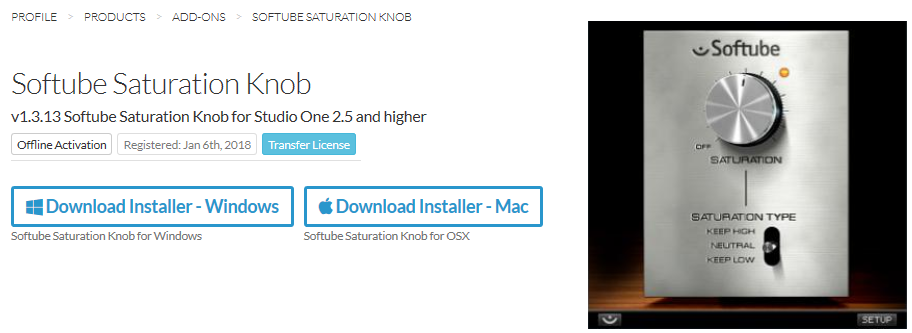
Figure 2: What are you waiting for? It’s free.
It’s a pretty basic module—turn the knob clockwise for more saturation (but I’ve never turned it up as high as shown in the picture!). Keep Low means it will apply more saturation to high frequencies, Keep High means more saturation for low frequencies, and Neutral means equal-opportunity saturation for all frequencies.
Saturation is great with drums, including mixed drums. You’ll get more punch and level (Fig. 3) that helps drums stand out in a track, without any of the artifacts (like pumping or breathing) associated with some dynamics processors.
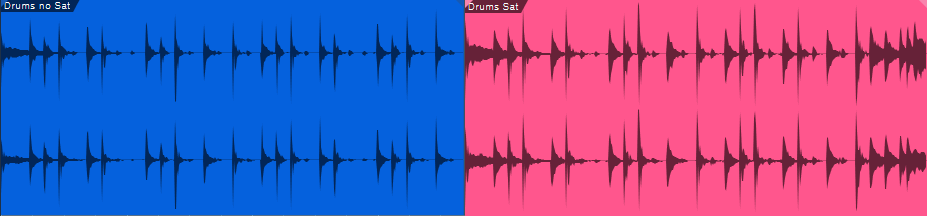
Figure 3: The waveform for the drums audio example. Unsaturated is blue, saturated is red.
Now listen to the audio example. The first four measures are the unsaturated version, the last four measures the saturated one. Note that both were normalized to the same peak value. Even though the waveforms don’t look all that different, the saturated version really punches through—yet doesn’t sound “distorted.” This same kind of approach can also work well for bass.
Now, let’s move on to saturating a two-track master. This may sound like a bad idea, until you realize that tape emulation plug-ins are basically just adding saturation, although some do it with a bit more finesse than a simple saturation plug-in (e.g., the Waves J37 provides different virtual tape formulations and bias settings). Fig. 4 shows the audio example’s waveform.

Figure 4: The two blue, four-measure groups are unsaturated; the two red, four-measure groups are saturated.
The audio example is excerpted/adapted from the song All Over Again (Every Day). I added a very slight pause between the unsaturated and saturated sections, although I’m quite sure you’ll hear the difference anyway. (To hear the final, mastered song—which of course was done in Studio One—click on the link.)
For this kind of application, you don’t want to apply too much saturation—a little bit goes a long way. As you turn up the knob you may think it’s not really making a difference, but it is. Toggle bypass frequently for a reality check. Fig. 5 shows the settings used for the master tape example.

And there you have it—we’ve done our shoutout for saturation. If you’ve missed out on the fun, load it in a track, and listen to what happens. You just might like what you hear!