Friday Tip: Perfect Pads!
Pads that Loop Perfectly—Yes, It’s Possible!
Pads are hard to loop, because their flowing, continuous sound exposes loop points that are anything less than seamless—there will often be a click, pop, or other glitch. But there is a solution, so keep reading for how to create perfect loops for just about any pad.
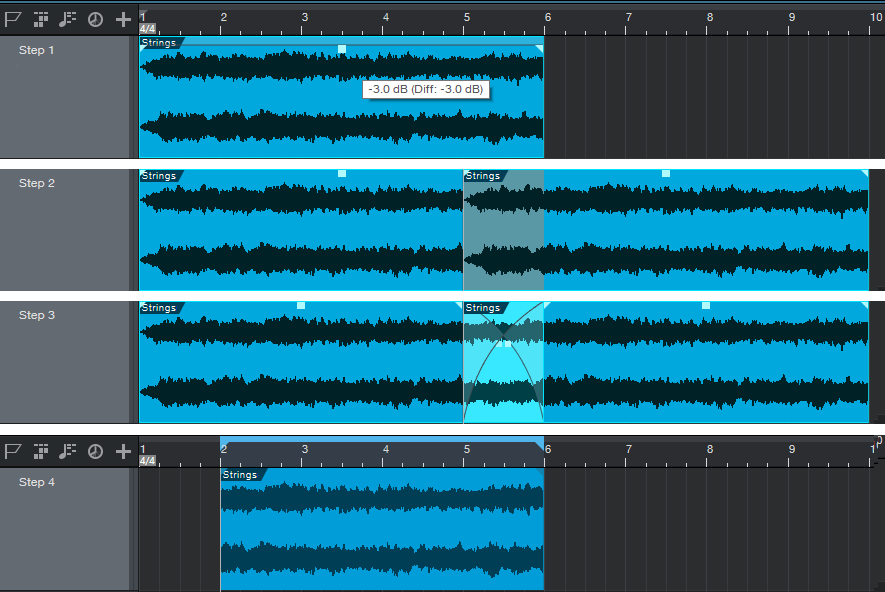
Step 1. Record a pad that’s one measure longer than what you want to loop. For example, record five measures to create a loopable four-measure pad. Normalize, then reduce the level by -3 dB or so to accommodate peaks that may result from later crossfading. Then, bounce the clip to itself to make this level change permanent.
Step 2. Copy the clip, and then paste it (or alt+drag the clip) so the first measure of the copy overlaps the last measure or the original clip. In this example, the overlap extends across measure 5.
Step 3. Shift+click on the original clip and the copied clip so they’re both selected, then type X to create a crossfade. Move the crossfade nodes up to create a logarithmic fade.
Step 4. With both clips still selected, bounce to create a single clip. Split at the end of the first measure and at the end of where the clips overlapped (in this case, measure 6). Delete both ends so what’s left extends from the start of measure 2 to the end of measure 6. Bounce what’s left to itself, loop it, and you’ll hear a perfect 4-bar loop.
Note: In some particularly challenging cases, you may need to overlap the clip’s first two measures over the clip’s last two measures to create a suitable crossfade. However, if the pad is relatively consistent you almost certainly won’t encounter any issues.