Friday Tip of the Week: The $10 Presence XT SSD Drive
The $10 Presence XT Solid-State Drive
One of Studio One Pro’s assets is that it comes with a lot of content—well over 20 GB. But of course, you need to figure out where you’re going to put it. If you have a laptop with an SSD boot drive, every gigabyte counts and you might not want it living on your system disk. Also, although the old saying goes “you can never be too rich or too thin,” I’d add “and you can never have too fast a load time for samples.”
Like many people, I use three separate drives on my desktop: system, projects, and samples (including SoundSets and loops). With USB 3.0 flash drives coming down in price, you can put all of Studio One’s SoundSets on a 32 GB flash drive, which at my last price check was $10 (I took it a little further, and spent an extra $20 for a USB 3.0 128 GB flash drive that can spew out data wicked fast).
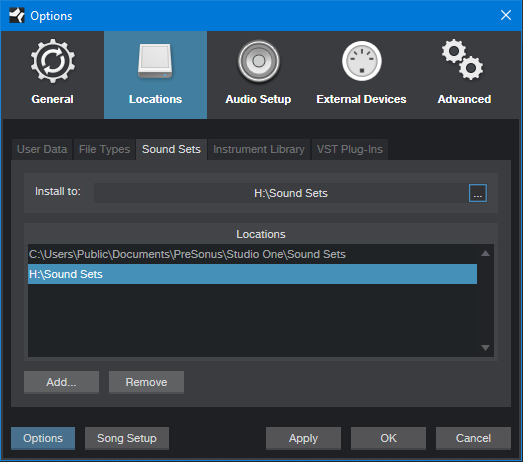
I deleted the default SoundSet folder, copied all my SoundSets over to the flash drive, then added the flash drive location at Studio One > Options > Locations > Soundsets (in this case, it’s H:\Sound Sets). Note that you can’t delete the default location for Sound Sets, so unless you actually delete the Sound Sets in the default location, Studio One will still see them.
USB 3.0 flash drives are super-fast for reading (and still pretty fast for writing). You’ll see the difference when Studio One scans the Sound Sets, and also, when loading instruments that take up a couple hundred megabytes. Furthermore, Sound Sets are compatible with Mac or Windows. So when I want to take my SSD-based MacBook Pro (which never seems to have quite enough space) on the road, I just pop the flash drive out of my Windows desktop, and take the Sound Sets with me. Yes, it’s literally “good to go.”